Heading into battle with an embarrassing name can throw you off your game. We've all had it where we've chosen a username that months or years later makes us cringe.
If you want to change your BattleTag for Battle.net, rest assured that you can do that with a few simple steps.
What Is a BattleTag?
A BattleTag is a player-chosen nickname to be used on games, websites, and community forums across the Battle.net platform. If you're a beginner to Overwatch or World of Warcraft, you'll need to make a Battle.net account (and, therefore, a BattleTag) to be able to play these.
We can associate only one BattleTag with a Battle.net account, it's essentially the display name you will use for that account. Only one person can use a BattleTag, so you never need to worry about running into other gamers with the same display name as yourself. It is completely unique.
Changing Your BattleTag
Changing your BattleTag is easy to do by following a few simple steps on the Battle.net website. You should keep in mind that your first BattleTag name change is free. After that, you will have to pay $10 a time to change. Make sure you put the free change available to you to good use, so that you don't have to pay to do it again.
- Head to Battle.net and sign in.
- Click on your profile in the top right and select Account Settings.
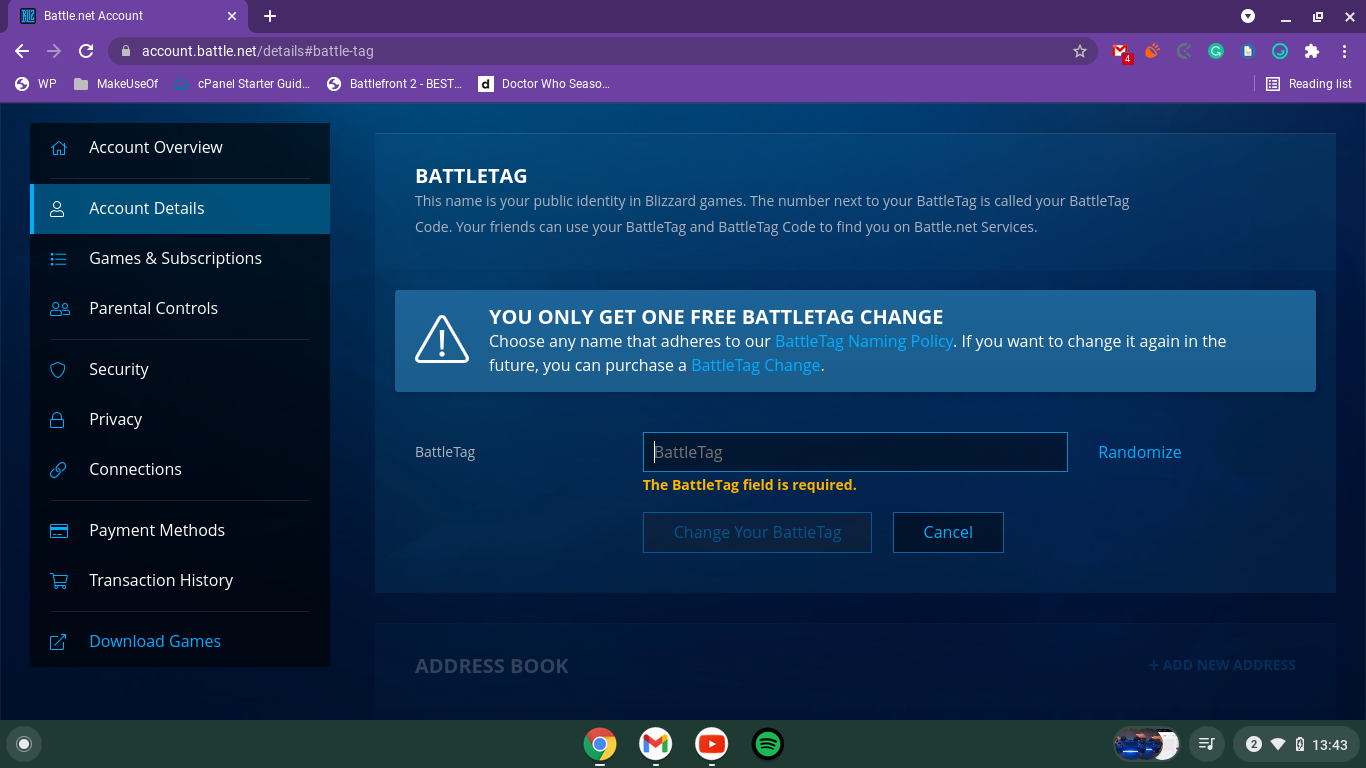
- Select Account Details via the left menu.
- Scroll down to BattleTag and to the right of that select Update.
- Type in your new desired BattleTag.
- Click Change Your BattleTag.
By following these steps you should have been able to change to your new BattleTag, which should update automatically across all of Battle.net's services.
Bring Your New BattleTag to the Game
You should now be able to go into games and feel happy with the BattleTag you have. If you need to change it again in the future, simply re-visit these steps. Don't forget, though, you can only do this once without Battle.net charging you a fee.


