OctoPrint is a powerful application that allows you to remotely upload GCodes, print 3D objects, and monitor and control all aspects of your 3D printer. However, to view or monitor 3D printers using OctoPrint, you need to open a particular IP in the web browser manually every time you want to check the progress or any other detail or whether the printer is running or finished printing.
To make 3D printer monitoring further easier and more convenient with OctoPrint, you can build a tiny OctoPrint monitoring device that displays the progress in real-time on a mini OLED display.
How OctoPrint 3D Printer Monitor Work, and Why Do You Need One?
If you've set up OctoPrint to control and monitor your 3D printer and prints, you should also consider building and installing a mini DIY OctoPrint 3D printer monitoring device that connects with OctoPrint API wirelessly and fetch information such as:
- Elapsed print time.
- Remaining time to complete the print with the progress bar.
- Bed temperature.
- Nozzle (tool) temperature.
- Percentage completed.
- Current time (24hr or AM/PM).
- OTA firmware updates.
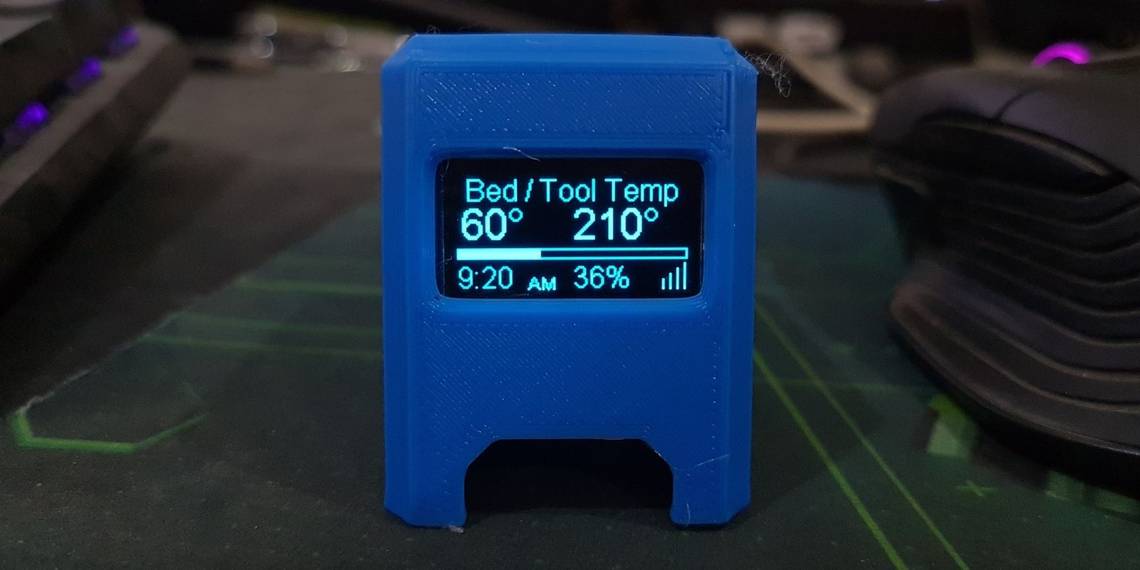
All this information is displayed on a small OLED screen. It turns off the display when the printer is off, not operational, or disconnects and turns on when the printer is connected and operational.
It's a WiFi-based monitoring device built using a D1 Mini and a 0.96-inch OLED display in a 3D printed case. You can place this device anywhere in your office or home, such as on your desk, to keep an eye on the progress and monitor the prints without actually browsing the OctoPrint web interface.
Things You Need for a DIY OctoPrint Printer Monitor
- A WEMOS D1 Mini Board.
- A 0.96" or 1.3" 128x64 OLED display.
- A micro USB cable.
- OctoPrint Server. You can install OctoPrint on an old Android phone or set up an OctoPrint on a Raspberry Pi to monitor the prints and control the printer remotely.
- A 3D printed case to assemble everything.
Once you have all the components required, follow the steps given below to build a wireless OctoPrint Monitor device.
Step 1: Flash the Firmware
Visit the printer-monitor release page and download the firmware. You can choose between two firmware based on the display you are using.
For this project, we are using the firmware for the SSD1306 OLED display (0.96"). If you want a slightly bigger display, get the 1.3" SH1106 OLED display. You also need to print a different 3D case for the bigger display.
- Download and install the CH340 drivers for your Mac or Windows PC from GitHub.
- Next, download the ESPHome Flasher tool from GitHub.
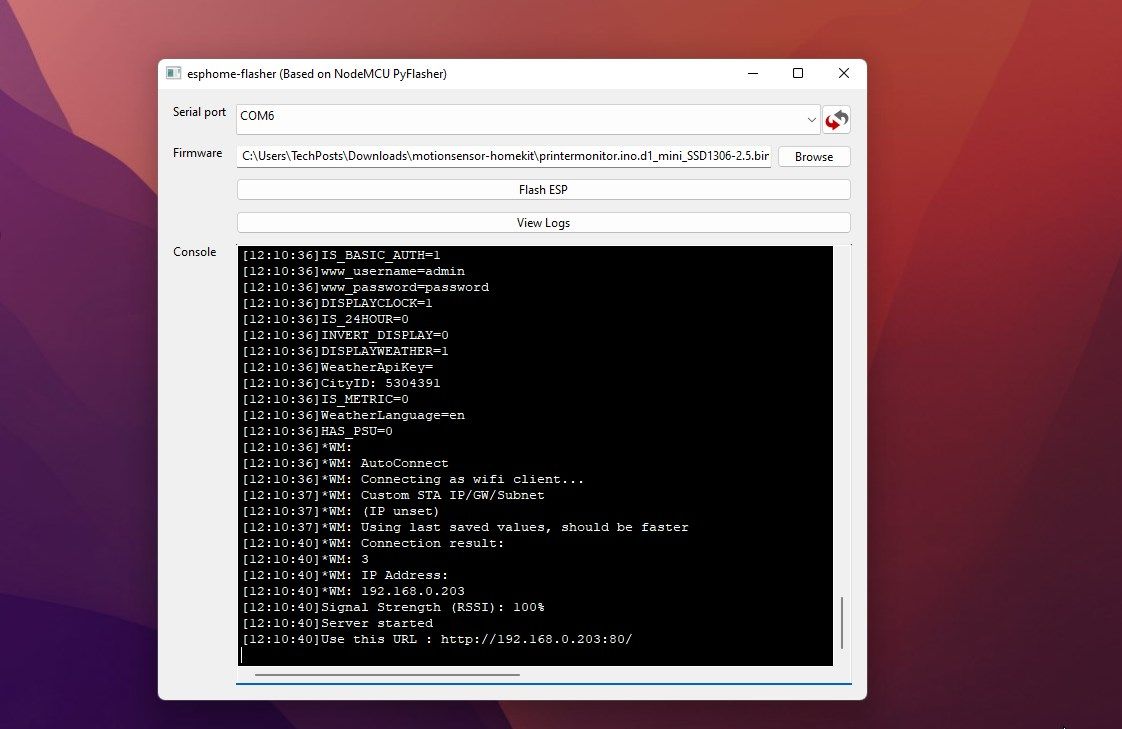
- Connect the D1 Mini to your PC using a micro USB cable and launch the ESPHomeFlasher tool.
- Click the Reload serial device list (refresh) icon and choose the COM port from the drop-down.
- Click Browse to choose the firmware you downloaded.\
- Click Flash. This may take a few seconds.

Alternatively, you may also download the project, extract it and edit the code in Arduino IDE. You can modify or edit the code as per your needs.
Step 2: Configure the OctoPrint Monitor Device
Once you've flashed the firmware, the device will reboot and start in Access Point (AP) mode. We will connect to the AP and configure the OctoPrint Monitor. The steps are as follows:
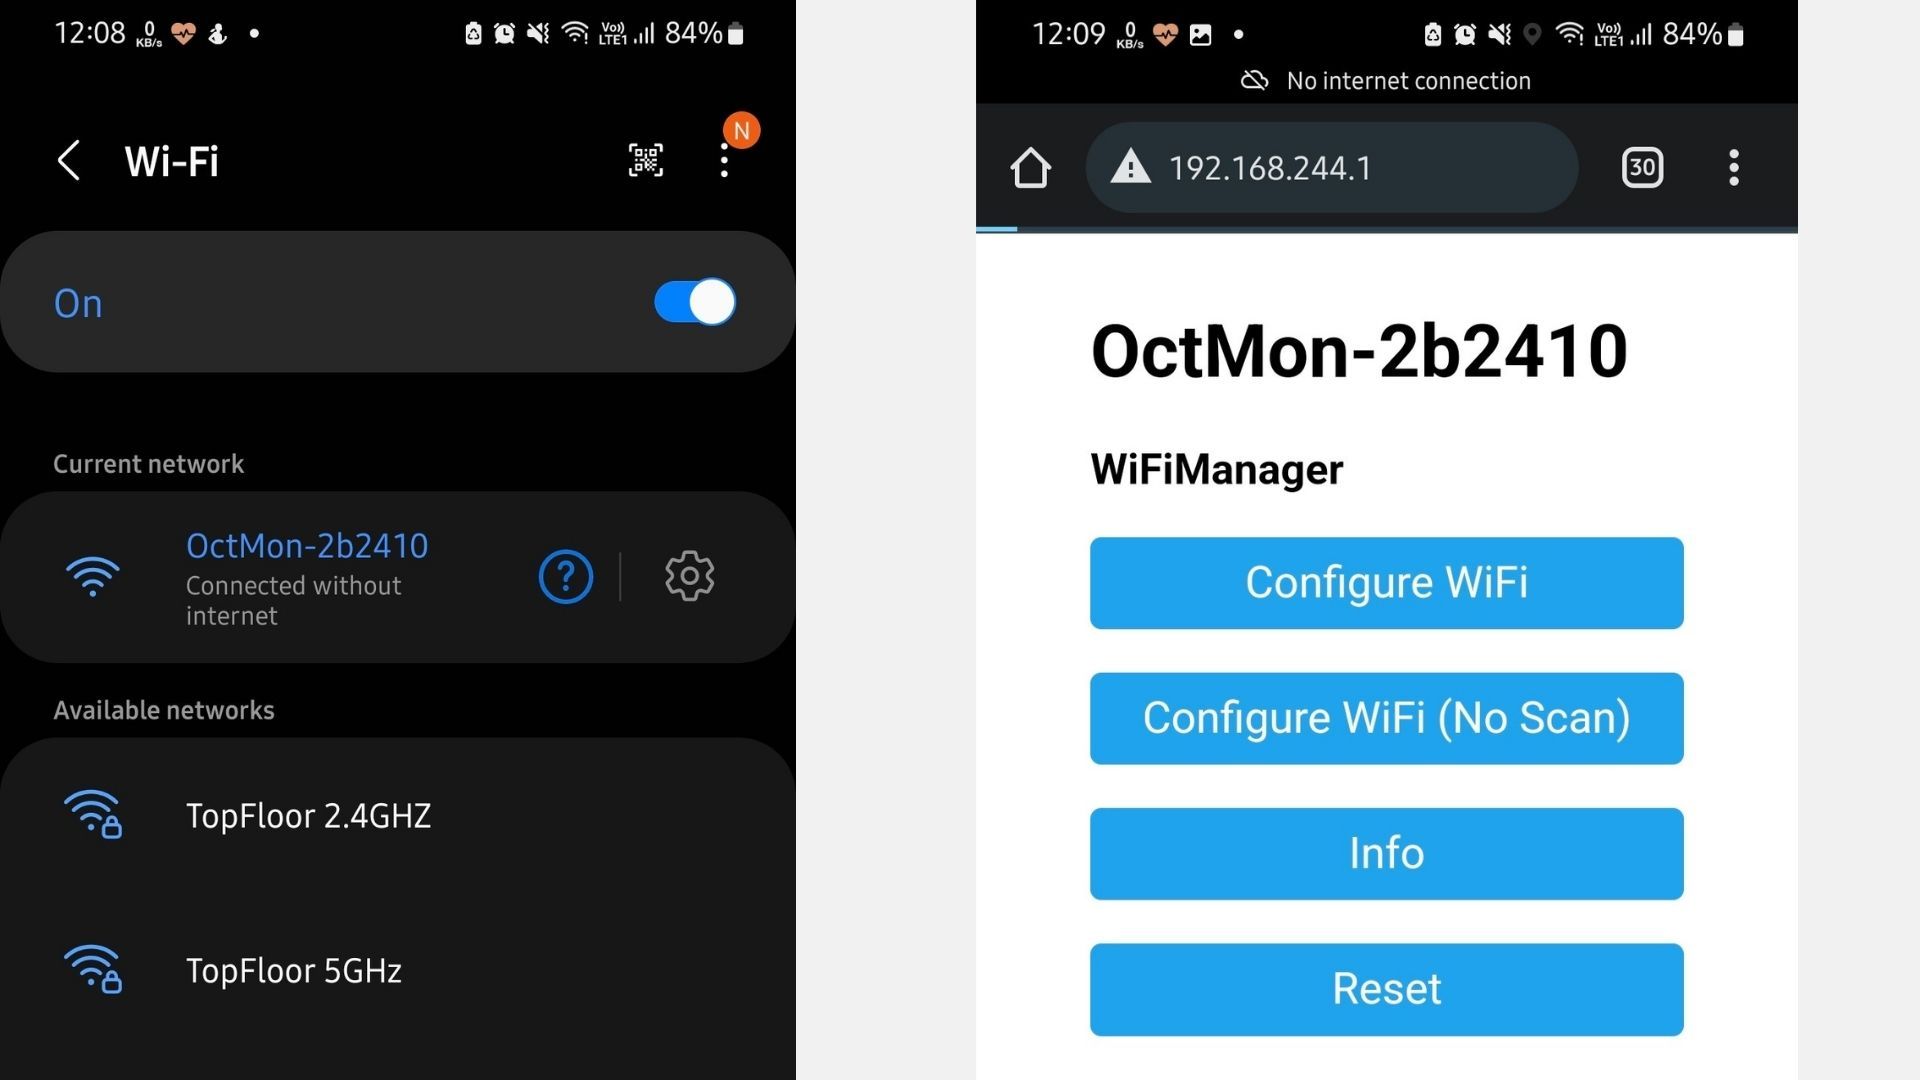
- On your smartphone or PC's Wi-Fi settings, connect to OctMon-xxxxx Access Point.
- Open the web browser and visit 192.168.244.1.
-
Click Configure WI-Fi, select the Wi-Fi network, enter the password and click Save.
-
The device will restart, and the IP will be displayed in the ESPHome Flasher.
-
Enter this IP in your web browser and visit the page.
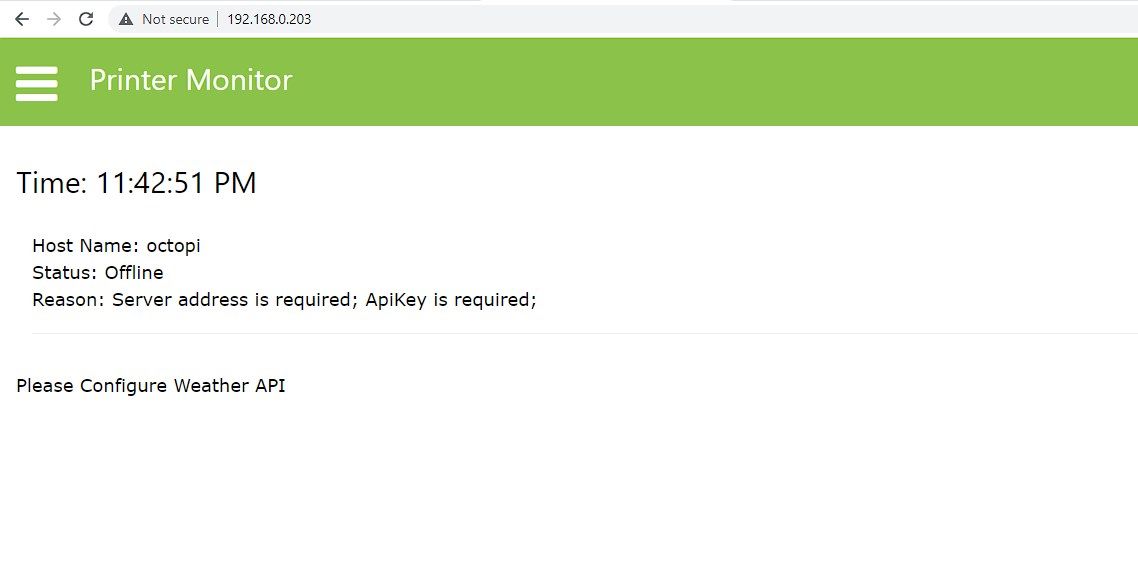
- Click on the Hamburger menu and click Configure.
- Enter the default admin and password in the Username and Password field and click Sign in.
- Open a new browser tab and visit the OctoPrint web interface.
-
Click on Settings (wrench icon) and then click API.
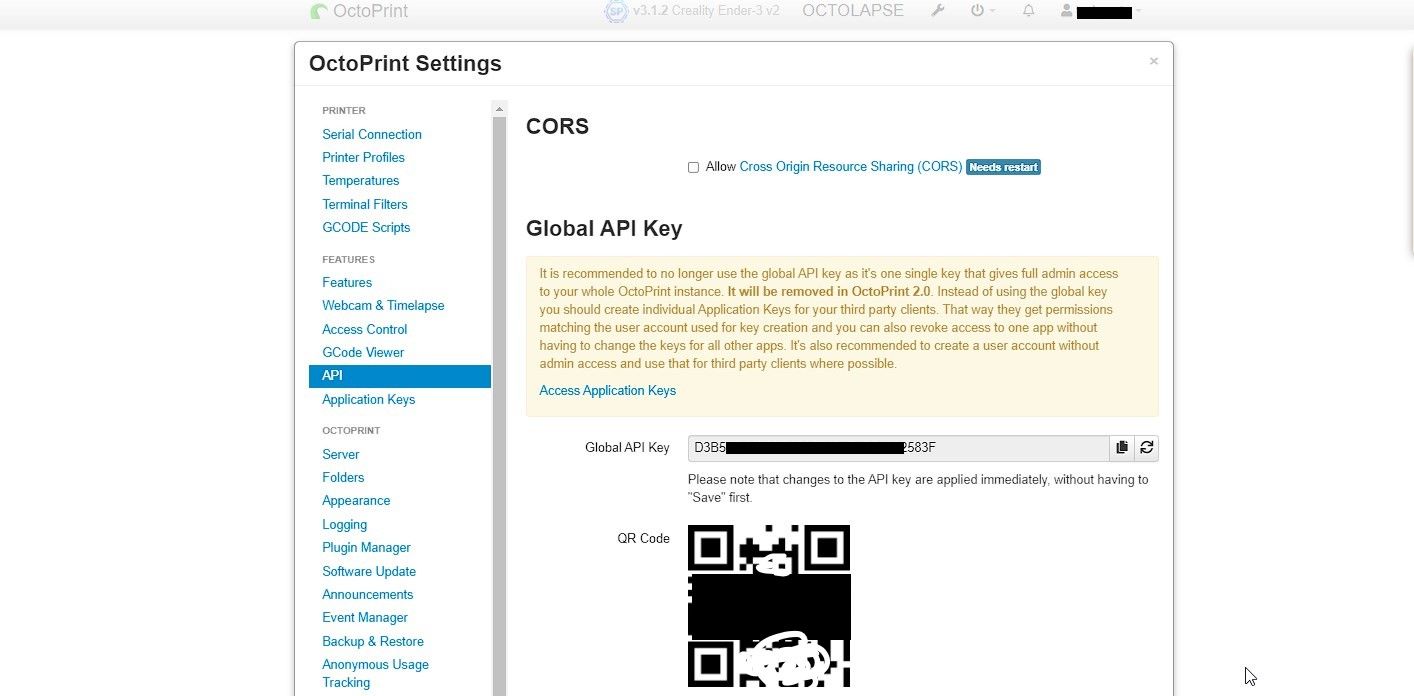
-
Copy the API and paste it into the OctoPrint Monitor web interface. Also, enter the OctoPrint Monitor IP address, Port (default is 80). If you use authentication for OctoPrint Monitor, enter the OctoPrint user ID and password. (You can

-
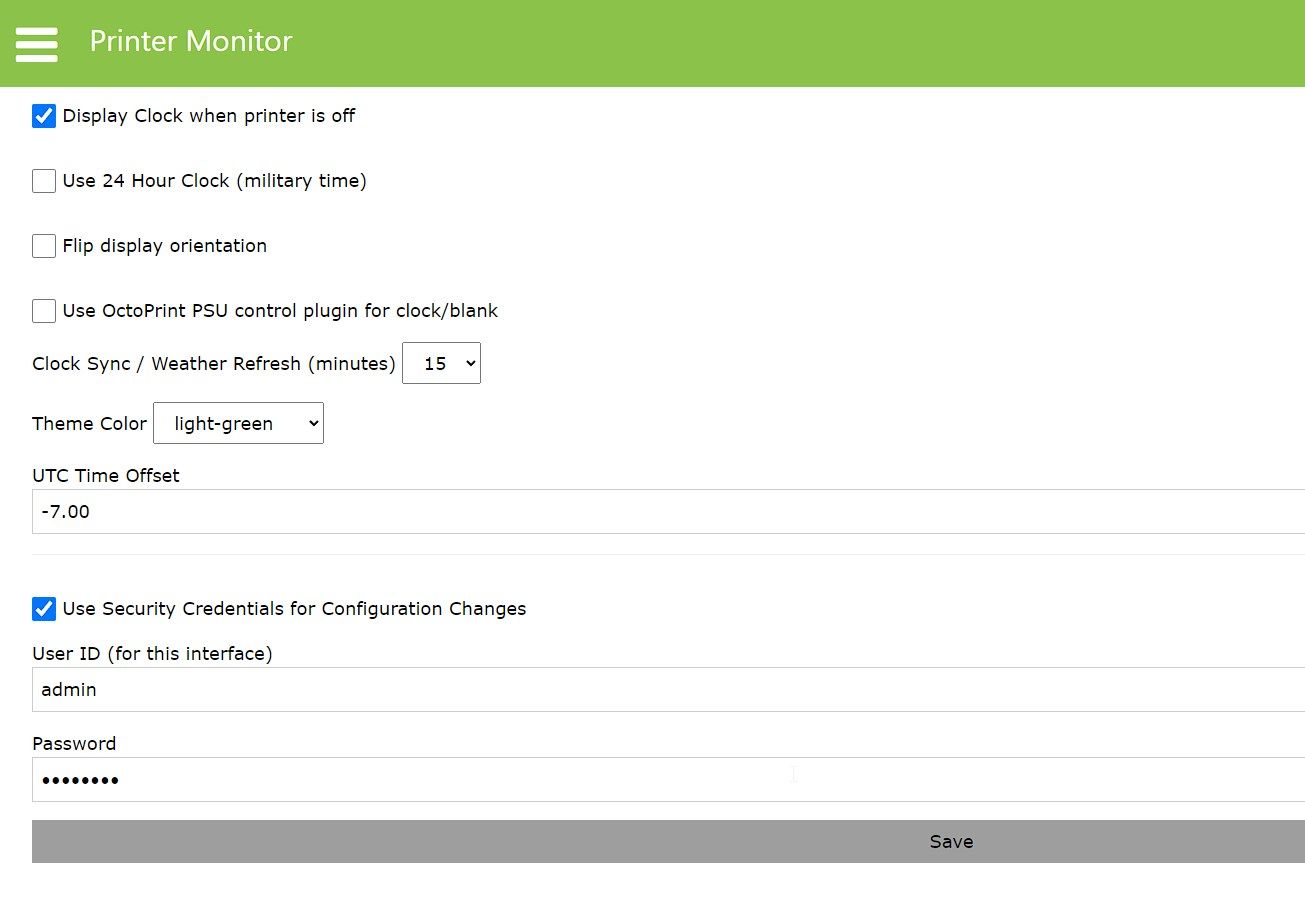
You can also check the options like Flip display orientation or change the OctoPrint user ID and Password in the same menu. Click on Save when you're done.
- Next, click on the Hamburger menu again and choose Weather.
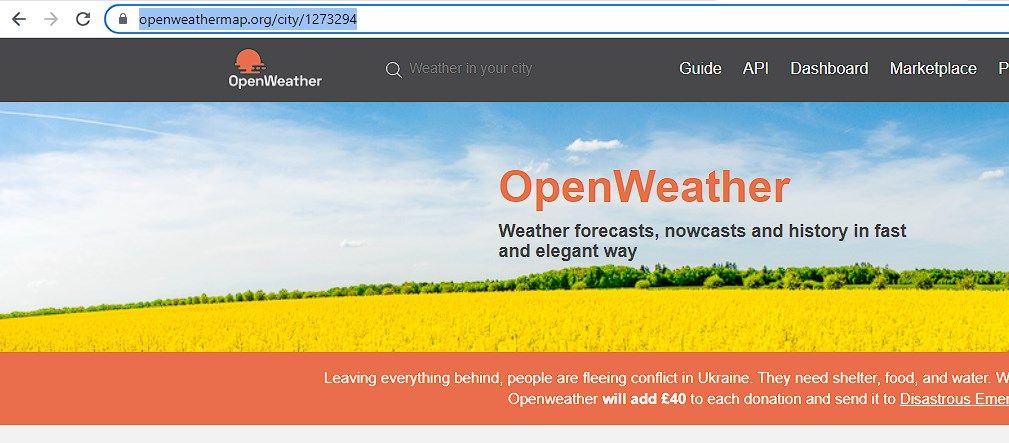
- Now, visit OpenWeathermap.org, create an account, log in and click the API Keys tab.
- Copy the API key and paste it into the OctoPrint monitor.
-
Also, search for your city to check the weather and copy the 7-digit City ID displayed in the URL.
-
Choose the Metric and weather language and click Save.
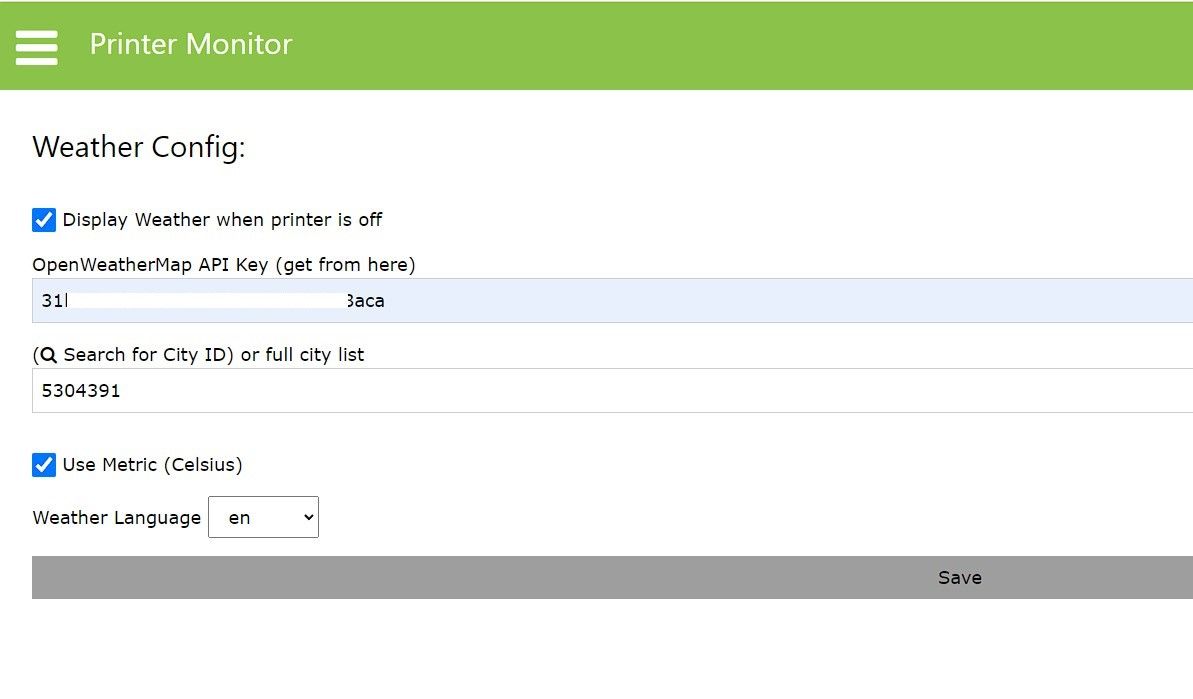


The OctoPrint monitor will now start displaying the weather information when the printer is not running.
Step 3: Connect OLED Display to D1 Mini
After the firmware is flashed and the OctoPrint Monitor is configured, you may connect the 0.96" or 1.3" 128x64 OLED display to the D1 Mini board using some jumper wires as shown below.

Connect the displays SDA to D2, SCL to D5, VCC to 5V, and GND to G pin on the D1 Mini board. Optionally, you may also use a NodeMCU board if you already have one. But you will need to design a specific 3D case for it.
Connect the USB cable to turn on the OctoPrint monitoring device and check if it's displaying the information on the display. Once confirmed, you can refer to the Thingiverse project and assemble this in a 3D-printed case.

You can use hot glue or tape to keep the display in its place. Put the cover and connect the micro USB cable to the D1 Mini micro USB port.
Connect the USB to a 5V power source such as a power bank or smartphone adapter. This will switch on the device.
Monitor Your 3D Printer Wirelessly
With the OctoPrint 3D printer monitoring device, you can keep an eye on the printer status, such as remaining time, progress, bed and nozzle temperature, etc., without browsing the IP address of the OctoPrint Server or need to refresh the page.
You can build a few of these and place them on your work desk or maybe living room to keep an eye on the print progress. You can also build a smart clock using the MAX7219 matrix and use it to display the printer status via OctoPrint API.