Both SSDs (solid-state drives) and SD cards use fundamentally similar flash storage technology to store data. However, SSDs offer faster controllers and more fault tolerance, making them much more reliable than SD cards. While most Raspberry Pis are still running on microSD cards, you may also use an external SSD to boot your Raspberry Pi.
Below, you'll learn the steps to enable USB boot on Raspberry Pi, then use an external SSD as bootable media to boot Raspberry Pi OS and use the leftover space as permanent storage for your data.
Things You Will Need
You will need the following items to enable SSD boot on Raspberry Pi:
- Raspberry Pi (4, 400, 3B+, Zero W, or Zero 2 W)
- microSD card (1GB minimum, 64GB maximum)
- microSD card reader
- Keyboard and a mouse (both wireless or wired will work)—not required if you want to enable SSD boot on a Raspberry Pi 4 or Pi 400
- Any type of external SSD (such as M.2, SATA, or NVMe/PCIe)
- USB enclosure for the SSD (if using an internal SSD)
Boot Raspberry Pi 4 or 400 from SSD
Booting a Raspberry Pi from an SSD and using it for permanent storage can provide significant performance improvements and reliability over using a microSD card. To boot a Raspberry Pi 4 or Raspberry Pi 400 from SSD, you must enable USB boot by following these steps:
- Connect the microSD card to another computer using a card reader.
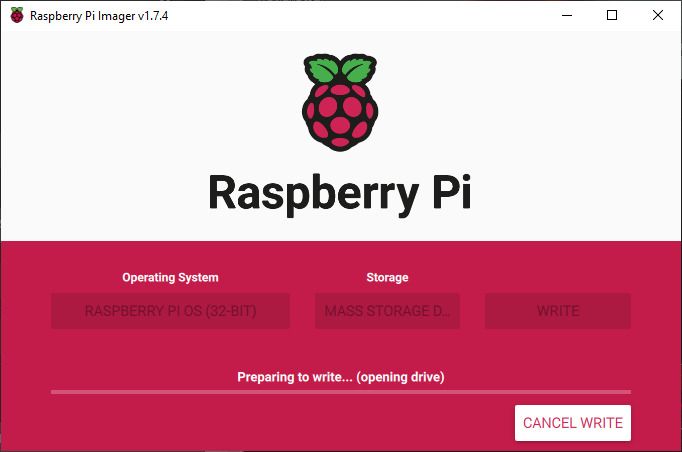
- Download, install, and launch the Raspberry Pi Imager tool on your Windows, Linux, or Mac system.
-
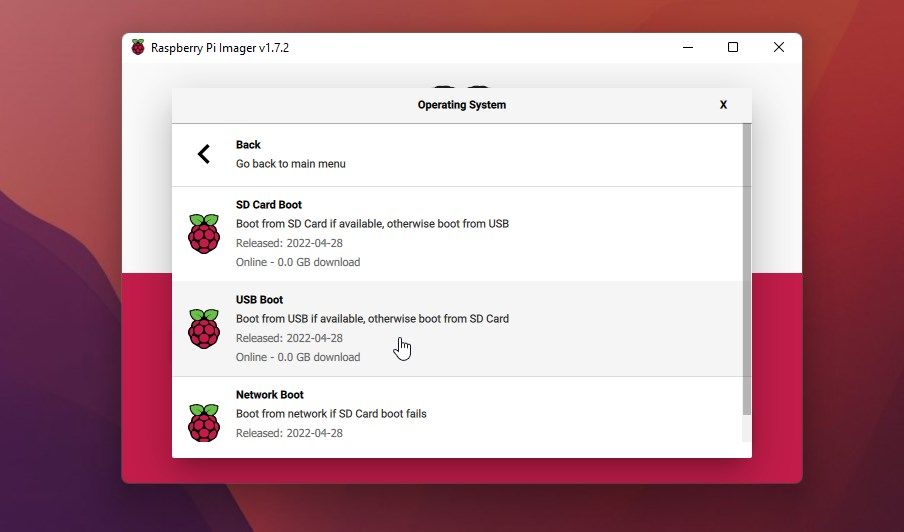
Click the Choose OS button and then choose Misc Utility Images > Bootloader > USB Boot.
- Click the Choose Storage button and select the microSD card connected to your system.
- Click Write and wait for the flash process to complete. It will take a few seconds only.
- After the flash process, the microSD card is auto-ejected. Disconnect the microSD card from the system and insert it into the microSD slot of your Raspberry Pi 4 or 400.
- Connect the power supply to the Raspberry Pi to turn it on. The Pi will automatically read and flash the USB bootloader from the connected microSD card. This takes a few seconds.
- When the flash is successful, the green LED light on the Raspberry Pi starts blinking steadily. To confirm further, connect the HDMI port to a display. If the display shows a green screen, it indicates that the flash process is complete.
- Turn off the Raspberry Pi and disconnect or remove the microSD card.

Boot Raspberry Pi 3 or Zero from SSD
To enable SSD boot on Raspberry Pi 3, Zero W, or Zero 2 W, you need to flash the standard Raspberry Pi OS on the microSD card, boot the Raspberry Pi, and make a few changes to the configuration files to enable USB (SSD) boot. The steps are as follows:
- Insert a microSD card into the system and launch the Raspberry Pi Imager tool.
-
Click on Choose OS and then select Raspberry Pi OS (32-bit).
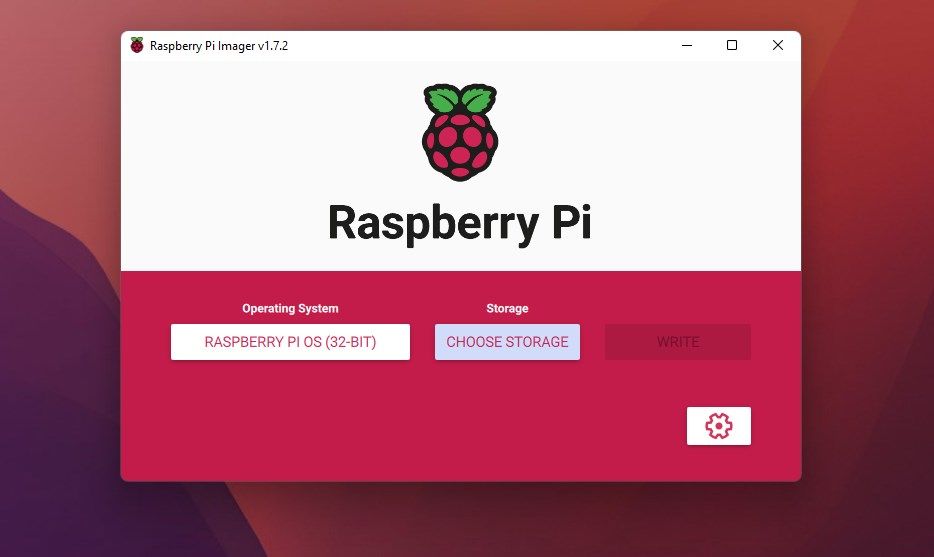
- Click Choose Storage and select the microSD card from the available storage devices.
- Optionally, you can click on the gear icon to bring up the advanced options, then enter your network’s Wi-Fi details and enable SSH.
- Click the Write button.
- After the flash process is complete, eject the memory card from the system, insert it into the Raspberry Pi 3, Zero, or Zero 2 W, and turn it on.
- Connect a keyboard and a mouse to the Raspberry Pi.
- After it boots up, log in using the default username pi and password raspberry (unless you changed these in the Raspberry Pi Imager advanced options).
-
Open the Terminal window and run the following commands.
        sudo apt update -y
sudo apt full-upgrade -y -
After updating and upgrading the packages, run the following command in the Terminal window.
vcgencmd otp_dump | grep 17 -
The output will display a code, 17:1020000a, showing that USB boot is disabled. To enable USB boot, we need to edit the config.txt file by running the following command.
sudo nano config.txt -
Scroll to the bottom of the file. For the very last line, add the following code.
program_usb_boot_mode=1echo program_usb_boot_mode=1 | sudo tee -a /boot/config.txt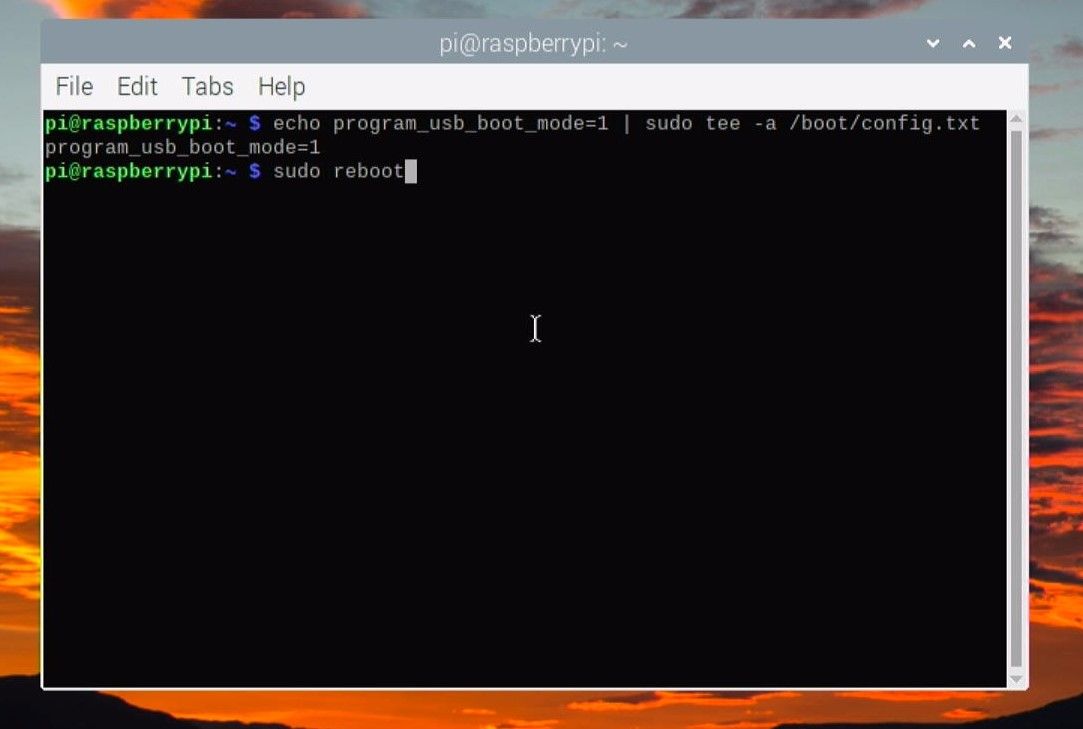
-
Restart the Raspberry Pi and then run the following command to confirm if USB boot is enabled.
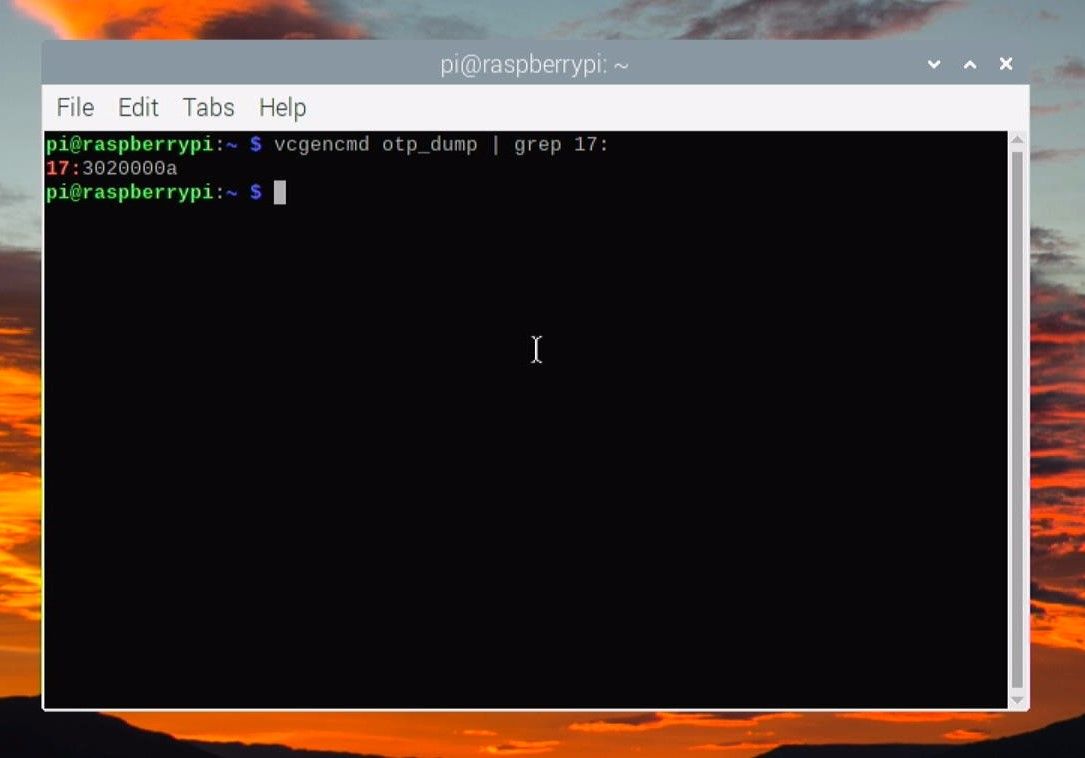
vcgencmd otp_dump | grep 17 -
If the output shown is 17:3020000a, USB boot is enabled. You can now remove the microSD card from the Raspberry Pi 3, Zero, or Zero 2 W.
-
Once USB boot is enabled, you can remove the code from the config.txt file using the nano editor or the following command.
sudo sed -i 's/program_usb_boot_mode=1//g' /boot/config.txt


Learn more about ways to edit the boot/config.txt file on Raspberry Pi.
Prepare Bootable Raspberry Pi SSD
To boot the Raspberry Pi Zero, Raspberry Pi 3, Raspberry Pi 4, or Raspberry Pi 400 via SSD, you must install an operating system such as Raspberry Pi OS on the SSD by using Raspberry Pi Imager (or the Balena Etcher tool).
In case you are already running an OS and services via microSD card, you can clone the SD card to the USB hard drive using Balena Etcher.
After writing or cloning the OS, you can connect the SSD to the Raspberry Pi via a USB port and run on the Raspberry Pi. The Pi will automatically detect a USB drive and boot the OS from the SSD. If USB storage is not detected, the Raspberry Pi will continue to boot from the microSD card (if connected).
To prepare the SSD for boot, follow these steps:
- Launch the Raspberry Pi Imager tool and connect your external SSD to your Windows, macOS, or Linux system via a USB port.
- Click Choose OS to select the desired OS from the list. If you want to flash a downloaded OS image, you can use the OS file by clicking on the Use Custom option and then selecting the OS file from your system.
- Click Choose Storage to select the connected SSD storage media.
-
Click the Write button.
- After the OS is flashed on the SSD, dismount the SSD drive from the system safely and then connect the USB SSD drive to one of the USB 3.0 or 2.0 ports on your Raspberry Pi 4/400, Raspberry Pi 3 (or to Zero W or 2 W’s micro-USB port via a USB OTG adapter).
- Connect the power supply to turn on the Raspberry Pi.
- The Raspberry Pi will check for a bootable SSD connected to the USB port and boot the operating system.

Using an SSD as Permanent Storage for Raspberry Pi
After booting the operating system from the external SSD drive, you can use the leftover space in the SSD as permanent storage to store other data.
To check the available storage space, run the following command in the Terminal app.
df -h
If you are using the Desktop version of Raspberry Pi OS, open File Manager and click on Filesystem Root at the top of the screen. You can see the available storage in the bottom-right corner.

Expand the Filesystem
If you don't see the full capacity of your SSD drive, you can follow these steps to expand the file system on Raspberry Pi.
-
Open Terminal, and run the following command to update and upgrade packages and repositories.
        sudo apt update -y
sudo apt upgrade -y - Then type sudo raspi-config and press the Enter key.
- Use the down arrow keys to move the selection to Advanced Options and hit the Enter key.
- Move the selection to Expand Filesystem and press the Enter key.
- On the next screen, select OK and press the Enter key.
- After that, select Finish and press the Enter key.
- You will be asked to reboot the Raspberry Pi; select Yes, and press the Enter key to reboot.
- After rebooting, enter the df -h command to check the available storage again. You should see the complete available SSD storage for use on your Raspberry Pi 3, 4, Zero W, or Zero 2 W.
Finally, use the rsync or cp command to move the data (migrate data) from the microSD card to your SSD. Make sure to connect the microSD card to the Raspberry Pi.
Now that you have faster SSD storage, you can use it to build a personal cloud storage accessible from anywhere or to host a secure website on Raspberry Pi.
You may also build a Raspberry Pi NAS by installing Samba and use the SSD storage as network storage in your home or office network.
More Storage With Faster Performance
Booting your Raspberry Pi with an SSD is highly recommended as it is much faster and more reliable than a microSD card. You can use any external SSD available on the market. This includes M.2, SATA, and NVMe/PCIe SSDs.
While the process to enable boot is a bit complex on Raspberry Pi 3 and Raspberry Pi Zero W / 2 W, it’s much easier on Raspberry Pi 4 and Raspberry Pi 400.