For iPhone screenshots, the default image format is PNG. But PNG images have a larger file size compared to JPEG. Therefore, you may sometimes find the need to convert your iPhone screenshots to JPEG format. If you’ve taken a lot of screenshots, you probably want to find a way to batch convert them.
Let’s look at how you can batch convert PNG images to JPEG on your iPhone for free, using Apple’s Shortcuts app.
About the iPhone’s Shortcuts App
Introduced in iOS 13, Shortcuts is a built-in app that helps to automate your iPhone tasks.
If it’s just a couple of pictures, there are quick ways to take JPEG screenshots on your iPhone instead of PNG. But if you have a lot of screenshots, it’s better to save time in the long term by setting up an iPhone shortcut. This way, your device does the work of bulk converting images for you and you don’t need to edit them one by one.
To set up a PNG to JPEG shortcut on your iPhone, these are the two main steps:
- Create a dedicated JPEG album in the Photos app.
- Create a three-action shortcut in the Shortcuts app.
Download: Shortcuts (Free)
Step 1. Create a New Album for Converted Images
By creating a dedicated JPEG album, you can ensure that your original and converted screenshots won’t later be lumped into the same place, like Recents. This makes it easier for you to sort out which are the new JPEG images and which are the original PNGs.
Here’s how to create a new album:
- Go to the Photos app, tap the plus (+) icon, and select New Album.
- Give your album a relevant name, such as Converted JPEGs. This album will be the destination for your converted images later.


Step 2. Create a Shortcut to Batch Convert PNG Images
Creating an iPhone shortcut involves adding and arranging specific actions into the Shortcuts app. Here are each of the actions you need to add.
Select the Images to Convert
To convert PNG images to JPEG, you need to let your iPhone know what the first action is—getting the images from the Photos app. Here’s how:
- Go to the Shortcuts app. In the My Shortcuts tab, tap the New Shortcut (+) button.
- Give your shortcut a relevant name, such as Convert PNG to JPEG.
- Tap Add Action. In the Apps tab, select Photos.
- You’ll see a list of actions related to the Photos app. Tap Select Photos.
- Tap the arrow next to Select Photos. Toggle on Select Multiple.


Convert All the Images
The second action is image conversion. To add this to your shortcut:
- Drag up the minimized menu at the bottom. Tap the x icon to return to the main selection.
- In the Categories tab, select Media.
- Scroll down to the Images section. Select Convert Image. The default file format preferred is JPEG, so you don’t need to change anything here.


Save the Converted Images
The third action is saving the converted images to your preferred album. To add this:
- Bring the menu up again. Tap the x icon to return to the main selection.
- In the Apps category, select Photos.
- Choose Save to Photo Album.
- The default album selected is Recents. Tap on the word Recents to edit and change it to the Converted JPEGs album you created earlier.


Once you’re done, your final, three-action shortcut should look like the below image. Then, simply tap the Exit button (icon shows an x) on the top right. Your Convert PNG to JPEG shortcut is automatically saved on your iPhone’s Shortcuts app.

How to Use Your iPhone Shortcut to Bulk Convert PNG to JPEG
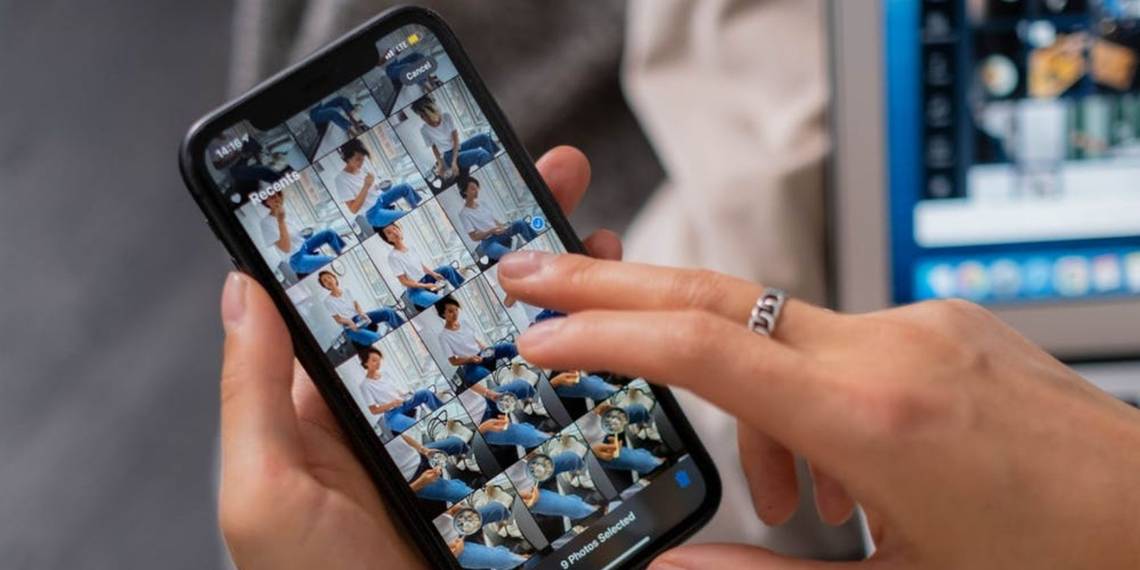
In the future, when you want to batch convert PNG screenshots to JPEG, just head to the Shortcuts app and tap on your Convert PNG to JPEG shortcut. This brings up your Photos album automatically. Select the screenshots you want to convert, tap Add, and wait for a couple of seconds.
Once loading is completed, you’ll see a little checkmark. This means that your iPhone has successfully converted the images. Simply head to your Converted JPEGs photo album to get your JPEG pictures.
Fastest Way to Batch Convert PNG images to JPEG on Your iPhone
The Shortcut app may feel a little complex if you’re using it for the first time. But once you set up this iPhone shortcut, your work process will become ten times more efficient. You’ll no longer need to manually convert the images one by one, or go through the hassle of uploading them to a desktop app to do so. You can manage your media files directly on your iPhone.