It is no secret that Canva is not Photoshop. If you tell any graphic designer that you use Canva to create professional images for your website, brochures, or social media, they’ll probably roll their eyes at you.
Still, Canva is growing more powerful every day and adding new features to help inexperienced designers create beautiful graphics. Not only is it beginner-friendly, but it also helps save time with templates and automated features.
In this article, we’ll talk you through the option to add textures and patterns to your images, even if you have zero graphic design experience.
A Short Introduction to Canva
As you can probably tell from the article's subject, this tutorial is focused on one element of the software. So, if you’re not familiar with Canva at all, we suggest you explore some other articles before diving into this one.
You can read our tips to get the most out of Canva or the beginner’s guide to Canva app to get a better understanding of the platform.
The main thing to remember is that the software allows you to create various designs—anything from a business card to an Instagram video or an eBook. While a textured image may not look great on all of these, you can still use the technic on any design you choose to make (yes, even on a video).
How to Add Texture to the Background of an Image
First things first, you need to create your main design. On the main page, click Create a Design and pick the size you want — either from the list or by typing custom dimensions.
Then, arrange the elements on the screen to your satisfaction. Add text and images, and adjust your colors. You can also play around with the Canva templates. Once that’s done, it’s time to make your background pop with added texture.
The easiest way to do that is with the Background tab on the screen's bottom-left. There, you can browse the free and paid backgrounds Canva has to offer, and once you click them, they will be automatically added as your background.

However, if you want to create something more subtle and blended, there are ways to do that too:
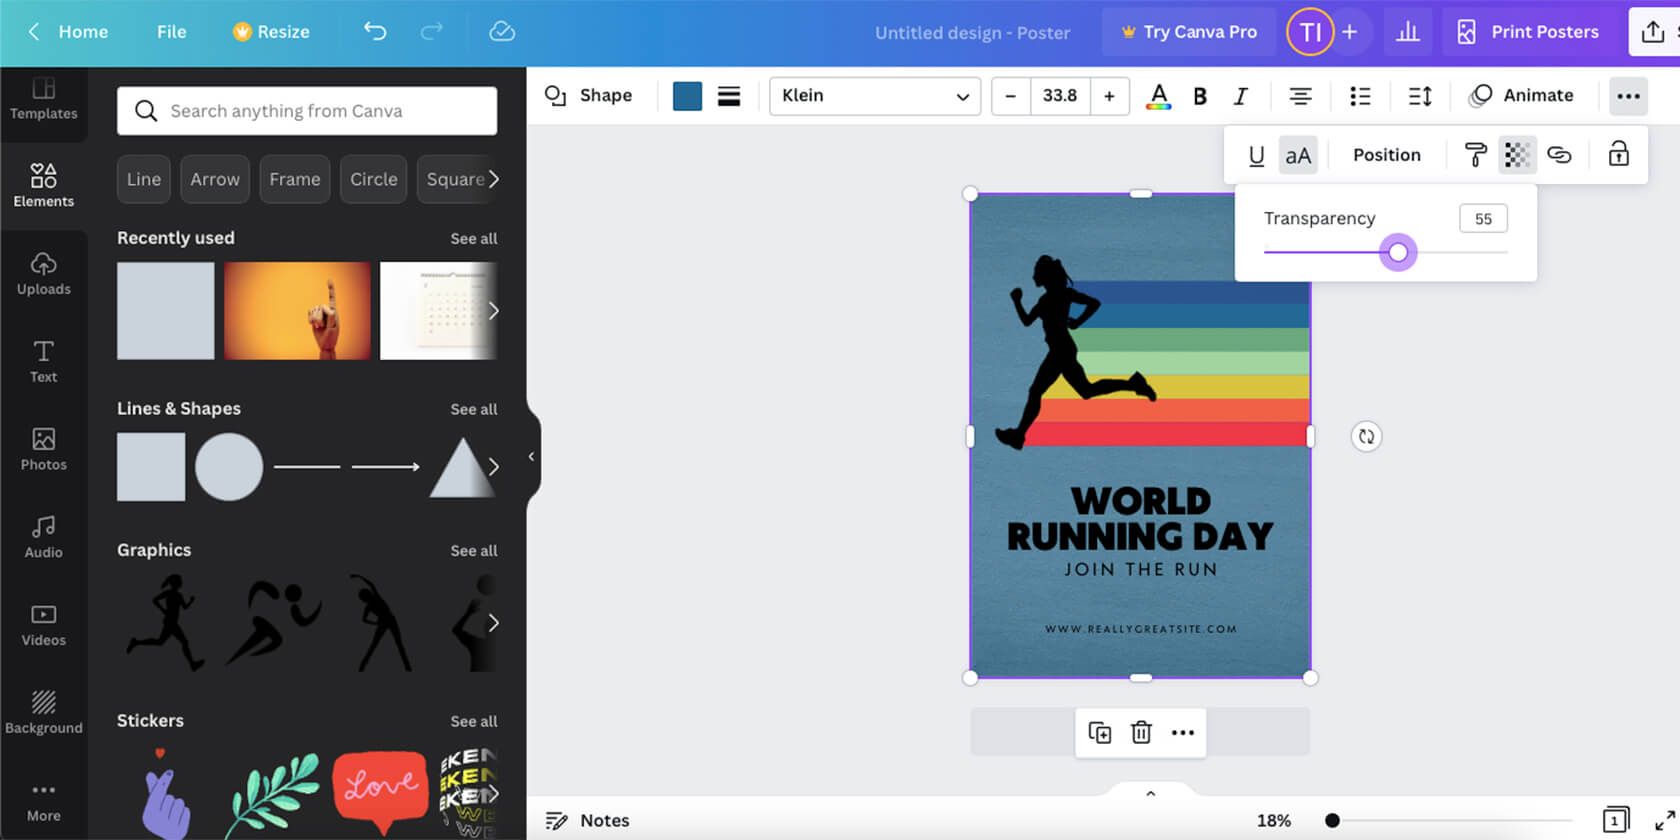
- After you pick the textured background, click it on the screen and click Edit Image on the top.
-
Navigate to Adjust and push Saturation all the way to the left. This will allow you to turn that texture into any color you like to fit your design better.

- Go to the Elements tab.
- Click on the square.
- Scratch it to the dimensions of your whole image, and set it to the color you want the background to be.
- Right-click the shape and pick Send to Back.
-
From the top menu, pick the Transparency button, and adjust it to your desired level.


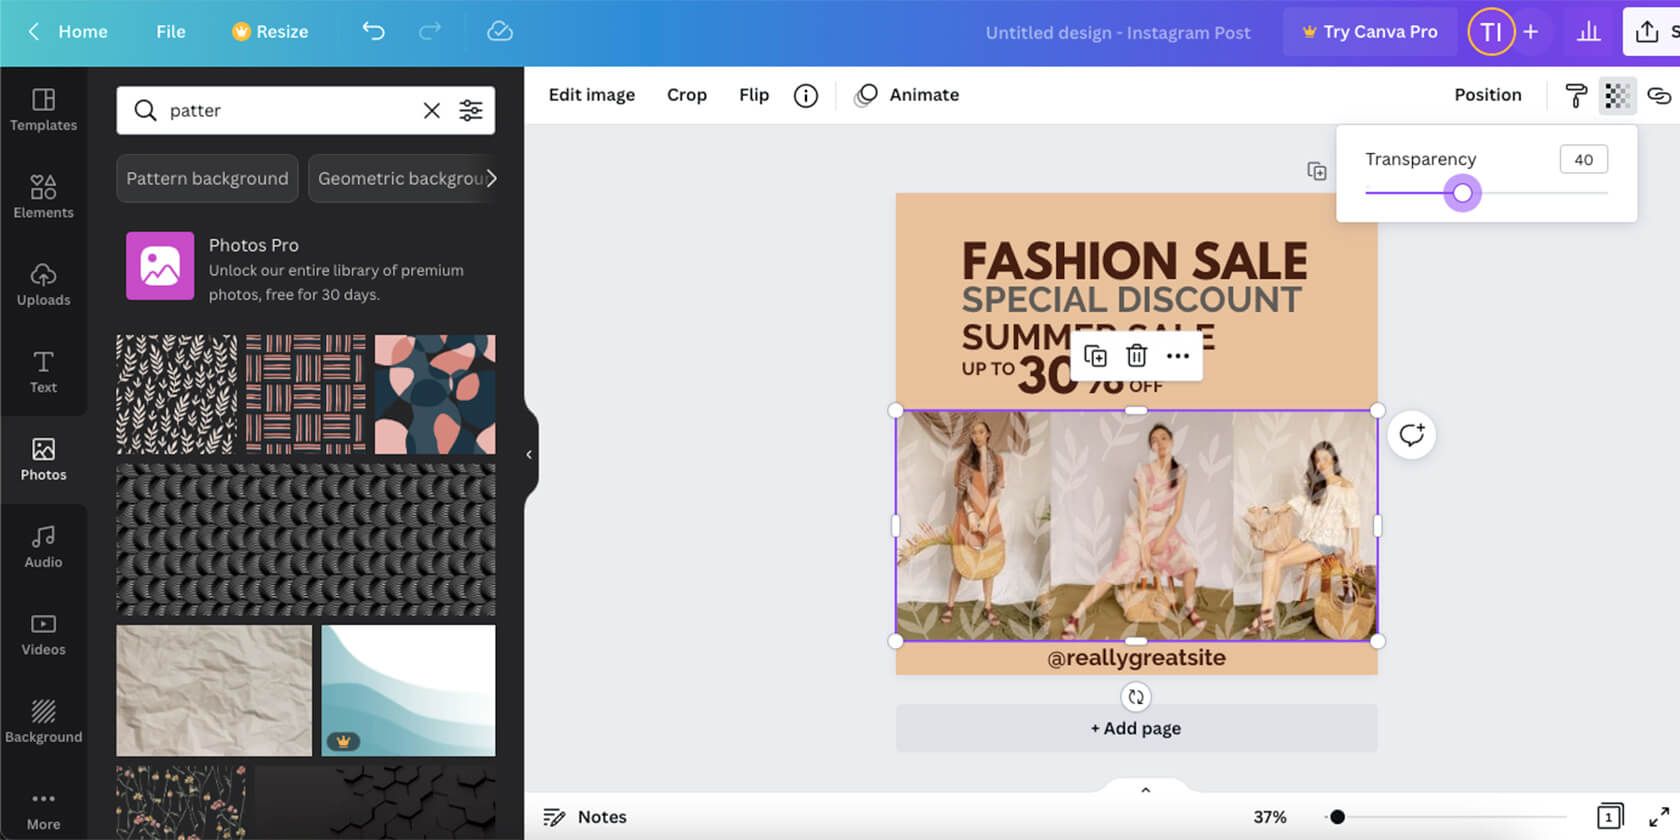
If you don’t like any of the images in the Background library, you can search the Photos tab as well for inspiration. Try the search words texture or pattern.
If you find something you like, it won’t be automatically set as the background, but you can easily do it yourself. After you click the image and add it to your workspace, right-click it and pick Replace Background. Then follow the same steps as before.

How to Turn Your Images Into Textures on Canva
You can always upload one from your computer if you have an incredibly specific texture in mind that you can’t find within Canva. For instance, free image websites like Pexels offer a variety of surfaces and patterns.
You can also take your own picture and easily upload it:
- Click the Uploads tab on the left side of the screen.
- Click Upload Media and find the image on your computer.
- After it’s done uploading, click it once.
- To crop it to the specific part you want to use as a texture, drag the lines on the picture's borders.
- Once again, right-click and pick Replace Background. Then, follow the steps as before.

How to Add Texture to a Small Part of an Image
Texture in photography is an excellent way to improve your image, and the texture feature is not limited to the background in Canva. You can also choose to add a pattern behind a specific element instead of the whole image. Or you can overlay the texture over a picture within the image. There are a lot of ways to play around with this feature.
- Add the texture image to your canvas. This time, don’t replace it as background.
- If, like before, you want to use just the texture and not the color, change the saturation in Edit Image.
-
To overlay the pattern over another image, simply crop it to the same size, and play with the transparency.
- To place it behind an element, like a text box, right-click the texture and pick Send Backward. Do it a few times until it’s in the proper position, and set the transparency again.

If you want the texture to appear in a particular shape, like a circle or a star, you can do that as well.
- In the Elements tab, scroll down until you see Frames and click See All.
- Find the shape you like and click it.
- In your workspace, drag the pattern into that shape until it fills it.
- Adjust the size and the placement of the new image you created.
- Play with the transparency and change the position to make it a more natural part of the image.

Learn More About Canva Through Trial and Error
There are many ways to add textures to your images with Canva, more that we can cover in this one article. Hopefully, we’ve given you enough of a taste of this feature that you’ll feel confident enough to go and explore everything else on your own.
The great thing about Canva is how user-friendly this software is. Most of the features are based on drag and drop, and those that aren’t are still incredibly intuitive. This means that if you want to discover new things within the software, it shouldn’t be too hard.