When you composite images, or combine two or more images together, adding shadows to your subjects can add realism to your photos and prevent the overall edit from looking “Photoshopped” or fake.
In this tutorial, we’ll explore how to use the Drop Shadow effect in our editing workflow to add a shadow to our rollerblader. Then we’ll polish the image with a few more adjustments.
If you’d like to follow along, you can download images 1 and 2 for free.
Cutting Out the Rollerblader From the Background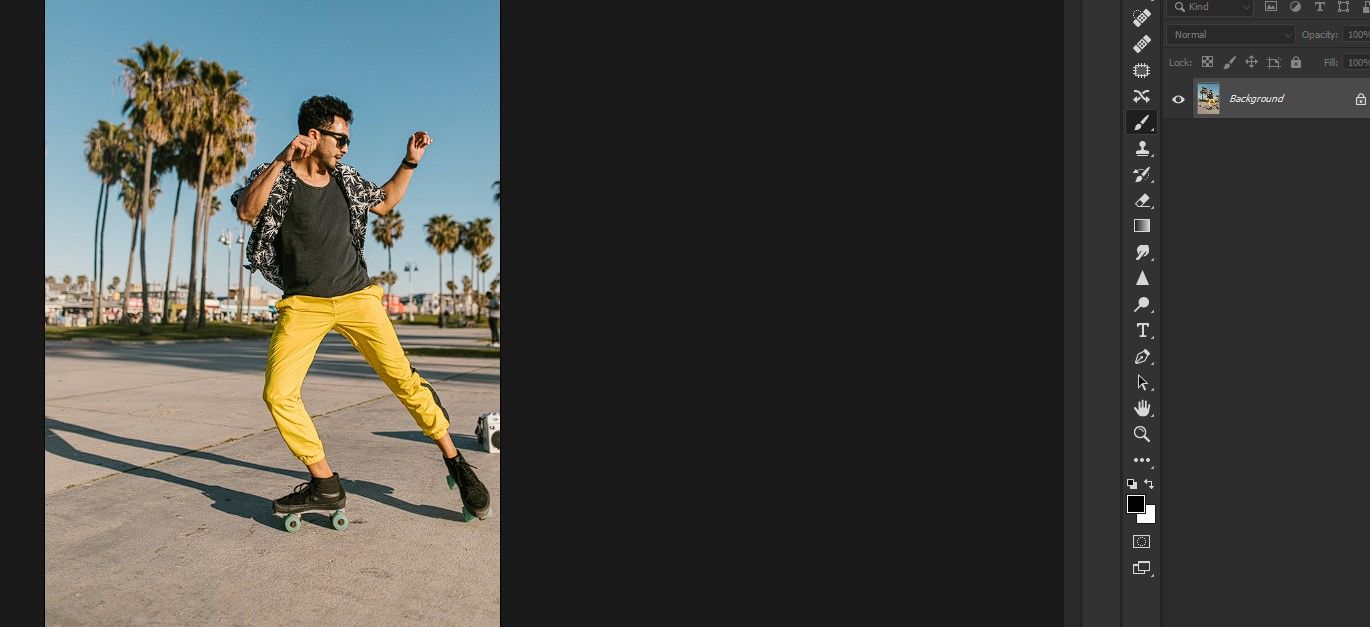
There are several ways to remove a person from the background or vice versa.
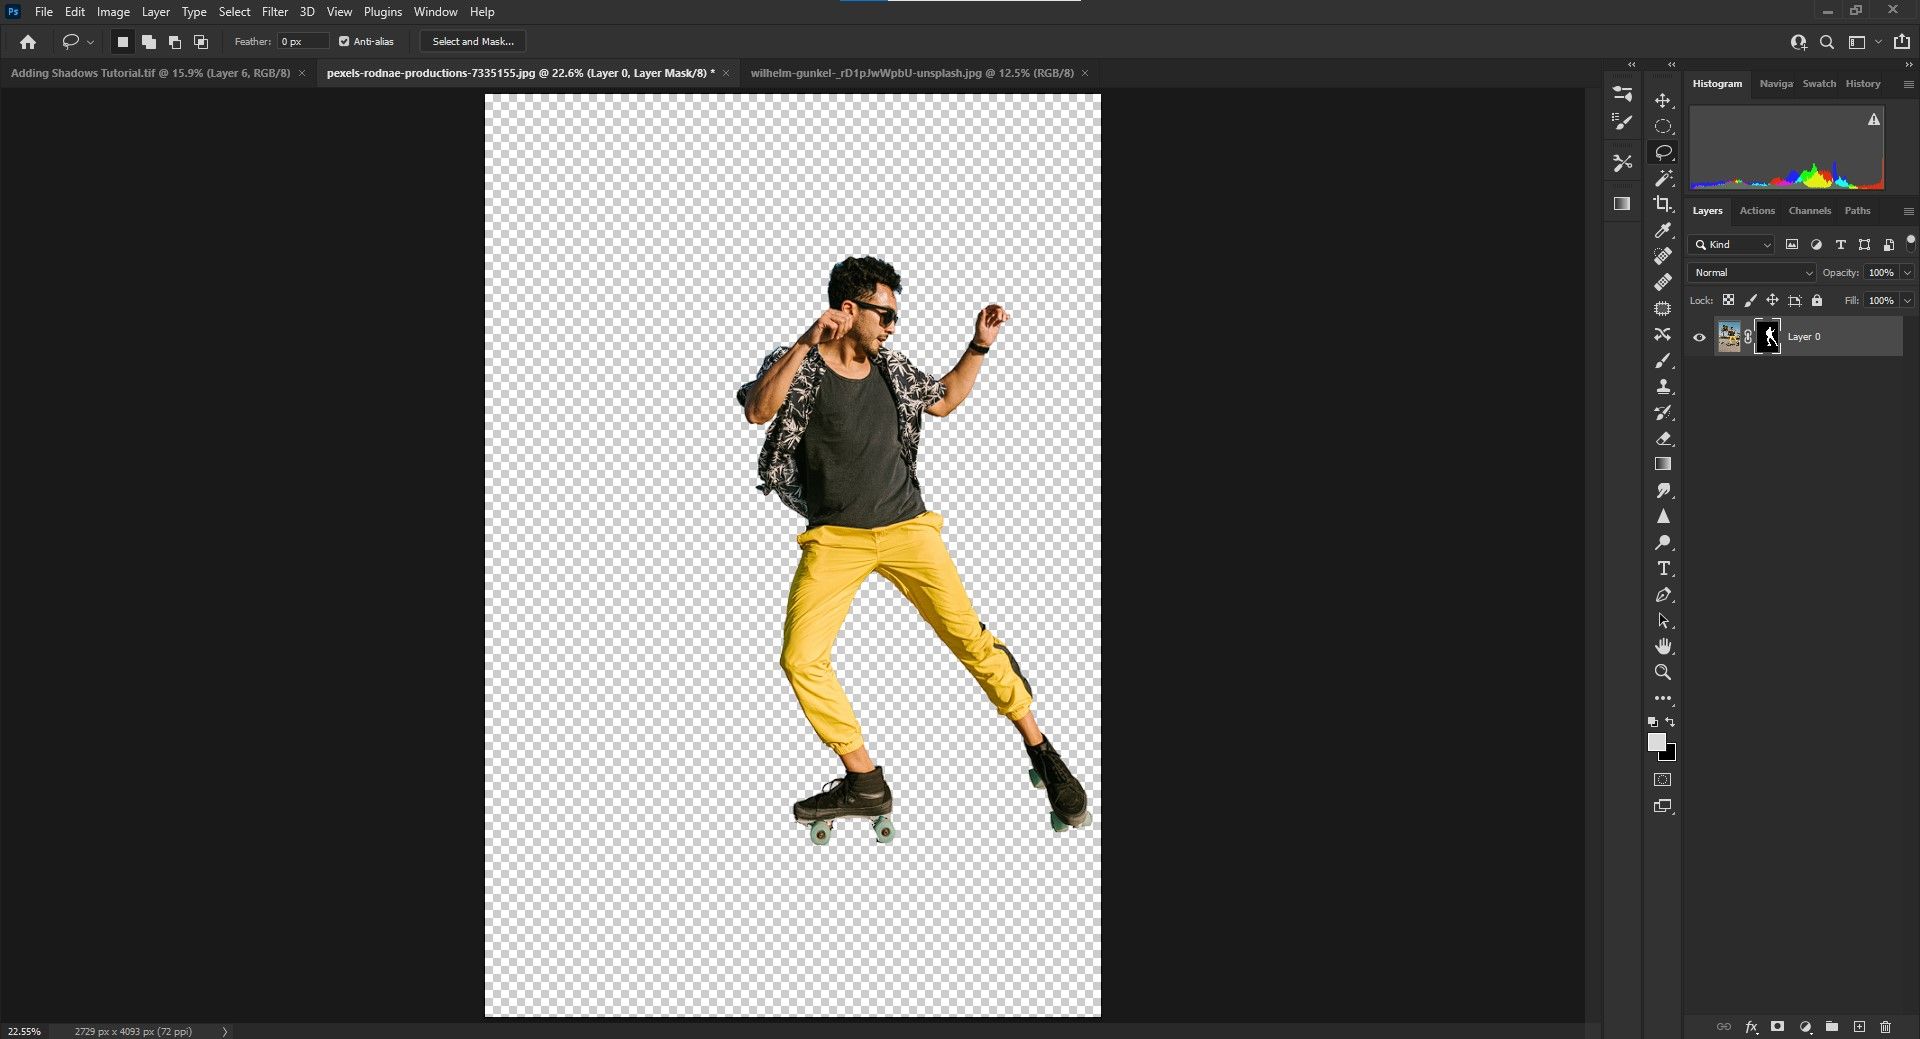
- Import both images into Photoshop.
-
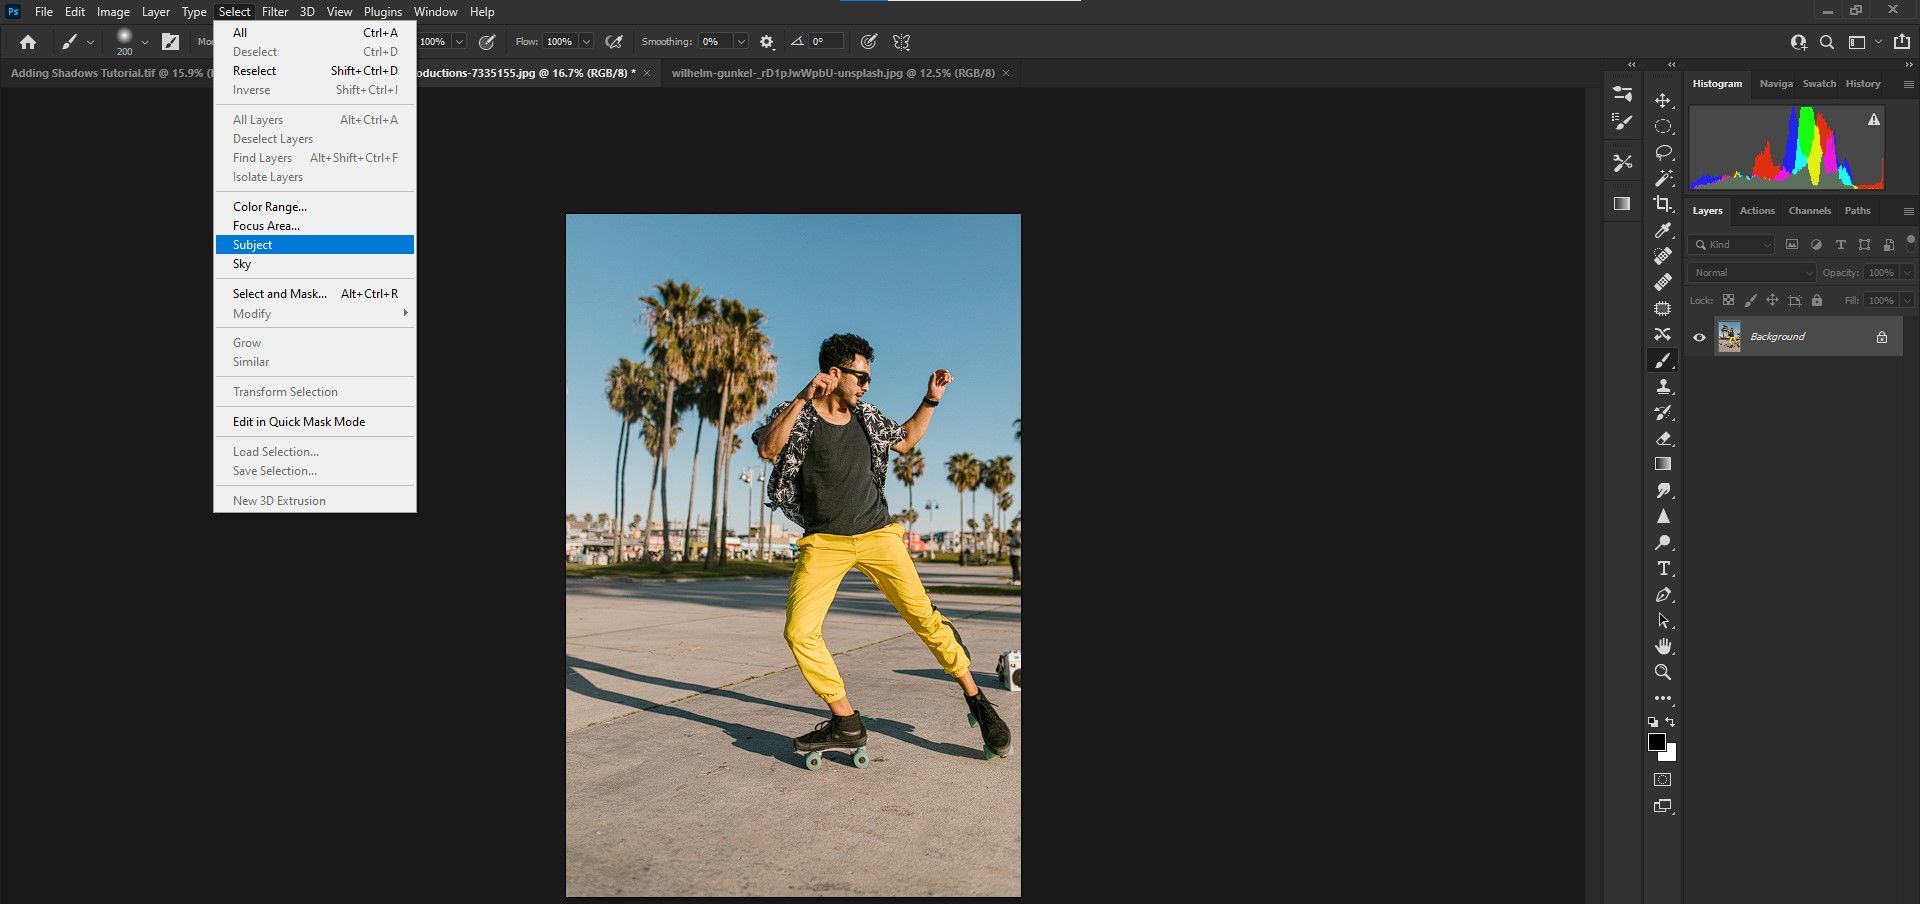
We’ll start on the image of the man in rollerblades. Go to Select > Subject.
-
Use Ctrl and + to zoom in to examine the selection. Use the spacebar to navigate directions.
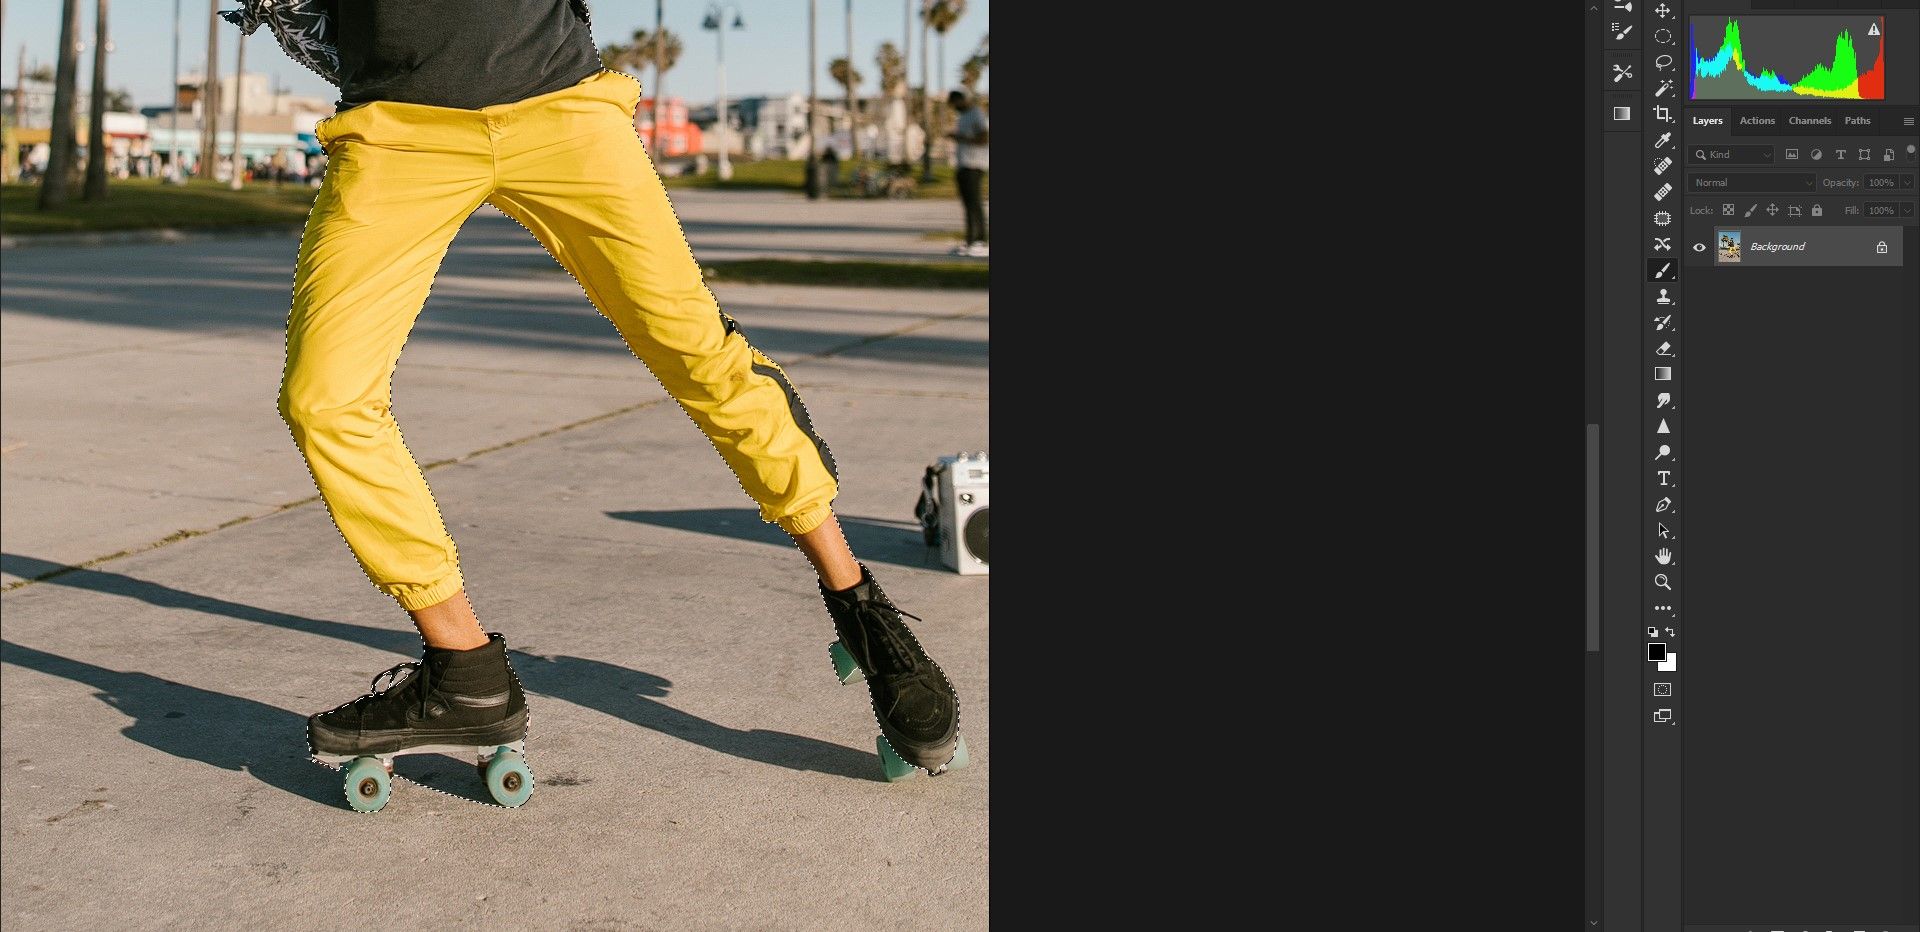
- Press L for the Lasso tool. Press and hold the Shift key and use the Mouse to trace around the areas of the man’s rollerblades that weren’t selected. Depending on your version of Photoshop, different areas may have been missed by Photoshop’s Subject Select tool.
- To deselect areas that were selected, follow the same process in Step 4 but use the Alt button instead of the Shift key. It’s common for Photoshop’s automatic selection tools to select shadow areas, for example.
-
The overall selection doesn’t have to be perfect. That’s because you will transfer it to the warehouse photo and this will obscure the tiny details. When you have the best possible selection, then click on the Mask tool (white rectangle with black circle) at the bottom-right in Photoshop.


Dragging the Rollerblader into the Warehouse Document
Photoshop provides a few ways to transfer an image to another document. But in our case, the easiest method would be to just simply drag the layer of the rollerblader into the other document. Why? Because the main image layer is unlocked.

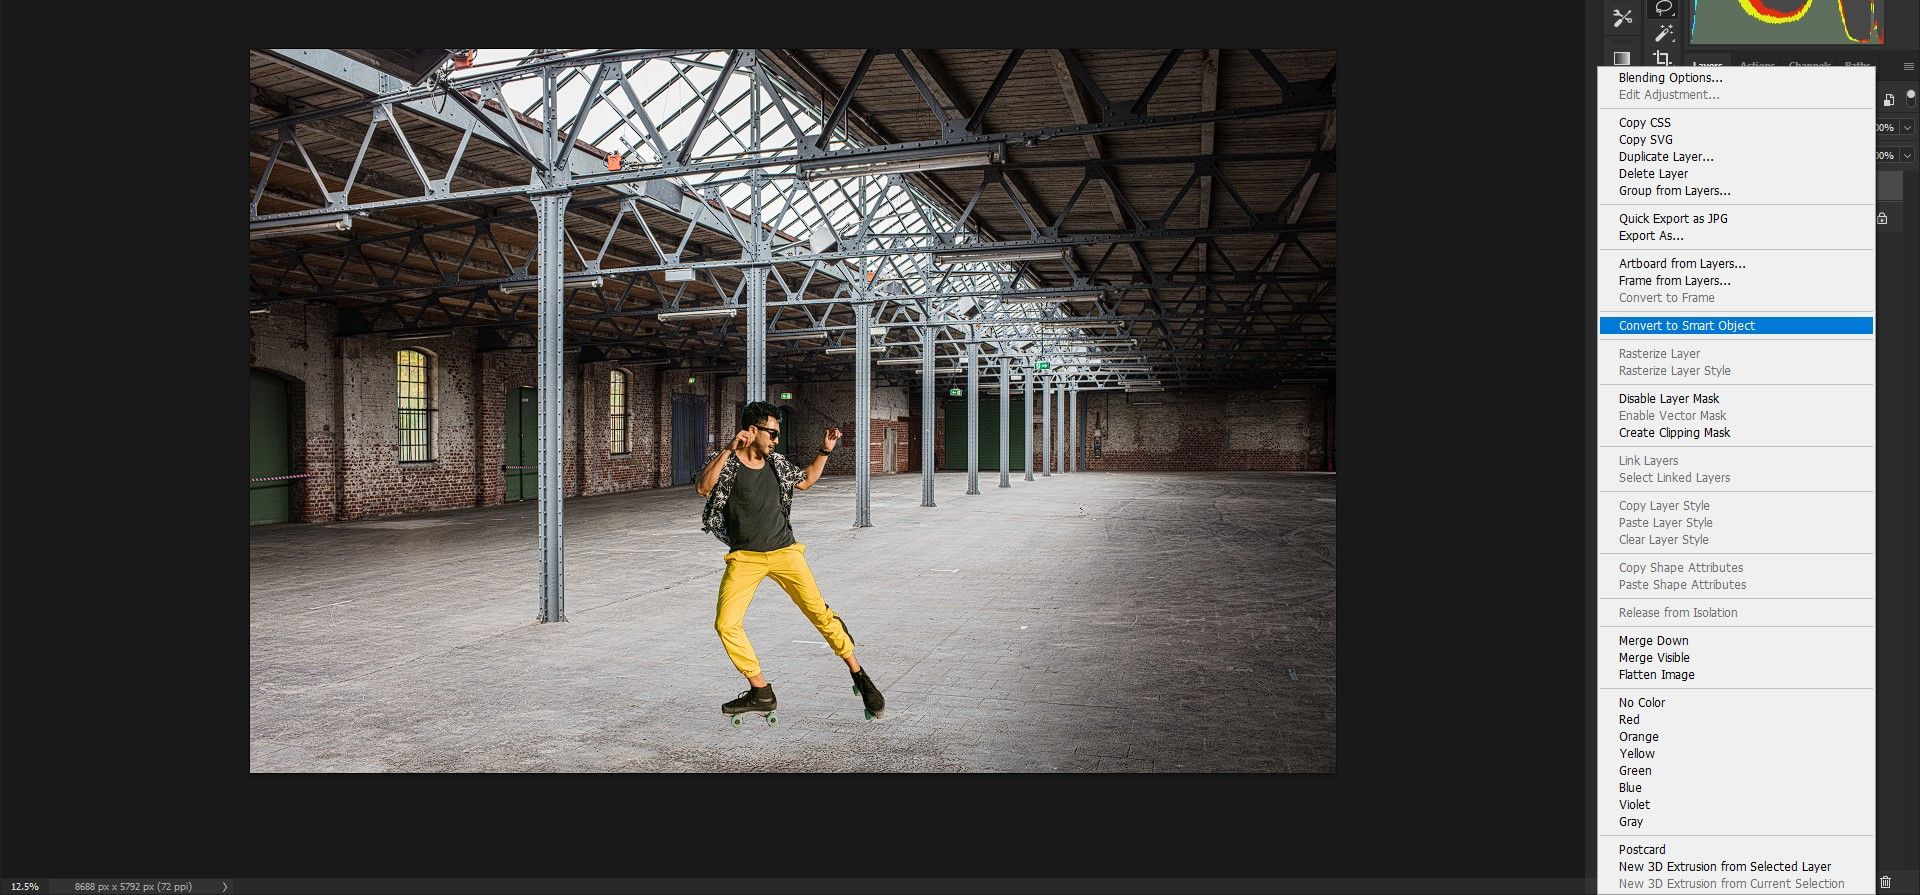
To do this, simply left-click on the layer and drag it off-screen to the warehouse image (at the top of the screen in Photoshop) and release the mouse button. The image will be dropped into the scene.
Adding a Shadow to the Rollerblader

With the rollerblader added to the warehouse image, we’re ready to add the shadow. Don’t let how unnatural the overall image looks discourage you. Once we add the shadow, we’ll then add additional edits to make the image look as if we photographed it this way in the real world.
Let’s add the shadow.
-
Right-click on Layer 1 and select Convert to Smart Object. This will make the process non-destructive, allowing you to increase or decrease the size of the image later while maintaining the original resolution. This prevents pixelization.
-
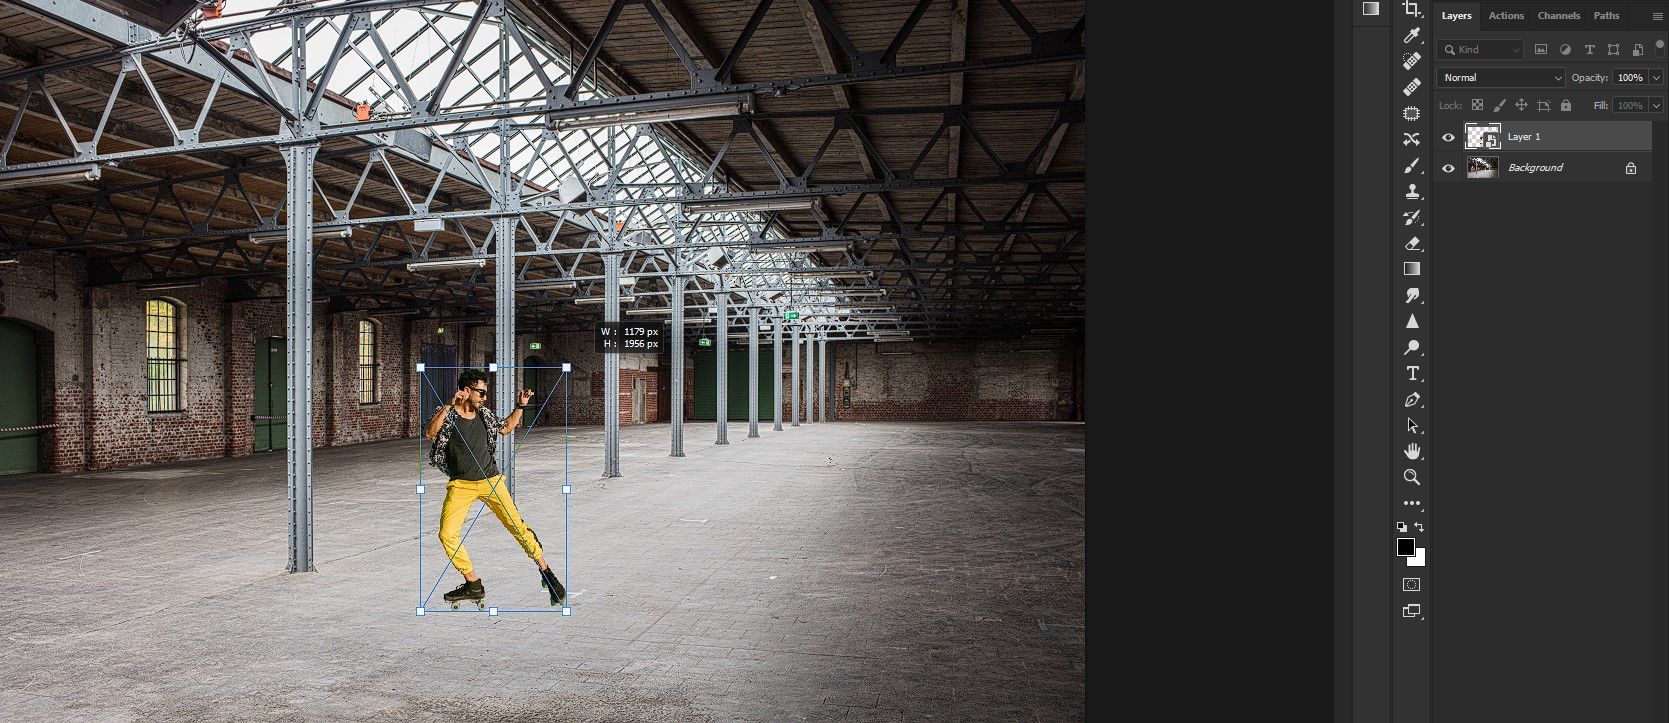
Press Ctrl + T for the Transform tool. Drag the mouse to place the rollerblader to where you prefer. In our example, we’re placing him in the foreground for emphasis.

-
Click on the square guides of the box and re-size the image to make the rollerblader look realistic compared to the background. We chose to shrink the image a bit.
-
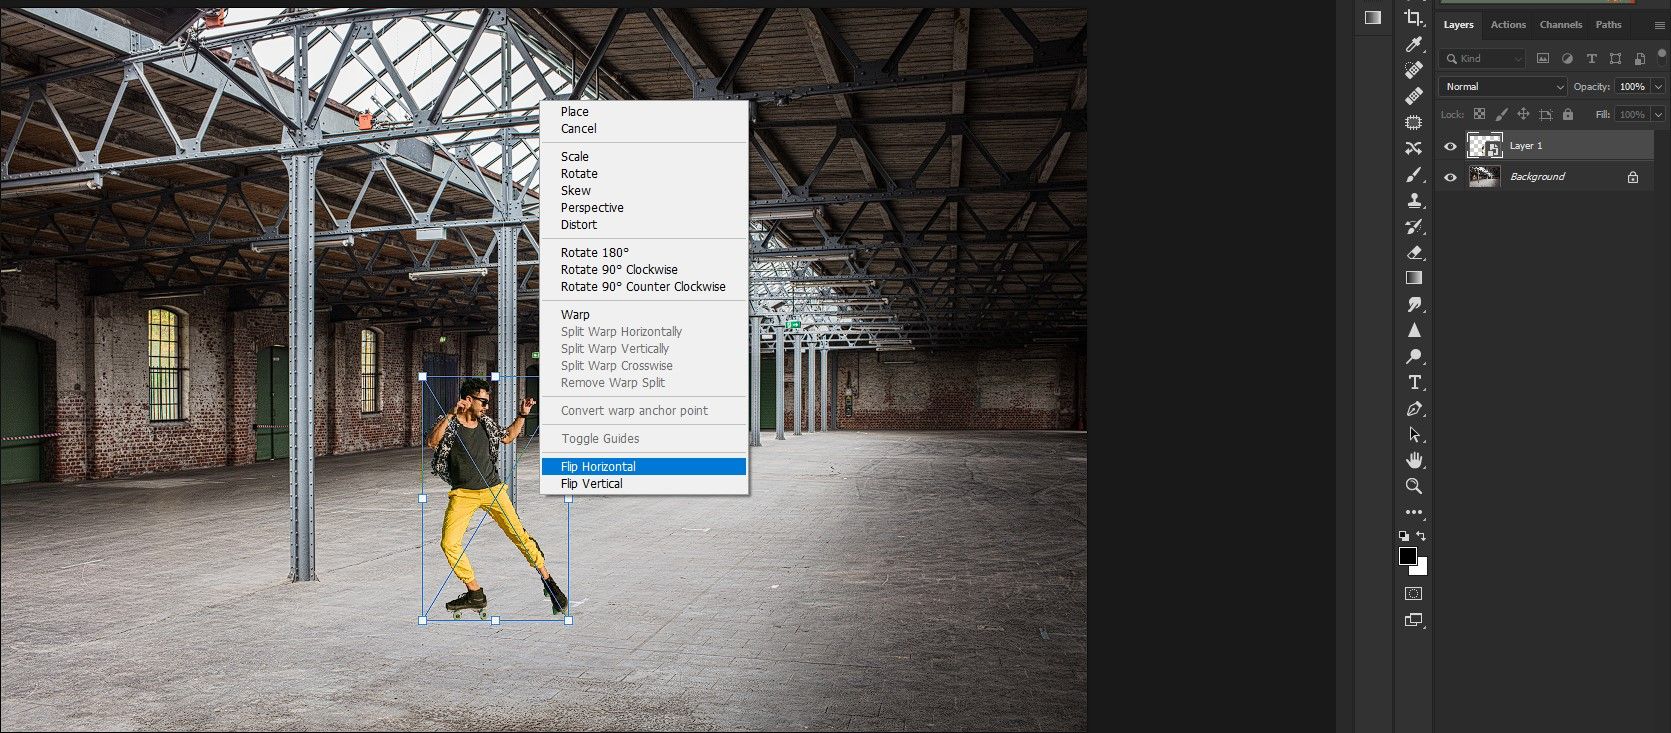
Let’s make the rollerblader face the other way as the original image has light hitting his face. Plus, the light from our warehouse scene is coming from the top-left in the windows. Right-click on the rollerblader and select Flip Horizontal.
- To accept the change, either click the checkmark at the top of the screen or simply press Enter. To undo any changes, click Ctrl + Z.
-
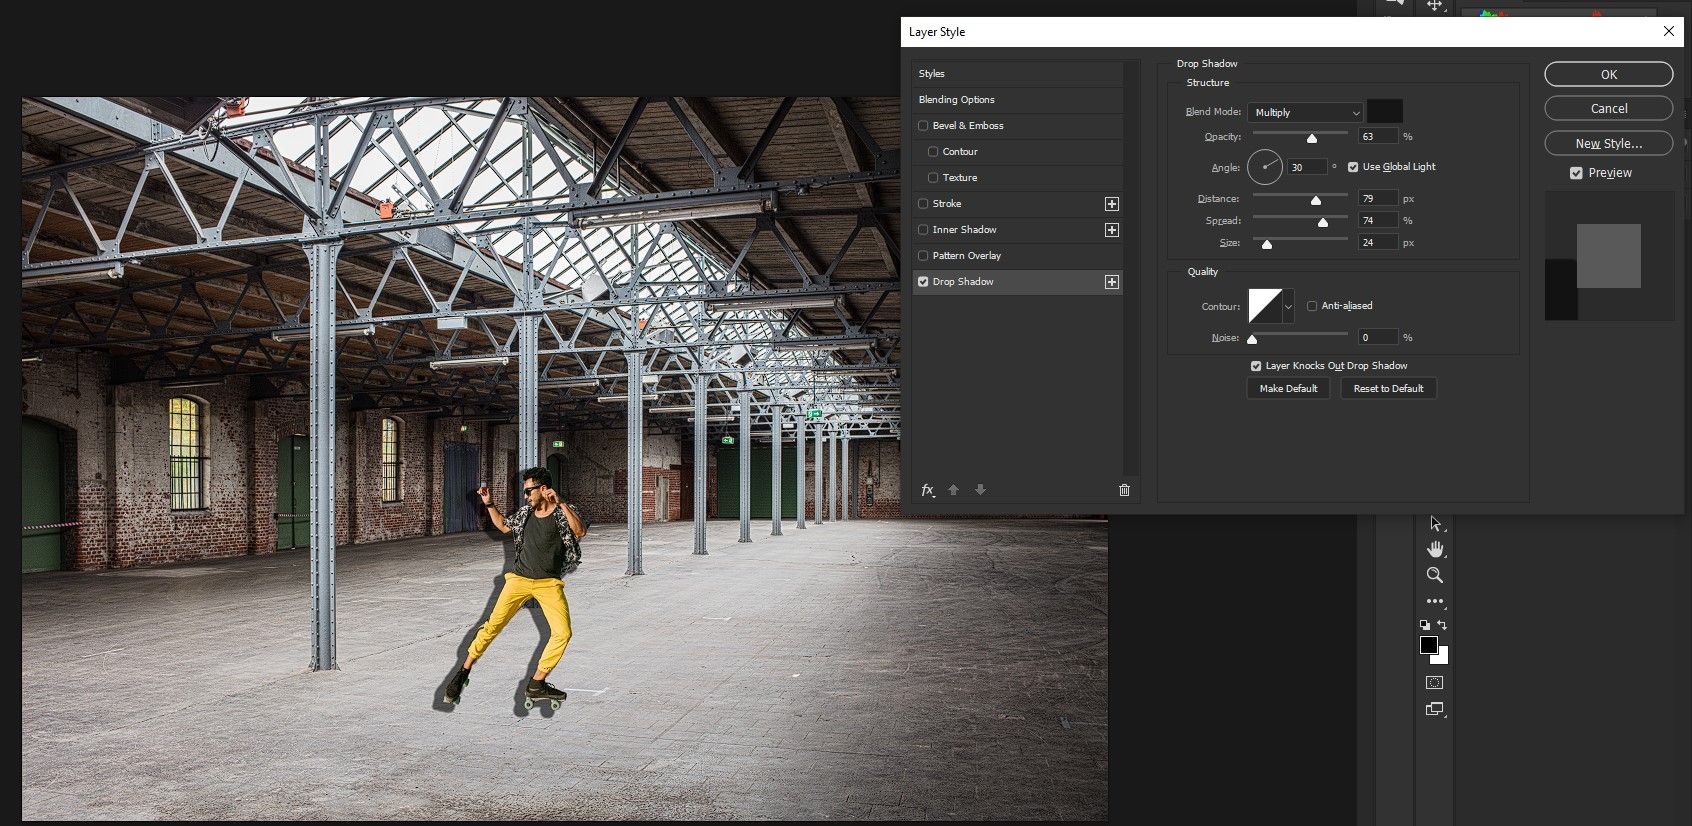
Double-click on the right side of Layer 1 to bring up the Layer Style menu. Don’t click on the actual checkered area because that will bring up a separate document of the rollerblader.
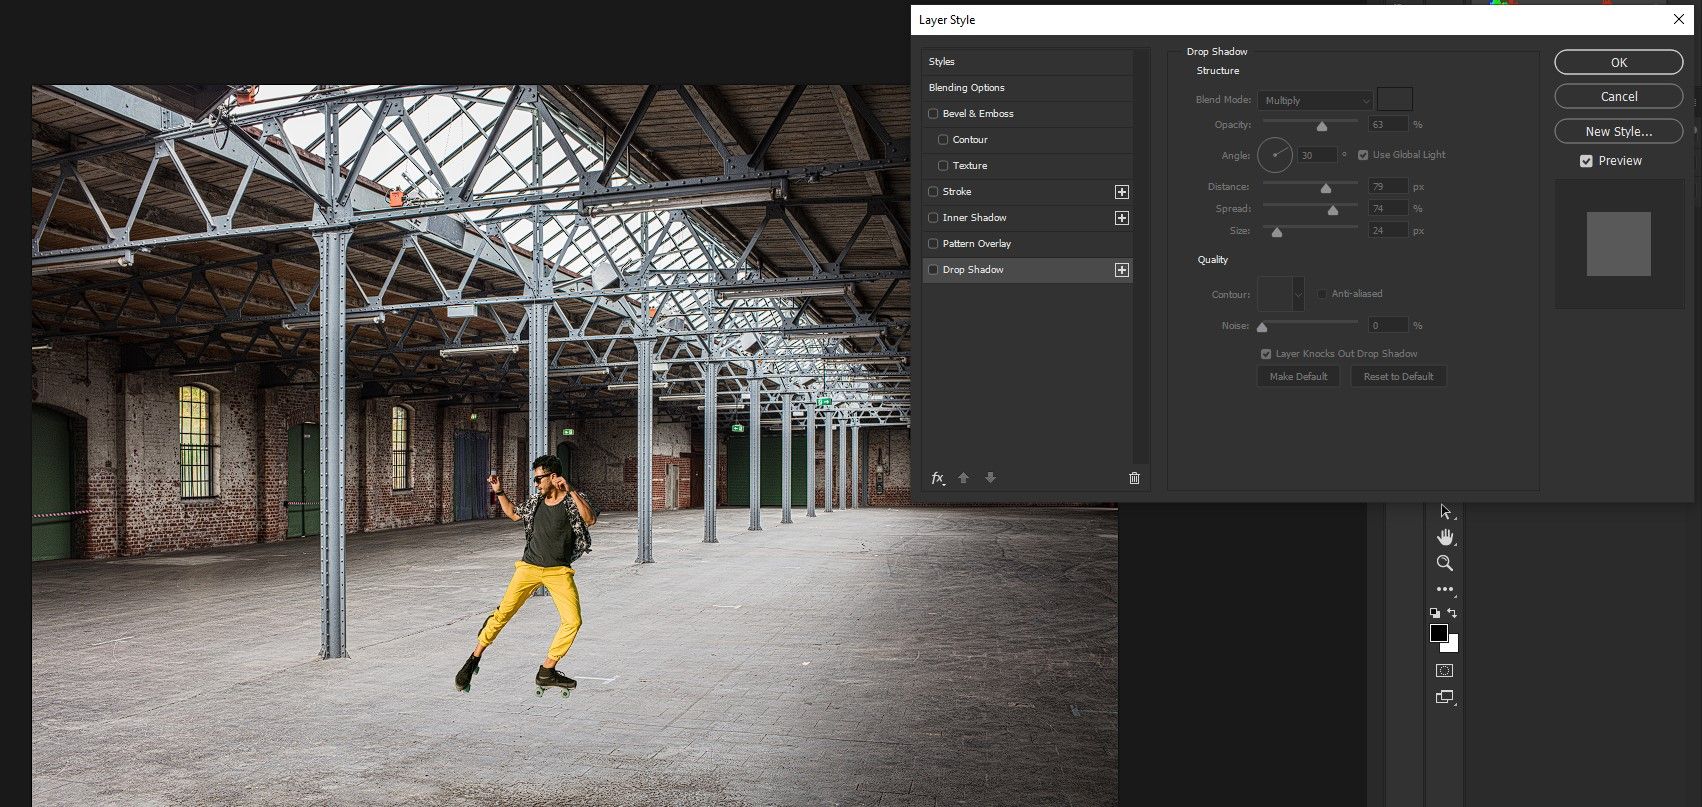
-
Check the Drop Shadow box and click on the single-click option to summon the Drop Shadow menu. Don’t worry about the settings now. Just click OK.
-
We’ll now put the shadow on a separate layer to edit. Go to Layer > Layer Style > Create Layer.
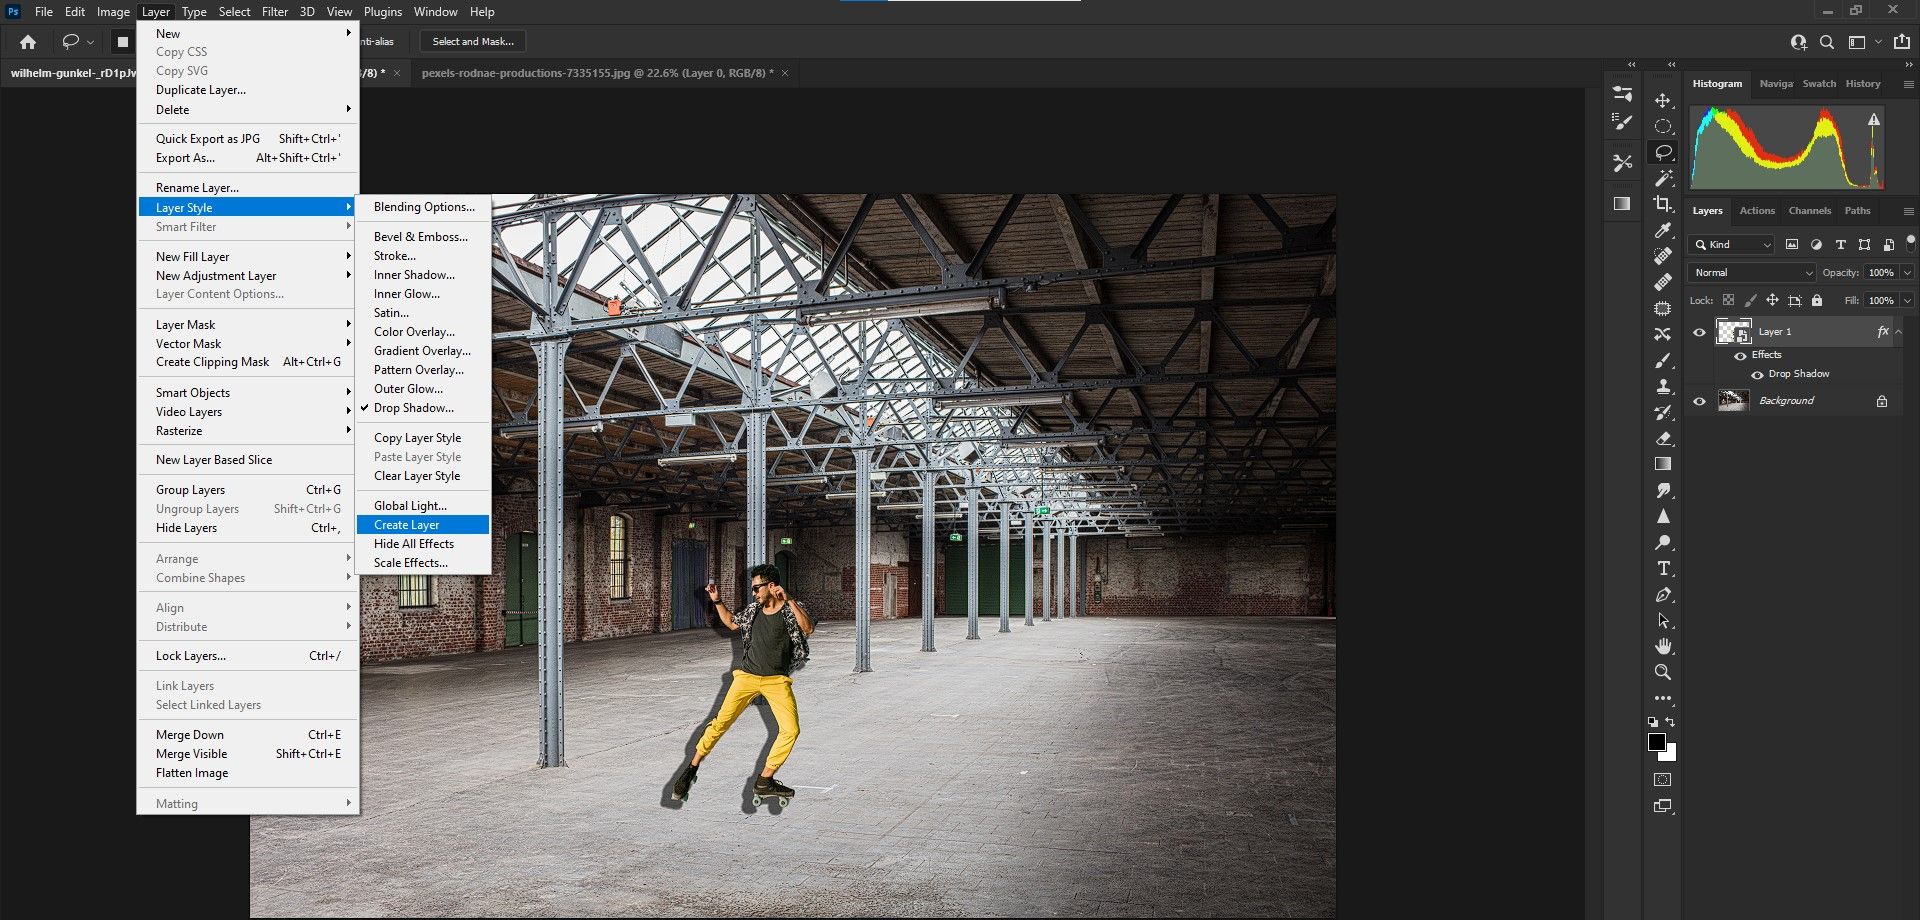
-
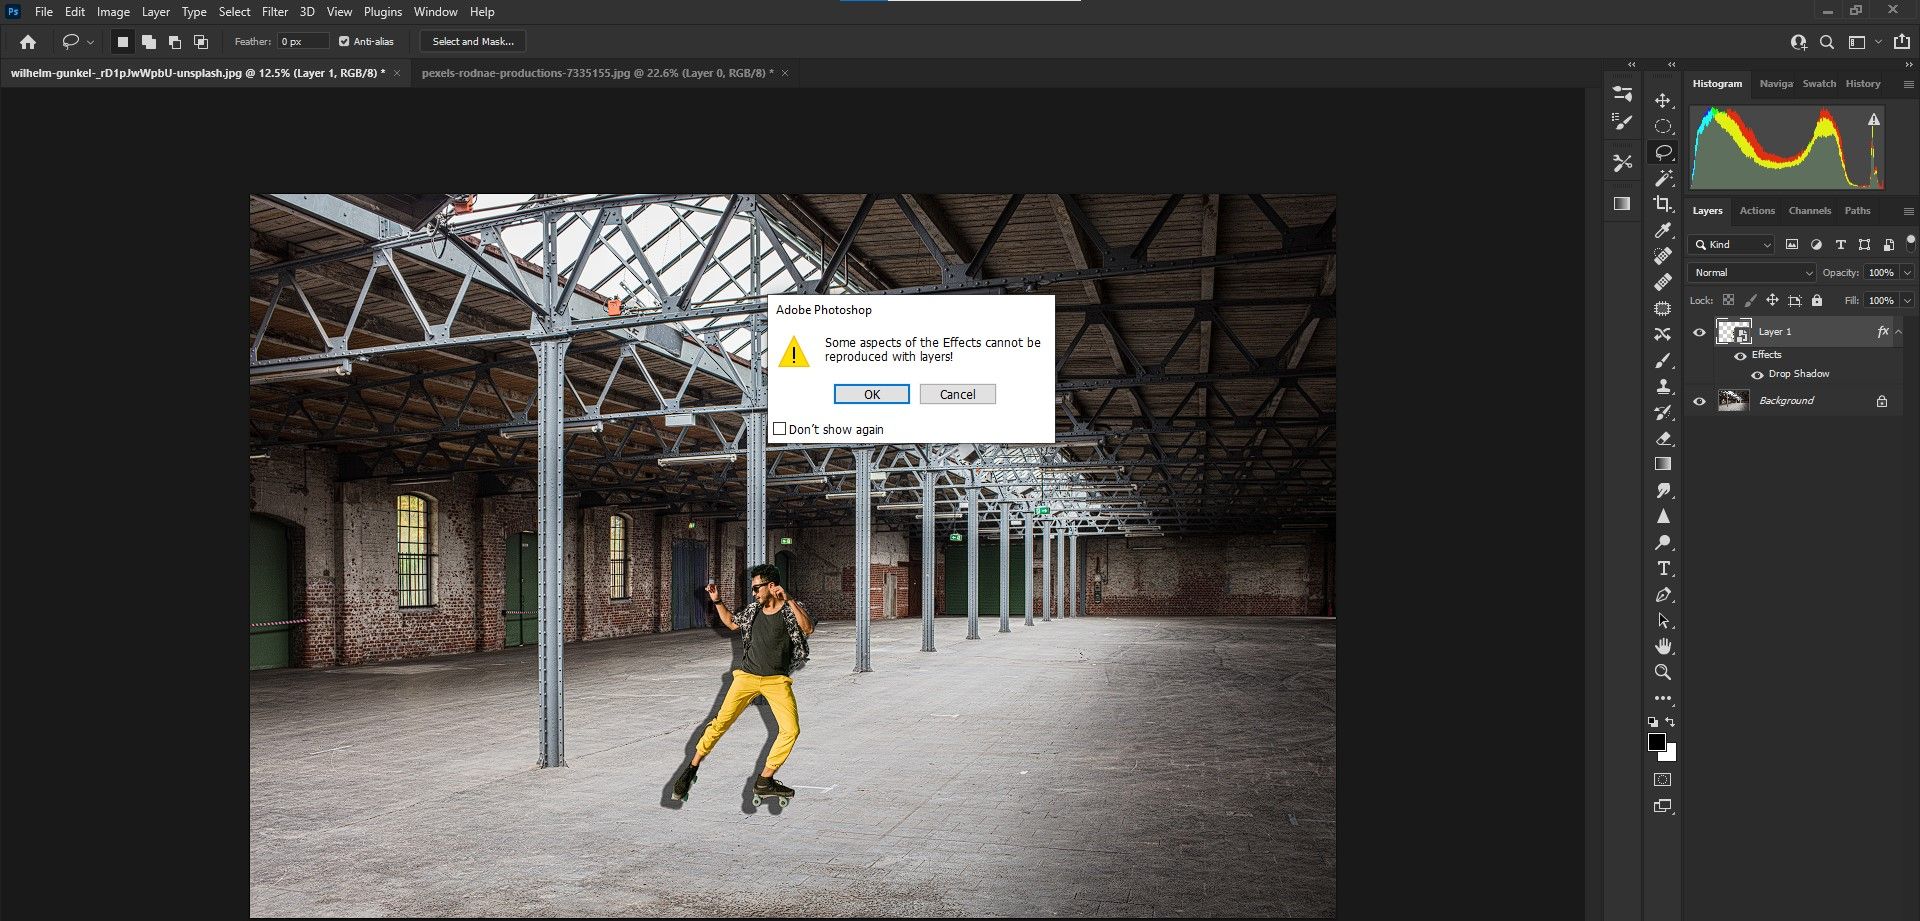
Click OK if you get an error message.
-
Select the Layer 1’s Drop Shadow layer. Press Ctrl + T for the Transform tool. You’re now able to move the shadow independently by dragging the mouse.
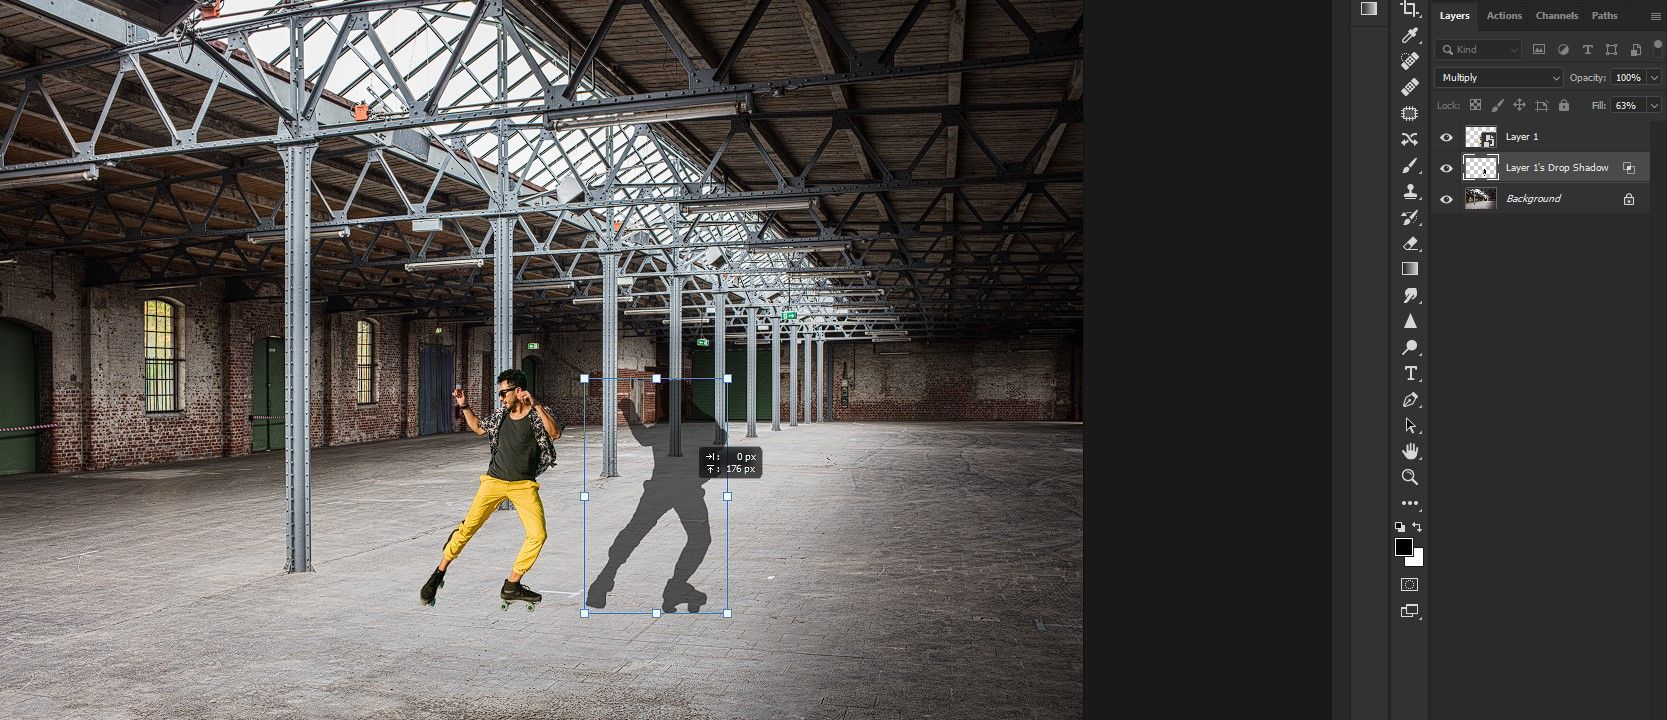
-
Time to shape the shadow to make it look realistic. Right-click on the rollerblader with the Transform tool still active. Select Distort.
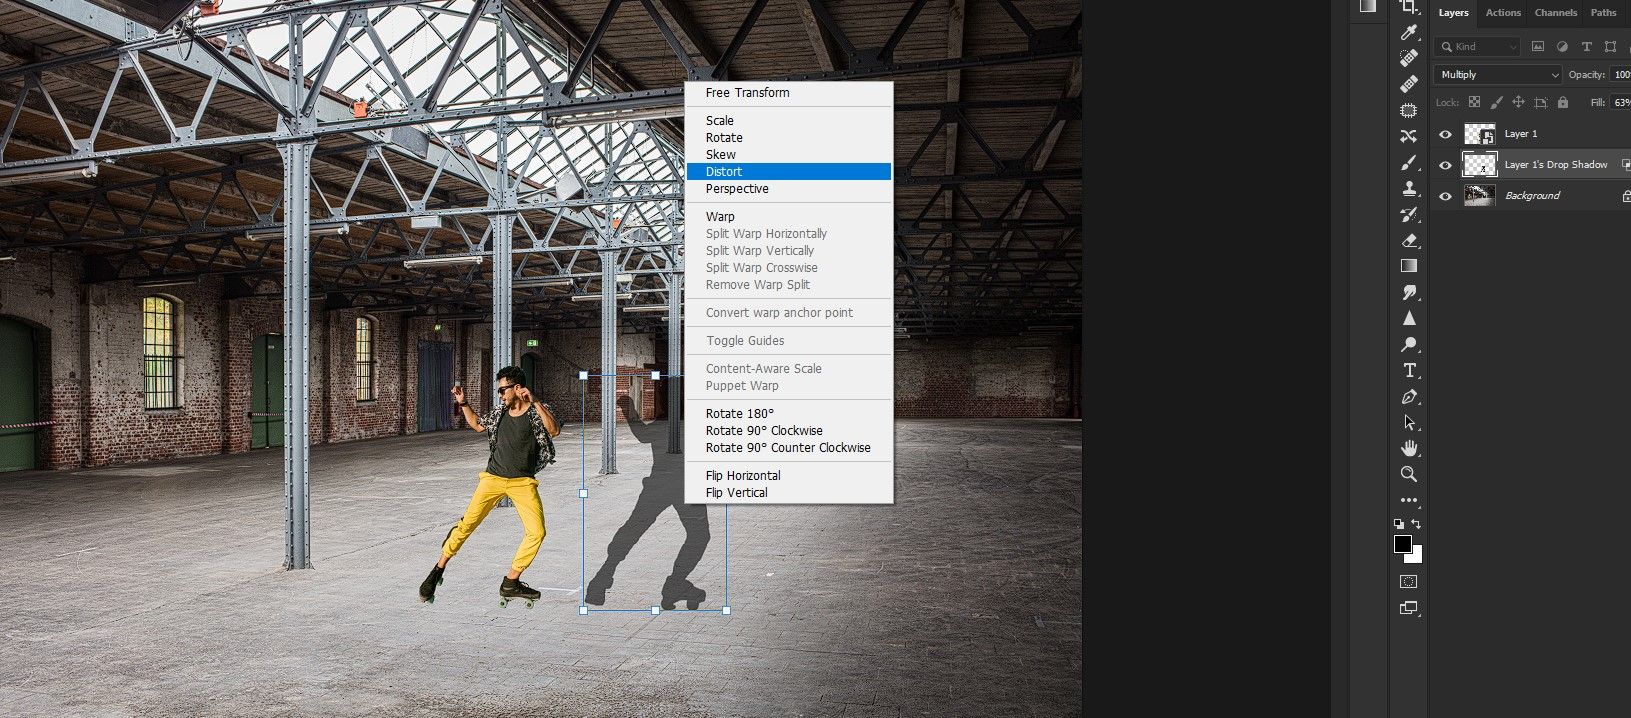
-
Use the square handles combined with the direction arrows (when you hover over the squares) to shape the shadow to fall to the right. This may take some experimentation. Try to line up the feet in both layers and lay the shadow down to the right as shown. Press Enter when you’re satisfied.


Keep in mind that if you’re unhappy with any of your edits, you may return to either the rollerblader layer or the shadow layer to re-edit.
Re-fining the Shadow to Make It Look More Realistic

We’re starting to get there but the shadow still looks fake. In real life, the shadow is darker near the body and fades as it gets further away from the subject. Let’s fix this.
-
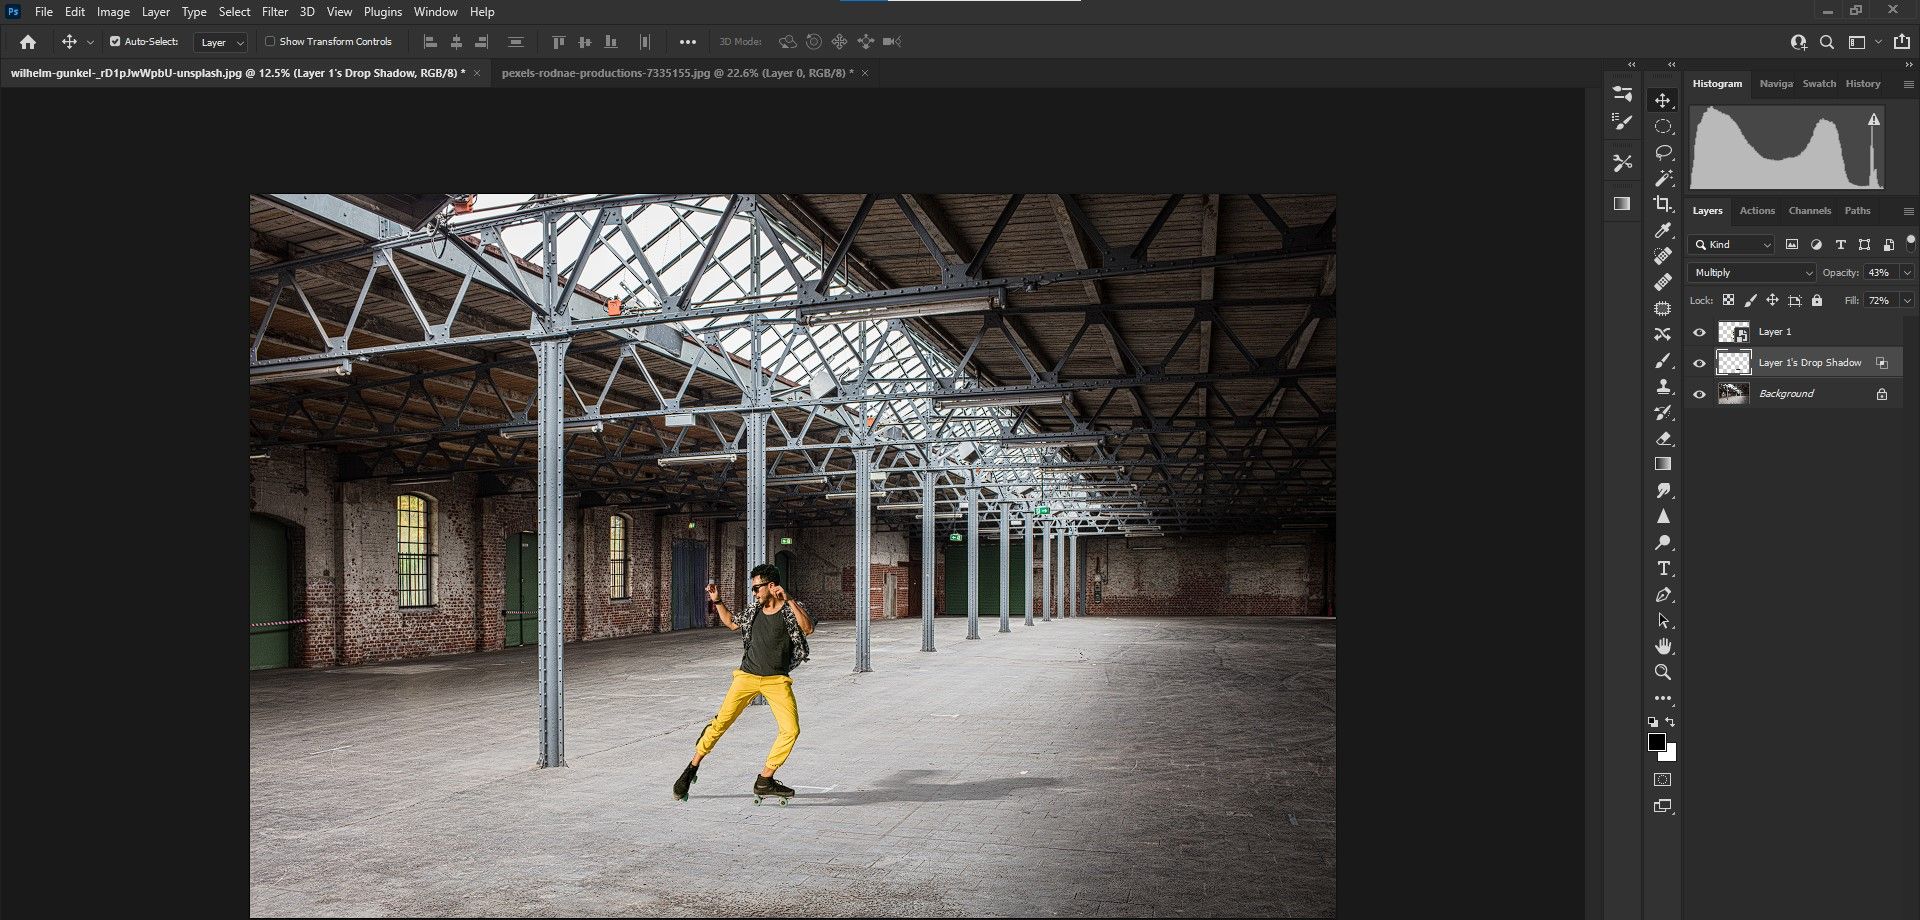
Select Layer 1’s Drop Shadow. Go to Filter > Blur Gallery > Path Blur.

-
Adjust Path Blur slider values to your liking. We selected Rear Sync Flash. Speed 100 percent. Taper 20 percent. You may always re-edit these settings later. Click OK or press Enter.

-
It may take some time to process the blur depending on your computer’s processing speed and if you have other applications open. Once complete, you can adjust the Opacity and Fill values to reduce the shadow effect to your liking. We chose 43 and 72 percent.


Before

After

Note that all of these layers may be adjusted later to fine-tune the shadow. You may also use other Photoshop tools like the Brush tool to clean up the shadow even more.
Adding a Silhouette as a Finishing Touch
Let’s finish by going into Camera Raw and adding a radial filter to create a silhouette.
-
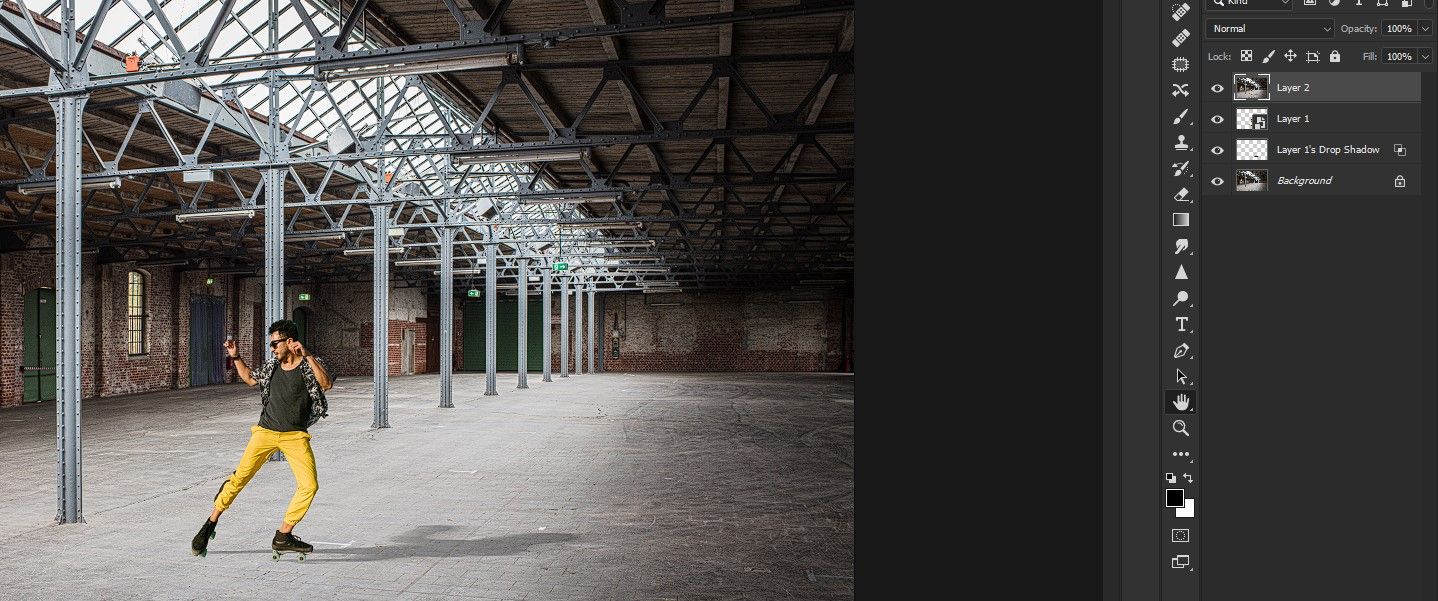
Create a Stamp Visible layer. Press Shift + Ctrl + Alt + E.
-
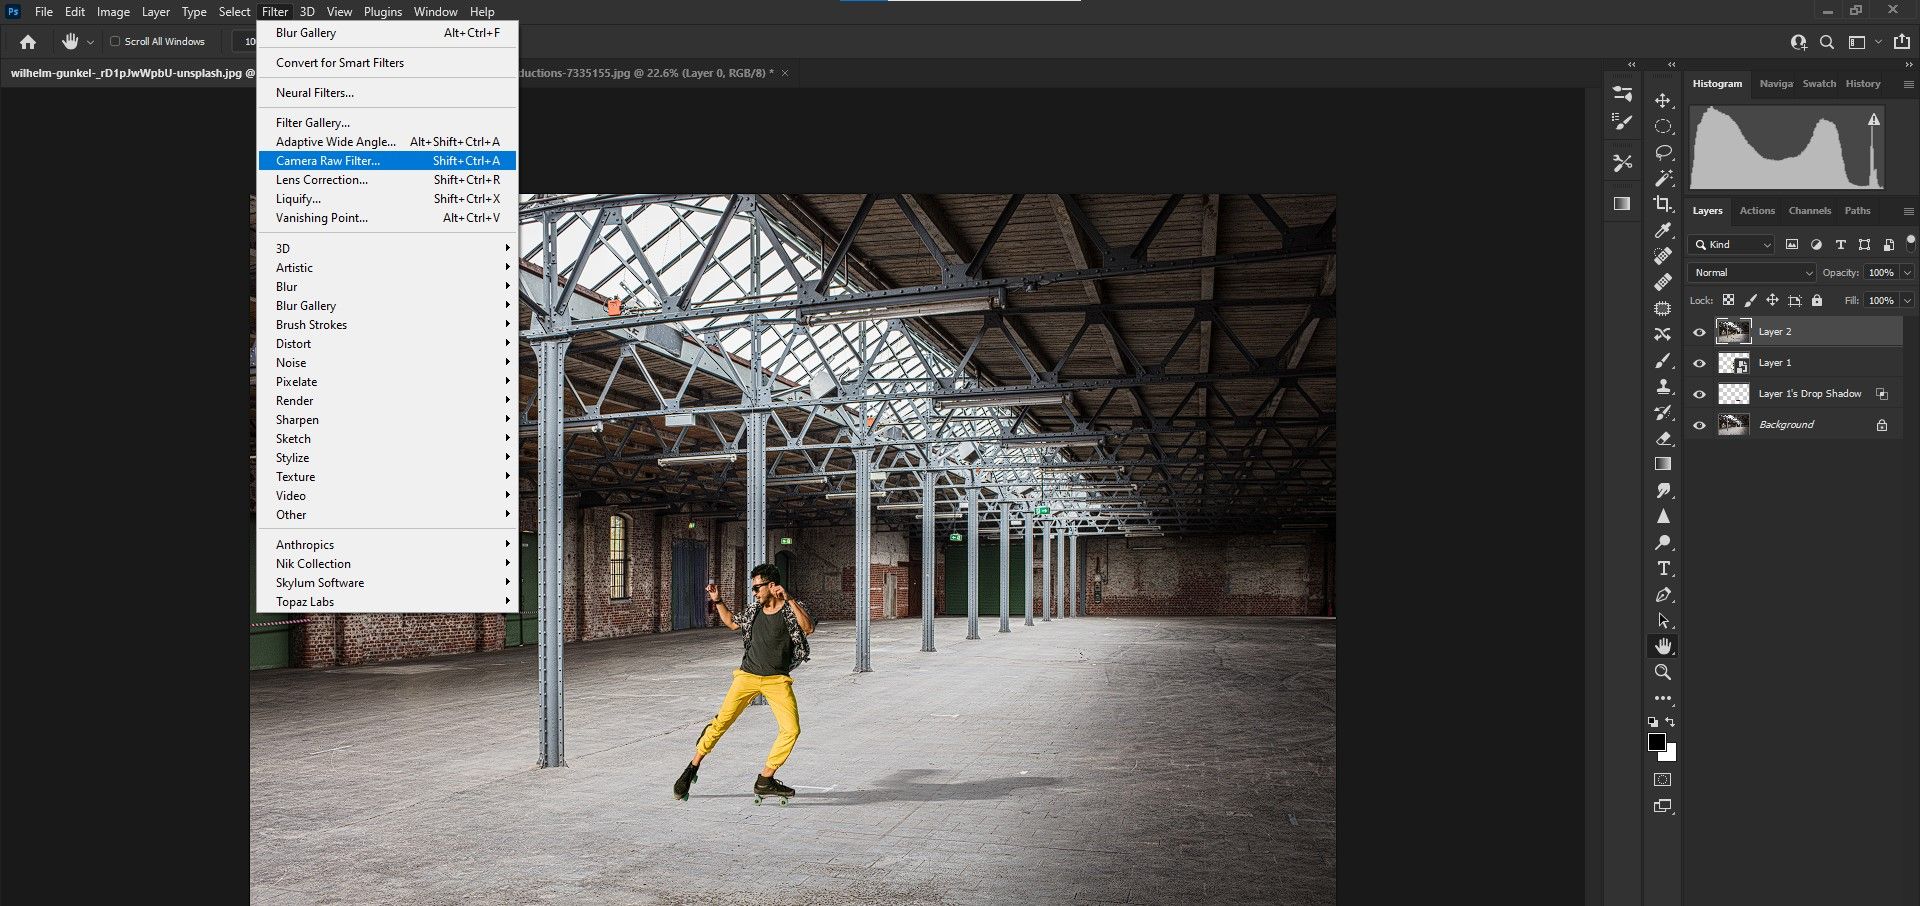
Go to Filter > Camera Raw Filter.
-
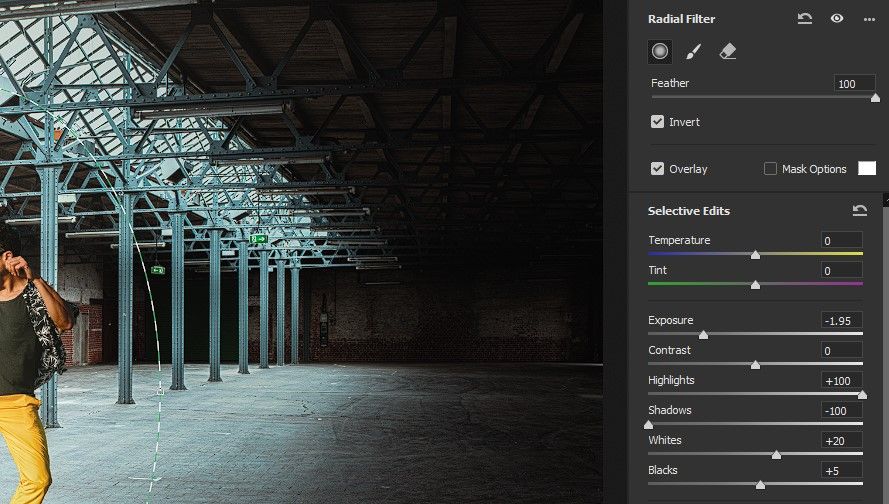
Click on the Radial filter icon on the right side of the screen. Then drag the circle around the rollerblader. Use the handles to adjust the size.

-
Checkmark the Invert box. Change the Feather value to 100. Change the Exposure slider to -1.95; Highlights +100; Shadows -100; Whites +20; Blacks +5. Press OK.


Before

After

Post-processing can continue as desired. For instance, you may want to bring the highlights back by either creating a mask and painting back in the original light with the Brush tool. Alternatively, you could use the Blend If method to protect the highlights. Options are limitless and are dependent on what you ultimately want to achieve.
Several Ways to Add Shadows in Photoshop

We explored just one method of adding shadows in Photoshop. As is usually the case, there are several ways to accomplish effects, and it all depends on what you want to achieve and the easiest (and fastest!) way to get it done.
There are also many third-party plugins for Photoshop to assist in compositing, especially at the end of your workflow when you’re looking for outstanding finishing touches.