When building your smart home, you naturally assign your devices to each of the appropriate rooms. This makes controlling your home easier, especially if you have two or more of the same device (e.g., TV, lights, speaker). Your smart assistant wouldn't be confused about what device you're talking about as all you have to do is mention the specific room it's in.
This is why it's important to know how to add and manage the rooms in your smart home. If you're using Google Home, here's how you can do so.
How to Add a New Room
There are two ways you can add a new room to your household. One is when you're setting up your Google Home device for the first time. During this initial setup, you will be asked to pick from a list of predefined rooms or create a new one with a personalized name.
However, if you've already set up your device and want to add a new room after the fact, you can do the second method instead. Here, you will add a new room by changing your device's current one. To do this, follow the steps below:
- Launch the Google Home app on your Android or iOS device.
- Tap on the device you want to move to your new room.
- In the top-right corner, tap on the Settings gear icon.
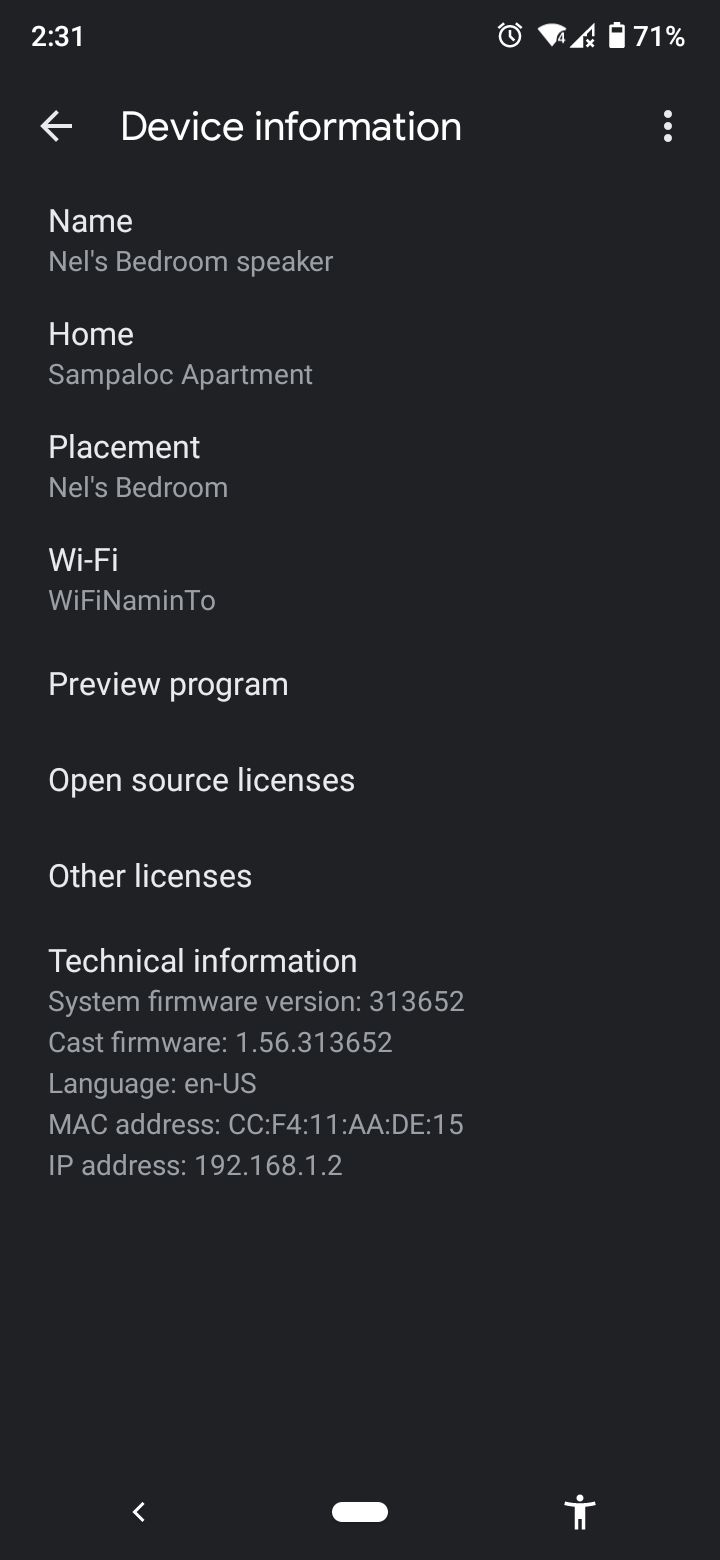
- Select Device information under General.
- Tap on Placement.
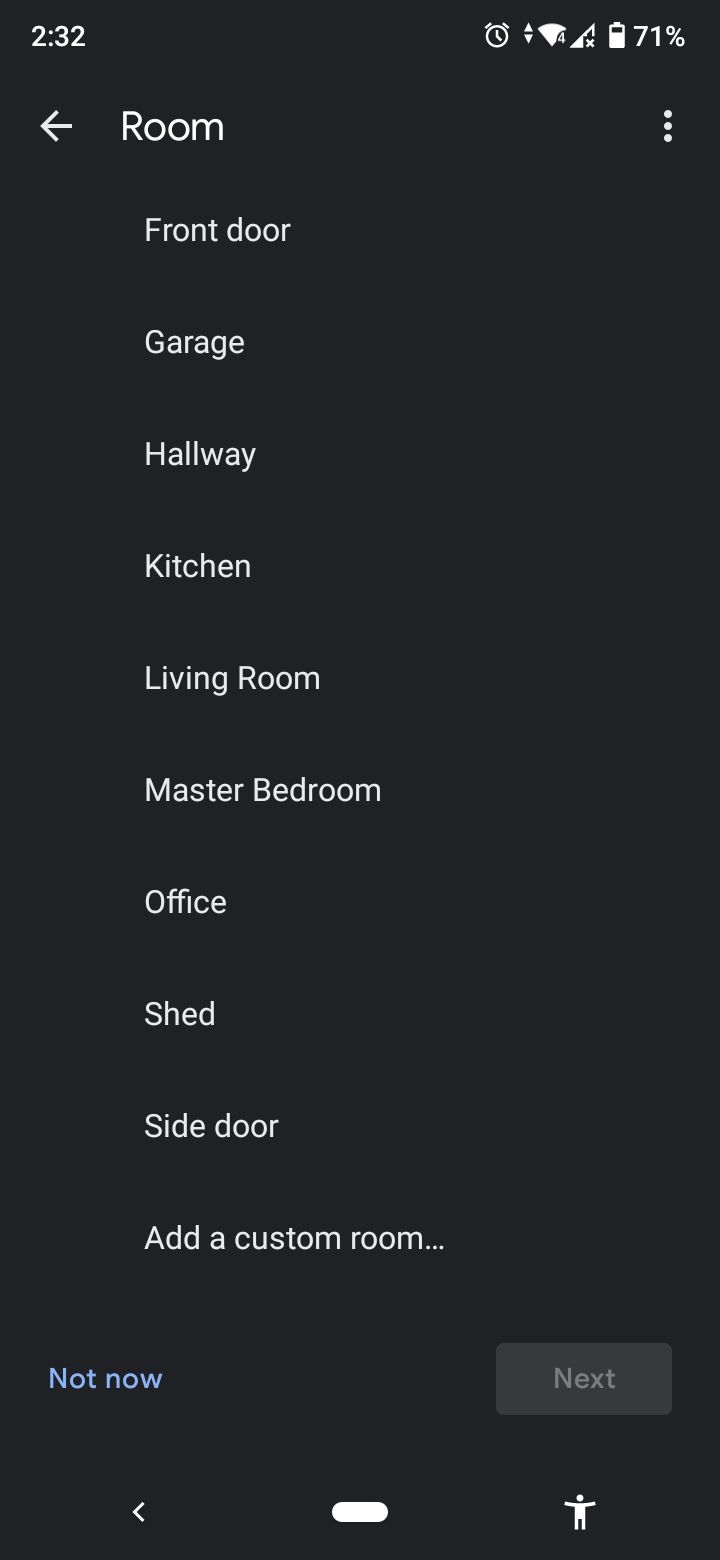
- Scroll down to the bottom of the list under Create new.
- Select Add a custom room.
- Tap on the Next button.
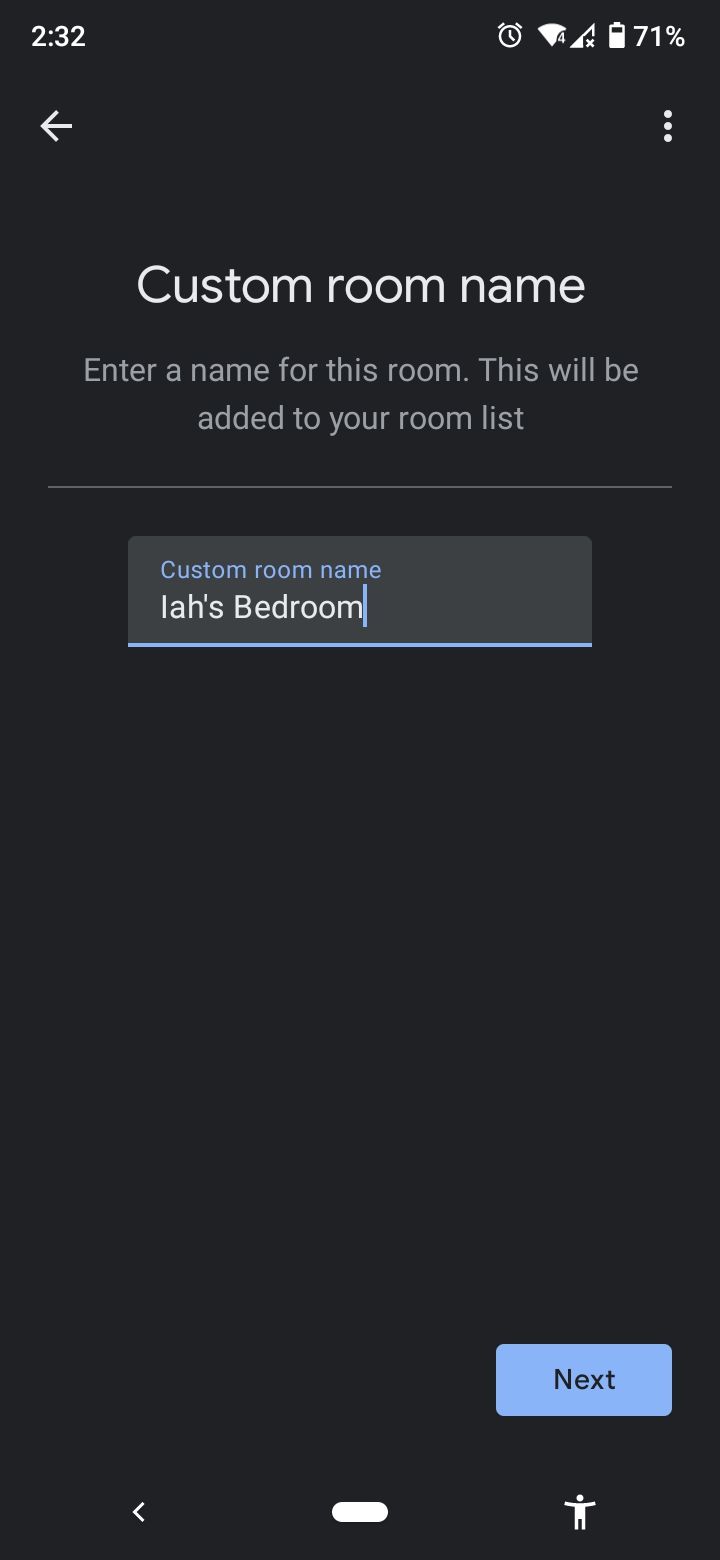
- Enter the name of your new room.
- Select Next.
- Update your device's name as you see fit.
- Tap Next.
- If there are no other devices in the previous room, you will be prompted to Keep or Remove the room.
Your device should now reflect the room changes you made.
How to Rename a Room
Like any other home, the rooms in your house are not always permanent. You may begin moving things around and start converting rooms to something else. For instance, you might want to use your old guestroom as your new office. Thankfully, you can easily rename a room in Google Home to prevent confusion.
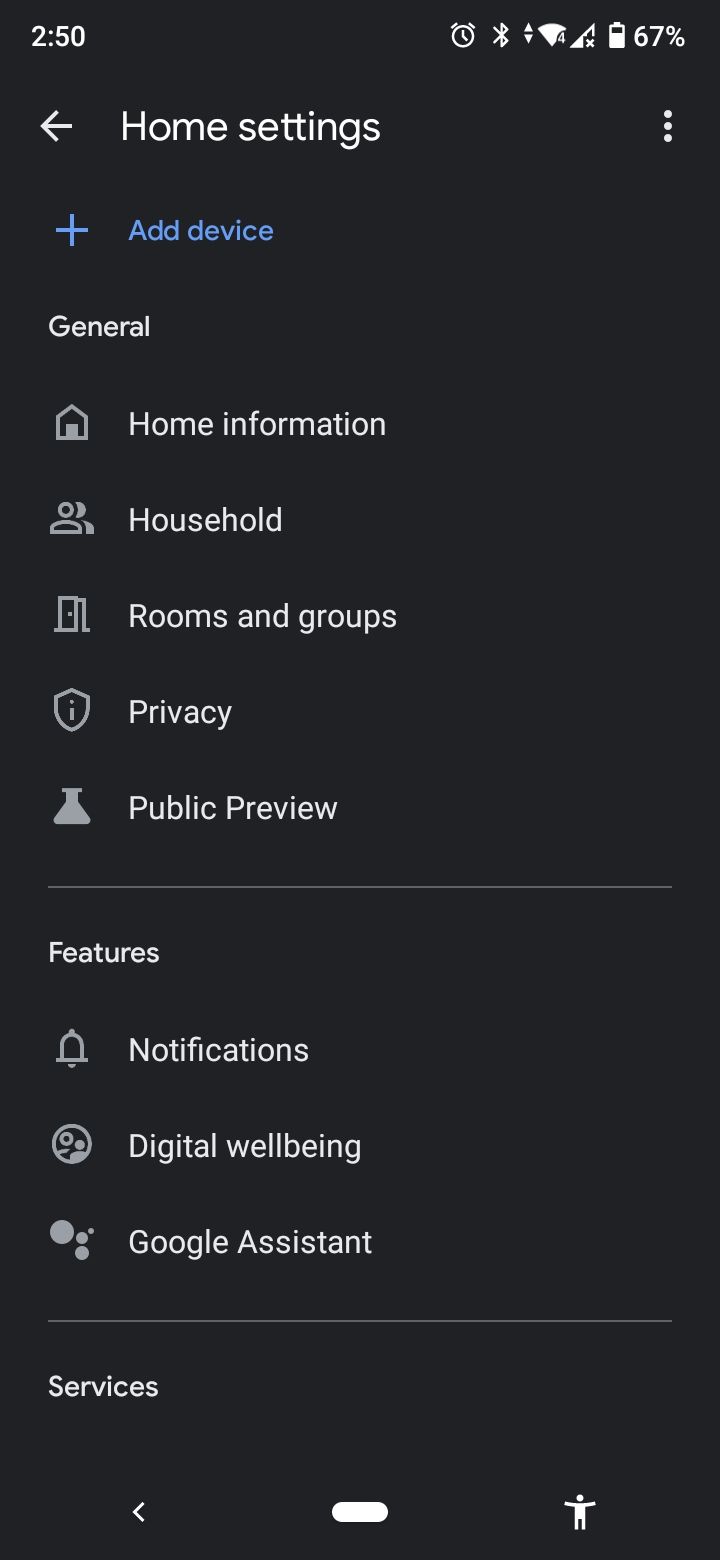
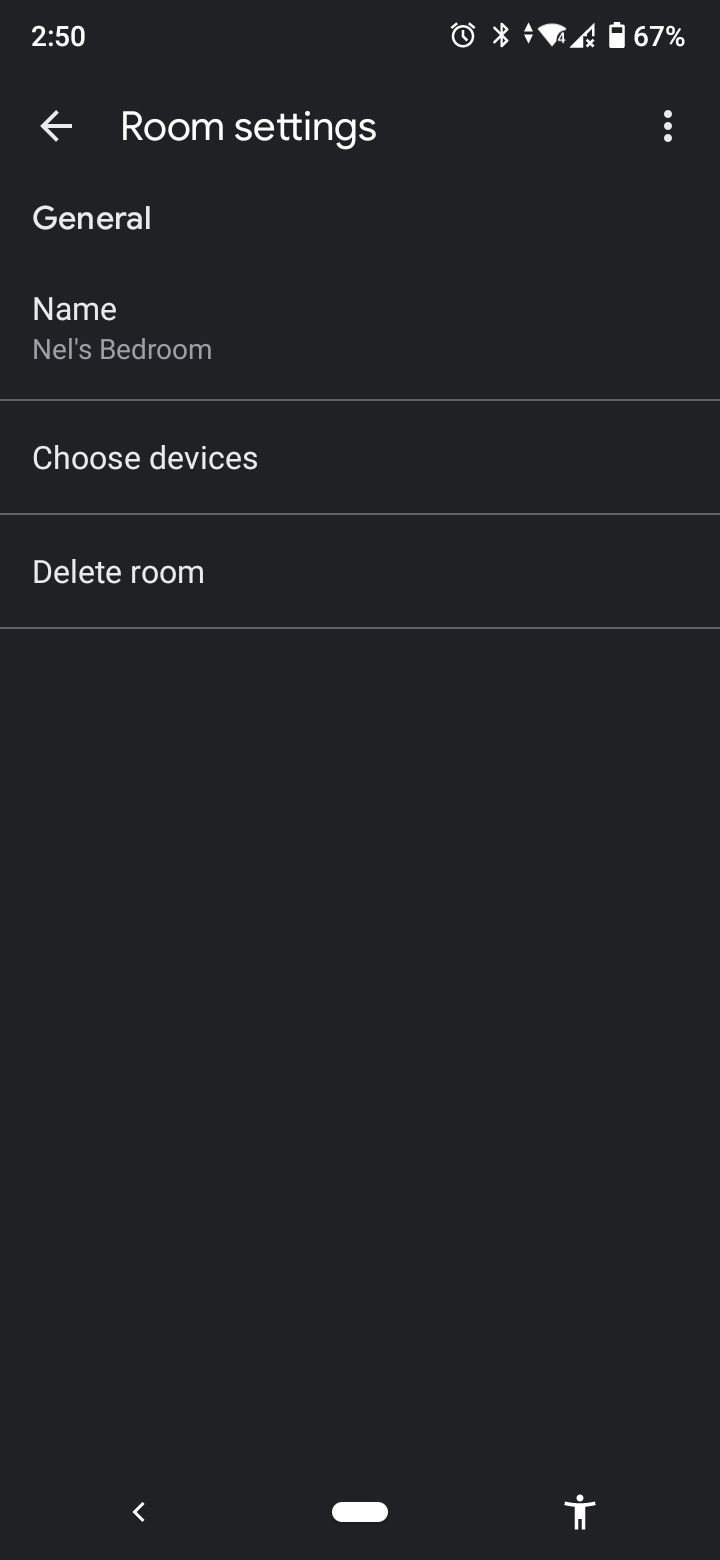
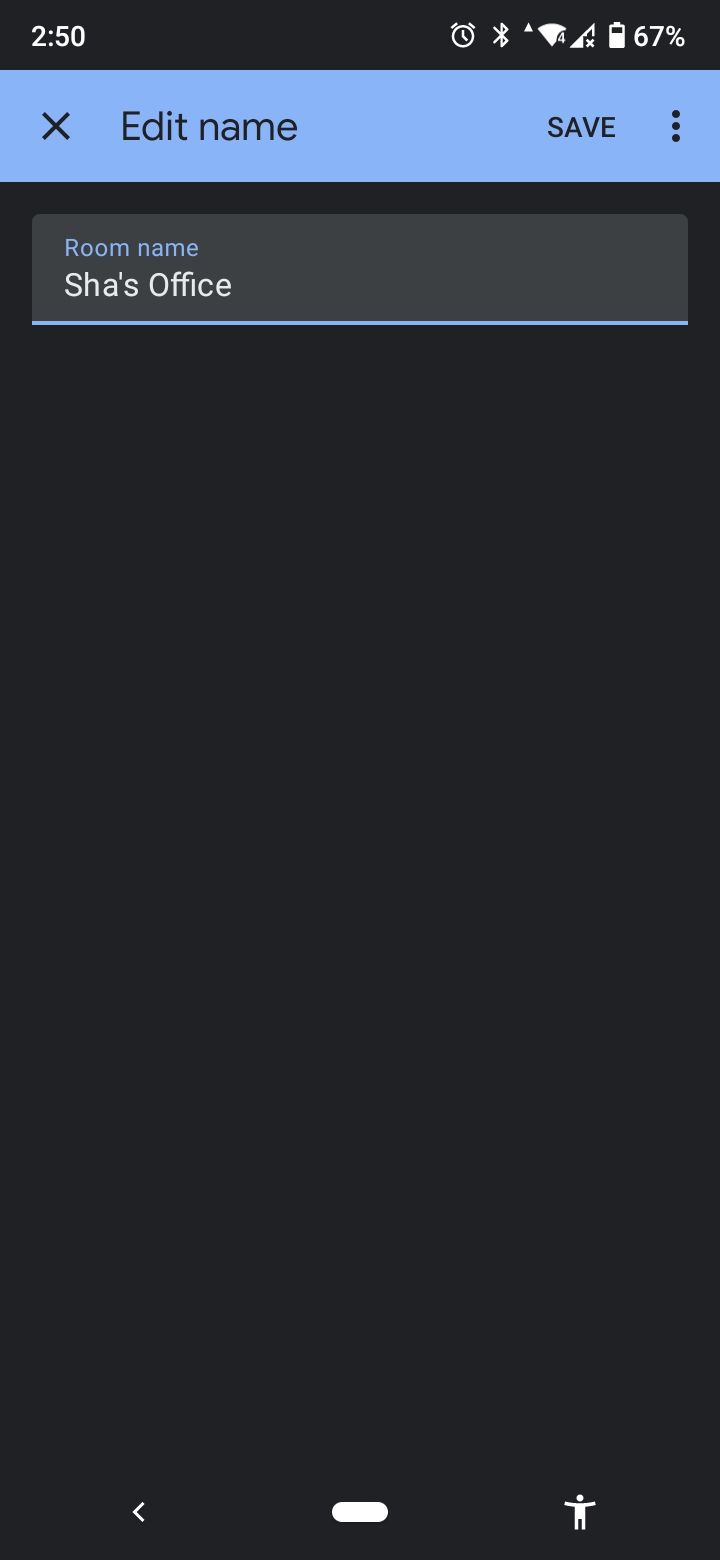
Once you have the Google Home app opened, make sure you're in the right household first. If not, change into the household where the room you want to rename is located. Then, tap on the Settings gear icon on the home page. Select Rooms and groups under General. Tap on the room you want to rename, and then tap on Name. In the Room name field, type in the new name. Hit Save in the top-right corner of the screen.
How to Delete a Room
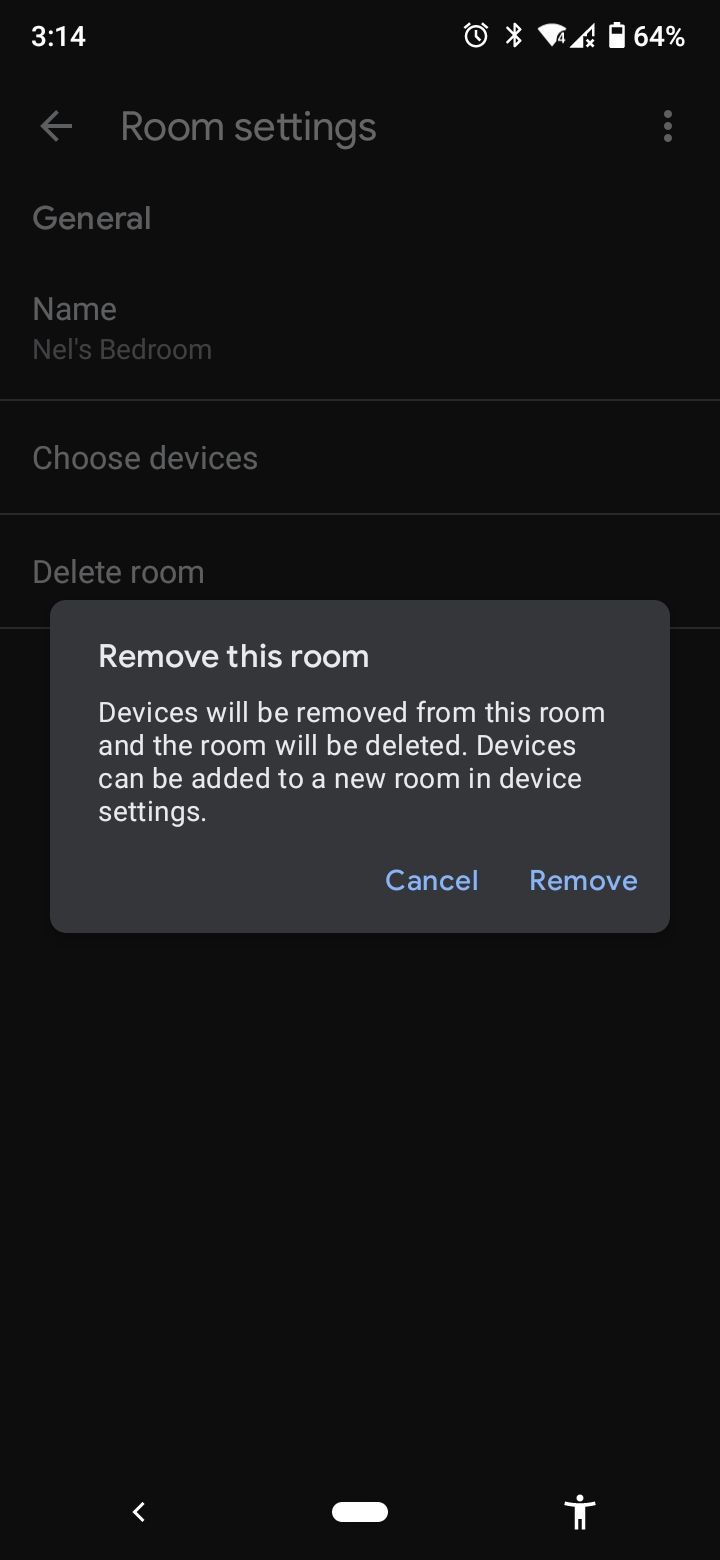
If you have no use for a room on your Google Home anymore, you can simply delete it. To remove a room, launch your Google Home app and go to Settings on the homepage. Open Rooms and groups under General. Pick the room you want to delete. Select Delete room. On the pop-up, tap Remove to confirm.
When deleting a room, any devices you have in that room will automatically be removed. However, these devices will not be deleted from your household and can still be added to your other rooms.
Another way to delete custom-made rooms is by resetting your Google Home device as this will set your device to its factory settings.


Manage Your Rooms With Ease on Google Home
An organized household is an easy-to-manage household, so as much as possible, you should know how to manage your rooms. This is especially important as you build your smart home and start equipping every nook and cranny with all kinds of devices. It will save you time and energy if you know how to add, rename, and delete rooms as your smart home gets bigger and bigger.

