Windows 11 has a redesigned interface that makes everything easier. The new modern look improves accessibility and brings a new era for the world's most popular operating system.
There have been quite a few changes to the user interface, and routine tasks that you may have been accustomed to on Windows 10 or earlier might have changed in Windows 11. Read on as we detail how you can add icons to the desktop in Windows 11.
How to Add Icons to the Desktop in Windows 11
There are a couple of different ways you can add a new icon to the Windows 11 desktop: either through the Start menu or the taskbar.
How to Add Apps to Desktop in Windows 11 via the Start Menu
To add an icon via the Start menu:
- Launch the Start menu by clicking on the Windows icon in the taskbar or pressing the Windows key from the keyboard.
- Type the name of the program you want to add to the Windows 11 desktop.
- Right-click on the Best match and click on Open file location; a new File Explorer window should pop up.
- Now, select the program icon and then right-click to pop up the context menu.
-
Click on Show more options to expand the right-click context menu. You should now see a menu similar to the one in Windows 10.
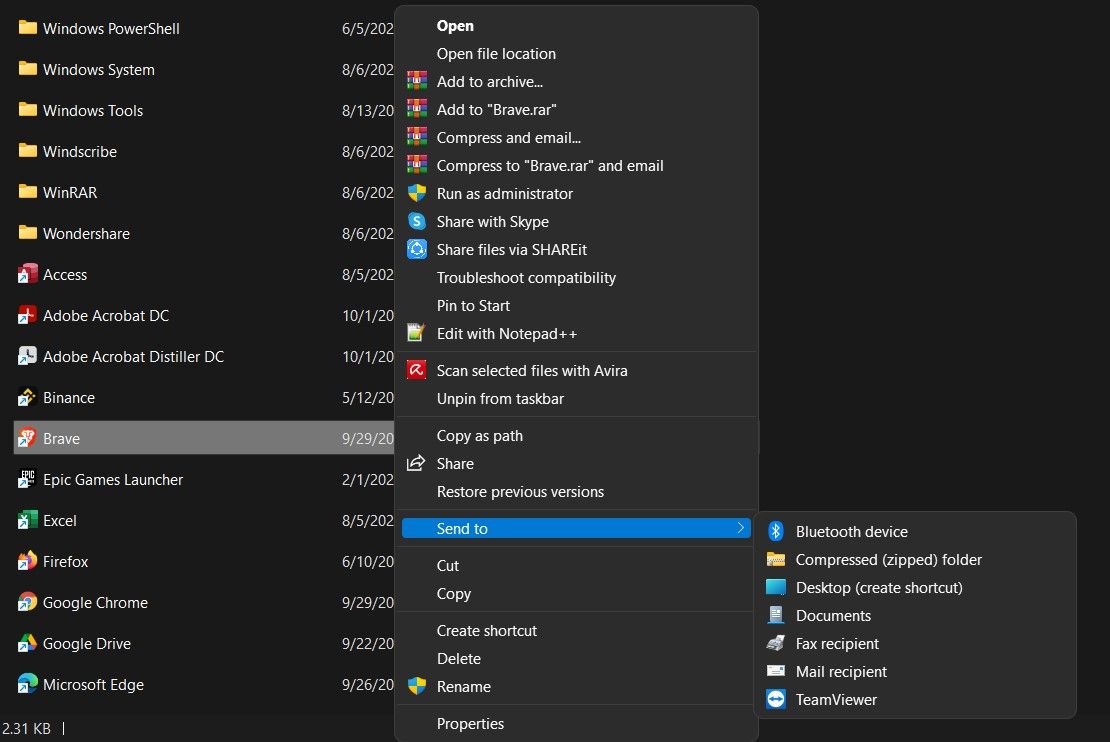
- Now click Send to and then finally click on Desktop (create shortcut).
- The program icon will now be visible on your Windows 11 desktop.

You can repeat the above steps for any program such as Google Chrome, Skype, Microsoft Word, etc. It can also work for system programs such as the Control Panel and Windows Terminal.
How to Add Icons to Windows 11 Desktop via the Taskbar
Another method of adding a new desktop icon in Windows 11 is as follows:
- Click on the magnifying glass icon from the taskbar to launch the Windows Search flyout.
- Type the name of the program you want to add to the desktop in the search bar.
-
Right-click on the Best match and then click on Open file location.
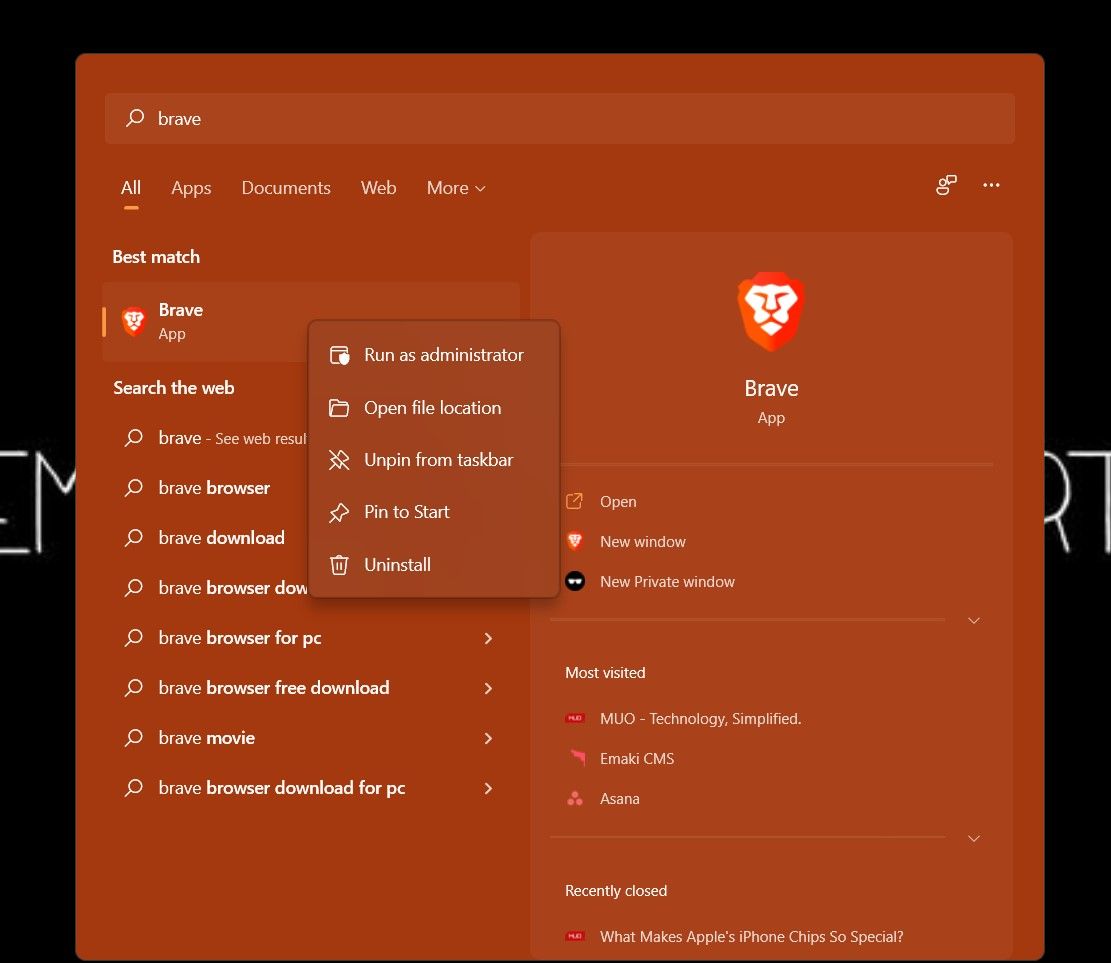
- In the File Explorer window that opens, select the program icon from the available list.
- You can now either drag and drop the icon to the desktop or right-click the program file and click on the clipboard icon to copy the file (you can also use Ctrl + C to copy).
- Once you've copied the file, click on an empty section of the desktop and press Ctrl + V from the keyboard.
- You have now successfully added a new icon to your desktop.

While installing a new program, you can also check the Add shortcut to desktop option from the installation wizard to add the new program directly to the desktop.
How to Make Desktop Icons Visible in Windows 11
If you do not see any icons on your desktop and want to show the different available desktop icons, then carry out the following steps:
- Right-click in an empty space on the desktop, and a context menu will pop up.
- Hover to View and then click on Show desktop icons.
If you had previously hidden the desktop icons, they should now be visible. Otherwise, you might want to add a new icon to the desktop. You can even adjust the size of the desktop icons on Windows 11.
How to Hide Desktop Icons in Windows 11
If you want a clean desktop without cluttered desktop icons, you may want to hide all of the desktop icons.
Here's how you can hide or disappear all of the desktop icons in Windows 11:

- Right-click in an empty corner of the desktop, and a context menu will pop up.
- Hover over or click on View, and from the flyout menu, uncheck the Show desktop icons option.
- All of your desktop icons are now hidden, and you can enjoy a clutter-free desktop.
Managing Your Desktop Icons in Windows 11
Adding a new icon on the Windows 11 desktop is easy and straightforward. Microsoft's new operating system is made for comfort and ease, which goes tenfold for the new and improved Windows Settings app.