You probably have a multitude of third-party applications installed on your Windows computer. Don't worry, most people do.
From carrying out basic tasks such as web browsing to dishing out complex lines of code, people prefer to use alternative applications from the ones in-built in Windows. While these applications make our lives easier, they sometimes interfere with system functions. These may range from minor mishaps to critical errors and BSODs.
This is where clean boot enters the picture.
What is a Windows Clean Boot, Anyway?
A Windows 10 clean boot enables users to rule out third-party applications as the cause of an error. It is done by simply booting the device with all third-party applications disabled. And even though the name sounds like it is an in-built Windows feature, it isn't. You have to manually clean boot your computer.
The benefits of a clean boot aren't just limited to diagnosing errors. It's been known to help when Windows updates don't install properly. It's also especially useful when your OS feels sluggish, and you want to check what may be causing the issue.
How to Clean Boot and Fix Errors
Clean booting is a relatively simple process once users have tried it a few times.
Before listing the steps, users should know that some actions require administrator privileges. Your computer may also not function in the way you're used to, but there's no need to sweat it. This happens because sometimes users aren't even aware that some menial tasks are being taken care of by third-party software.

Here are the steps on how to clean boot Windows 10:
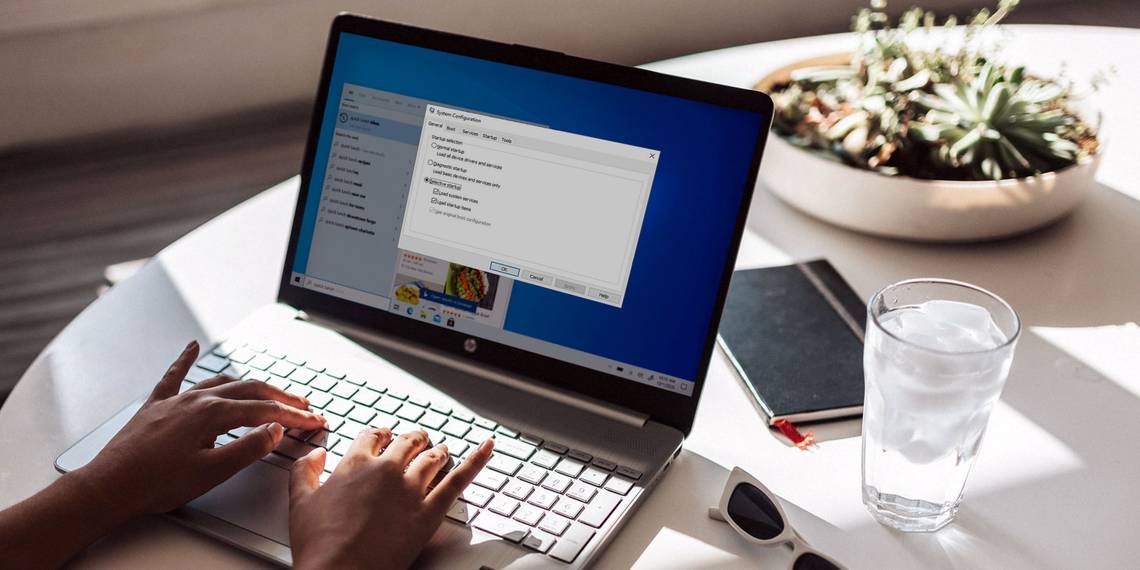
- In the Start menu search bar, type in sysconfig and click on System Configuration.
- In the System Configuration window, go to the Services tab.
- Check the Hide all Microsoft services box.
- Check all the services in the list and click on Disable all located towards the lower right, then save and exit.
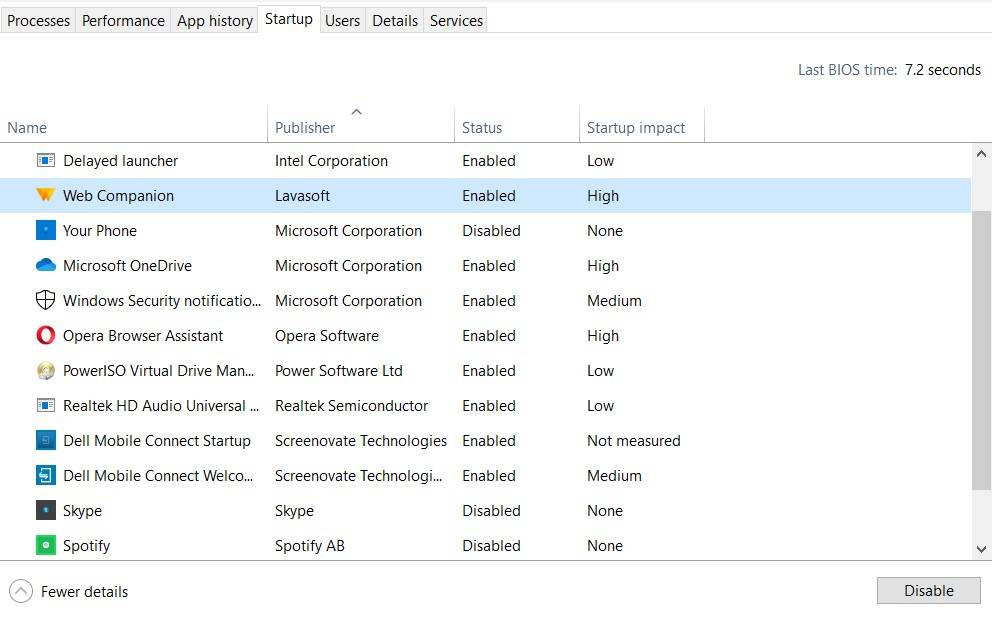
- Now, open the Task Manager. You can do this via right-clicking on the Taskbar and selecting Task Manager or using Ctrl + Alt + Delete.
- In the Task Manager window, navigate to the Startup tab.
- Select all the services one by one and click Disable.
- Exit Task Manager and Restart your computer.
Fixing Errors With Clean Boot
After following the steps listed above, your PC will boot into a clean state. The first thing users should do is wait and check whether the same error appears again. Sometimes, the error's source could be Windows system files, in which case the error will appear, but it could take longer than it does during a normal boot.
If the error is not popping up, then it's time to narrow down the suspects. This is a somewhat tedious task but, unfortunately, also the best way to go about it. To narrow down the list, do the following:
- While in a clean boot state, open System Configuration.
- Under the Services tab, select the top half of the list and click Enable. Make sure that the Hide all Microsoft services box is checked.
- Now, open Task Manager and go to the Startup tab.
- Similarly, enable the top half of the services and reboot your computer.
After the reboot, if the error doesn't appear, you can rule out the selected software and services from the culprit list. You will have to repeat these steps until you find the program or service responsible and uninstall it.
Clean Boot Windows 10 to Isolate Errors
Now it's time to reboot Windows 10 as standard. Just open System Configuration and Task Manager and enable all services and programs. It's recommended that users perform a clean boot before resorting to more advanced fixes when Windows crashes or displays a BSOD.