Whether your colleagues are working from different locations, or you just have a large team, working on projects together can be tricky. If you want a quick and easy way to collaborate, Padlet might be your answer.
Getting Started With Padlet
At its most basic, Padlet is a digital pin board where you can share information, ideas, and updates with your team.
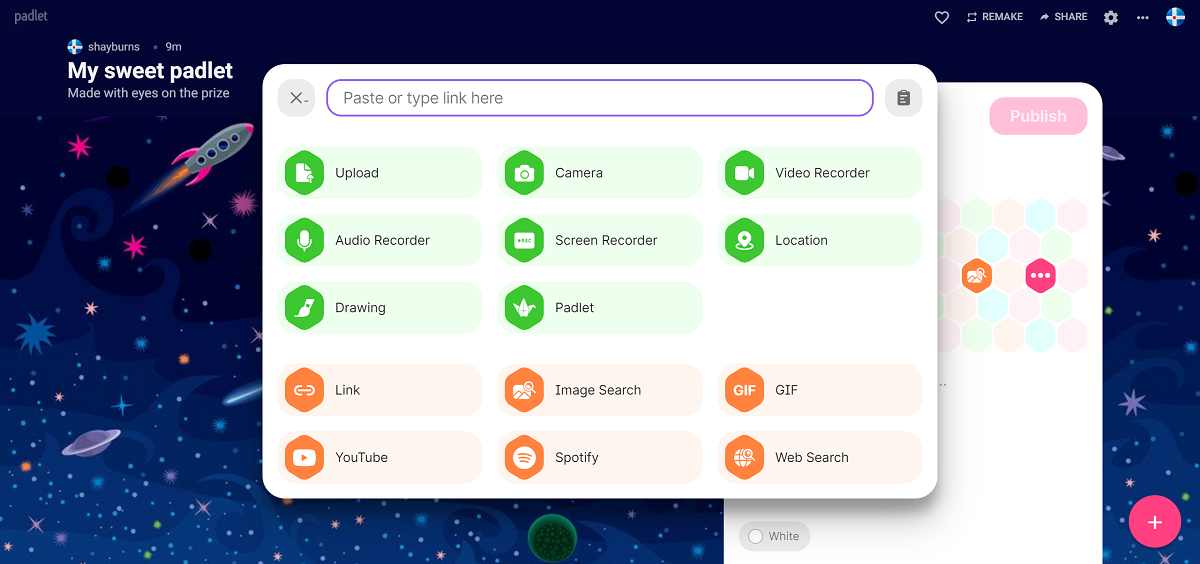
When you create an account, you will have the option to Create a Padlet, which produces a board that you can add a title and description for. Once you have this, you are free to add as many Sections or pins to it as you like by clicking the pink Plus icon in the bottom right corner of the screen.
Padlet lets you upload many different file types to a pin, including Microsoft Office files, images, videos, YouTube videos, GIFs, and whiteboards, and much more. The application is also available in 42 languages.
On the free Basic plan, you can create up to three Padlets, and it gives you 25MB per upload. There is also a paid Premium plan, where you can make unlimited Padlets and you get 250MB per upload. Padlet is available as an iOS, Android, Kindle, and on Windows and Mac desktop. You can also use it in your web browser.
Using Padlet's Templates for Project Planning
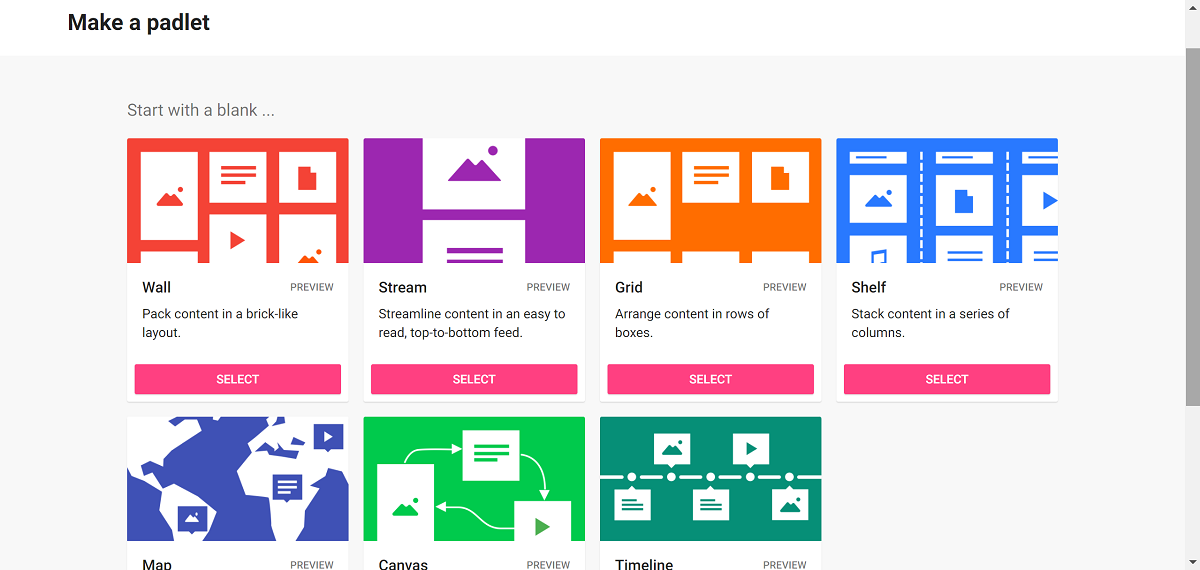
When you create your Padlet, you will see seven different ready-made templates you can choose from.
You can click Preview on any of the templates to view what they would look like with content added. You can also Start with a blank Padlet and design it how you like.
If you want to share information, to-do lists, ideas, or updates in a simple structure, the Wall, Stream, or Grid templates are good options. They will organize your pins into that specific structure, without any additional features.
The Shelf will enable you to add Sections, which is beneficial if your project plan has several stages to it. For example, your sections might be: project ideas, plan, and completed work. You and your team can then add pins to each section and upload any materials, to keep the information in order.
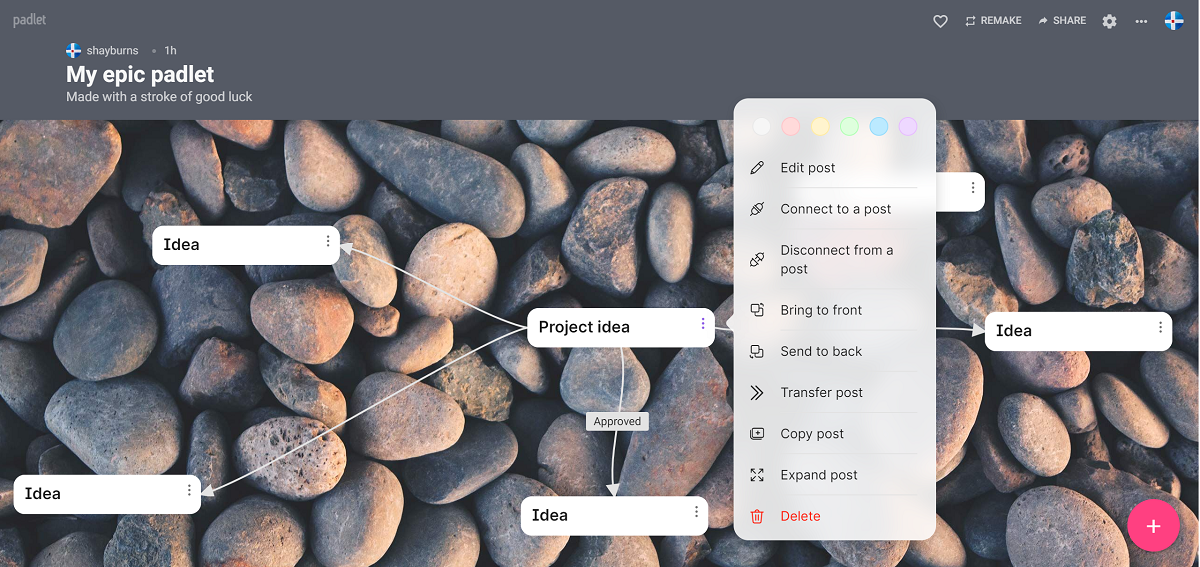
With the Canvas, you can drag your pins to anywhere on the Padlet and is useful for mind-mapping. Simply create a pin, type the topic you want to explore, drag it to the middle, and add other pins around it.
Click the ellipses and select Connect to a post. At this point, it will prompt you to add a Label, which you can do by typing into the text box. If you do not want a label, just click Connect and this will add an arrow between the posts.
If your project has a specific schedule, you can opt for the Timeline template. When you add a pin, it will place it on the timeline, and you can drag each pin along the line to where it fits best.
You may want to use more than one of these templates for a particular project, and if so, you can link them together by doing the following:
- From the Home screen, click on your main Padlet.
- Click the Plus sign to create a pin.
- Click the Link symbol and select the Padlet file type.
- When the screen appears on the right, you can select the Padlet you want to link.
- Add in a Title or any Text if you want.
- Click Publish.
You can then click on this pin, and it will open that Padlet up in a new window.
Collaborating With Your Team on Padlet
There are no limits to the number of contributors you can have on the Padlet, and any changes you or your collaborators make will be updated and saved in real time. They will also remain anonymous, which can be useful if your team feels reluctant to share ideas. Others can add to your Padlet without creating an account.
It doesn't matter whether you use Zoom, Microsoft Teams, or any other video conferencing apps to meet with your team remotely, you can share your Padlet into a live meeting by doing the following:
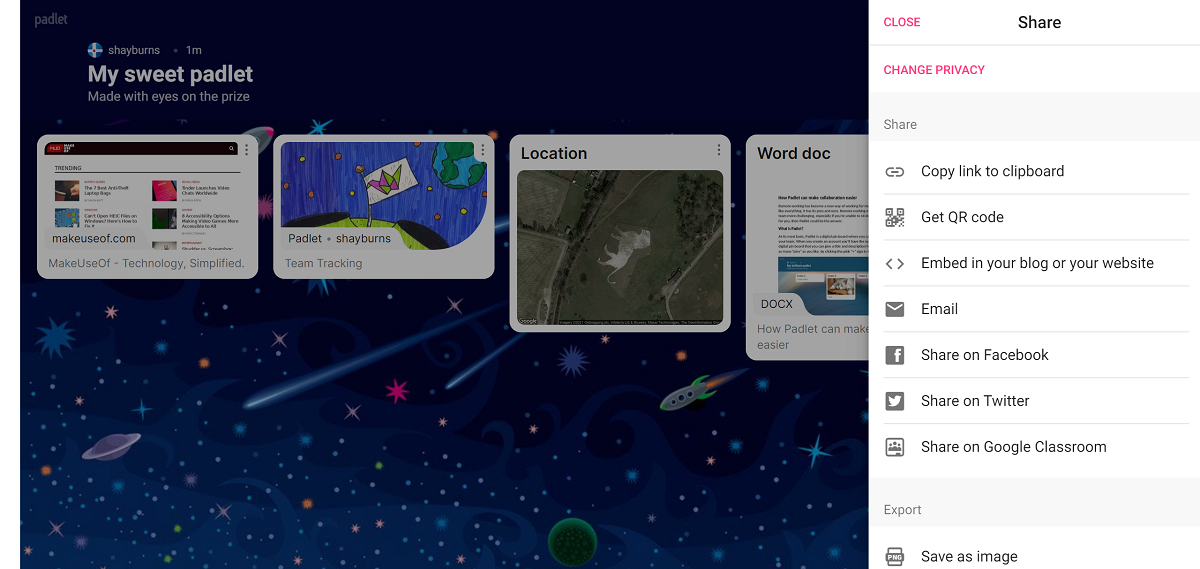
- On your Padlet, click Share at the top-right of your screen.
- Select Copy to clipboard.
- Paste the link into your video conferencing application's Chat and click Send.
Once they click the link, it will open your Padlet in a new window, and they can view and add to it. You will see their contributions appear as they post them, and facilitate a discussion around it. This is especially handy for quick-fire collaboration.
Alternatively, if you want to work jointly and save time on the deliberation, you can share the Padlet via Email, QR Code or any of the other Share options. This way, you can silently work on a project or work task together without ever being in the same room or conference call.
You might want to export the Padlet as an Image, PDF, CSV or Excel Spreadsheet when it is completed by clicking Share and under Export, and selecting the file type you want to save it as. There is also the option to Print it.
When you no longer need a Padlet, you can delete it to free up space for future work. To do this:
- Go to your Home screen.
- Click the Ellipses on the Padlet you want to delete.
- Select Delete Padlet.
- Type in the Code and click Delete.
Padlet Has You Covered
Padlet provides a straightforward and user-friendly way of collaborating together, whether you're working remotely or just want to try a different approach. Everyone will have access to it as long as you keep the Padlet live, and if you just want a space to put your own work, you can just keep the Padlet to yourself.
If nothing else, it is a useful tool that can make working together easier and more efficient, and the range of functions it has offers flexibility for you and your colleagues to use it as you see fit.


