By their nature, hidden Wi-Fi networks cannot be joined using the standard way. They are designed to remain hidden, out of sight from most users. When you enable your Wi-Fi in Windows 10, you will not see the network under available networks.
So, how can you connect to a hidden Wi-Fi network in Windows 10?
What Is a Hidden Wi-Fi Network?
Hidden Wi-Fi networks are wireless networks set to conceal their network SSID (the Wi-Fi name). As such, these types of networks do not appear under the Wi-Fi section of your device on Android, Windows, iOS, etc.
To join a hidden Wi-Fi network, you need more than just the password. You'll need to know the network's name, Wi-Fi security type, encryption type, and password. Furthermore, you'll have to ask the network administrator for these details.
How to Connect to a Hidden Network on Windows 10
Follow these steps to connect to a hidden wireless network in Windows 10:
- Click the Wi-Fi icon in the lower-right corner of the taskbar.
- Select Network & Internet Settings.
- Next, click Dial-up on the left-side navigation panel, then select Set up a new connection.
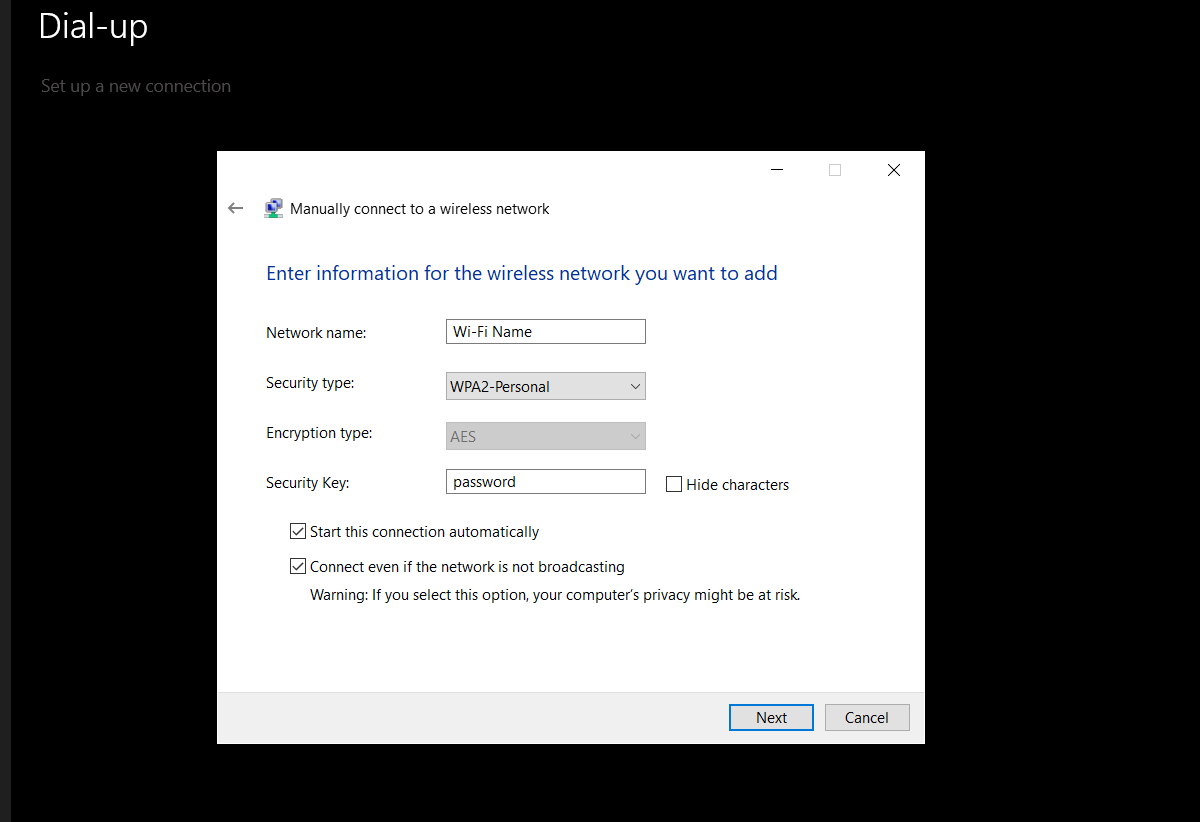
- From the pop-up, select Manually connect to a wireless network and click Next.
- Enter the network name, security type, and security key.
- Select the checkbox under Connect even if the network is not broadcasting and Start this connection automatically.
- Tap Next, and your device will automatically connect to the network.
If you experience issues connecting to the network, you can temporarily reveal the network's SSID, connect to it then hide it again.
Connect Your PC to Hidden Wi-Fi Networks
Hidden Wi-Fi networks add unnecessary overhead to the connection process. Independent of your device, connecting to a hidden network can be tricky since it doesn't follow the usual procedure. This article should help you connect your Windows 10 device to any hidden network.


