If you're planning to launch a website but don't want to pay recurring monthly or annual hosting fees, you can use any old laptop or desktop PC to host a website for free. It's a great way to utilize your old system instead of throwing it away.
In this guide, we will install and set up services on our 10-year-old laptop to host a WordPress, Joomla, or custom HTML or PHP-based website with a free SSL certificate.
Things You Will Need to Host a Website
Following are the pre-requisites to host a website for free from home with just your computer:
- An old laptop or PC running Ubuntu Server.
- A registered domain name for your website
- Ethernet cable to connect the laptop or PC to router for reliable and fast connection
Step 1: Update and Upgrade the Packages
After installing Ubuntu Server on your computer, execute the following command to update the package list and upgrade existing packages. We recommend you enable SSH and access the server via Terminal or PuTTY on your macOS or Linux PC.
sudo apt update && sudo apt upgrade -y
This may take a while to finish. So, sit back and relax until the process completes.
Step 2: Install Apache
Apache is a popular open-source web server that works with PHP to host dynamic websites, including WordPress sites. Once the update is complete, execute the following command to install the Apache server.
sudo apt install apache2
When you see a prompt, press Y and then hit the Enter key to continue the installation. You can check the status by running the following command.
systemctl status apache2
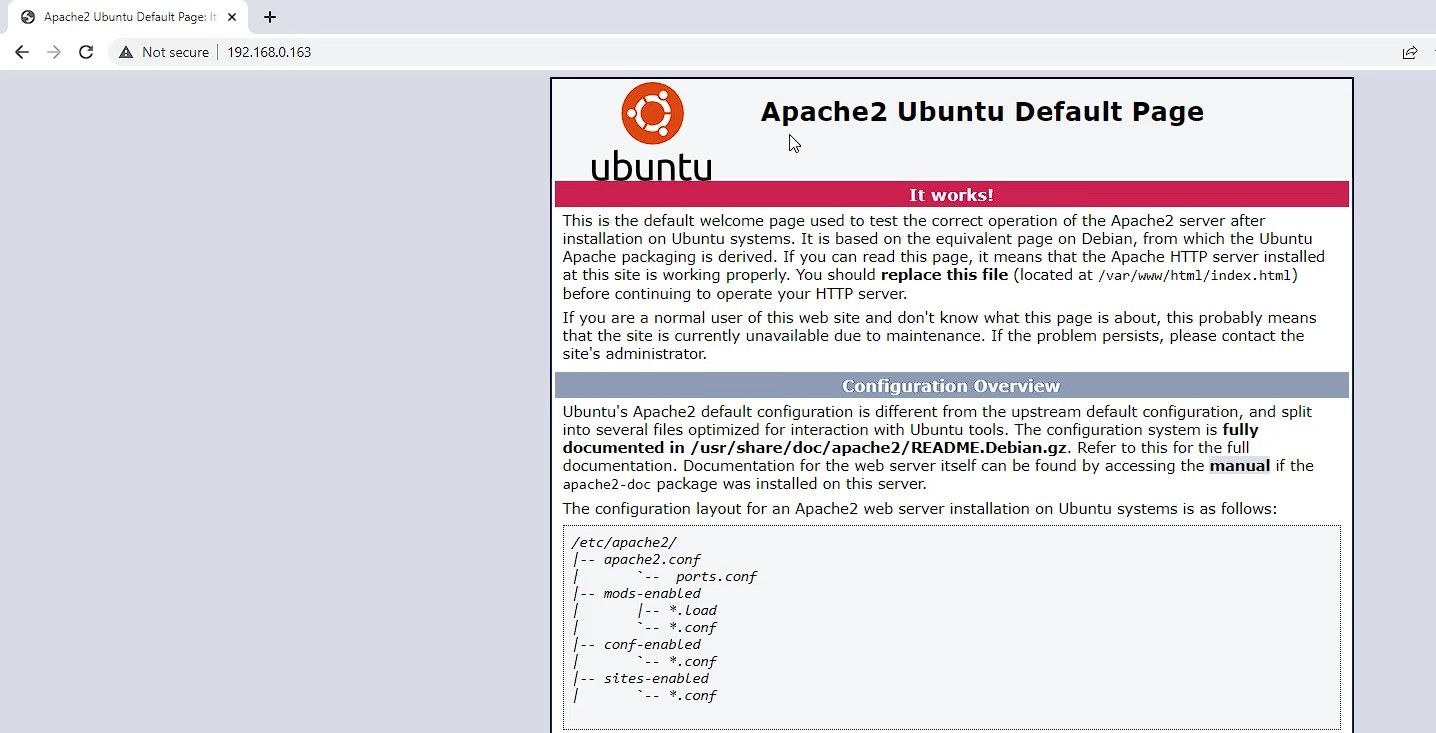
It should show active (running) status. To verify, you can visit the IP of your laptop or localhost.
Step 3: Install MySQL Server
MySQL is a database management system (DBMS) that helps organize and provide access to the database for storing the information. To install the MySQL Server, use the following command.
sudo apt install MariaDB-server MariaDB-client
Press Y and then the Enter key to confirm and proceed with the installation.
Next, secure the MySQL installation by running the following command.
sudo mysql_secure_installation
Set root password? Press Y and hit the Enter key. Enter a secure password and keep it safe.
Remove anonymous users? Press Y and then the Enter key.
Disallow root login remotely? Press Y and then the Enter key.
Remove the test database and access it. Press the Y key followed by the Enter key press.
Reload privilege tables now? Press the Y key and then Enter.
Step 4: Install PHP
PHP is required to process code for displaying dynamic content, run scripts, connect to the MySQL database and display the processed content on the web browser. To install PHP, run the following command.
sudo apt install PHP PHP-MySQL
Press the Y key to confirm and proceed with the installation. Create a test.php file using the following command to confirm the installation.
sudo nano /var/www/html/test.php
Now, paste the following code into the Nano editor.
        <?php
phpinfo();
?>
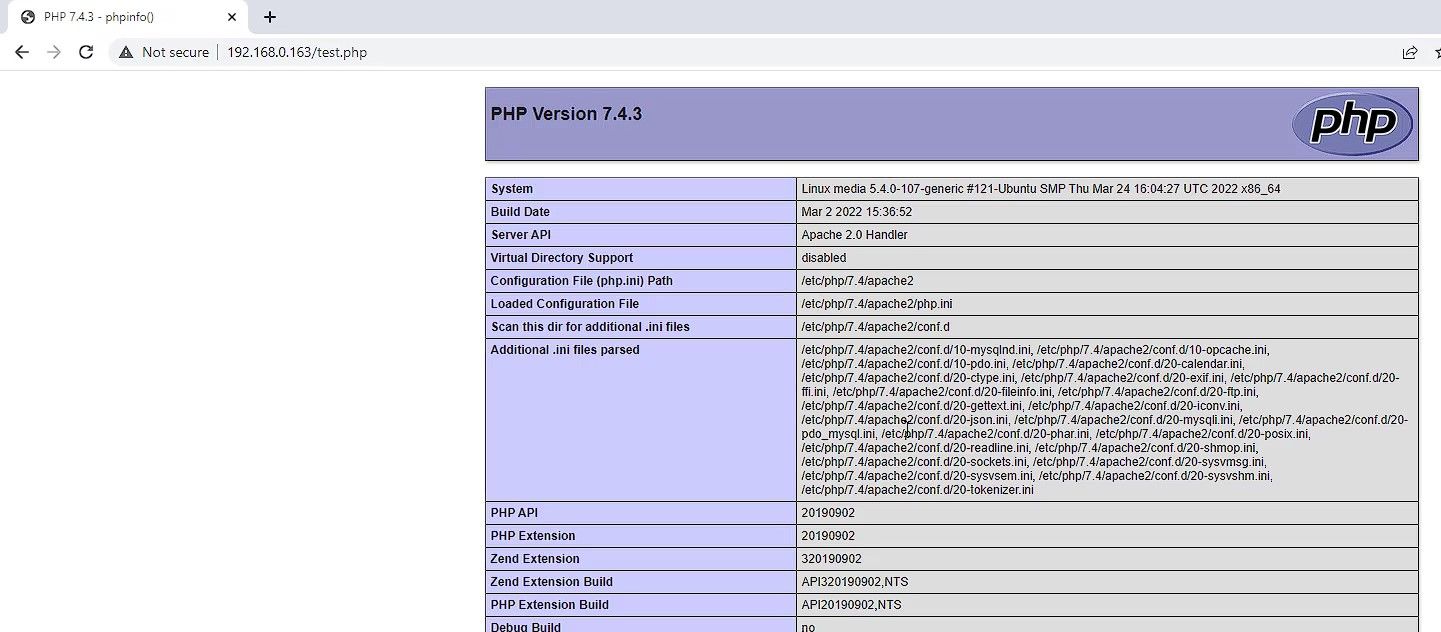
Press CTRL+X followed by Y and the Enter key to save the changes. Now, visit the IP of your laptop with /test.php in the URL. This should load the PHP information page, indicating PHP is installed and working.
Step 5: Create a MySQL Database and User
We need to create a database and user account with access to the database with all privileges. The commands are as follows:
sudo MySQL –u root -p
Type the password (the one you created while securing the MySQL installation) and press the Enter key. Then execute the following commands in the given order to create a database and user with full access to the database.
        CREATE DATABASE mysite;

CREATE USER ‘ravi’@’localhost’ IDENTIFIED BY ‘YourPassword’;

GRANT ALL ON mysite.* TO ‘ravi’@’localhost’ IDENTIFIED BY ‘YourPassword’;

FLUSH PRIVILEGES;

EXIT;
This will create a database named "mysite" with user "ravi" having access to the database. Of course, you can use any name you like.
You can now host a custom HTML, PHP-based website, or host CMS-based sites, such as WordPress, PrestaShop, Joomla, etc. However, we will set up and host a WordPress website on our old laptop for this tutorial.
Step 6: Download and Setup WordPress
Navigate to the /var/www/html path and download the latest WordPress package.
cd /var/www/html/
sudo wget <a href="https://wordpress.org/latest.tar.gz">https://wordpress.org/latest.tar.gz</a>
Extract the package contents.
Sudo tar xf latest.tar.gz
This will extract the wordpress directory at /var/www/html location. You can view the directory using the ls command. Next, we will grant permission to www-data:www-data using the following command.
sudo chown -R www-data:www-data /var/www/html/wordpress
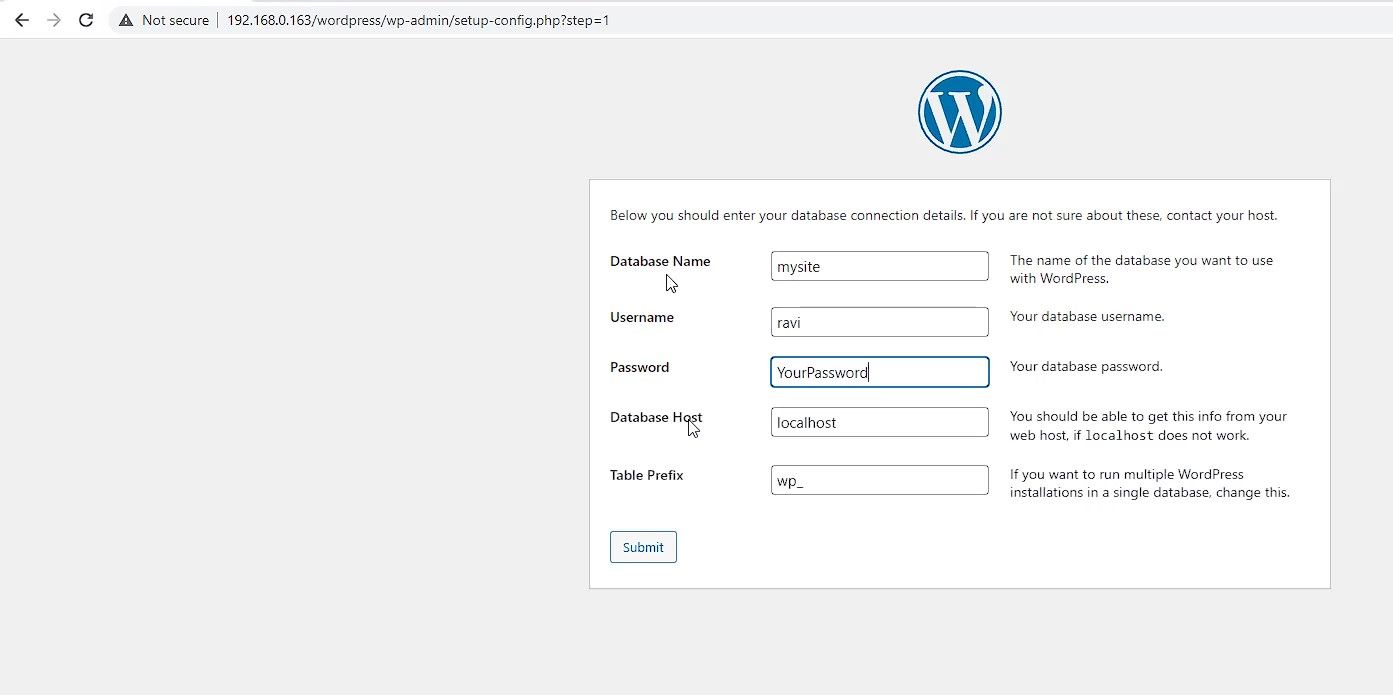
Once done, you can visit the IP of your laptop followed by /wordpress. Enter the Database Name, Username and Password we created in Step 4. Leave Database Host and Table Prefix to default. Click on Submit.
Now, click on Run the installation.
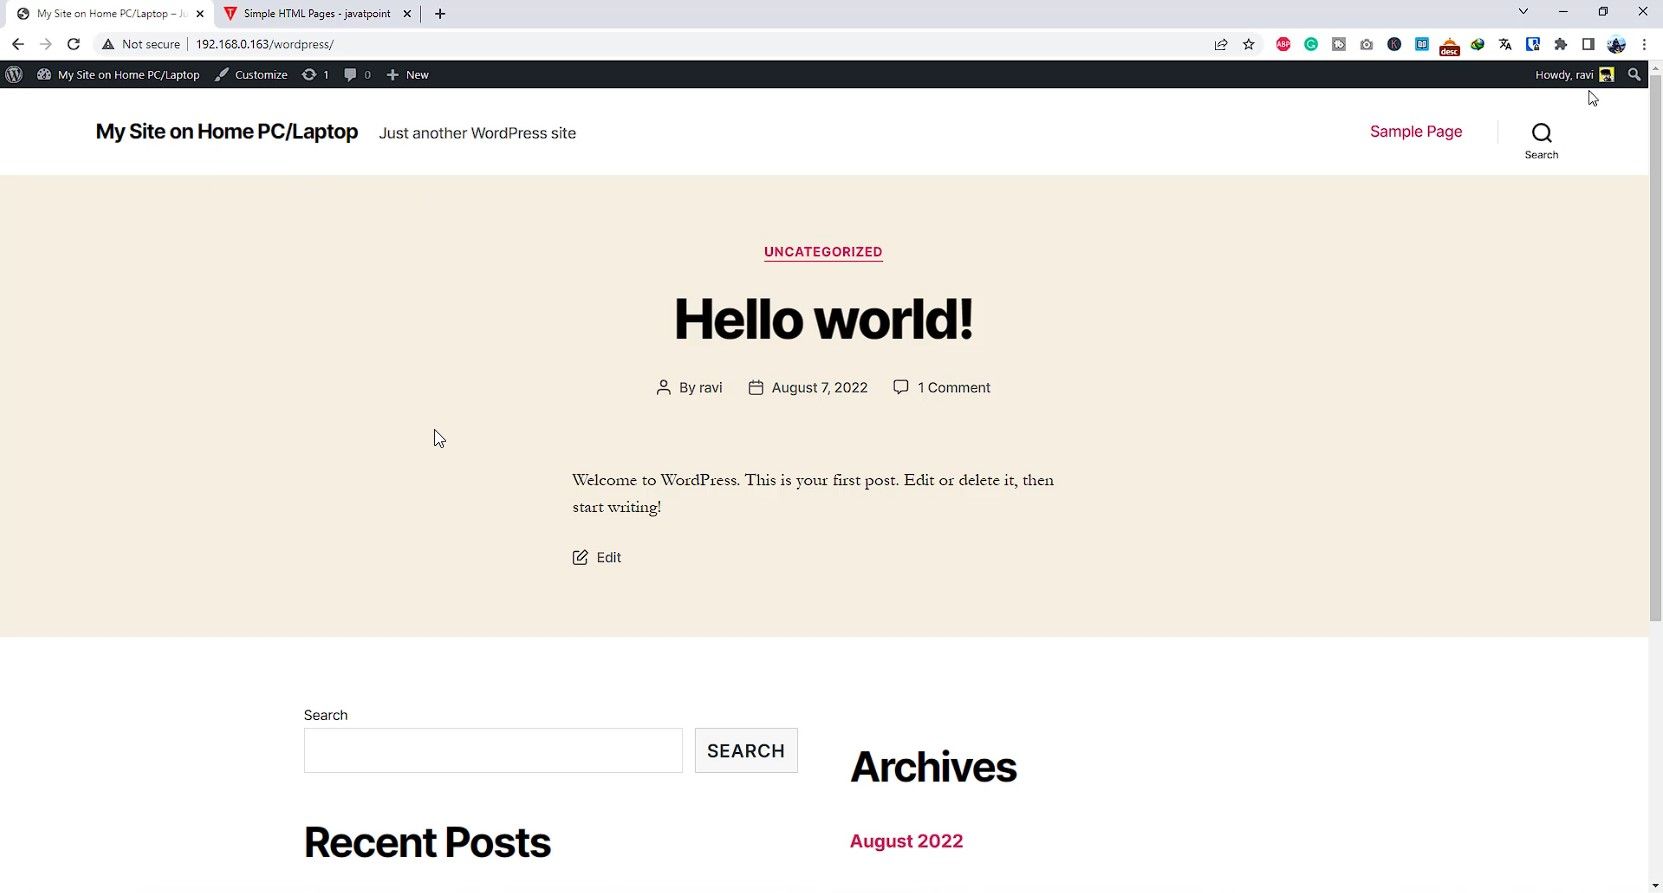
Enter the Site Title. Also, create a new Username and Password for the WordPress backend (wp-admin), and then click Install WordPress. This will install WordPress, after which you can access the WordPress site at http://IP-Address/wordpress (Replace the IP-Address field with your computer's IP).
Next, we need to add the domain name and enable SSL for the HTTPS connection. For this, we are going to use the secure Cloudflared Tunnel.
Step 7: Download and Install Cloudflared Service
Sign up and add your domain to your Cloudflare account to get started. After adding the domain, run the following commands to download and install the Cloudflared service on your old laptop or PC-based web server.
sudo wget https://github.com/cloudflare/cloudflared/releases/latest/download/cloudflared-linux-amd64.deb
sudo dpkg –I cloudflared-linux-amd64.deb
Step 8: Create Cloudflared Tunnel and Enable HTTPS
Follow the instructions and use the commands below to create a Cloudflared tunnel and enable a secure connection to your website.
Log in and authorize the domain you added to Cloudflare.
Cloudflared tunnel login
Copy the URL displayed and open it in a web browser to authorize the domain.
Once authorized successfully, create a Cloudflared tunnel called "mysite". You may name it anything but remember that name.
Cloudflared tunnel create mysite
Copy the credentials file path (JSON file path) and the tunnel ID. Keep them safe.
Now, create a configuration file using the command below.
Sudo nano ~/.cloudflared/config.yml
Next, paste the following code into it. Make sure to replace the tunnel ID and credentials-file (JSON file path).
        tunnel: a2efc6dg1-2c75-45f8-b529d3ee
credentials-file: /home/pi/.cloudflared/ a2efc6dg1-2c75-45f8-b529d3ee.json
ingress:
- hostname: YourDomain.com
service: http://Laptop-IP
- service: http_status:404
Press CTRL+X followed by Y and hit Enter to save the changes.
Now create a DNS entry for the hostname. You can host your WordPress site on the main domain or subdomain based on your requirement. For this tutorial, we will create a subdomain DNS entry to host our WordPress site on the old laptop.
cloudflared tunnel route DNS <Tunnel Name> <YourDomain.com>
Here's an example:
cloudflared tunnel route DNS mysite mysite.smartghar.org
Once the entry is created successfully, you can start the tunnel by running the following command.
Cloudflared tunnel run mysite
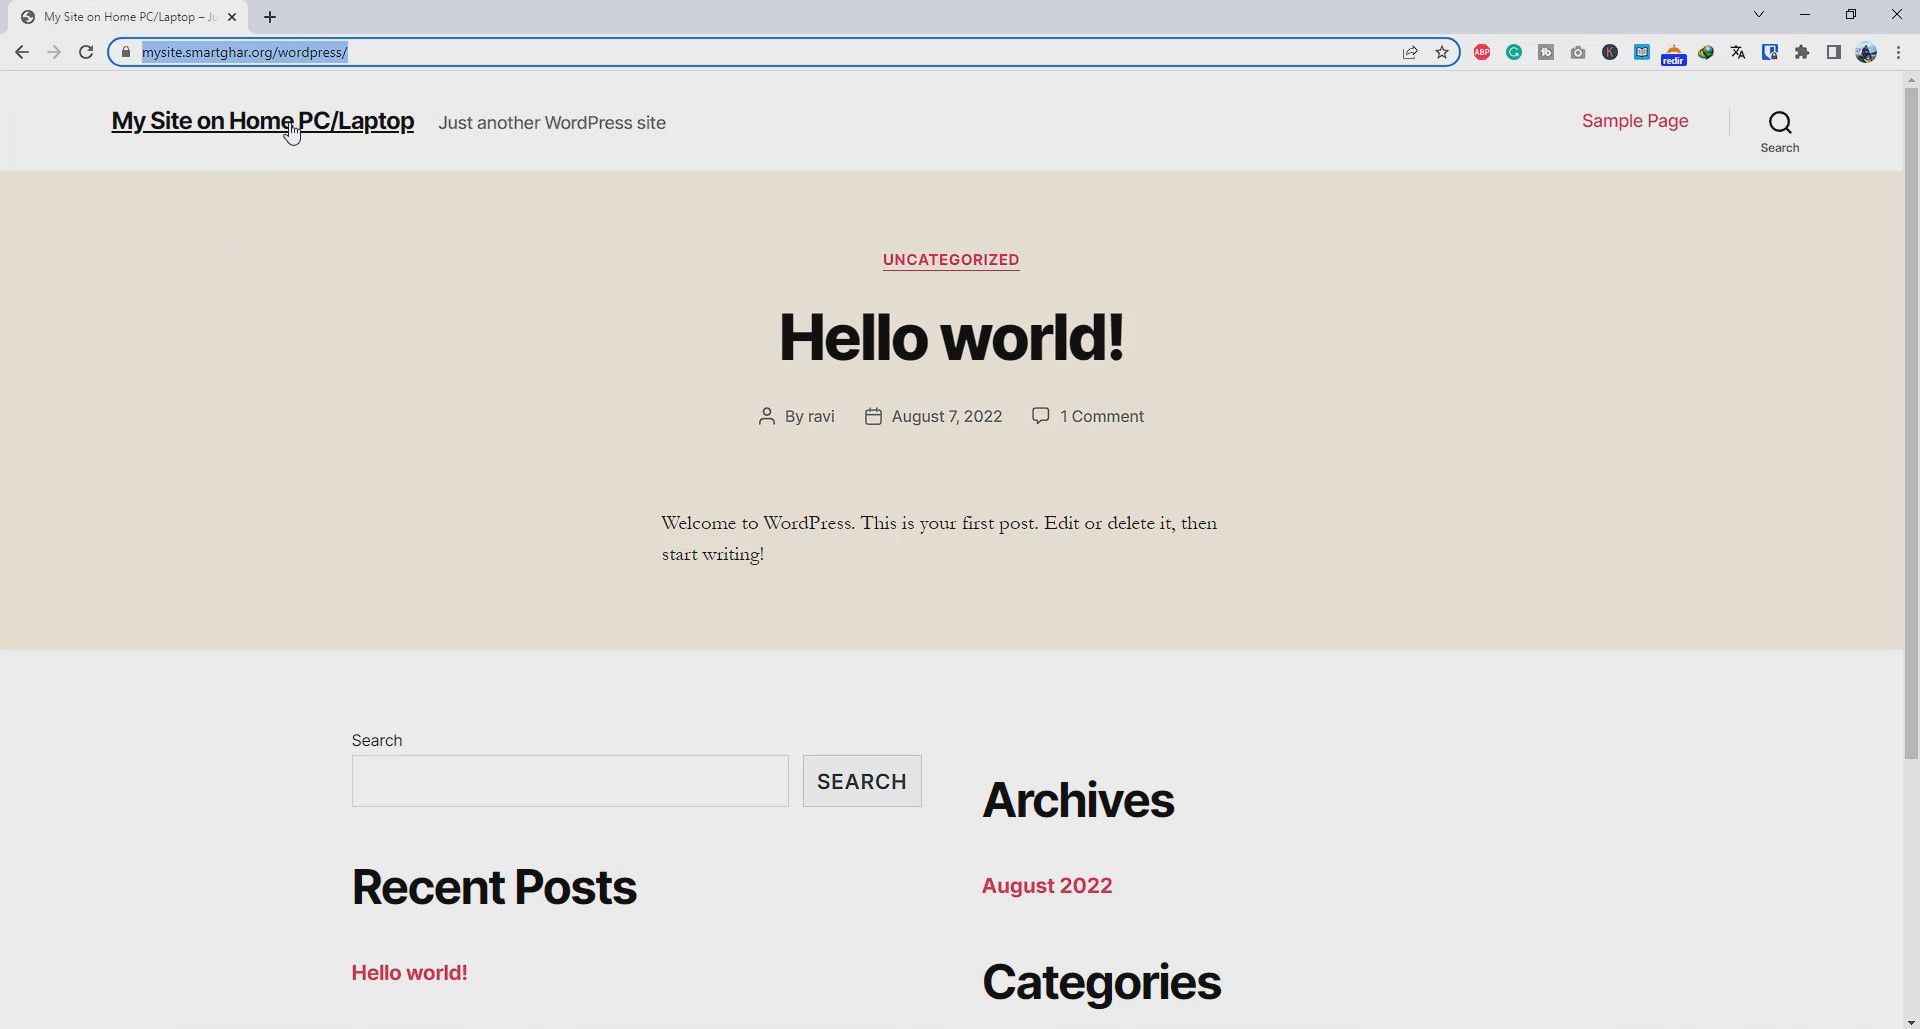
You can open the web browser and visit the hostname (mysite.smartghar.org in this case). You should be able to access the WordPress site. However, you may see CSS has broken and HTTPS disabled.
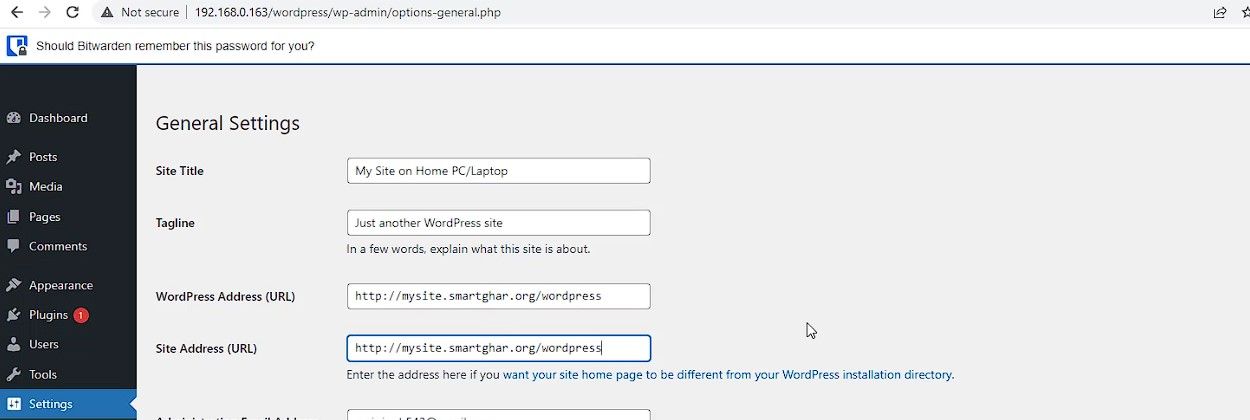
To fix this, log in to https://yoursite.com/wp-admin, go to Settings > General Settings, and update the WordPress Address (URL) and Site Address (URL) fields to YourDomainName.com or YourDomainName.com/wordpress as per your configuration.
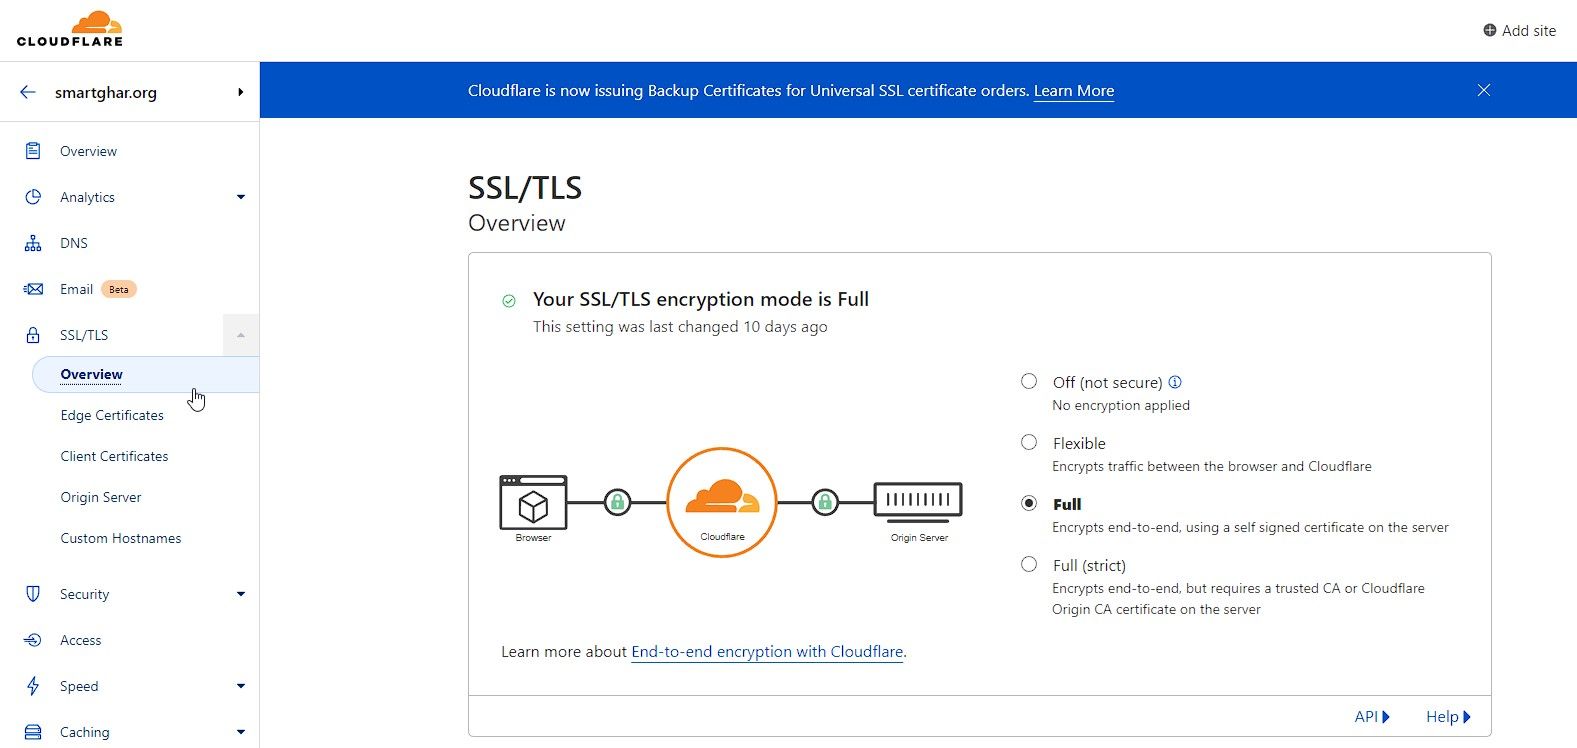
Then, log in to Cloudflare, head over to SSL/TLS > Overview from the left pane, and choose either "Flexible" or "Full" for the domain you added.
Once done, visit the URL and access your website. Your site should now load fully with an HTTPS connection.
Is Free DIY Hosting Worth It?
If you're just getting started with building an online service, portal, or business, a local DIY server on an old PC or laptop can help you. You can use it to showcase your projects to clients or users and host a fully functional website.
Although the hosting is free and secure, remember that you will have to pay for your computer's electricity usage, which will vary based on its efficiency. Typically, it's between 30-65W/hour at full load for laptops, but desktop PCs will consume much more power. A cheaper and more power-efficient option would be to use a Raspberry Pi to host your site, as it runs on a 15W power supply.


