So you've just completed a simple portfolio website with Python, and you want to put it up using free hosting. You've heard about Heroku's free hosting, but you don't quite understand the technicalities involved.
This guide will help you work through the whole process of hosting your Python website for free on Heroku, in a much simpler way. We assume that you have a basic knowledge of Python and at least one of its frameworks---preferably Django.
Why Choose Heroku?
Heroku is a Platform as a Service (PaaS) web hosting provider that runs its infrastructure on something it calls Dynos. It keeps you focused on deployment, while it takes care of the difficulty of maintaining and building your web infrastructure.
In case you can't afford paid hosting but want to put up an online portfolio rapidly, then you might want to consider hosting it on Heroku. In addition to coming at no charge, it's pretty fast to put up your website on Heroku.
Of course, there are other platforms where you can host your Python website for free, such as Amazon Web Services and PythonAnywhere. But the process of hosting on Heroku is easy---especially for people without prior knowledge of deployment.
When you host a website for free on Heroku, you don't necessarily need to have a domain name. All you need is to specify your app name on the hosting platform. Heroku then creates an app.herokuapp.com locator for you. When you're on this free service, your site runs on Heroku Dynos.
If you later decide to scale up and get a domain name, that's equally easy and fast, but you have to pay for it. The overwhelming cost of maintaining the upgrade might cause you to rethink it, but it's worth the money if you're determined to invest more in the project.
Let's now examine how to host your Python website for free on Heroku. Note that this is based on Python version 3.7 and Django version 2.1.7.
Set Up Git and Heroku
To start, download Git from the git-scm website. The various commands and twists for getting Git installed on all OSes are explainedthere.
After installing Git, you also need to set up an account with Heroku at the Heroku signup page if you don't have one already.
Next, download and install the Heroku CLI from the Heroku website. The Heroku CLI lets you communicate with your repository each time you need to commit changes to your app.
If you're not familiar with Git commands already, you should take a look at our introduction to version control with Git.
Set Up a Django Project
If you don't have a Django project set up and want to try it out with this tutorial, open the command line and make a virtual environment if you don't have one yet. Once the virtual environment is ready, use this command to install the Django framework:
pip install django==2.1.7
After Django is installed in the virtual environment, run the following command to start a new Django project:
django-admin.py startproject project_name
Next, create a new Python app. To do that, migrate into your project's root folder on the CMD and run:
python manage.py startapp app_name
Remember to replace project_name and app_name with your preferred names.
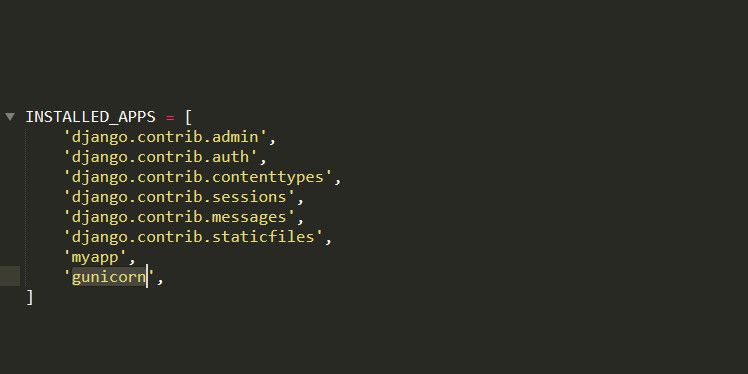
You need the gunicorn module for this, so you should also run pip install gunicorn. Then add gunicorn to the list of installed apps in settings.py, as shown below:
This is just a surface introduction to building a Django app. However, whether your app is ready, or you're just building one, ensure that your run python manage.py migrate to create your database.
You should now have a Python app running within your Django framework. Now we'll dive into our main goal.
Deploying Your App to Heroku
To have a successful deployment of your app to Heroku, you need to set up a requirements.txt file. To set it up, run the following on your CMD:
pip freeze > requirements.txt
That line creates a .txt file that contains all the packages used to serve your project. Heroku looks into that file during deployment and installs those packages automatically.
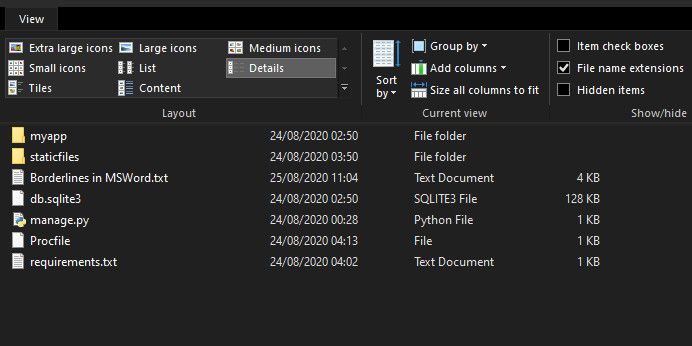
Another important file you need to specify is the Procfile. This tells Heroku the commands to run on the initialization of the app. However, you have to create this file by explicitly making a new text file named Procfile in your project root. Ensure that this file doesn't have a file extension; otherwise, it won't work.
To remove the file extension from the Procfile in Windows, open the folder in File Explorer, click View on the top toolbar, and check the File name extensions box. You'll then see the extensions for all files, including the .txt extension for Procfile. Right-click on Procfile and choose Rename, then simply remove the .txt extension and hit Enter.
Next, open up the Procfile and add the following line, replacing project_name with the name that applies to your project:
web: gunicorn project_name.wsgi
Optionally, you can also create a runtime.txt file. Open up the file and specify the Python version as follows:
python-3.7.6
That's how you tell Heroku the Python version that your app runs on. If you don't specify this file, Heroku just uses the latest version of Python by default.
Next, in the command prompt, log into your Heroku account by running this command:
heroku login
That command opens up your default browser to the Heroku login page, where you get to provide your login credentials.
To create an app on Heroku, type the following line:
heroku create ademosapp2
Replace ademosapp2 with your preferred app name. If your selected app name is in use, you'll see a message prompting you to pick a new name.
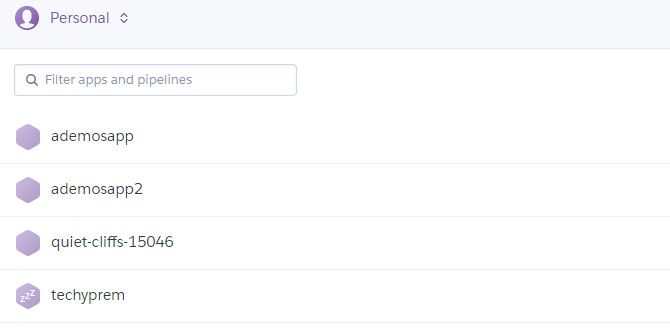
On the login page, click on the Heroku logo to log into your Heroku dashboard. You should now see the app you just created.
Next, open up your preferred text editor to your project's location and go into your project's settings.py. In the settings.py file, change the Allowed Host to [*]---this makes your app accessible to any global host.
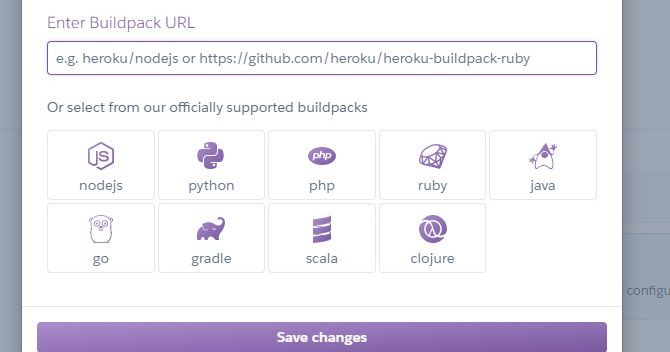
Now go into your Heroku dashboard and click on the newly created app, followed by settings. In the settings, scroll down and click on Add buildpack. Then select Python as your buildpack and click Save changes.
Next, move back to your CMD and run the following code to install Heroku in your project:
pip install django-heroku
Now, add the newly installed package to the requirements.txt file by running:
pip freeze > requirements.txt
Then, open up your project's settings.py file and type:
import django_heroku
Also, on the last line of settings.py, activate django-heroku by adding:
        django_heroku.settings(locals())
#ensure that you comment this line out after deployment
Once that's done, initiate a remote repository by typing the following in your command line:
heroku init
Next, create a Heroku app repository by running:
heroku git:remote -a ademosapp2 #replace ademosapp2 with your app's name
To check the files that need to be committed, run:
git status
Next, type the following command to add all changes to your repository:
git add --all
Once the changes are added, commit your changes to Heroku by running the command:
git commit -m "initial-commit"
Note that "initial-commit" can use any name you like.
Next, you should disable collectstatic by using the following:
heroku config:set DISABLE_COLLECTSTATIC=1
Otherwise, you might run into problems during the deployment process.
To finally push your files to your Heroku repository, use the command:
git push heroku master
This pushes all your files to Heroku and makes the app accessible from anywhere. To see your newly deployed app, go to https://app_name.herokuapp.com in your browser, replacing app_name with your app's name.
Can Heroku Host an App That Doesn't Run on Python?
You can host a variety of app builds on Heroku; the same Git processes we covered here work for other languages besides Python. You only need to make little changes, such as resetting your build pack.
Although Heroku offers you free hosting, we all know that free content comes with some limitations. However, if you don't expect your website to receive much traffic, free Heroku hosting might be a good option.


