Windows 10 comes with three basic power plans, ranging from high performance to power saver. However, these power plans are not perfect. It is worth taking some time to create a custom power plan or customize existing ones to better suit your needs and usage style.
Thankfully, it's relatively easy to do this. But before creating one, you need to understand the various power options that can be configured. This will allow you to create a plan that perfectly fits your needs.
How to Open the Power Options in Windows 10
There are multiple ways to access the Power Options in Windows 10. One of the easiest methods is to use the Start button:
- Right-click on the Start button and select Power Options from the list that pops up.
- In the window that opens, look for Additional power settings under Related Settings. You can find this towards the right side of the window.
- The Power Options menu will open.
Now, you can either customize an existing power plan or create a new one from scratch. Regardless, you will get the same list of options and the process will be quite similar.
The Power Plans in Windows 10 and What They Mean
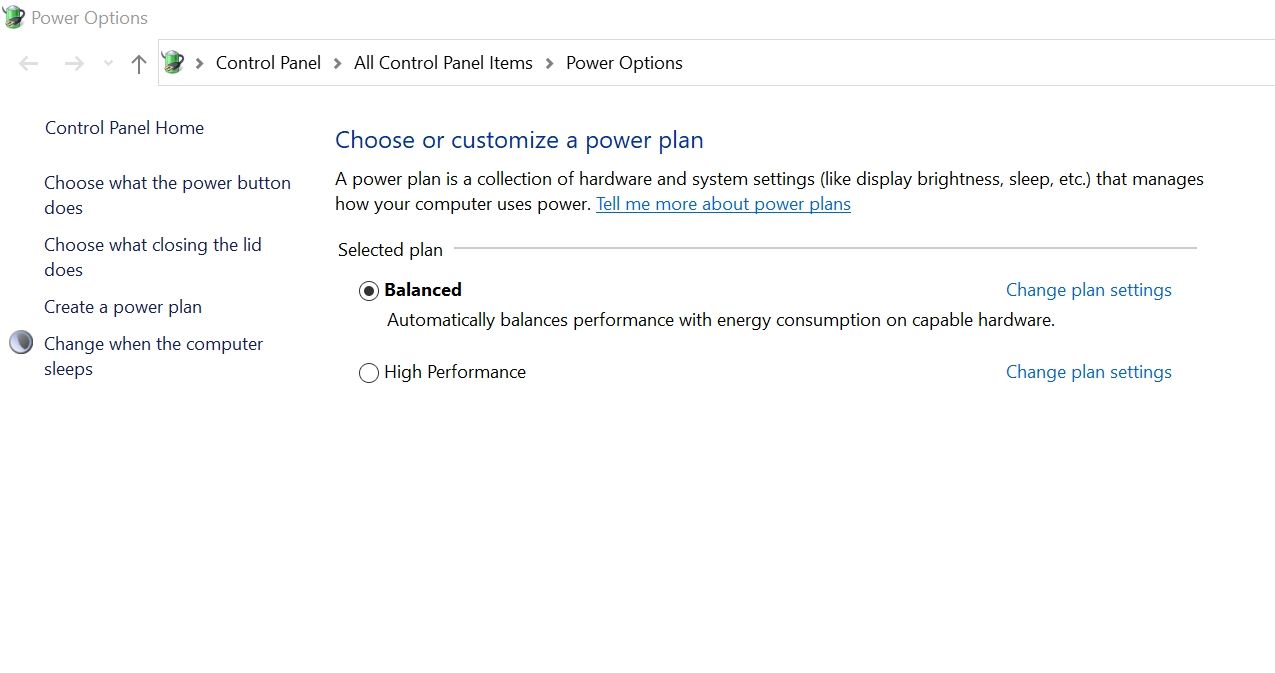
After opening the Power Options Control Panel window, you will see a list of Power Plans. On most computers, these will be:
- Balanced: This is usually the power plan that is selected by default in most laptops. Evident from its name, the plan uses power in a balanced way, offering a sweet spot between performance and savings. It's a good idea to use this plan if you use your system for low-intensity work, and not for demanding tasks.
- High Performance: The High Performance plan is designed to obtain the maximum performance from your computer in exchange for more power draw. Most laptops automatically switch to this plan when they're plugged in. Desktop computers also use this plan, since they draw power directly from the socket.
- Power Saver: This plan is most relevant for laptops, especially when the battery is running low. It will automatically dim the brightness while throttling the GPU and CPU speeds. When using a desktop PC, you will have to manually select this plan if you want it to consume less electricity. In the case of laptops, most of them automatically switch to this mode when the battery percentage dips below a certain point.
These plans can also be further customized according to your needs and as mentioned earlier, you can also just create a completely new power plan.
Customize an Existing Power Plan
Simply follow the steps listed below to customize an existing power plan on your computer:
- Open the Power Options window using the steps in the first section of this article.
- Now, next to your preferred power plan, click on Change plan settings.
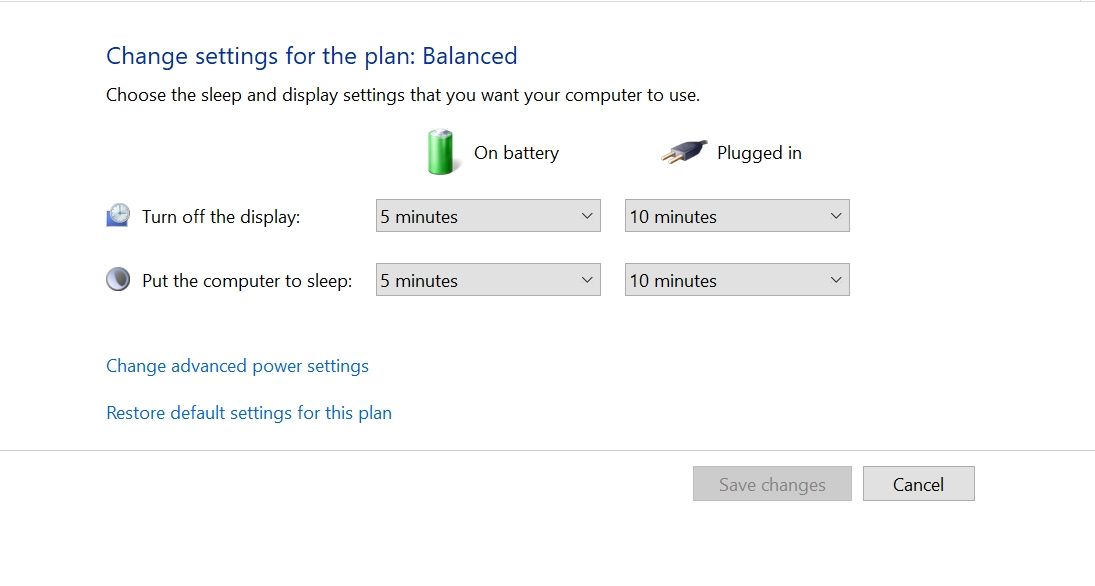
- In the window that opens, you can change how your device when it's on battery or when plugged in.
- Click on the drop-down menus under each section to choose the time duration after which the display turns off and when your computer sleeps.
- Additionally, you can click on Change advanced power settings for additional options such as when your hard disk stops spinning.
- After changing the settings, click on Save changes.
Create a New Power Plan
Creating a new power plan is fairly easy in Windows 10:
- Open the Power Options window.
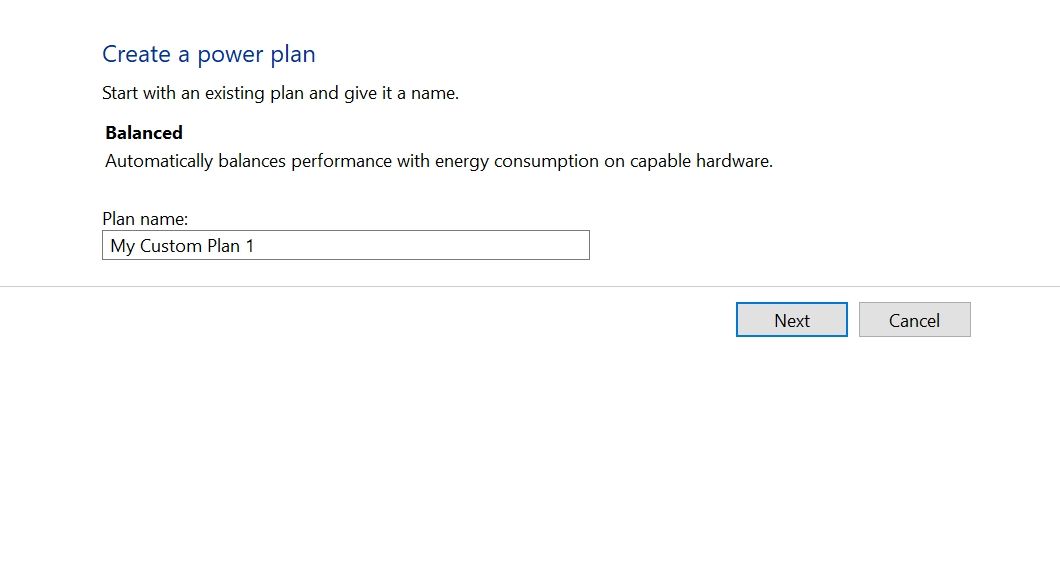
- On the left, click on the Create a power plan option.
- In the next screen, type in a name for your power plan. Click on Next.
- Now, adjust the settings as you did in step four of the section above.
- Click on Create.
- Your new custom power plan will be created. To customize it further, use steps two to six in the section above.
What Do the Advanced Power Settings Mean?
If you want to modify how a power plan works, you will have to access its advanced power settings. It's recommended you do this because having a well-optimized power plan is one of the primary ways to increase your computer's performance.
The sections above already explain how you can go about doing so. Simply click on the Change advanced power settings option in the Change plan settings window.
However, once you're in the Advanced Power Settings menu, you may be a little confused as to what each option does. Read on to find out what the important options mean and how to alter them for your needs. Depending upon your device type and your hardware, you may see different options, so don't panic if you don't see them all.
Hard Disk Drive (HDD)
The hard disk option is only relevant for computers using a hard disk drive as their primary storage device. If your computer only uses an SSD, you won't see this option.
Upon expanding the option, you will be able to adjust the inactivity time after which your hard drive stops spinning. This option is best left at its default value of 20 minutes.
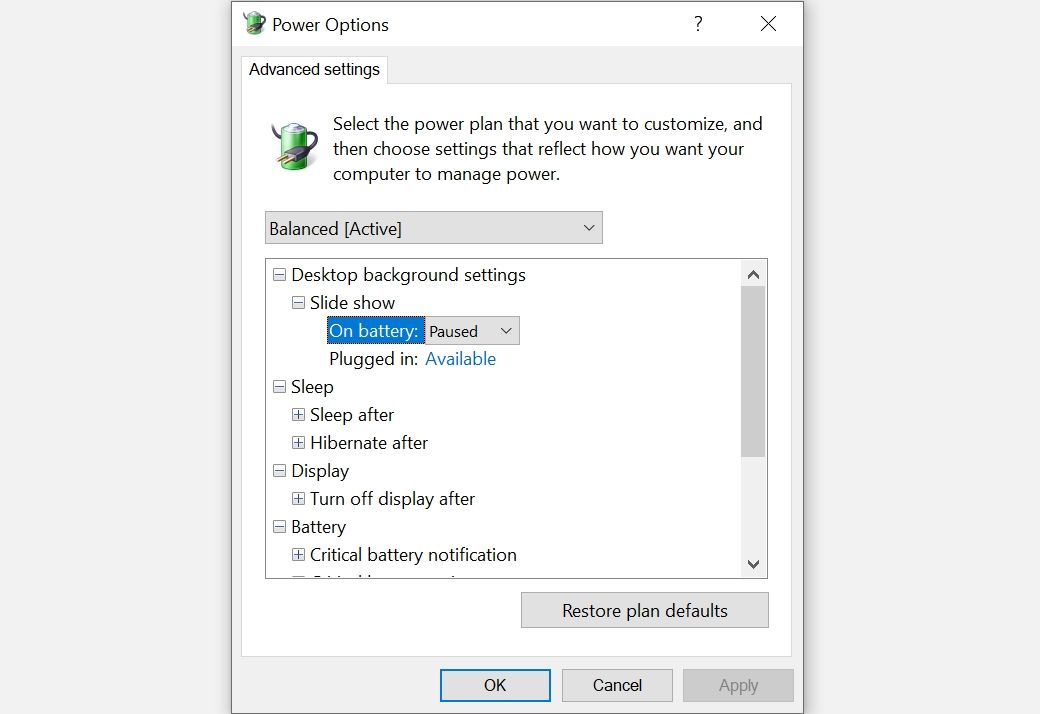
Desktop Background Settings
This option is essentially a toggle switch for the desktop background slideshow feature in Windows. By default, it will be available when your device is plugged in and paused when on battery.
If you use the slideshow feature, you can leave the settings as they are. However, if you don't use the feature, switch the setting to paused in both cases.
Processor Power Management
Your computer's processor is one of the primary sources of power consumption. This option lets you manage how the processor draws power. Expand the option for more sub-menus.
The minimum processor state option defines the percentage at which your processor functions under no load. It's best to leave this between the five to ten percent range. The maximum processor state should always be left at 100 percent since the computer will use the whole CPU only when needed.
The system cooling sub-option has two states: passive, and active. Ideally, leave this active. Although, if you don't use your PC for heavy work, switch it to passive to save more power.
PCI Express
The PCI Express setting is used to manage the power settings for the PCIe slot on your computer. The PCIe slot houses components such as the GPU or a sound card.
Here, you should use one of the power-saving modes, as they don't affect the performance of your computer in any way. The only potential drawback is that your computer will take slightly longer to wake up from sleep mode.
Completely Control Your Computer's Power Draw
Using the settings above, you can wholly manage how much power your computer draws. While it may not have immediate short-term gains, you will save a lot of money and slow down the wear and tear of your computer parts in the long run.
Alternatively, if you're not one for power saving and want to see all that your computer can offer, it's best to enable the ultimate performance power plan in Windows 10.

