
Are you a business owner looking to automate or provide services without spending tons of money? Maybe you are looking for a chatbot. From customer support on websites to having conversations with Google Assistant, chatbots have come a long way.
While you can build a chatbot from scratch, it takes immense effort to build, train and deploy them. This is where Google Dialogflow comes to the rescue.
What Is Google Dialogflow?
Google Dialogflow is an end-to-end tool that uses Natural Language Understanding (NLU), an advanced type of Natural Language Processing, to produce rich human conversations. It helps you build chatbots that you can integrate with your website, and applications such as Slack, Messenger, and Telegram.
A chatbot is a software application that simulates and processes human conversations in the form of text or audio.
Google Dialogflow comes with a visual flow builder to visualize the workflow. It uses advanced AI techniques and provides management features like analytics, CI/CD, experiments, and validations.
The best part is that it contains over 40 pre-built agents. These cover cases like hotel booking, banking operations, smart home, and navigation, which you can customize and use in your product.
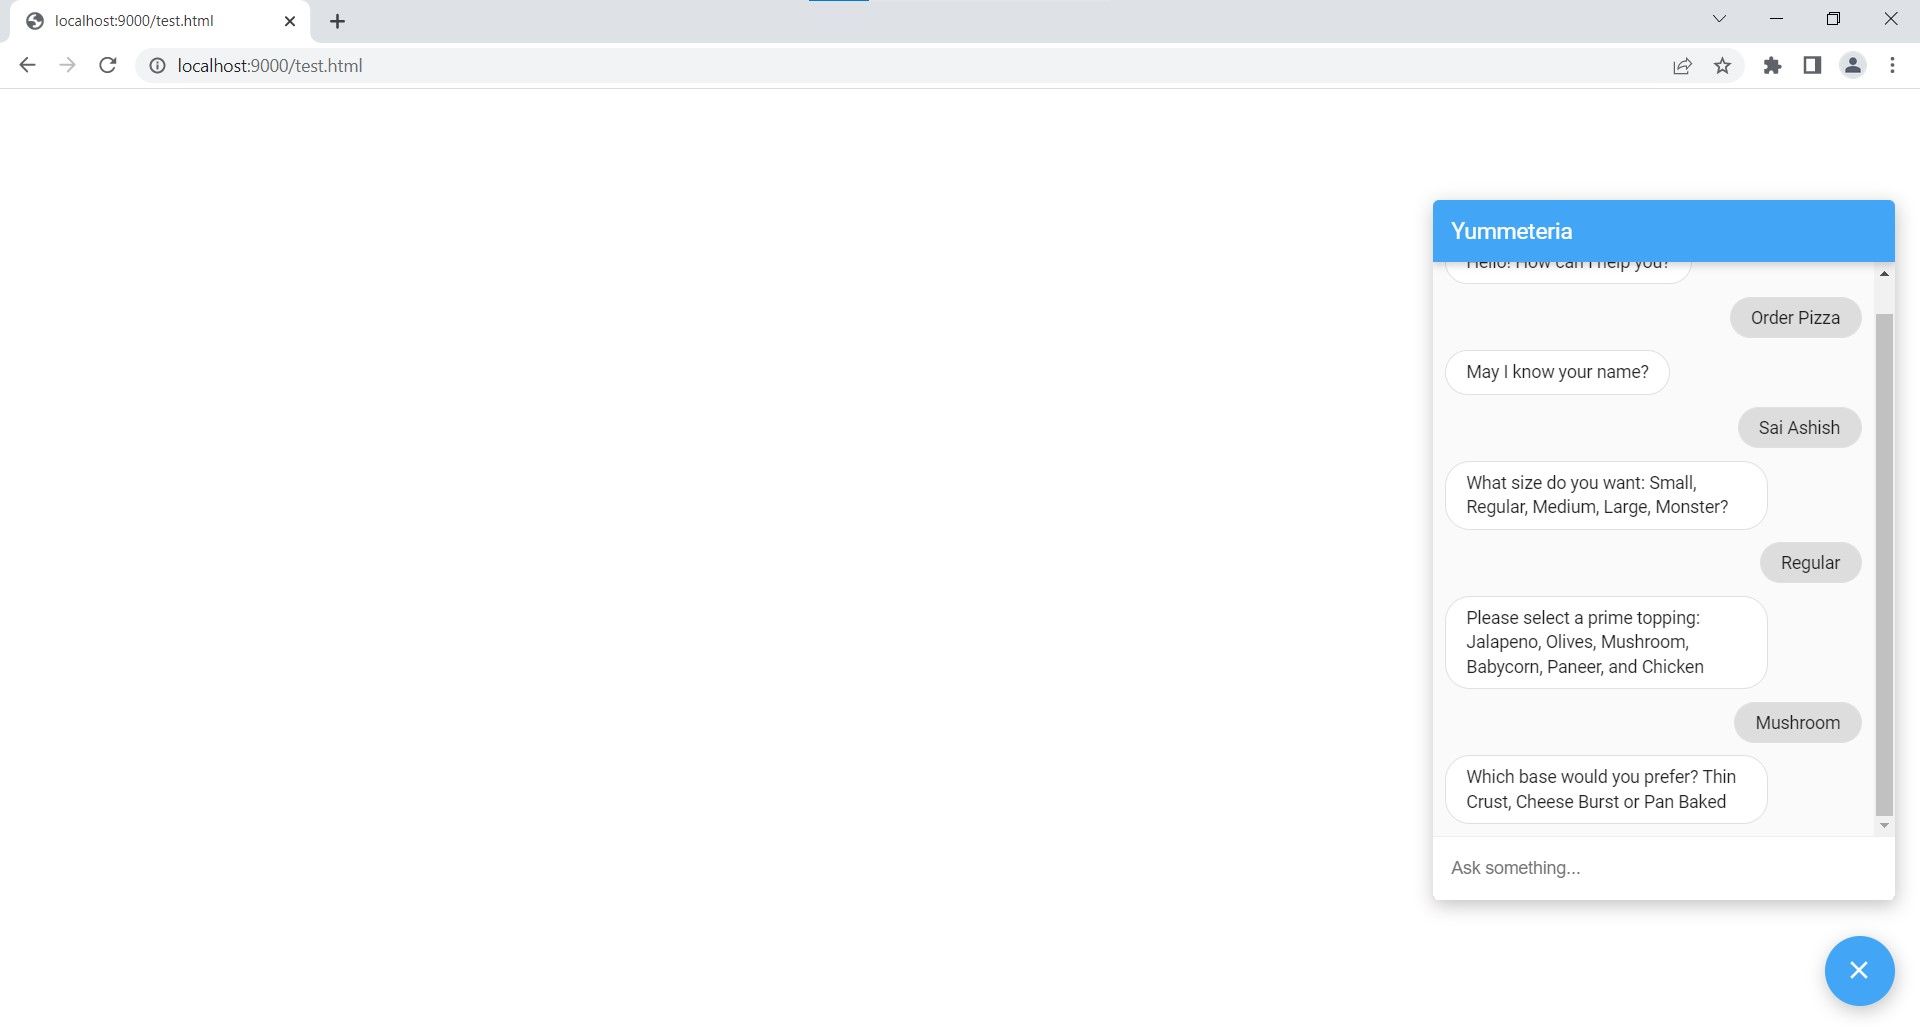
You can easily build a chatbot using Google Dialogflow even without the knowledge of coding. This is how you can build Yummeteria, a Pizza food delivery bot that asks for your name, email address, phone number, address, pizza size, topping, and crust. It then responds with your selected choices.
How to Build a Food Delivery Chatbot
Follow these steps to build a pizza food delivery chatbot.
- Visit Dialogflow and sign in using your Google account.
-
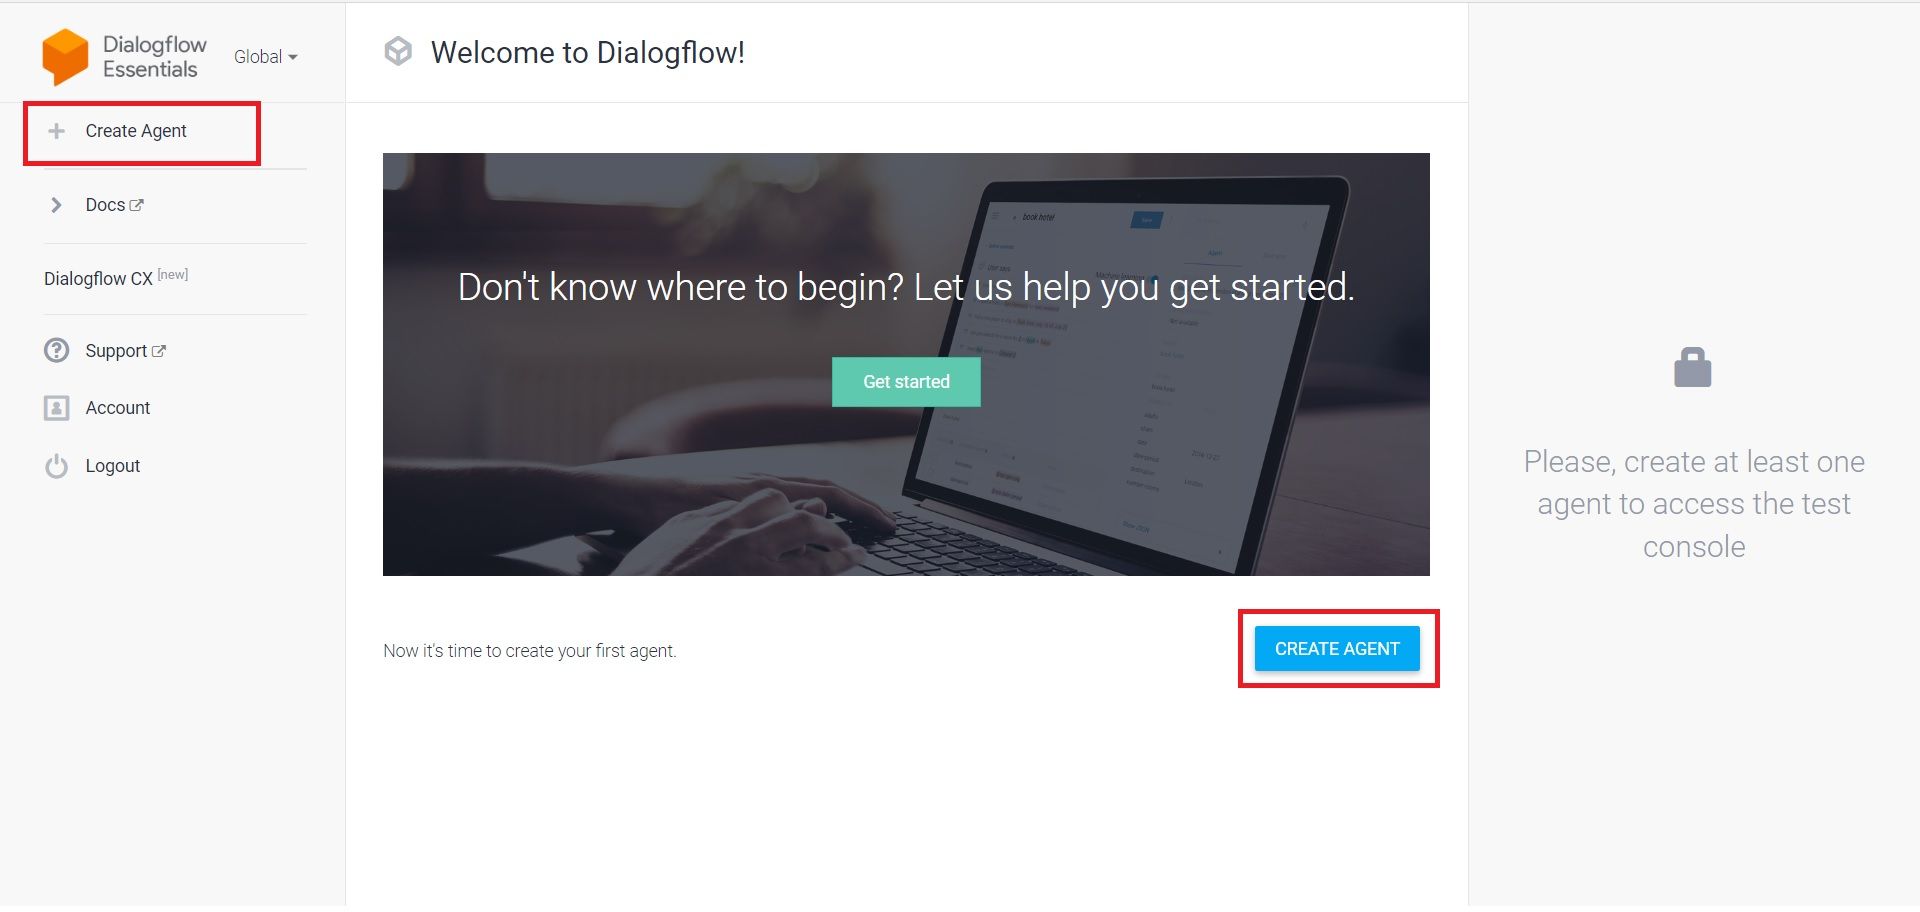
Agree to the Terms of Service and click on the Create Agent button. An agent represents the chatbot as a whole.
-
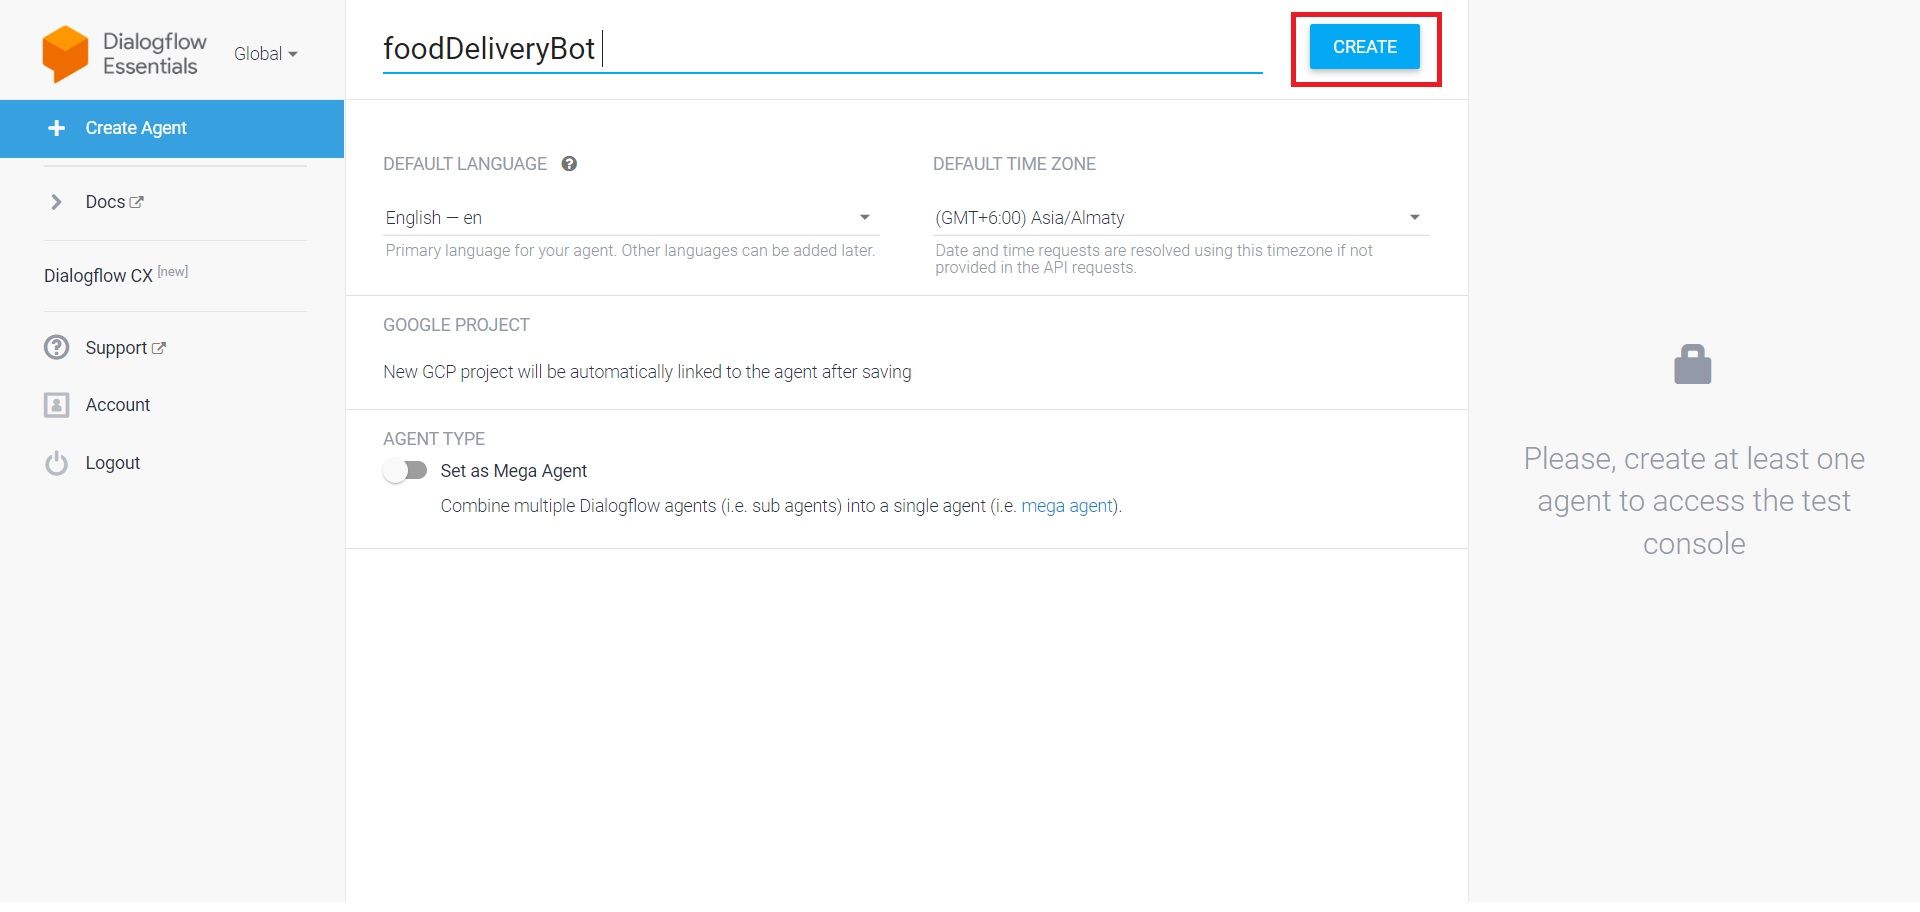
Enter Agent Name and click on the Create button. Note, you cannot use whitespaces for naming your agent.
-
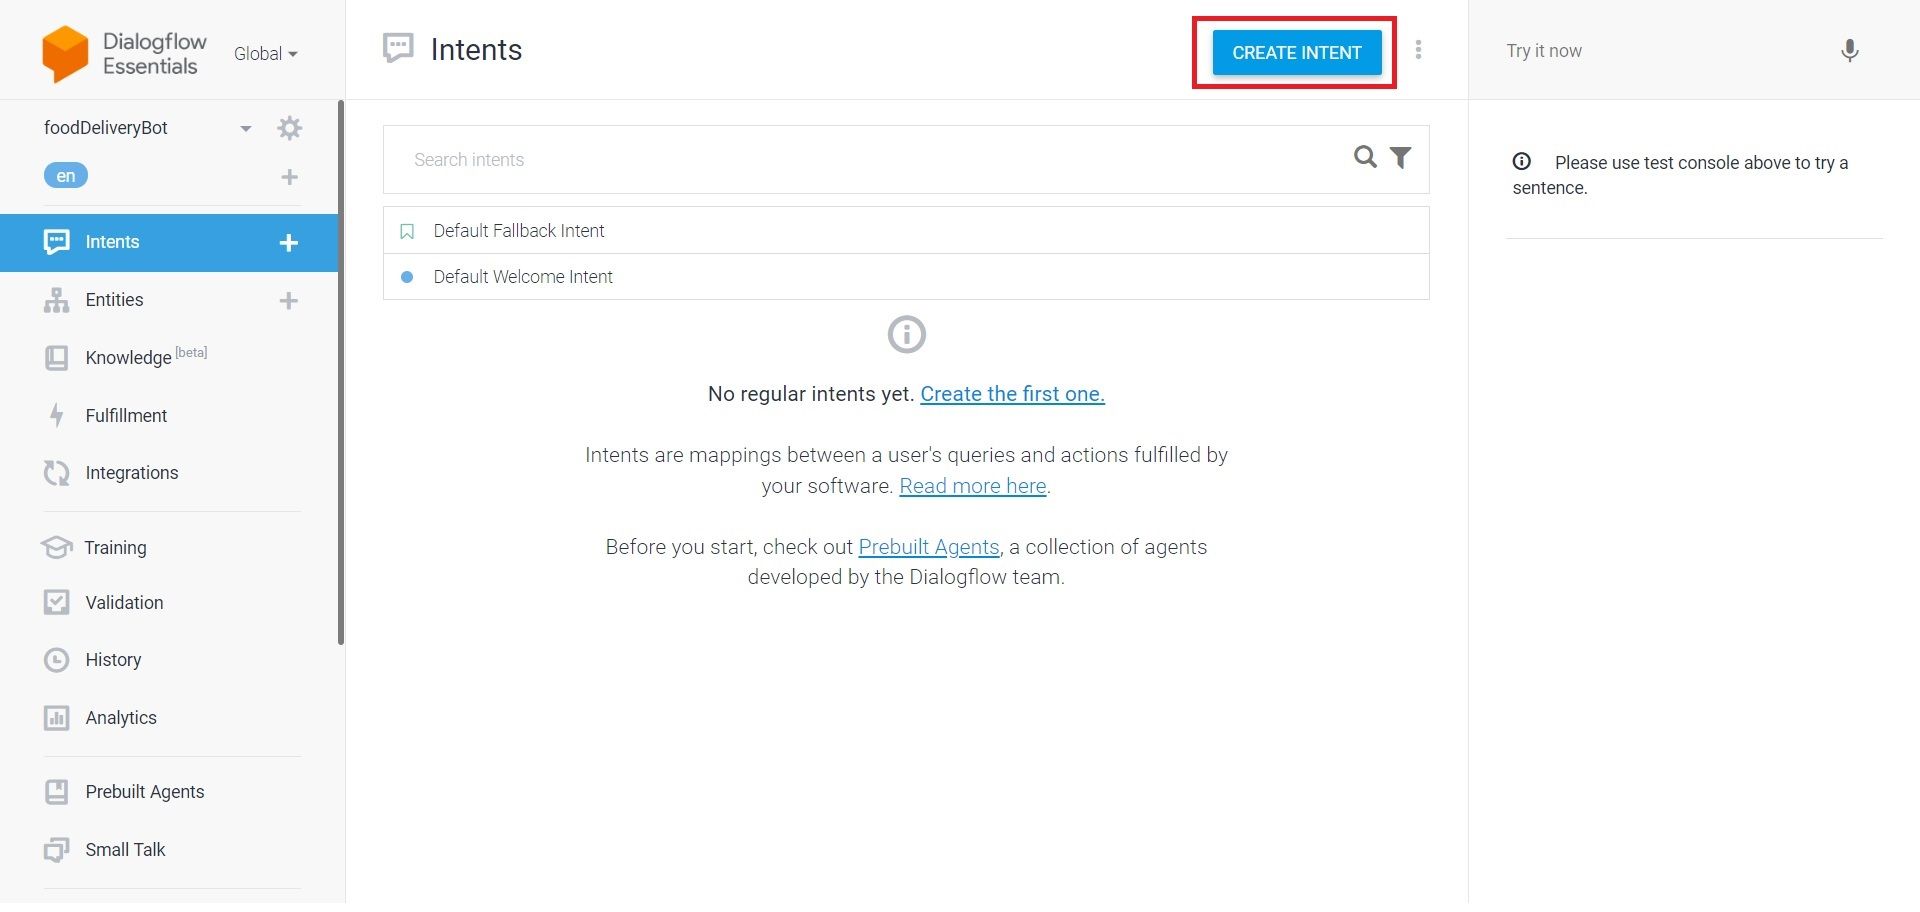
Click on Intents in the left menu panel and click on Create Intent. Intents are categories of conversation you want the chatbot to perform. By default, Google Dialogflow includes Welcome intent that greets the user and leads the conversation. Similarly, you will create an intent that asks for your personal details, and the Pizza you want, and order it.
-
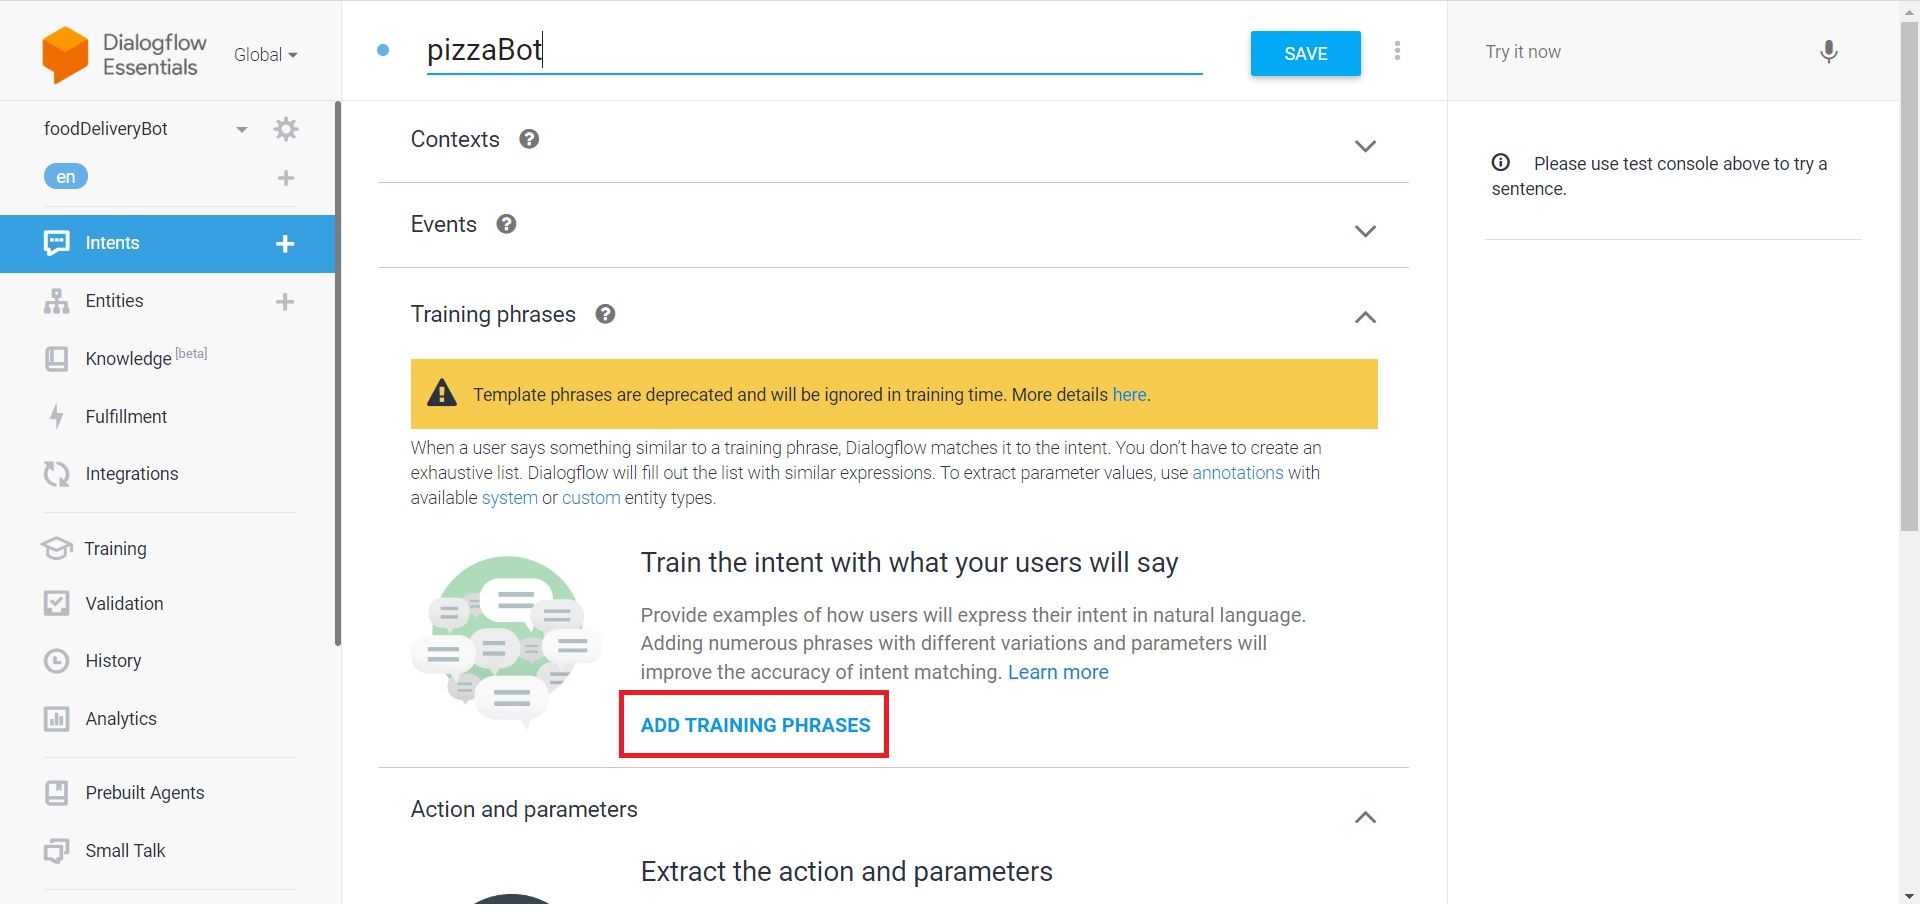
Add an Intent name and click on Add Training Phrases. There is no one perfect way of conversation. Training phrases help to train the chatbot on various real-life examples and reply accordingly.
-
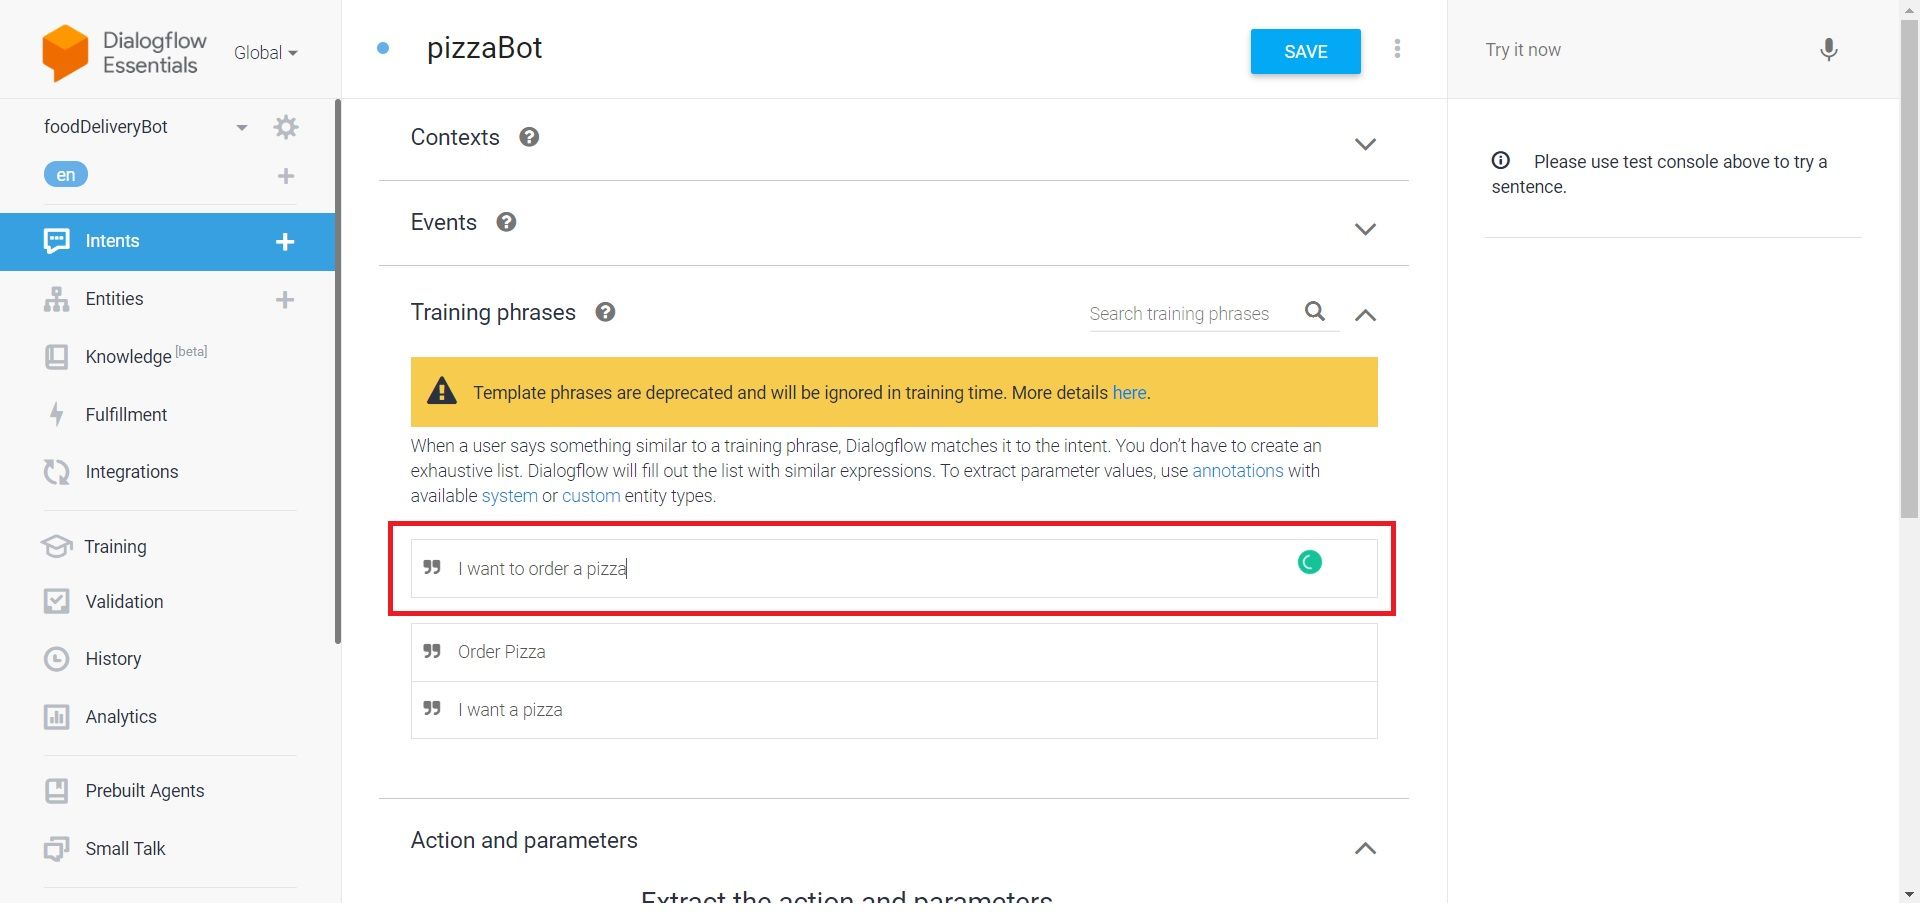
Add some training phrases that the customer might ask the chatbot such as, "Order Pizza", "I want a Pizza", and "I want to order a Pizza."
-
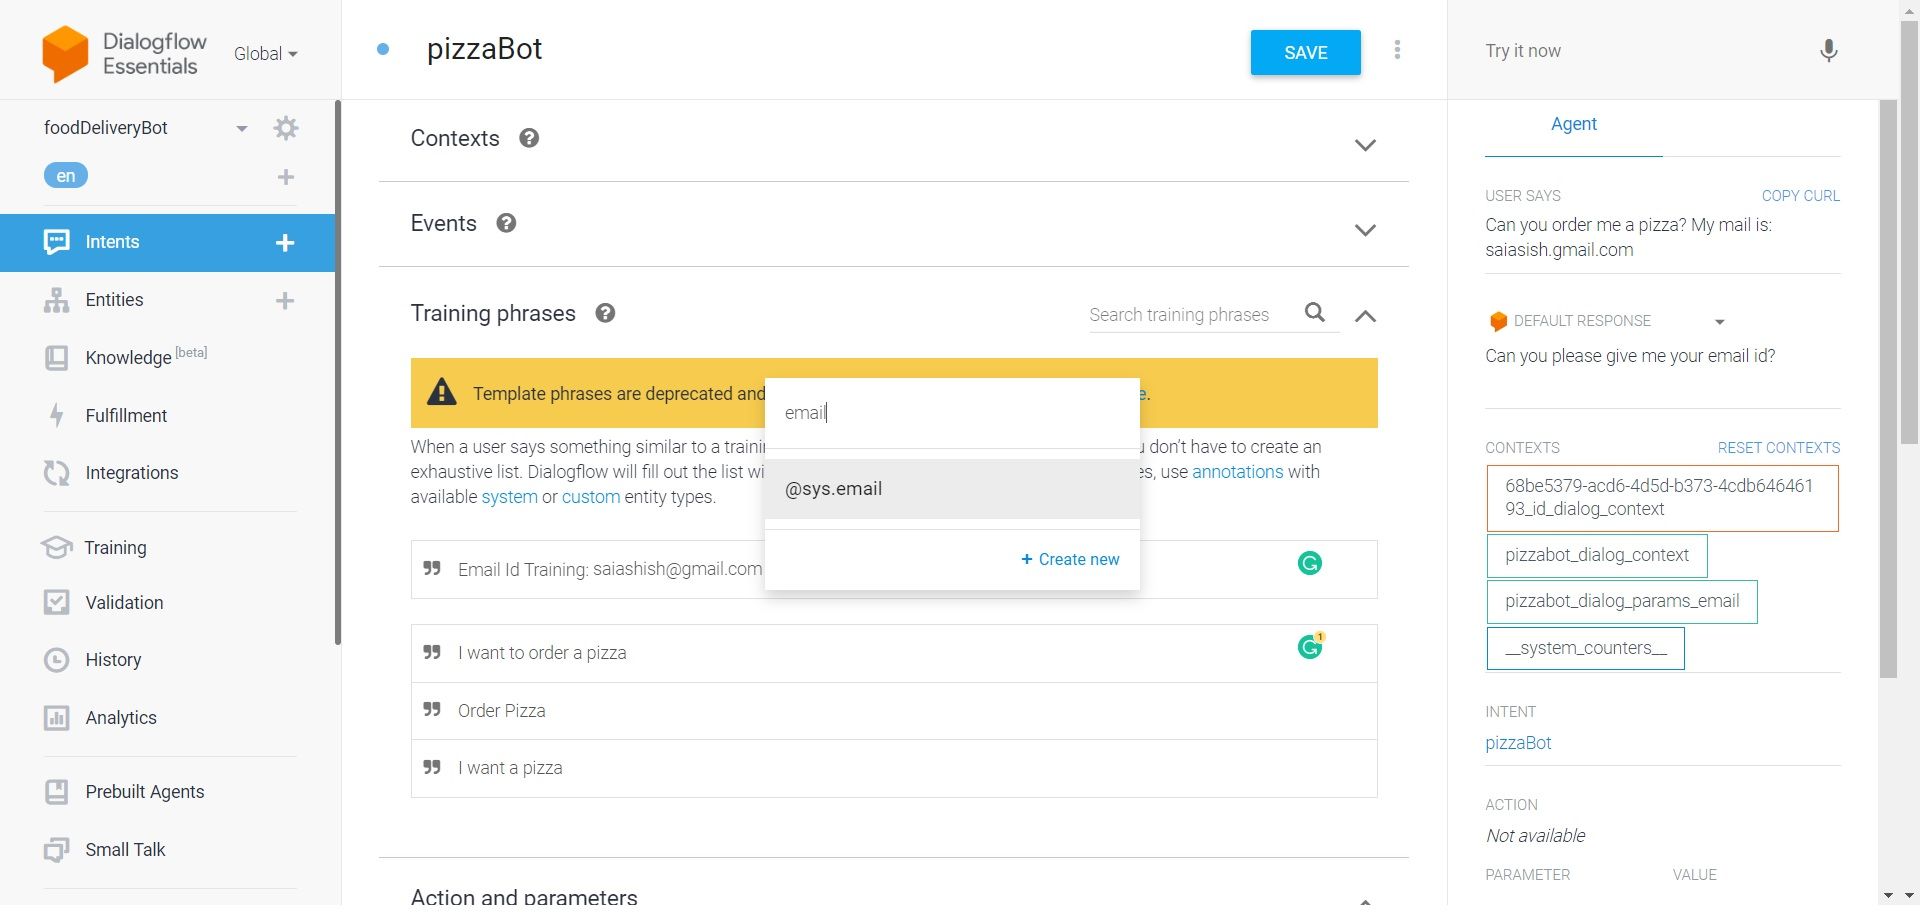
To train the chatbot to ask for emails, type, "Email ID Training: sampleemail@domainname.com" in the Add user expression field. Double-click on the email format. A menu appears. Type email and select @sys.email.
-
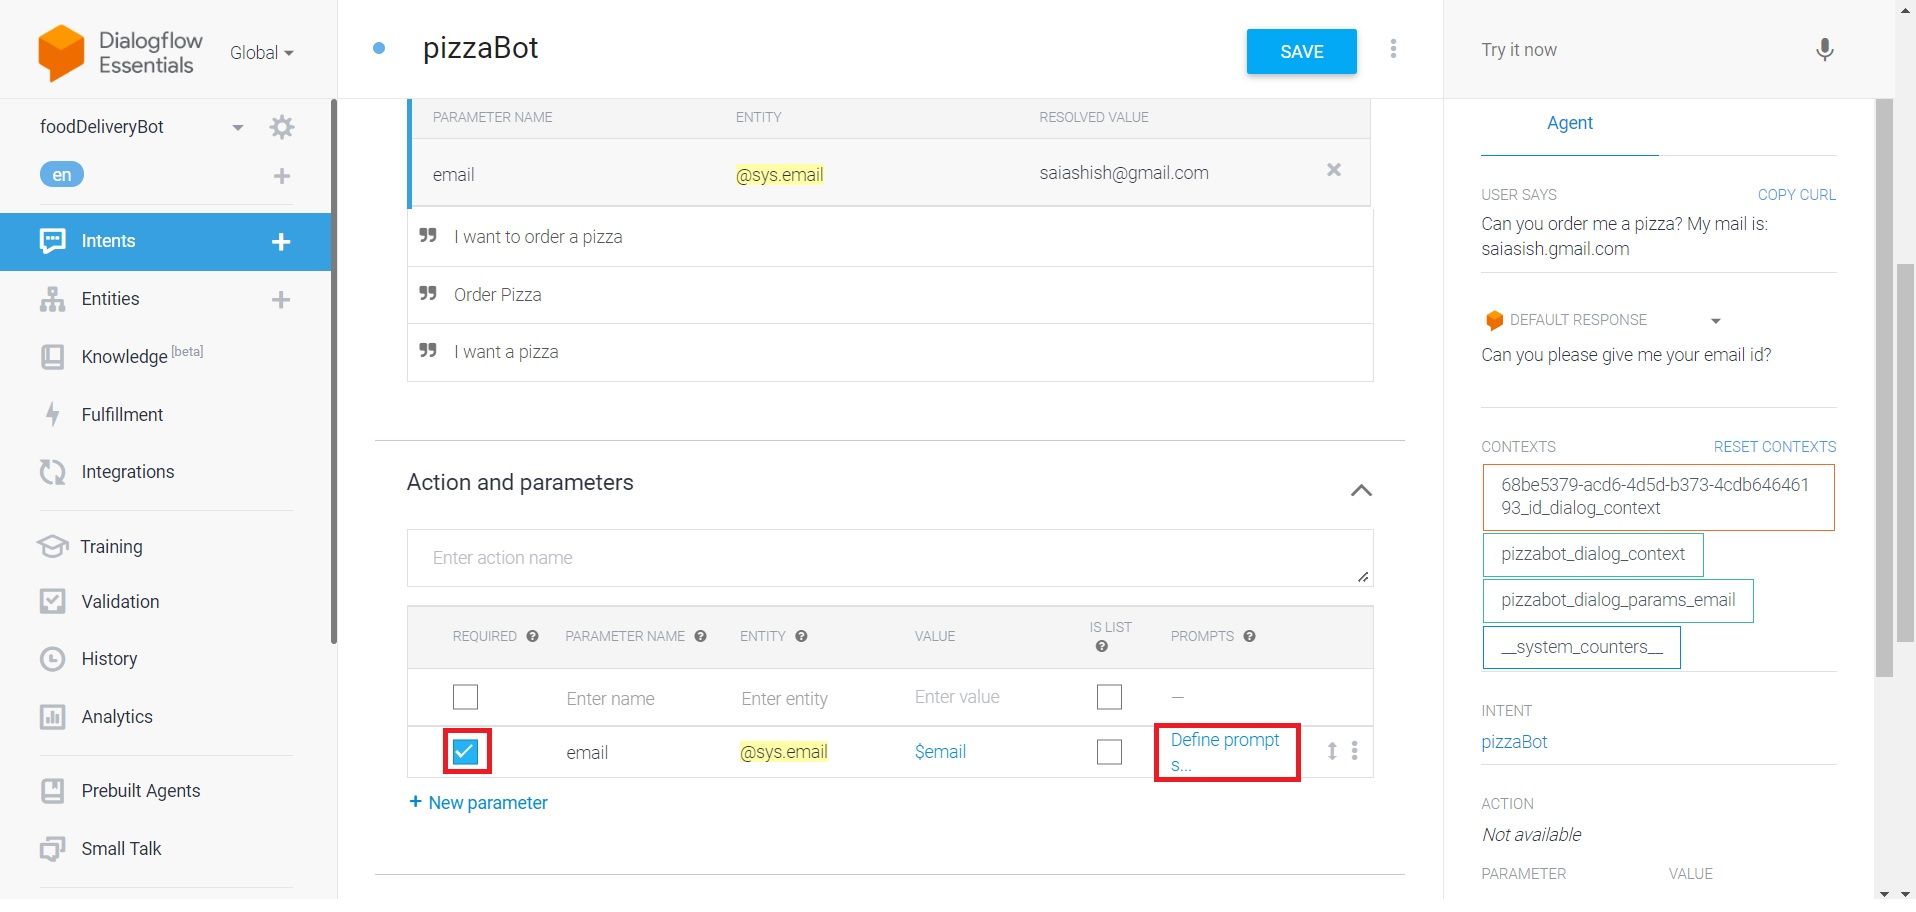
Click on Save. Scroll down and check the box next to the email parameter under the Action and parameters section. Then, click on the Define prompt ... option located on the right.
-
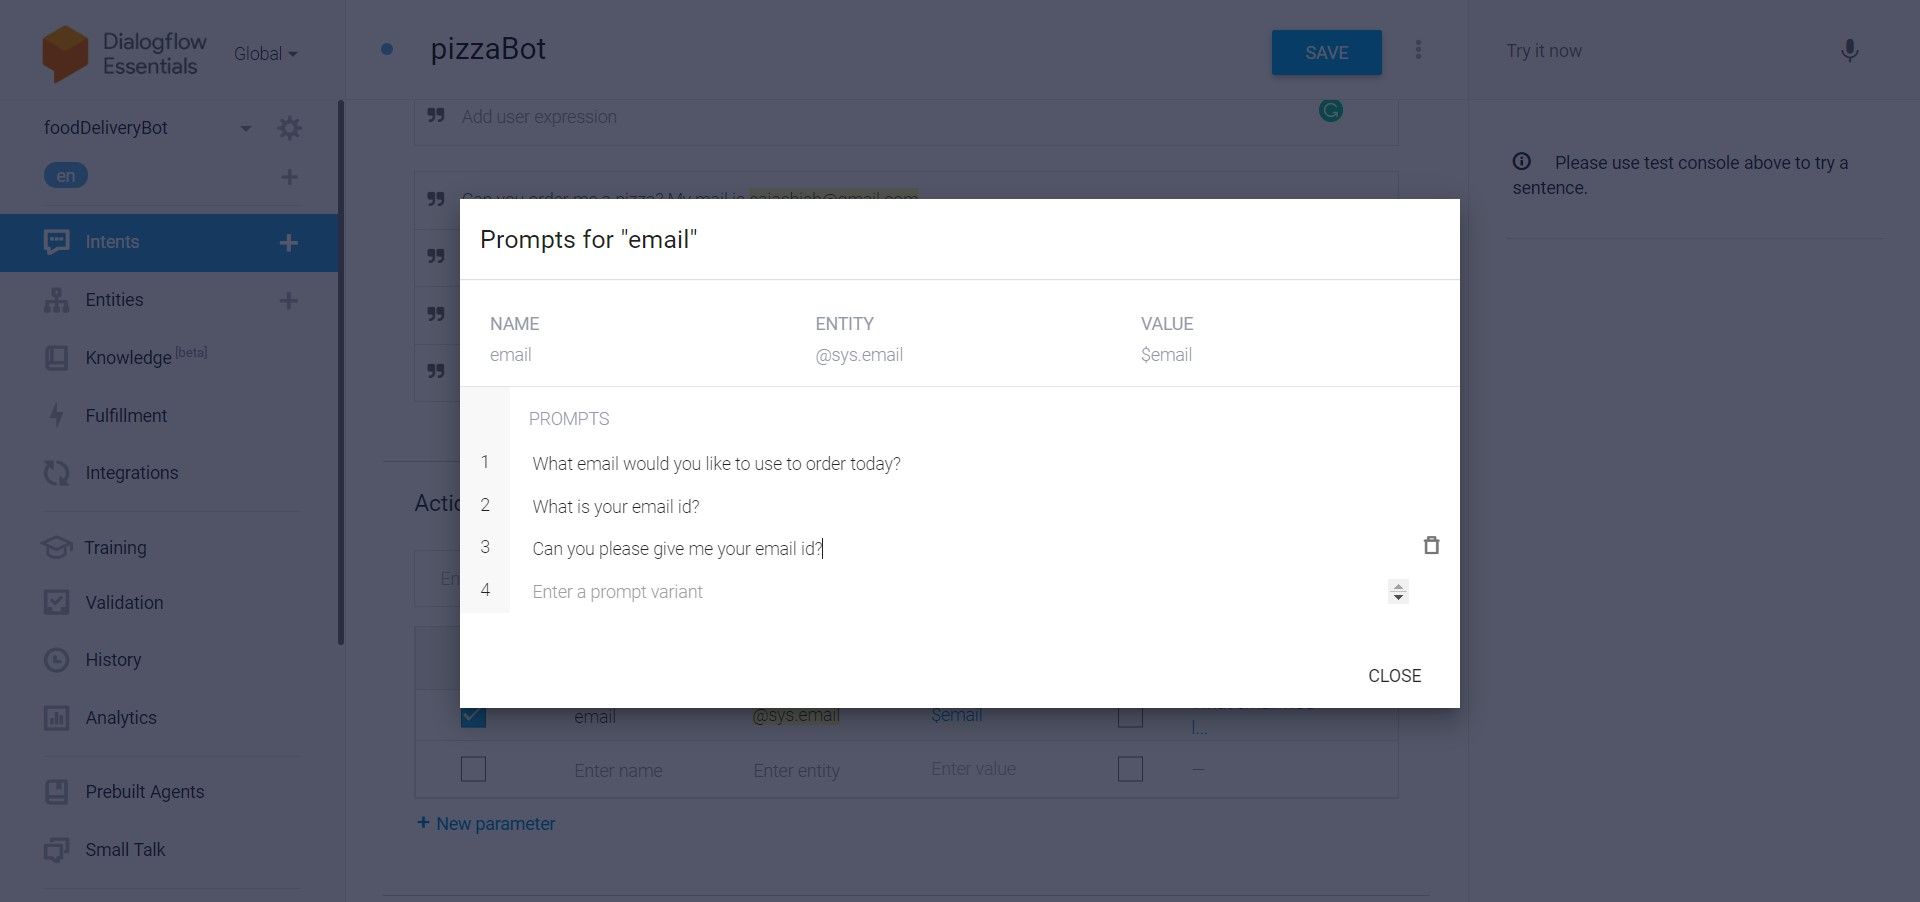
Add the prompts asking for the customer's email.
- Repeat Steps 7-9 to train the chatbot to recognize names, phone numbers, and addresses. Select type as @sys.given-name, @sys.phone-number, and @sys.address for name, phone number, and address respectively.
-
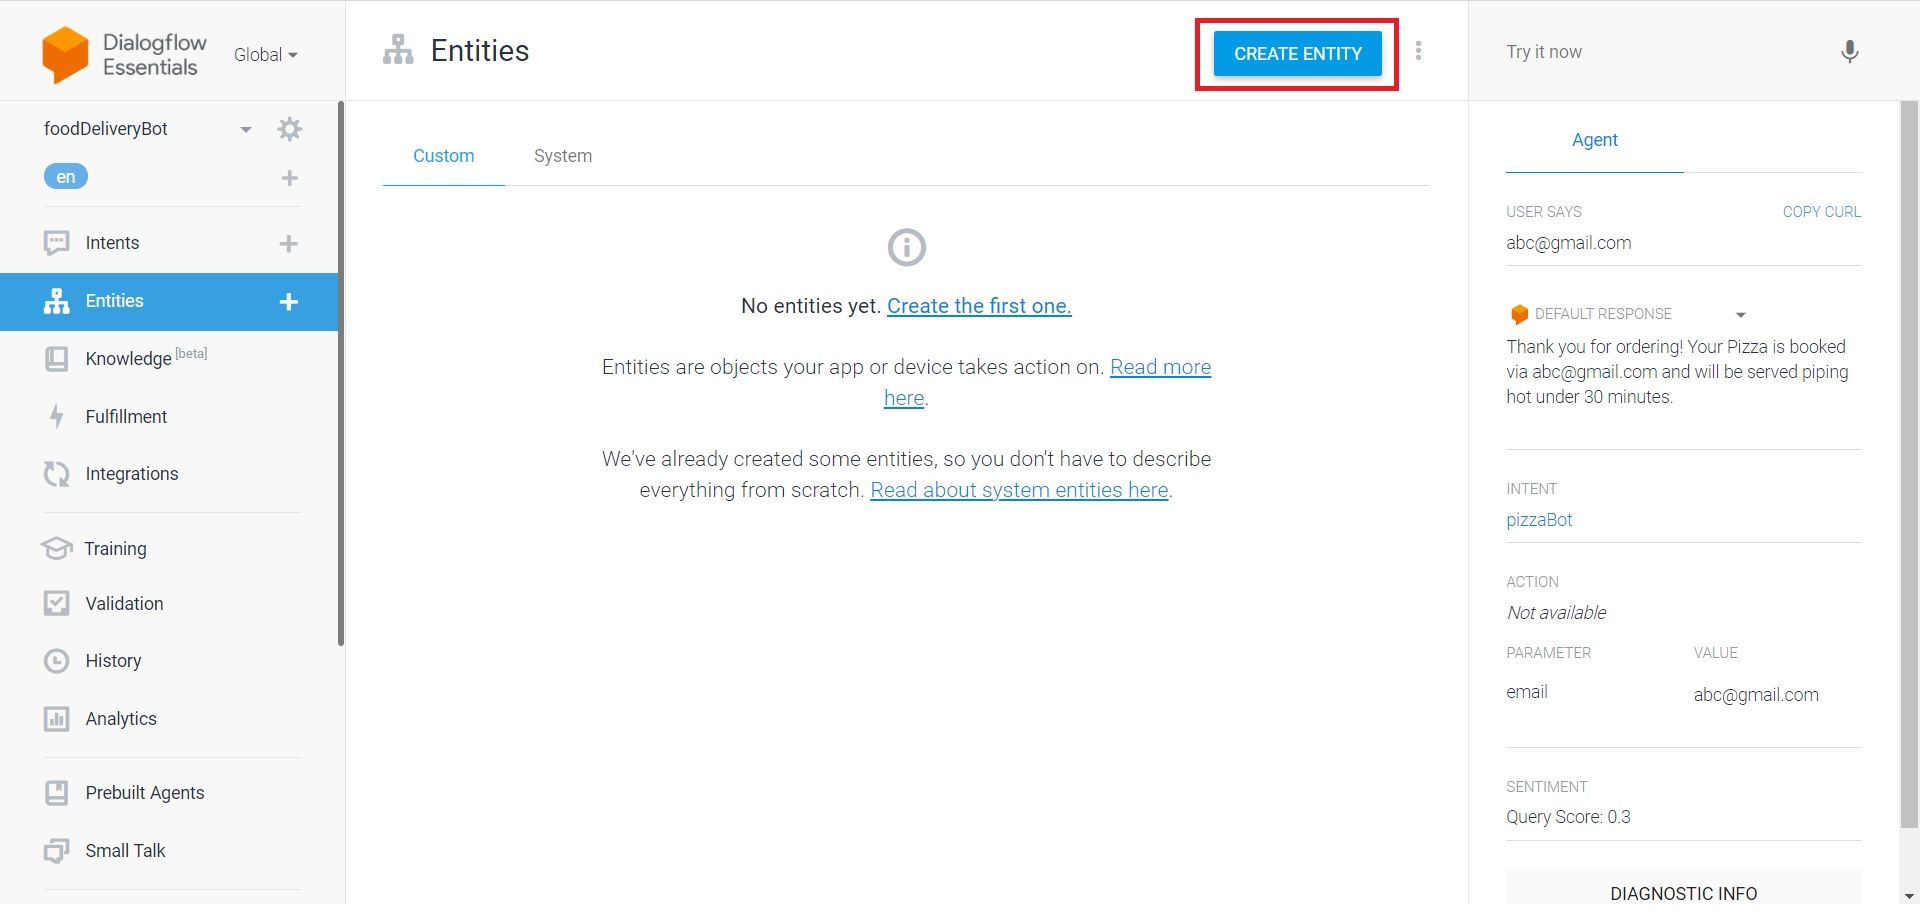
In the left menu panel, select Entity and click on the Create Entity button. Entities are a mechanism that helps to identify and extract useful data from human conversation.
-
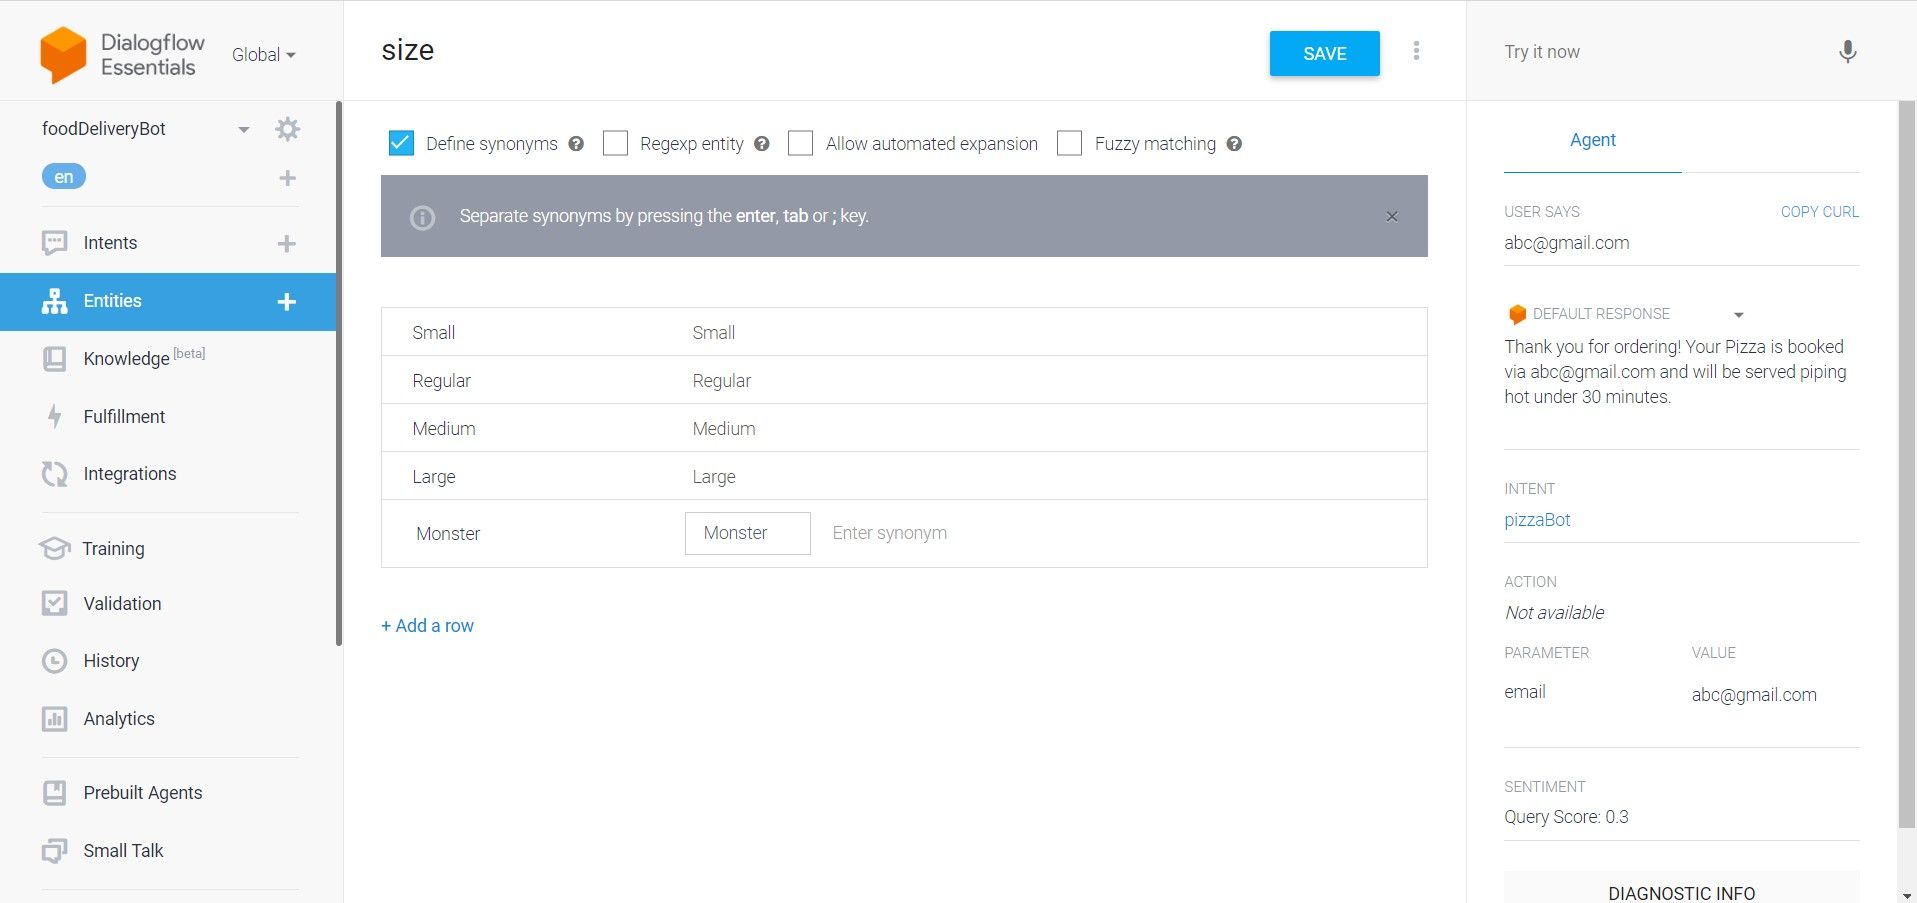
Enter an Entity name and add the options you want to give the user one by one. For example, create an Entity called Size and add options as Regular, Small, Medium, Large, and Monster. Click on Save. Repeat this step to create the Topping entity, the Base entity, and any other customization you want to offer.
-
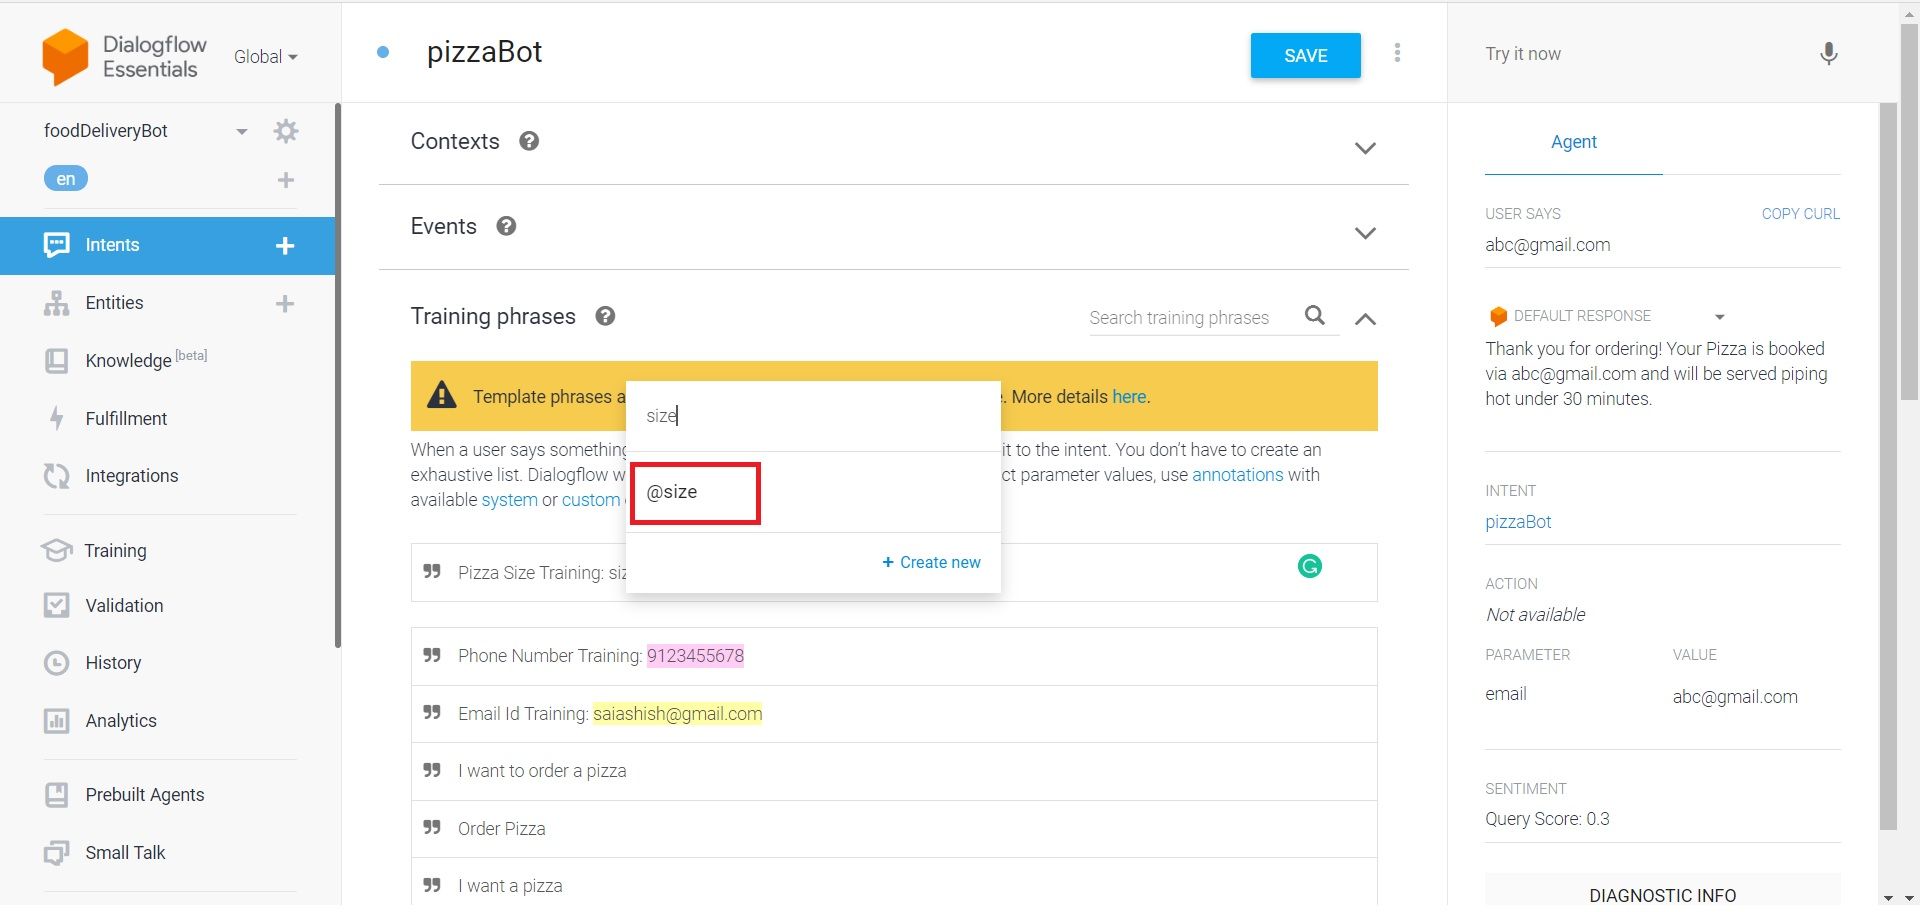
Go back to Intents and add training phrases for the entities created in Step 12. For example, to train the chatbot to ask for pizza size, type, "Pizza Size Training: size" and double-click on size. Select @size type. Similarly, repeat this for the base, and topping as well.
- Select all the checkboxes and add prompts for all the sections. You can sort the question order of the chatbot by clicking and dragging the double-sided arrow on the rightmost side of every field.
-
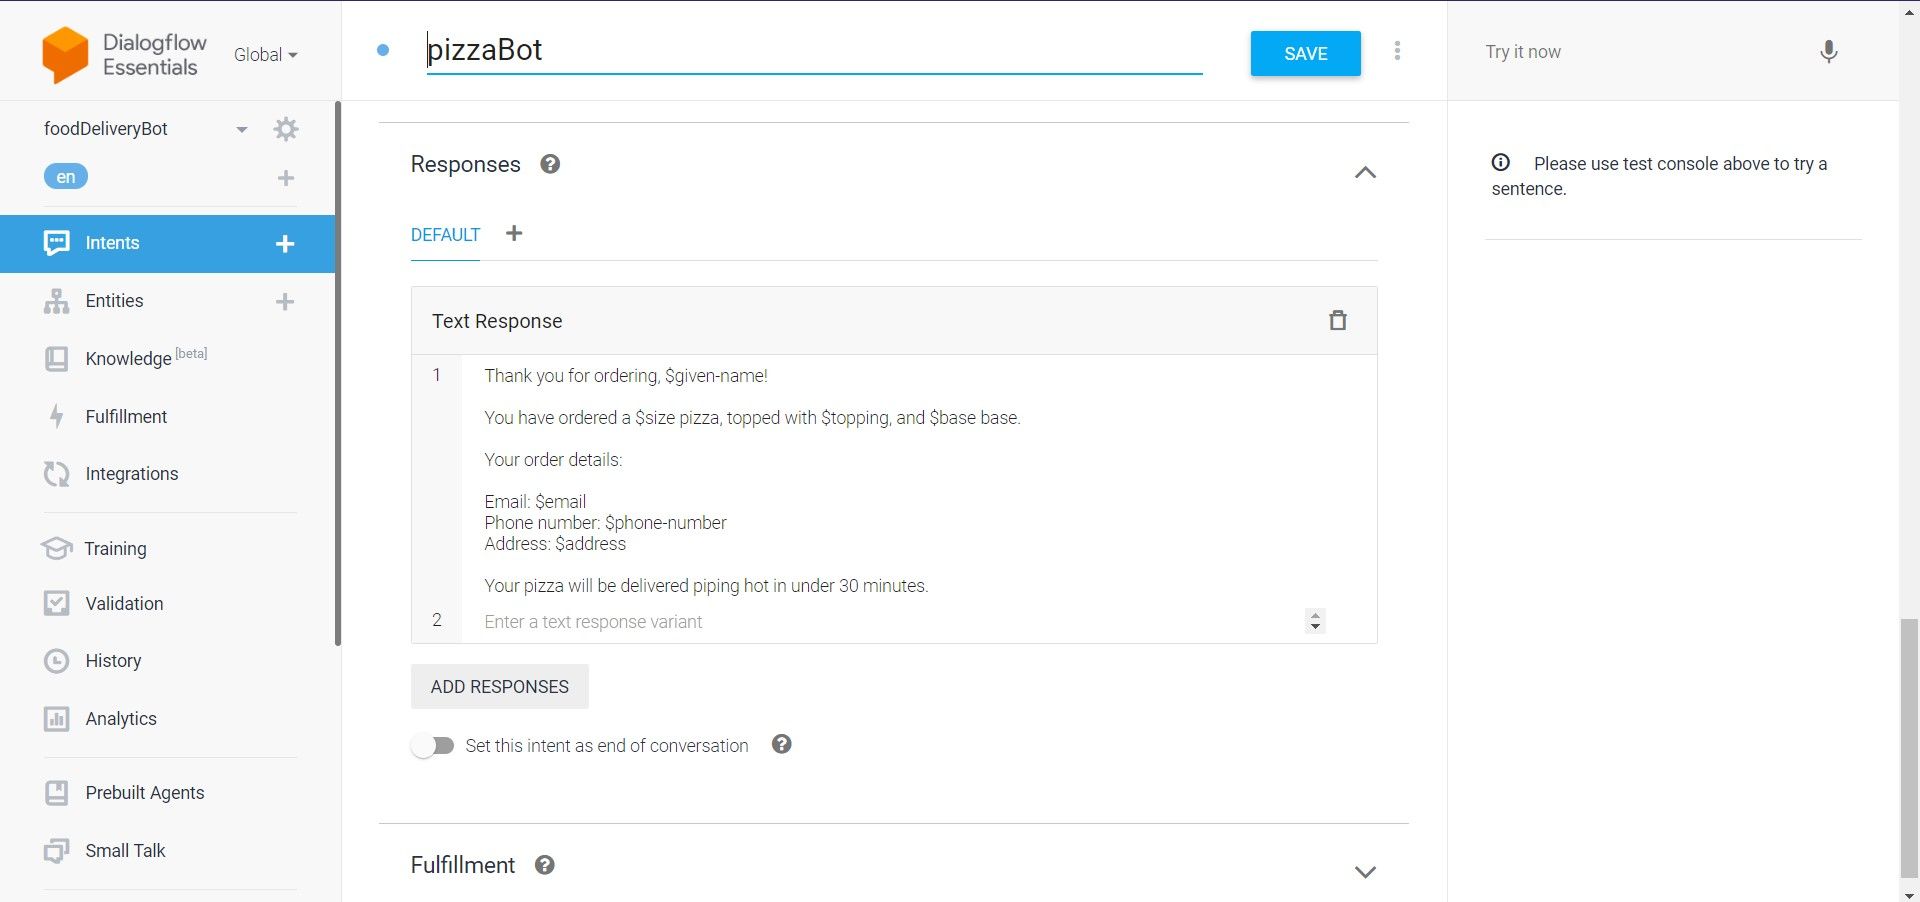
Scroll down and enter a text response under the Responses section of the Intents page. Use the dollar symbol $ to insert entities. This will act as the Order Confirmation for this project.
-
Click on the Setting (⚙) icon right to the agent name. Update the description and enter the URL of an image to act as the profile picture for your chatbot. Optionally, you can update the name to the name of the business you want the chatbot to appear on the site. Click on Save.


The chatbot is now ready for integration.
The complete chatbot is available as a zip file in this GitHub repository that you can import into Google Dialogflow and use. To import, click on the Settings icon next to the Agent name and select Import from Zip option under the Export and Import tab.
How to Integrate Google Dialogflow Chatbot With Your Website
Follow these steps to integrate the Google Dialogflow chatbot with your website:
-
Click on Integrations on the left side menu panel. Scroll down and select Dialogflow Messenger under the Text Based section.
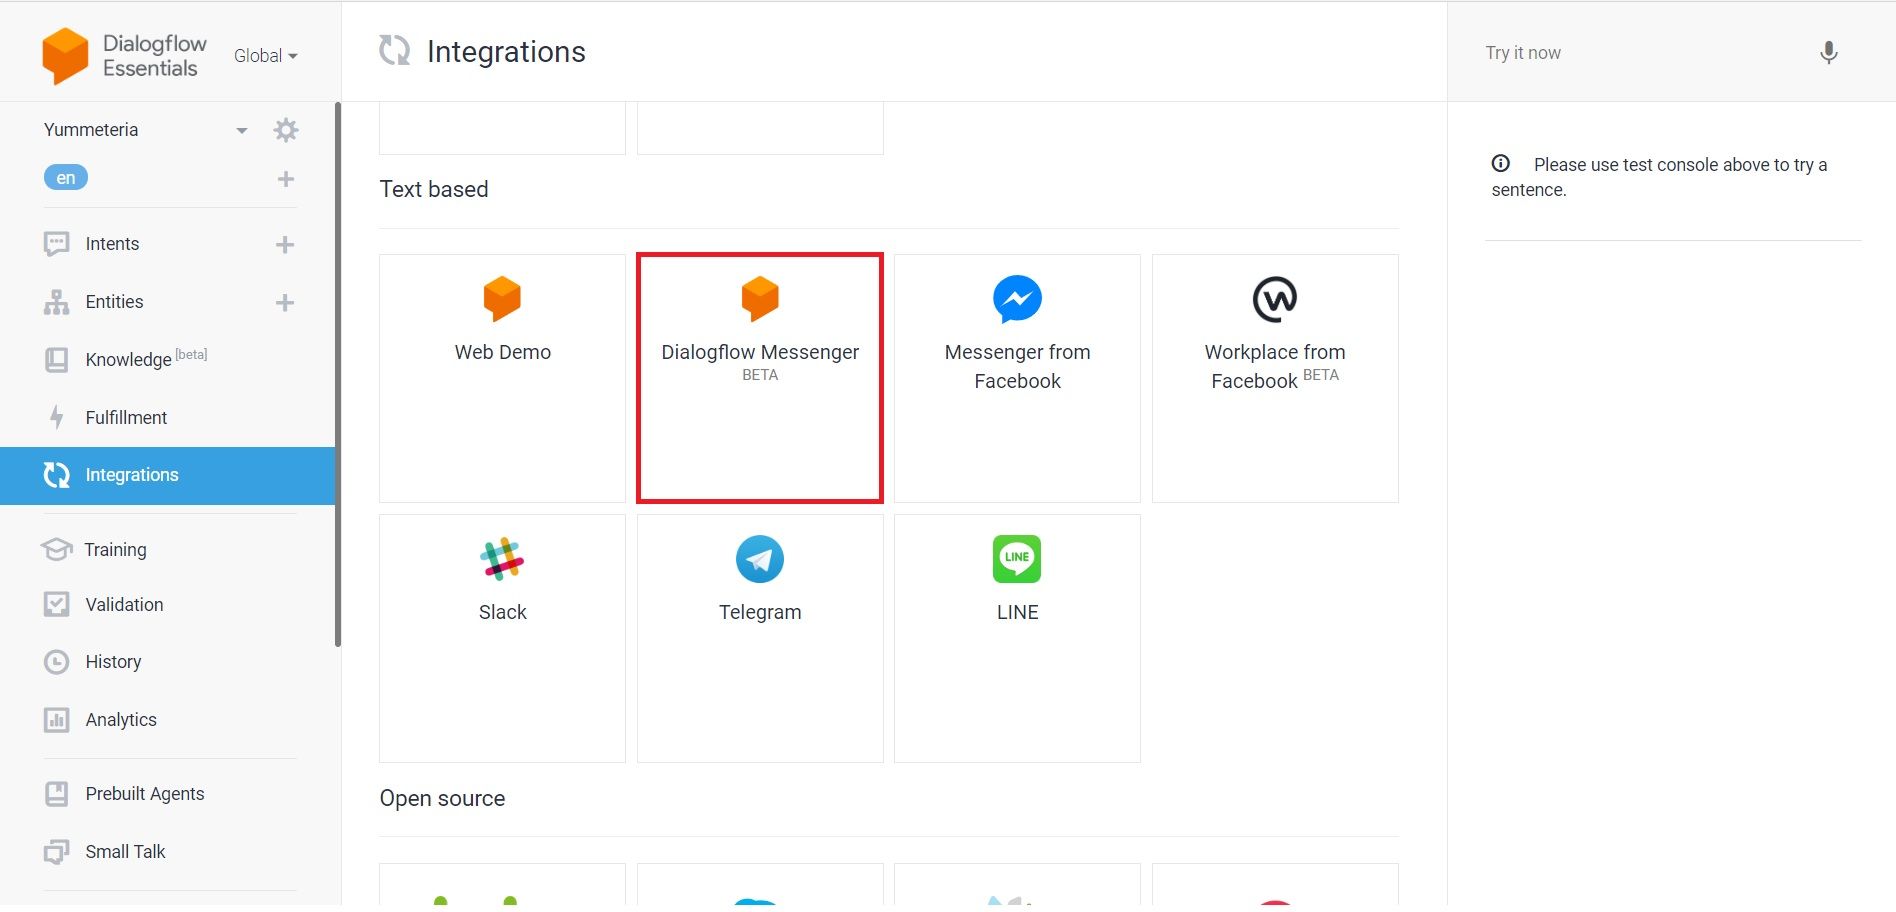
- Click on Enable.
- Copy the code and paste it into the body section of your website.

How to Test and Customize a Chatbot in Your Local Environment
Follow these steps to test the chatbot in your local environment:
-
Create a file named index.html and paste the code below.
        <html>
<head>
    <meta name="viewport" content="width-device-width, initial-scale=1">
</head>
<body>
<!-- Paste the script copied from the Dialogflow messenger page below  -->

</body>
</html> -
Start a local server. You can explore these tools to start a local web development server. Python is one of the easiest methods to set up. Open your terminal in the same path your HTML file resides and type:
python3 -m http.server 9000Click on it to interact and order your favorite Pizza!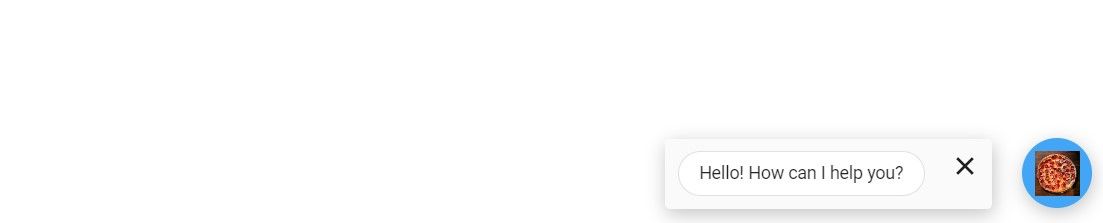
-
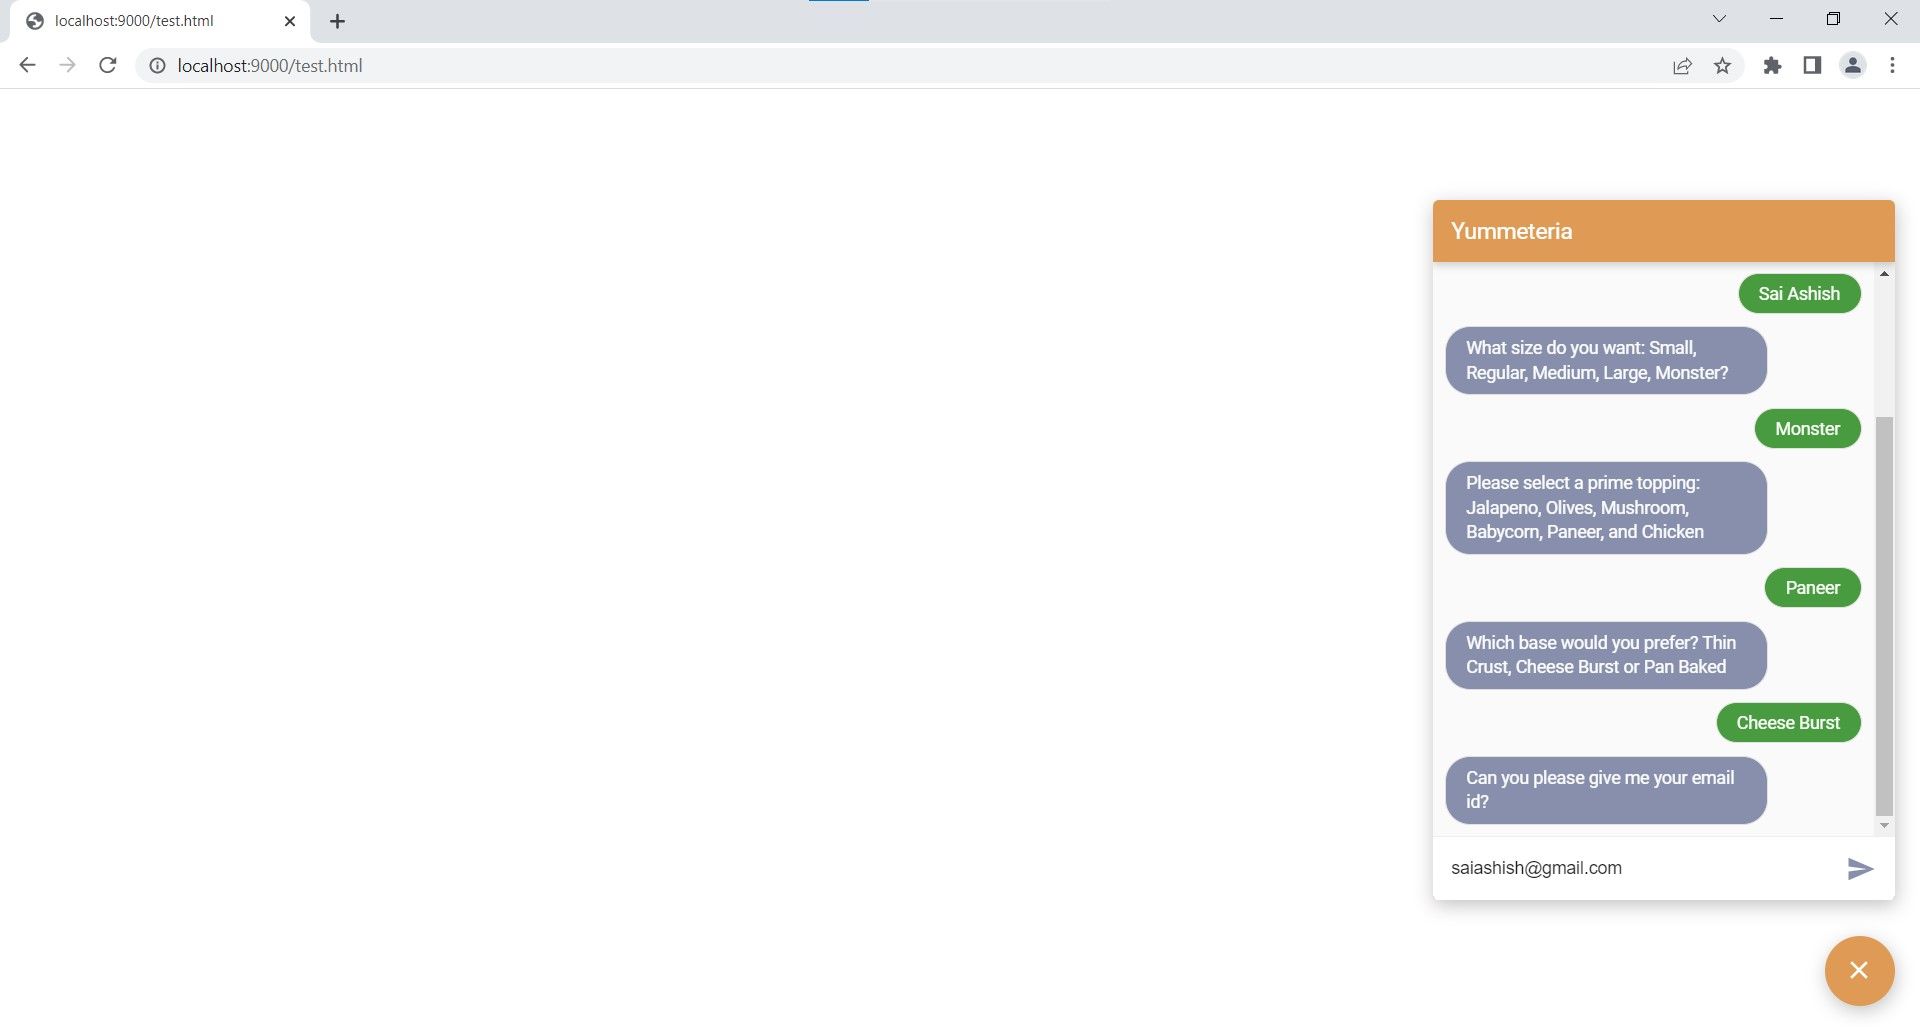
You can customize the font color, background color, bubble color, and more. Visit the Dialogflow Messenger guide and scroll down to find an entire list of CSS customizations. You can use these properties and paste them into the Head section of the HTML page. This is how the chatbot looks after a few customizations.


Chatbots Have Many Varied Applications
Chatbots are a fascinating way to simulate conversations, automate processes, and save money. Top companies and websites such as Naukri.com, Vedantu, Zomato, and Spotify use chatbots to enhance the user's experience.
Today, chatbots find applications in fields from customer service and hotel reservations to food billing processes, tracking menstrual cycles, and much more.