Chatbots are becoming an increasingly vital tool for businesses in the modern age. With the right tools and know-how, companies create chat agents that can have real conversations with customers.
Google Dialogflow ES is one of the market's most powerful—and free—chatbot-building tools. But how can you unleash its full potential?
Step 1: Create Your Dialogflow ES Agent
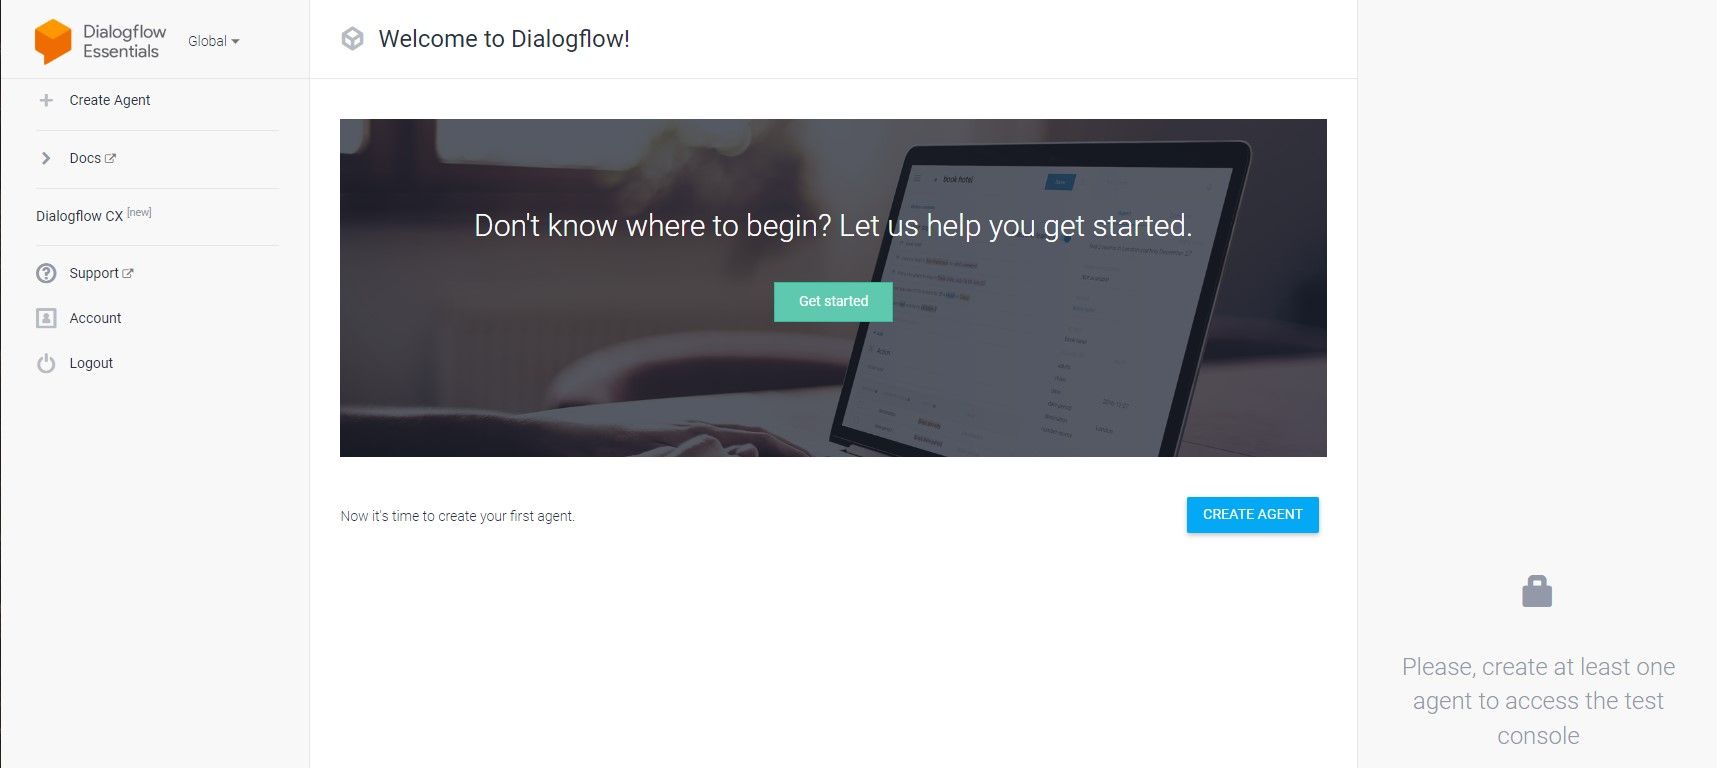
Creating your own Dialogflow ES agent is the first step in this process. Any Google account works, and you start by navigating to the Google Dialogflow ES website. Click on Create Agent once you have logged in and fill out the details in the form before clicking Create. You can use Dialogflow to create a chatbot for entertainment, automation, or customer service. This project covers the latter.
Step 2: Add Dialogflow Follow-Up Intents
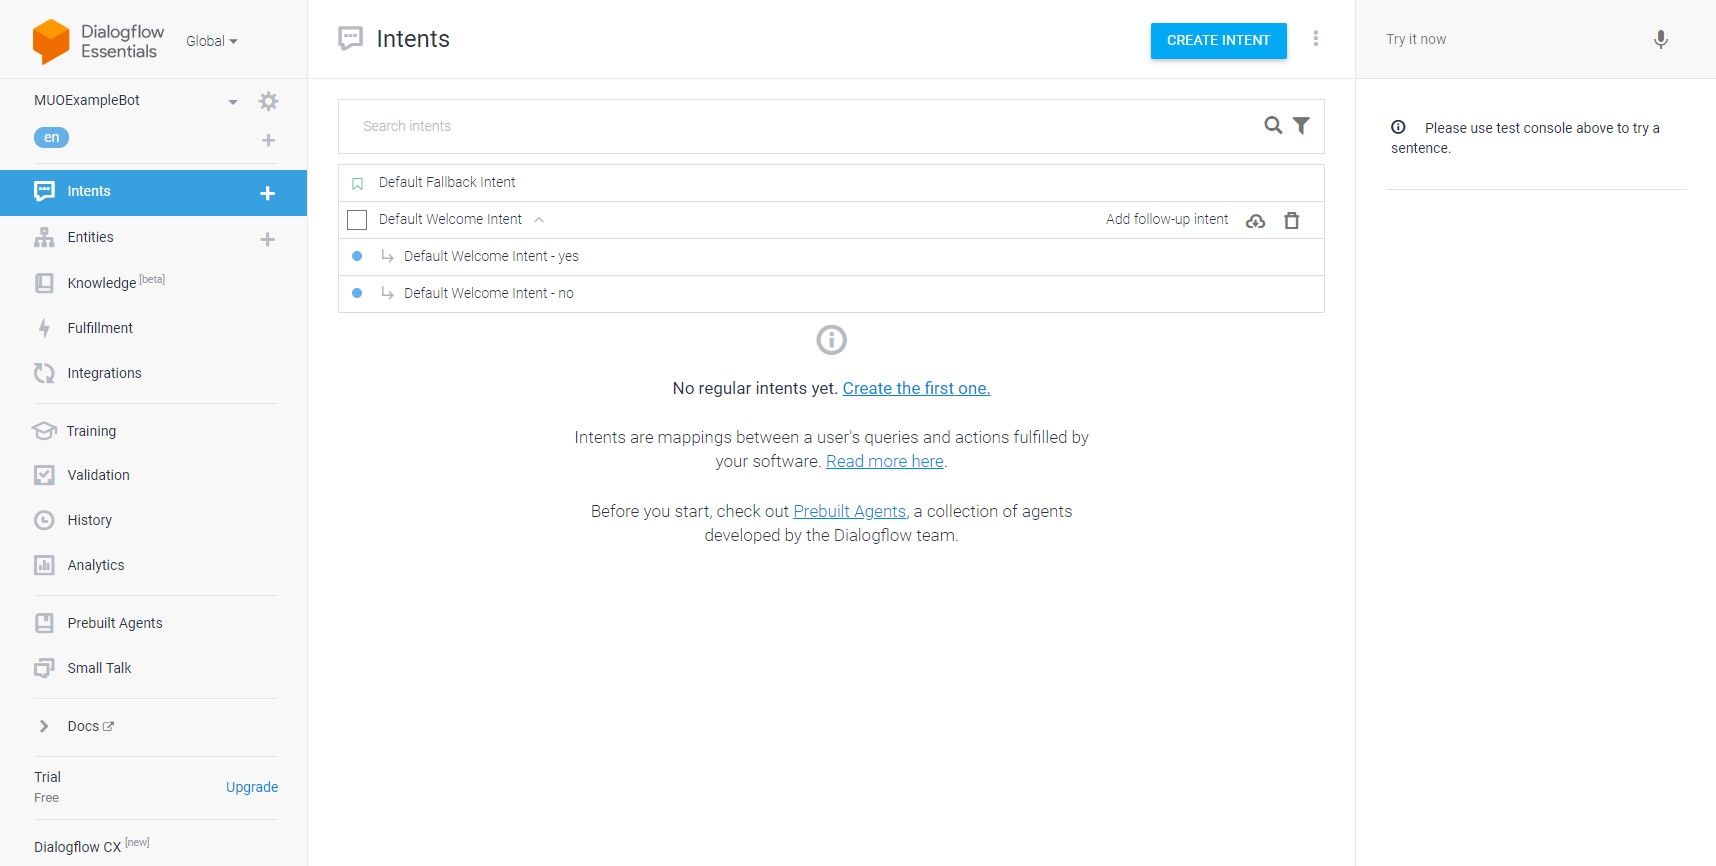
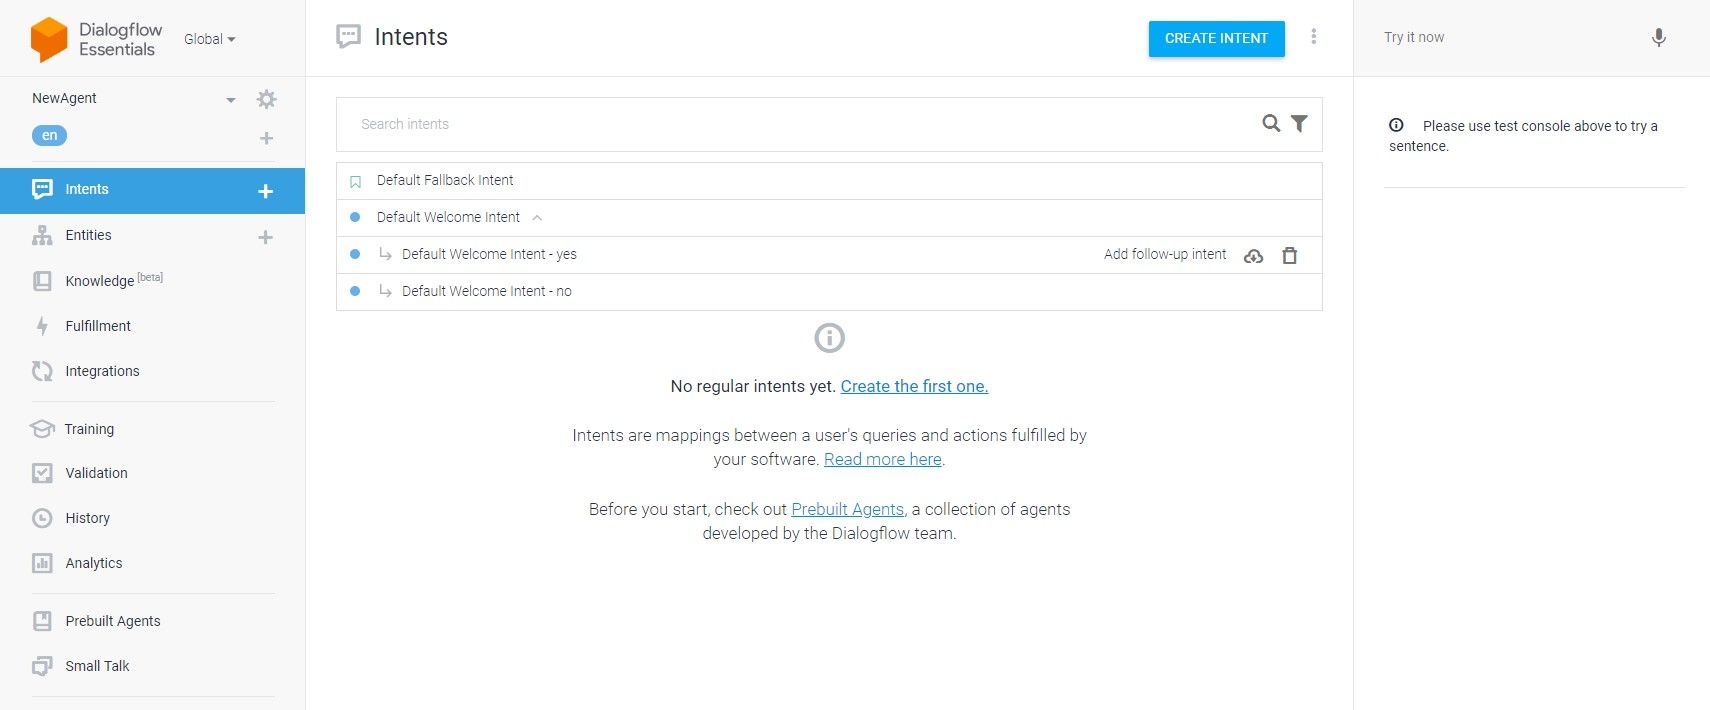
The new agent only has a Default Welcome Intent and a Default Fallback Intent. An intent is a fragment or stage in a conversation.
You need to add two follow-up intents to the existing Default Welcome Intent to get started. Hover over the Default Welcome Intent, click on Add follow-up intent, and pick Yes from the drop-down menu. Repeat the process by selecting No from the drop-down menu to create the second follow-up intent.
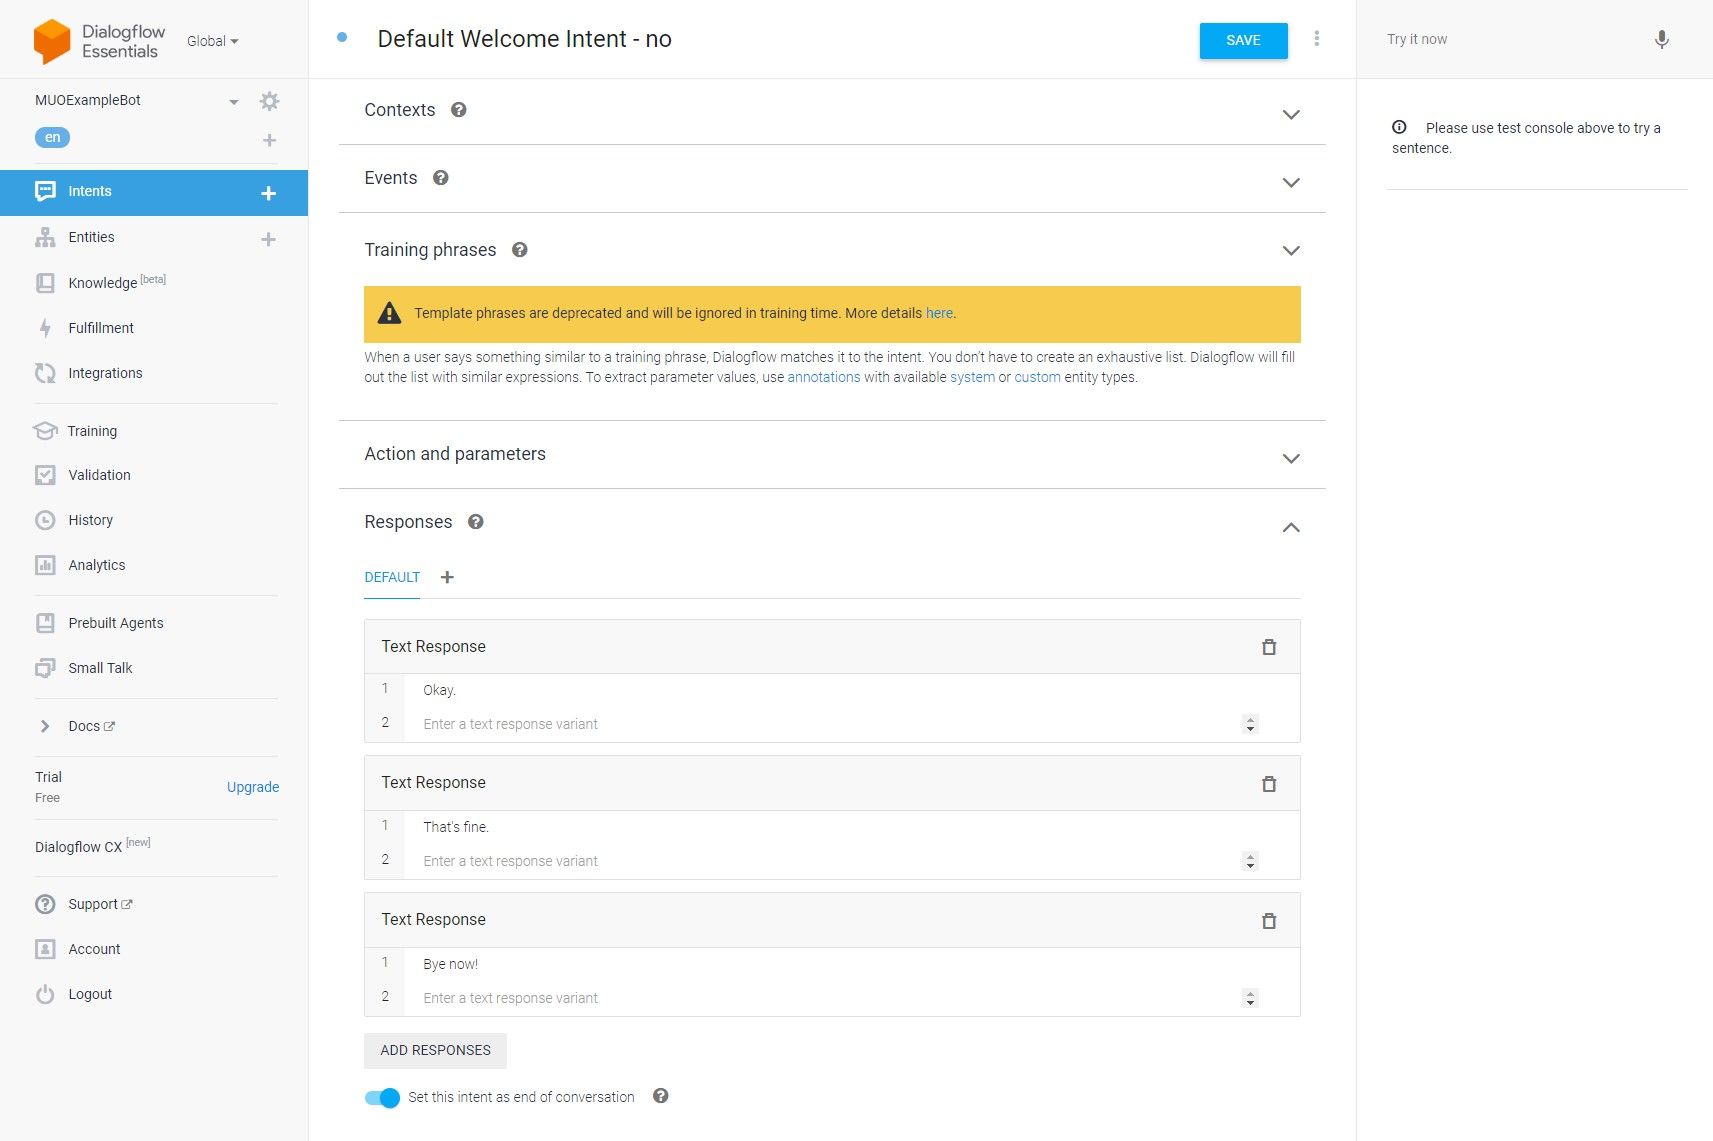
The No follow-up intent will end the conversation and say goodbye to the user. Open the No follow-up intent and add a series of text responses to end the conversation. Activate the Set this intent as the end of conversation slider.
Go back to the main Intents screen and click on the Yes follow-up intent to open it.
Step 3: Build a Rich Dialogflow Response List With JSON
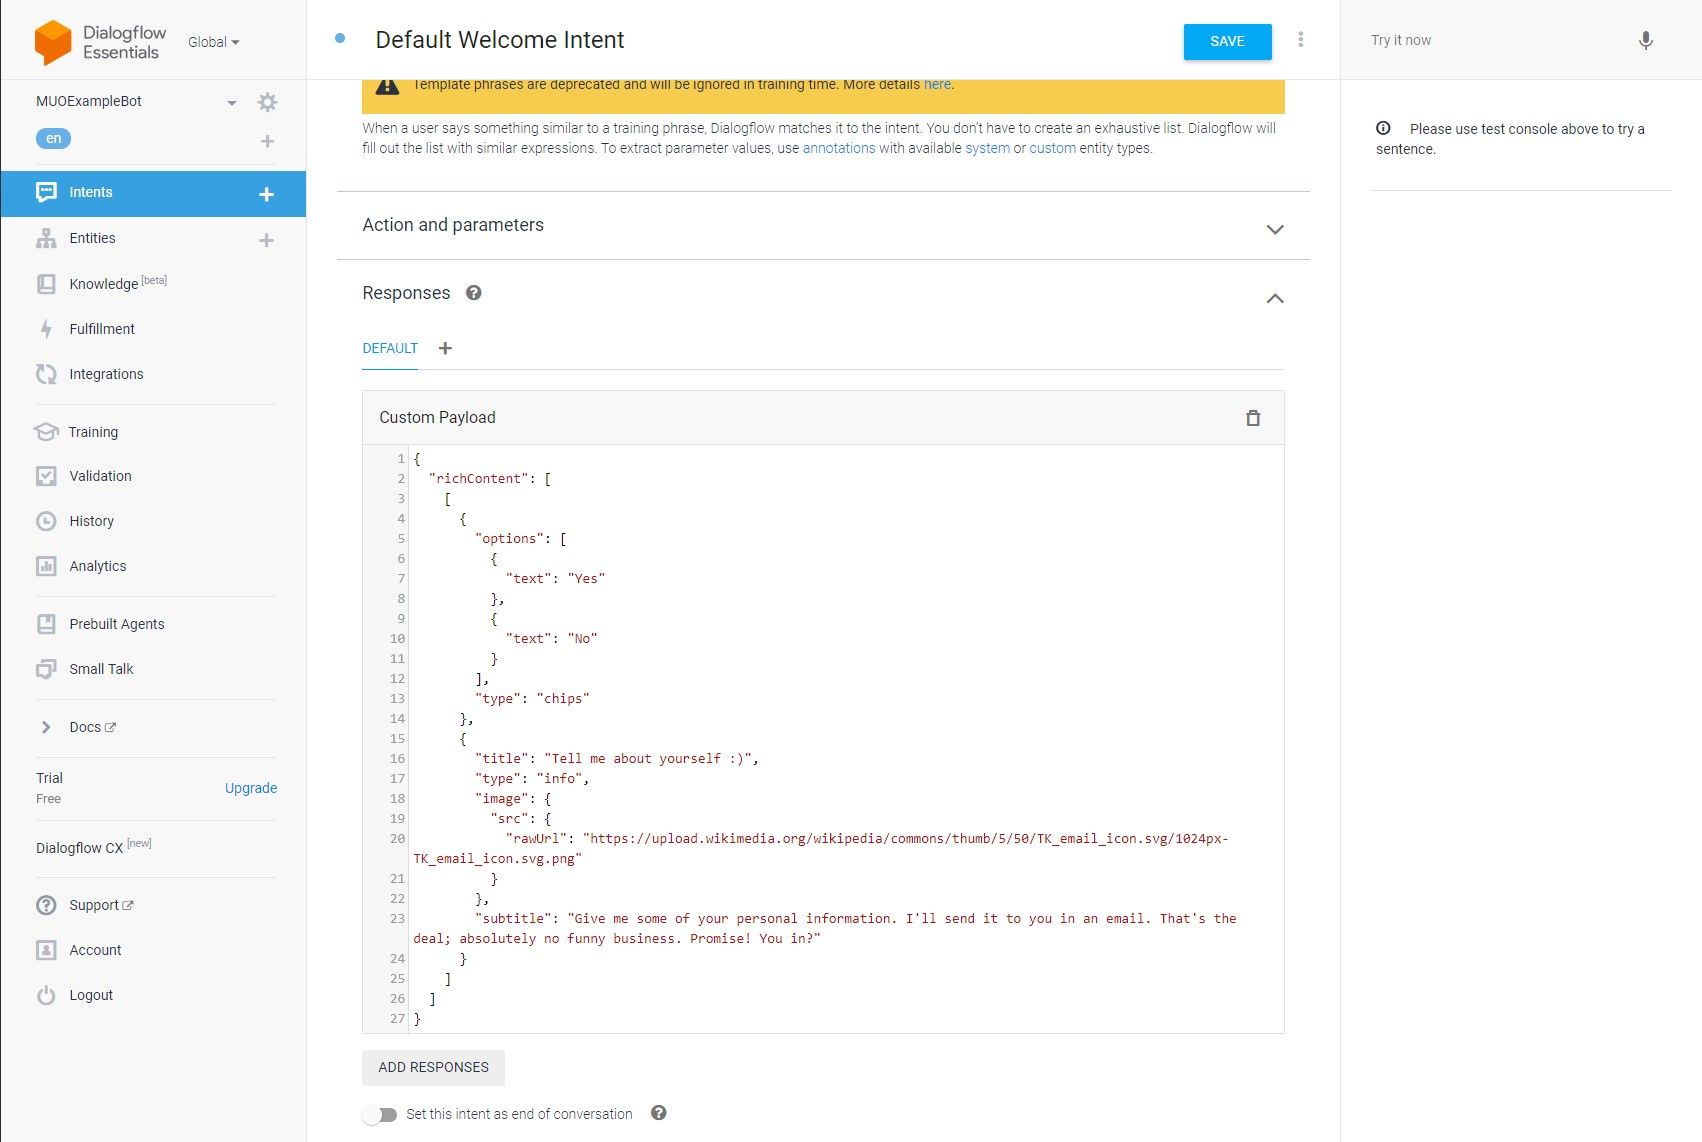
Now you have these intents set up, it’s time to pose the user a question so that they can get to them. Open the Default Welcome Intent and Delete the responses it generated with. Click Add Responses and select Custom Payload from the menu.
The JSON code below adds two different types of rich responses; info and chips.
        {
   "richContent": [
       [
           {
               "type": "chips",
               "options": [
                   {
                       "text": "Yes"
                   },
                   {
                       "text": "No"
                   }
               ]
           },
           {
               "image": {
                   "src": {
                       "rawUrl": "https://upload.wikimedia.org/wikipedia/commons/thumb/5/50/TK_email_icon.svg/1024px-TK_email_icon.svg.png"
                   }
               },
               "title": "Tell me about yourself :)",
               "subtitle": "Give me some of your personal information. I'll send it to you in an email. That's the deal; absolutely no funny business. Promise! You in?",
               "type": "info"
           }
       ]
   ]
}
Step 4: Collect the User’s Name as a Dialogflow Parameter
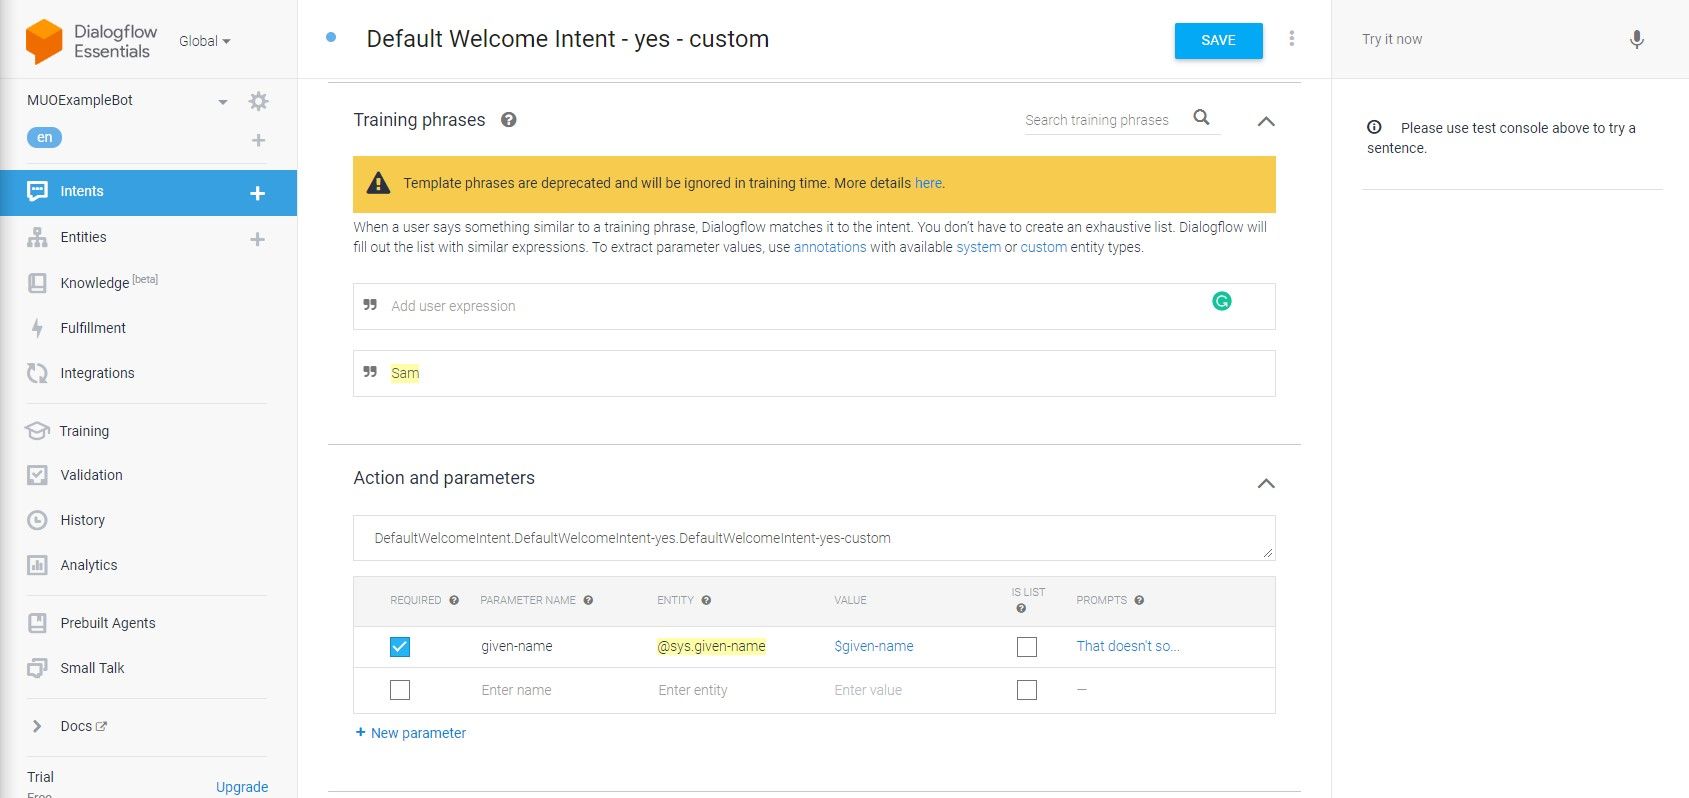
Next, it’s time to add another follow-up intent to collect data from the user. As outlined in Step 2, you should already have a Yes follow-up intent that asks for the user’s name. Hover over the Yes follow-up intent in the main intents menu, click Add follow-up intent, and select Custom from the list.
This will create a new follow-up intent without any training phrases. Go to the Training Phrases section, type a name into the box, and hit Enter to add it as a new phrase. This will trigger the creation of a new parameter with the @sys.person entity type. Click on the @sys.person entity and change it to a @sys.given-name entity.
This will store the user’s input so that the agent can use it. Head to the Responses section and add a response with $given-name inside it. This calls the name parameter you have collected, enabling it to appear in the chat.
Step 5: Use a Dialogflow Custom Payload to Trigger Intents
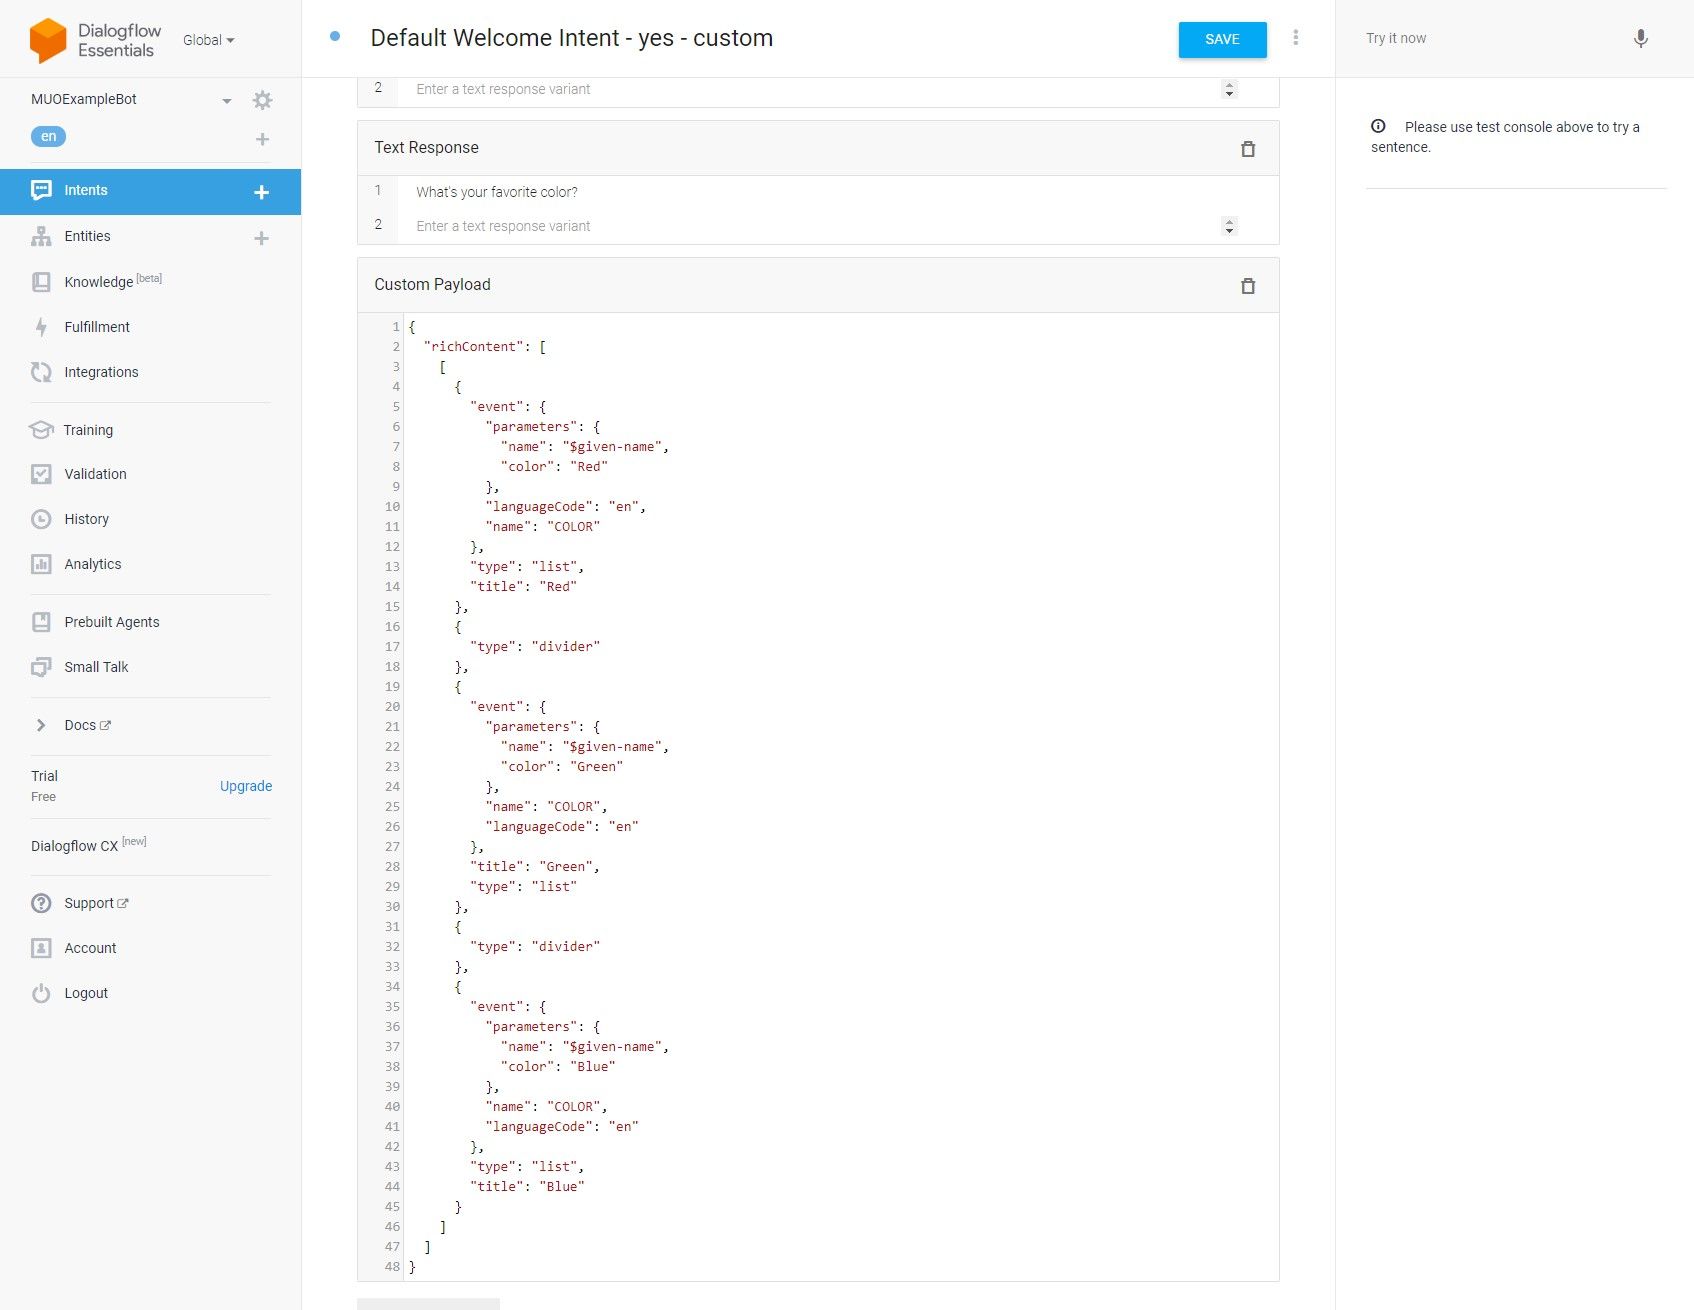
Remaining within the follow-up intent you just added, click on Add Responses and select Custom Payload from the list. Adding the JSON code below to this section will trigger a list rich response asking the user to pick a color.
The most important part of this JSON code is the event section with each entry. When clicked, each list item calls an event called COLOR with the name and color parameters that have been collected so far. Intents can have events assigned to them that will trigger them.
        {
   "richContent": [
       [
           {
               "event": {
                   "languageCode": "en",
                   "parameters": {
                       "name": "$given-name",
                       "color": "Red"
                   },
                   "name": "COLOR"
               },
               "title": "Red",
               "type": "list"
           },
           {
               "type": "divider"
           },
           {
               "event": {
                   "name": "COLOR",
                   "languageCode": "en",
                   "parameters": {
                       "name": "$given-name",
                       "color": "Green"
                   }
               },
               "type": "list",
               "title": "Green"
           },
           {
               "type": "divider"
           },
           {
               "type": "list",
               "title": "Blue",
               "event": {
                   "languageCode": "en",
                   "name": "COLOR",
                   "parameters": {
                       "name": "$given-name",
                       "color": "Blue"
                   }
               }
           }
       ]
   ]
}
Step 6: Move Dialogflow Parameters Between Intents
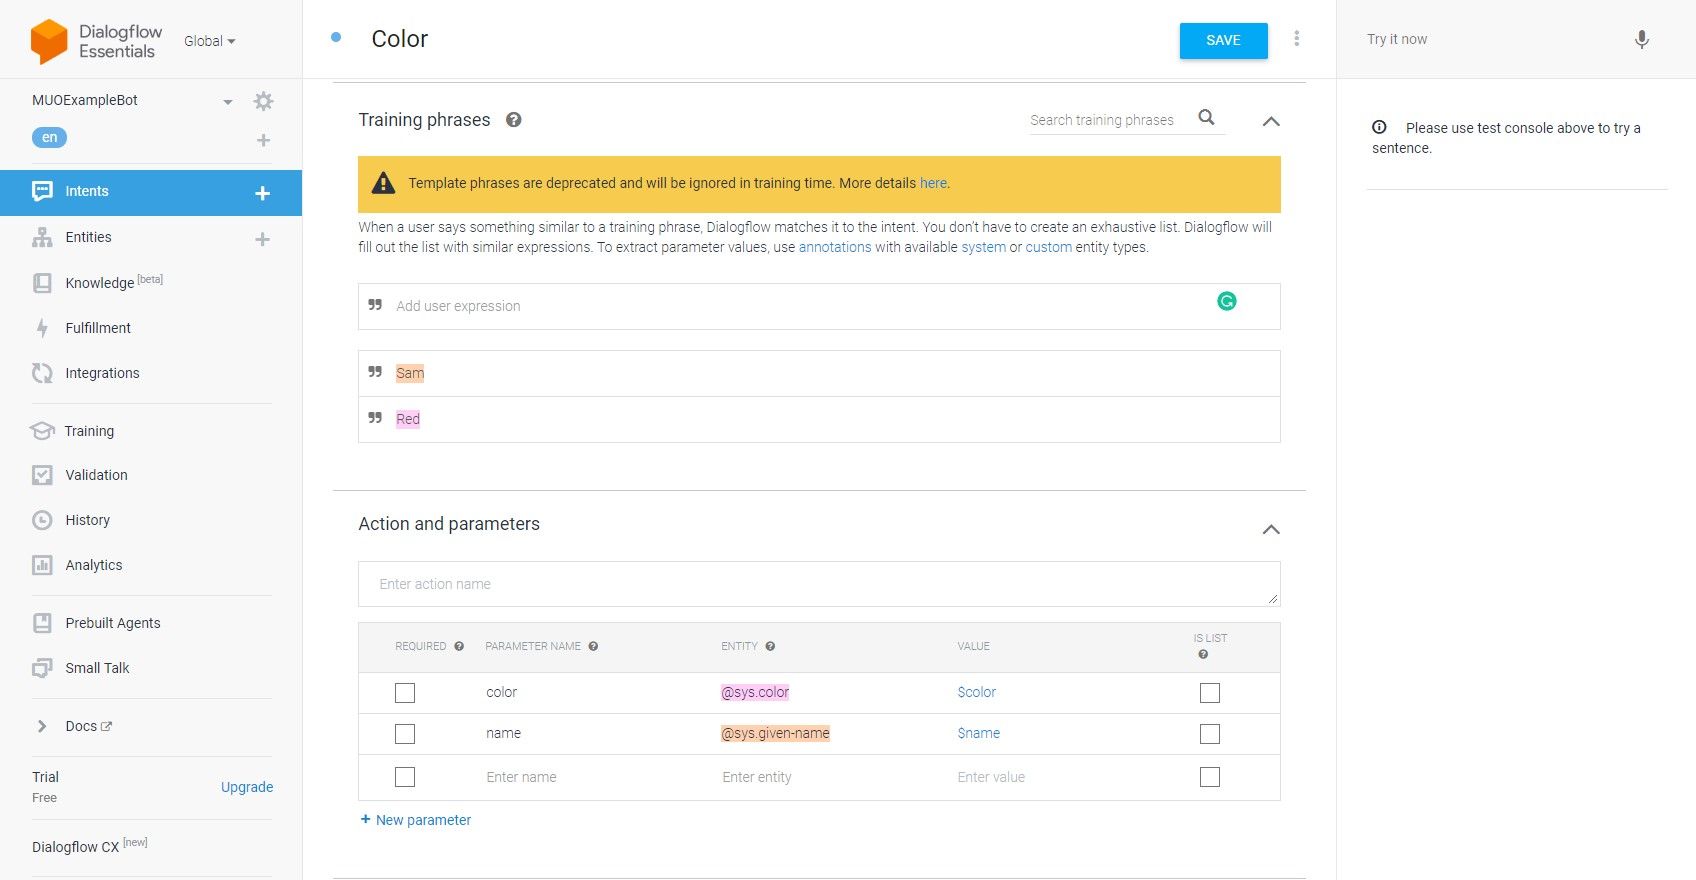
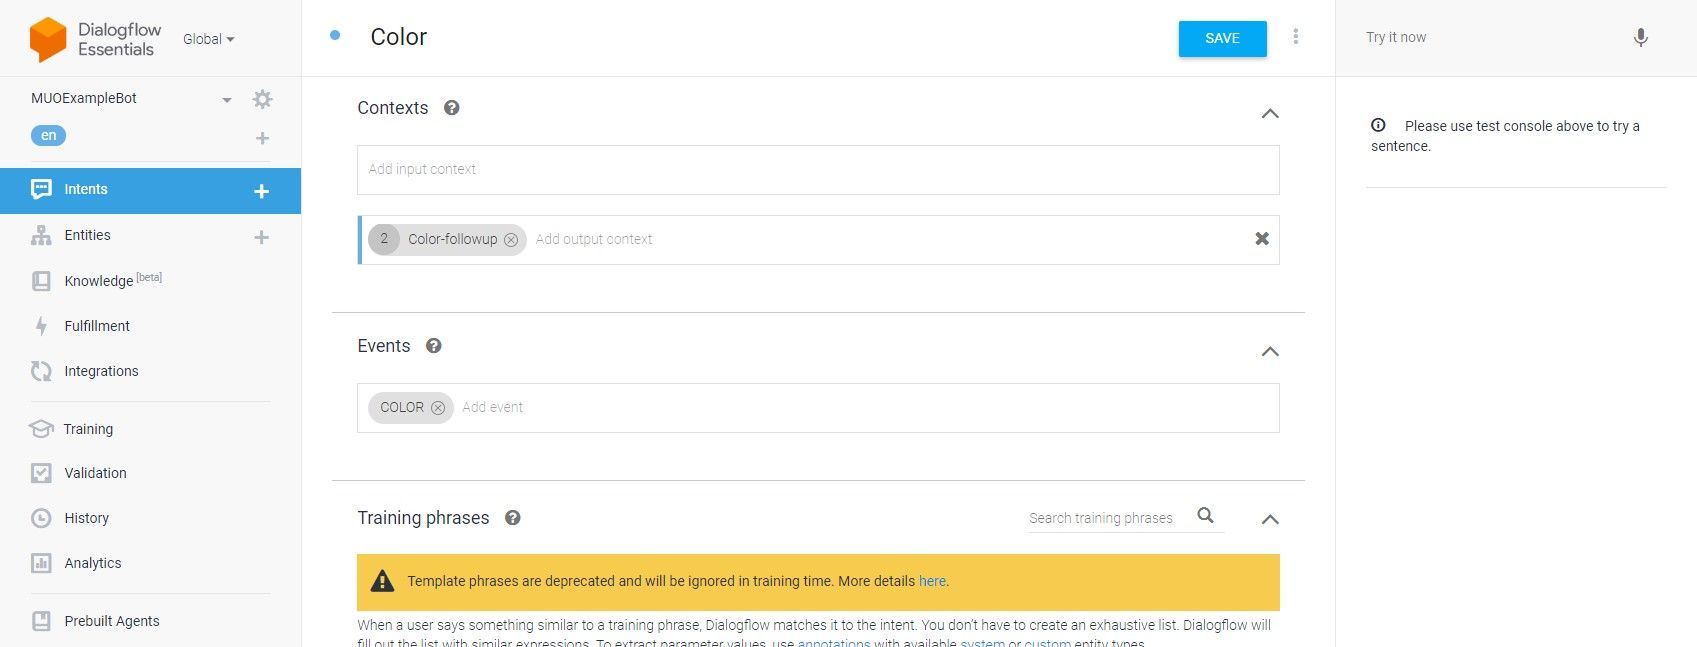
Go back to the main Intents menu and click on Create Intent. Give your new intent a name and enter COLOR in the events section before hitting Enter.
Go to the Training Phrases section and add a name and a color to the list of phrases to trigger the creation of new parameters. Change the @sys.person parameter entity to a @sys.given-name entity and make sure that the color entity is set to @sys.color.
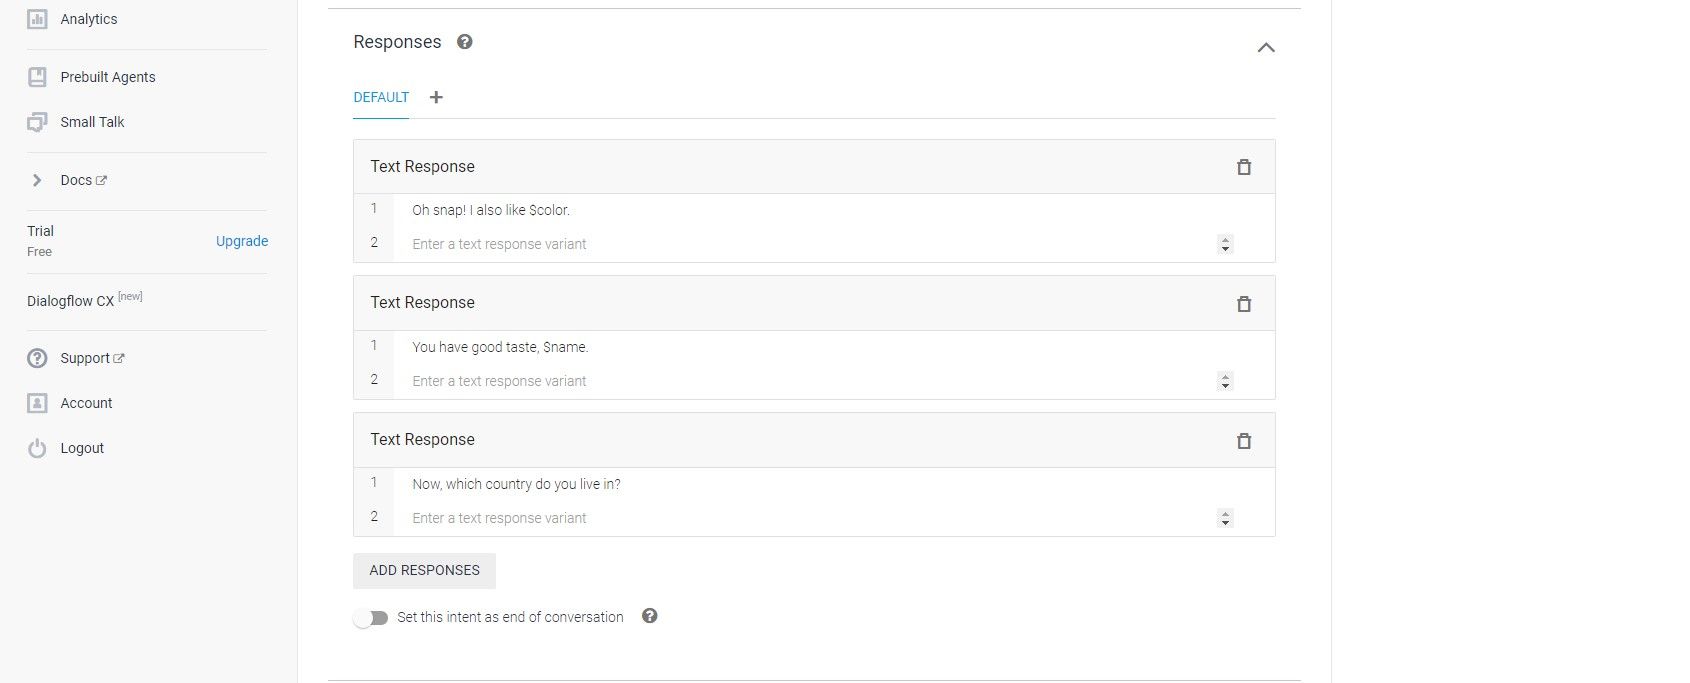
You can now add some responses using $given-name and $color to have the user’s inputs appear in the chat window.
Finally, go back to the Contexts section at the top of the page and add an output with a unique name. This will pass the parameters from this intent to the next one.
Step 7: Collect the User’s Country & Phone Number as Dialogflow Parameters
Go back to the main Intents menu, hover over the Color intent you just created, and click on Add follow-up intent. Check the Contexts section of the new intent. Make sure that it includes the Color context you created in the last step in both the input and output sections. Add another output context for the current intent.
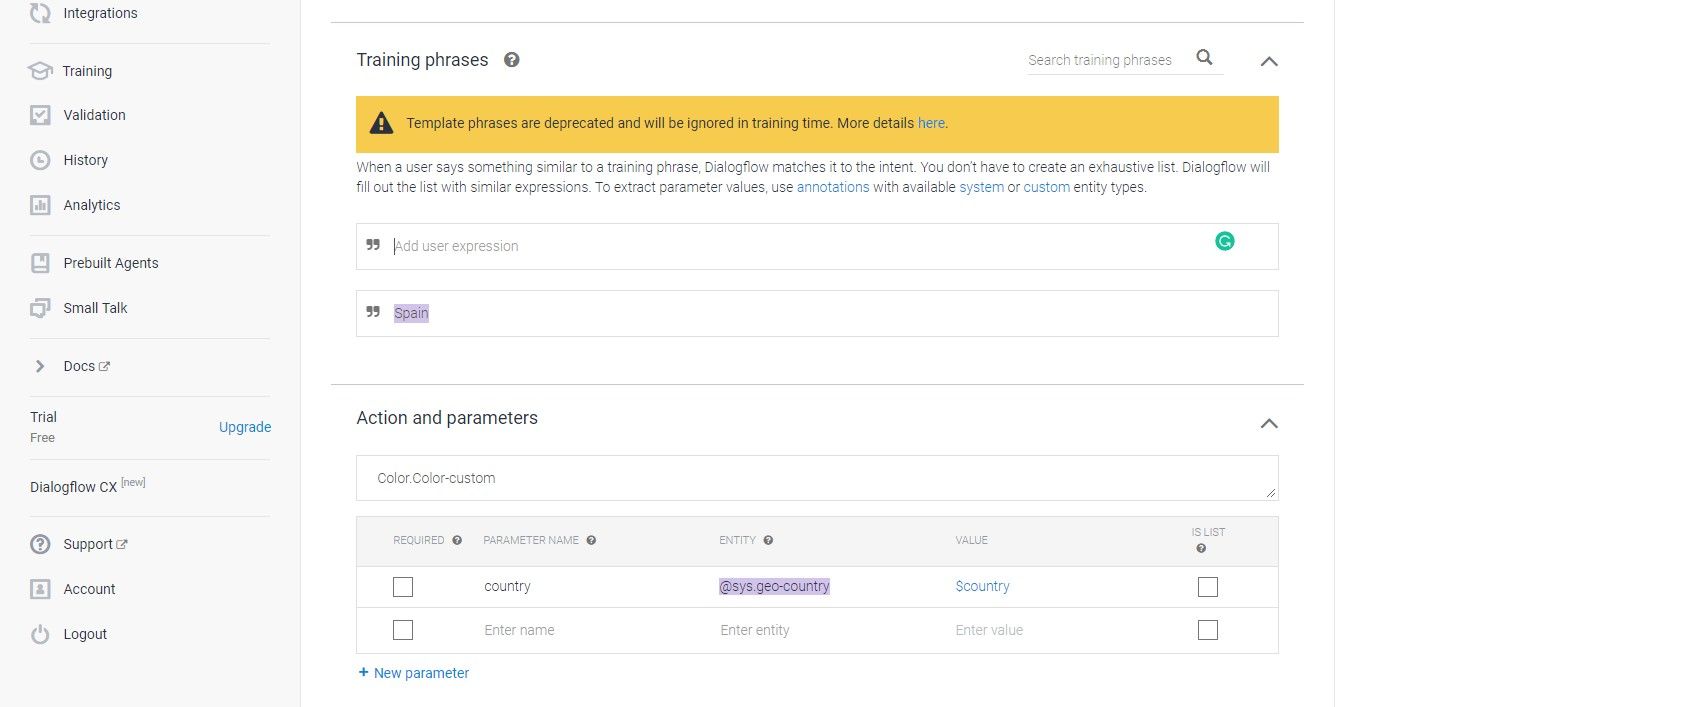
Go to the Training Phrases section and add the name of a country to the list before hitting Enter. This will create a new parameter. Change the parameter’s entity type to @sys.geo-country before adding the parameter to the response section.
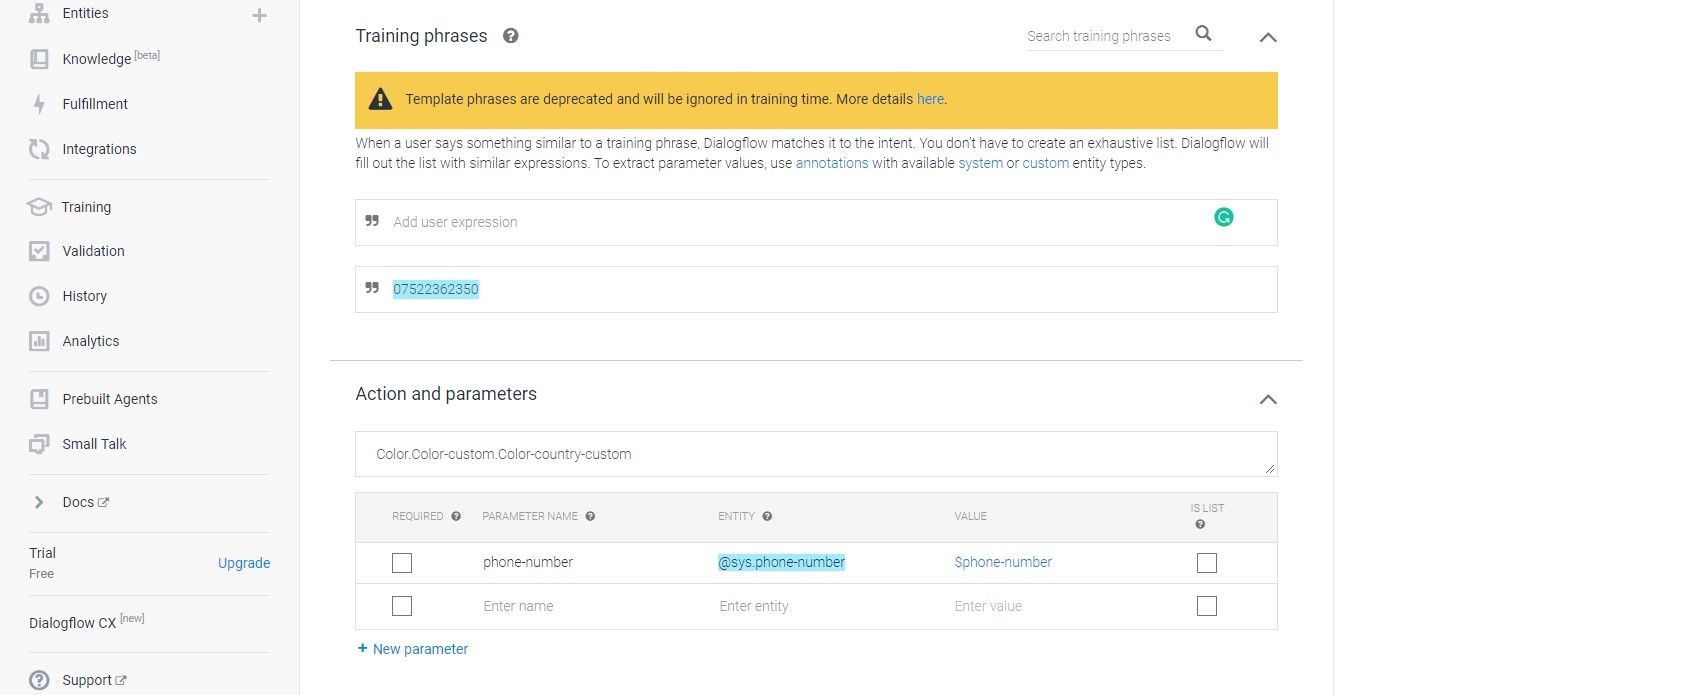
Go back to the main Intents menu and create a new follow-up intent for the intent you just created. Repeat the steps you've just taken, but use a phone number in the Training Phrases section. Make sure that the generated parameter has a @sys.phone-number entity type.
Go back to the main Intents menu and create two new follow-up intents for the intent you just created; a Yes and No follow-up intent. You can set the No follow-up intent to end the conversation.
The Yes follow-up intent needs to have all the Contexts from the previous intents you have created.
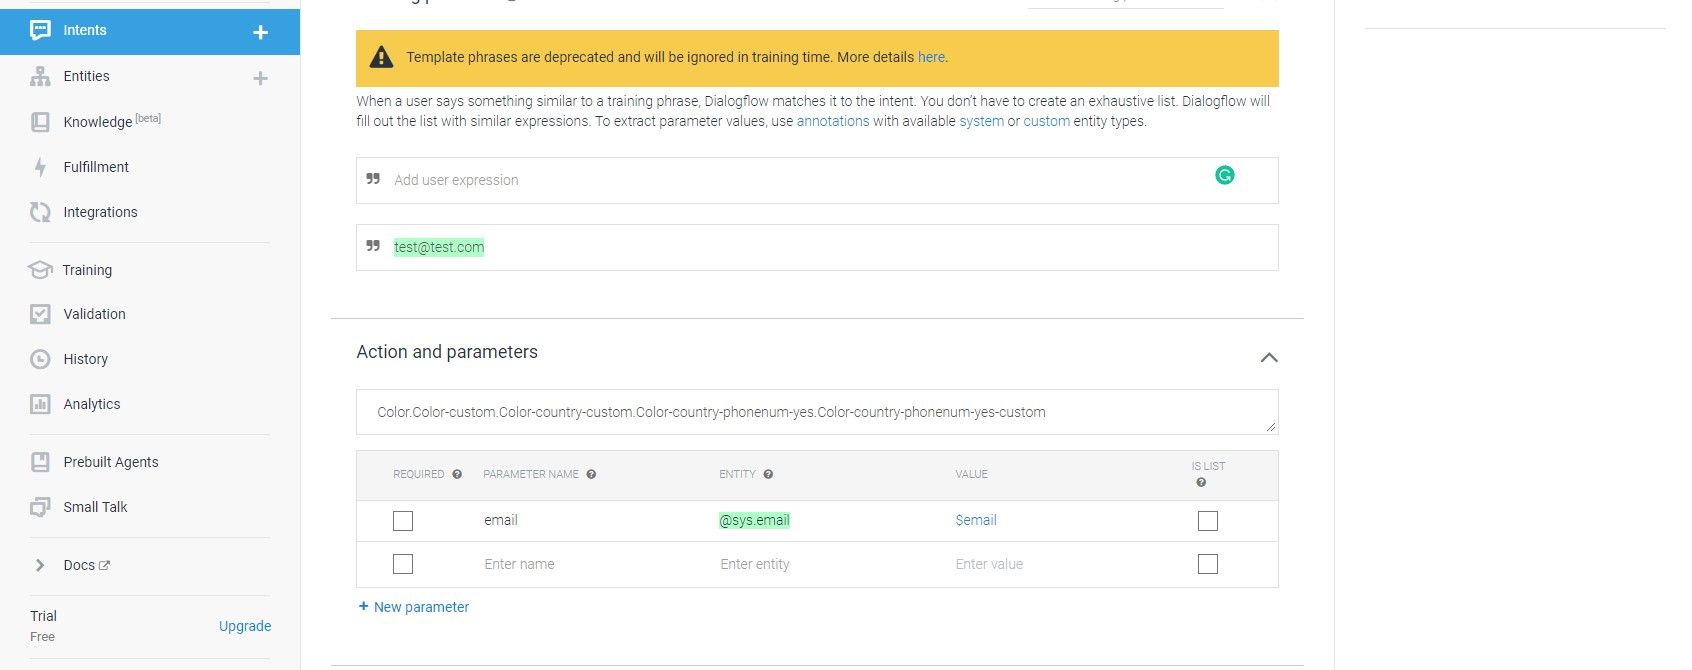
Finally, go back to the main Intents menu and create a new follow-up Intent for the Yes follow-up intent you just created. Add an email address to the Training Phrases section and make sure that the generated parameter has @sys.email as its entity type.
Go to the Responses section, click Add Responses, and select Custom Payload from the list. The following JSON code will add a list-type rich response that calls an event called SENDEMAIL. All the user parameters you have asked for so far will be sent to this intent.
        {
   "richContent": [
       [
           {
               "title": "Send Email",
               "event": {
                   "parameters": {
                       "name": "#Color-followup.name",
                       "country": "#Color-country-followup.country",
                       "email": "$email",
                       "color": "#Color-followup.color",
                       "phone": "#Color-country-phonenum-followup.phone-number"
                   },
                   "name": "SENDEMAIL",
                   "languageCode": "en"
               },
               "type": "list"
           }
       ]
   ]
}
Step 8: Send an Email Using the Dialogflow Node.js Inline Editor
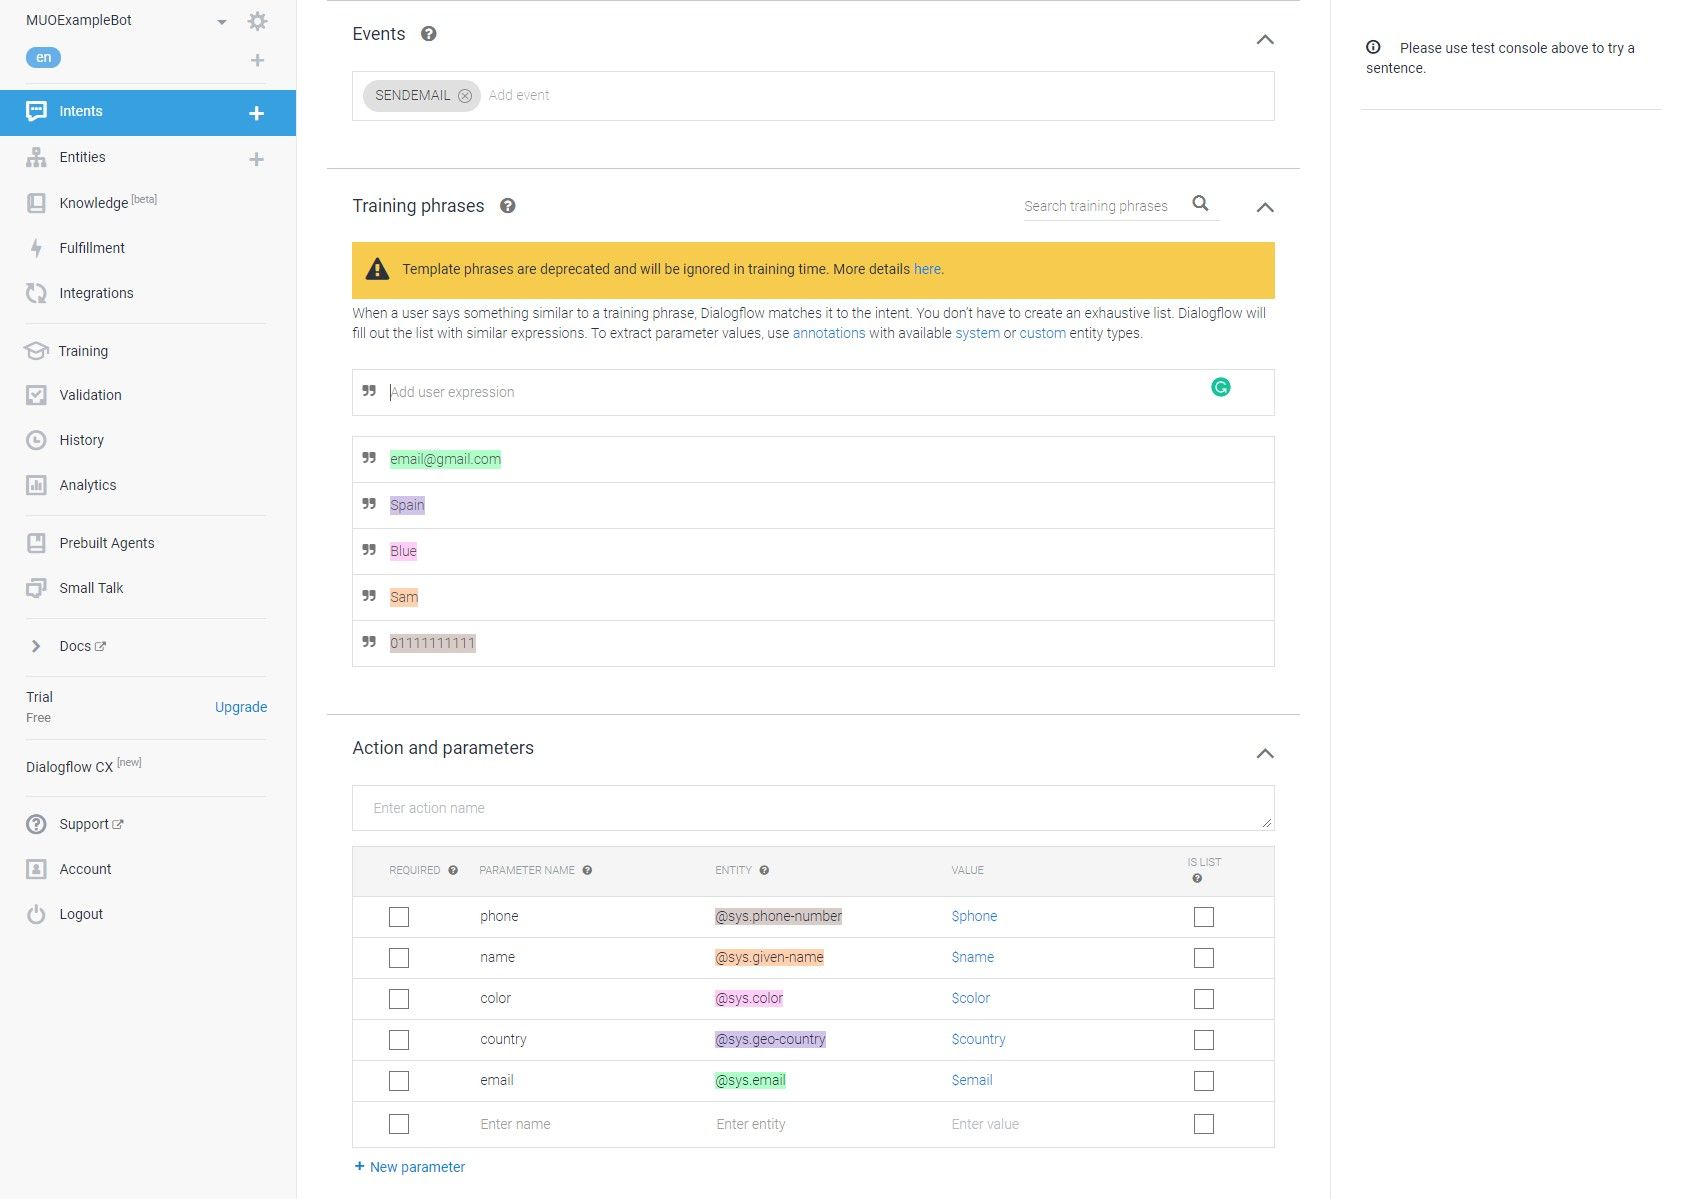
Click Create Intent in the main Intents menu. Add SENDEMAIL to the Events section and hit Enter. Follow this by adding all the parameters you have collected to the Action and parameters section.
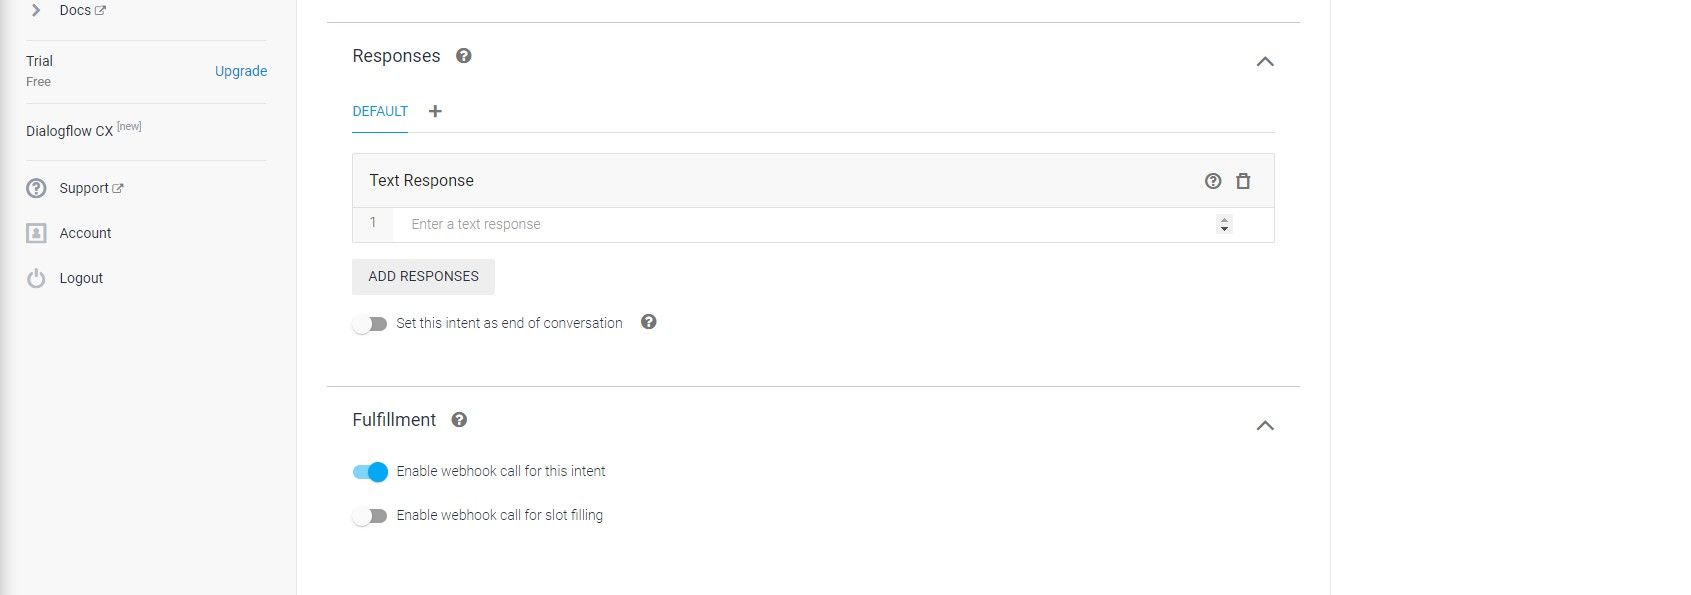
Go to the Fulfillment section at the bottom of the page and activate the slider labeled Enable webhook call for this intent. This will enable you to add custom code to this intent.
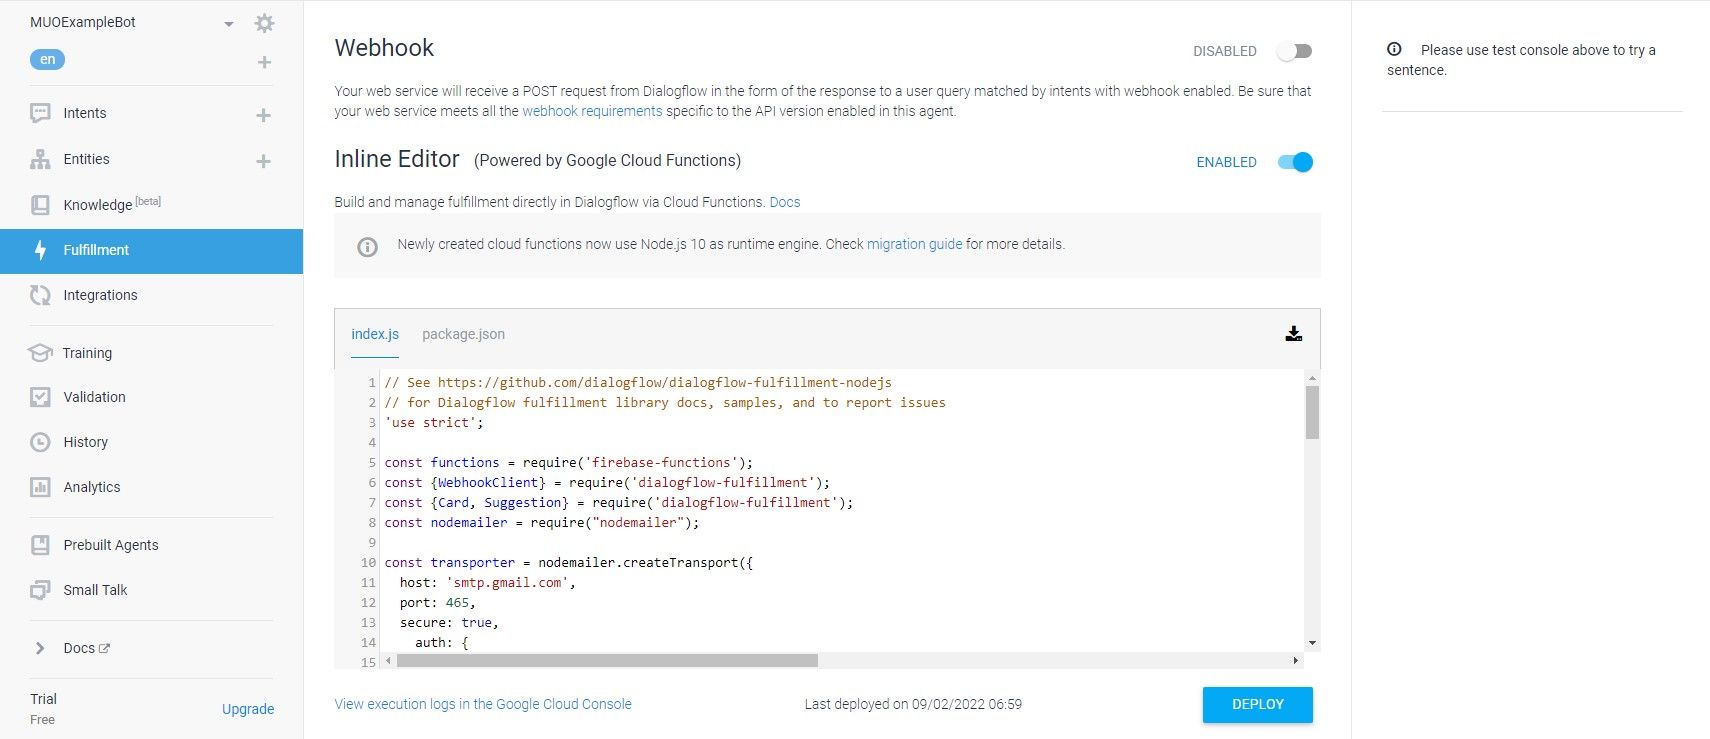
Select Fulfillment from the main menu on the left of the page and activate the slider to enable the Inline Editor. You may have to add a billing account to your Google Project to do this.
Click on the package.json tab and scroll to the bottom of the file. Replace the dependencies section with the following code to add the Nodemailer API to your project.
        "dependencies": {
    "actions-on-google": "^2.2.0",
    "firebase-admin": "^5.13.1",
    "firebase-functions": "^2.0.2",
    "dialogflow": "^0.6.0",
    "nodemailer": "^4.4.2",
    "dialogflow-fulfillment": "^0.5.0"
}
Go back to the index.js file and replace the existing code with the sample found on this CodePen project before clicking Deploy. You will need to replace the Gmail credentials with those of your own account. You need to use an App Password for this. Once complete, your chatbot will email all the details you collect to the user at the end of a successful conversation. You can learn more about Node.js and how to use it with our handy guide.
Using Dialogflow ES on Your Website
Your new chatbot can collect user information and send emails, but Dialogflow ES can do so much more. You can connect just about any API to this service, and you can use the Dialogflow API to control your chatbot on your own website.

