
GitBook is a platform that allows you and your team to create and collaborate on documentation sites. GitBook does this by using version control concepts, such as branching and merging.
Since many team members can work on a single documentation site, GitBook allows you to create and manage separate drafts. You can also view the differences between your current draft and the master documentation copy.
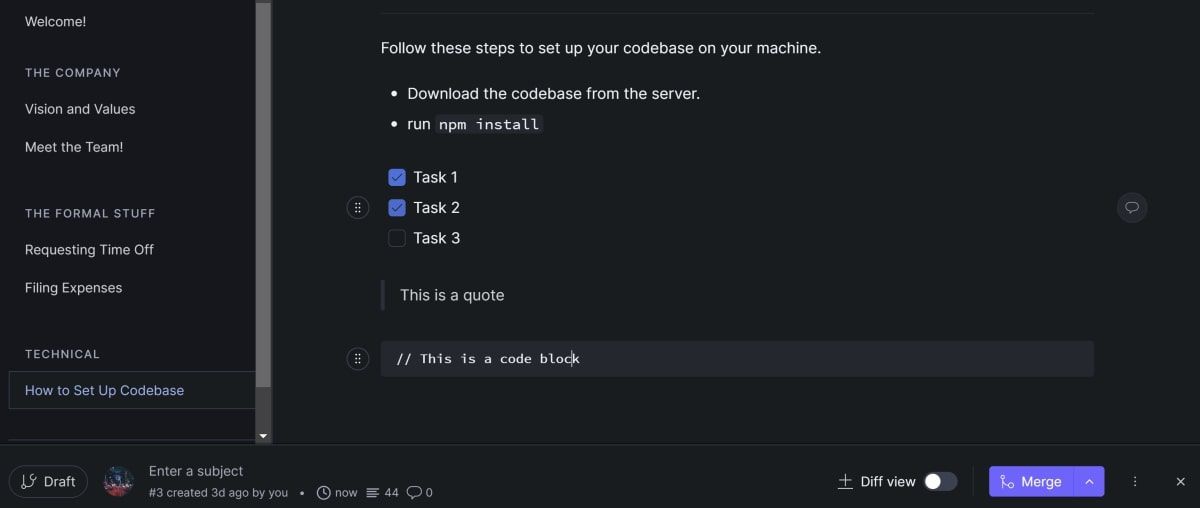
Several types of block are available for you to add to your wiki pages. This includes headings, paragraphs, images, hints, tables, code blocks, file attachments, and more.
How to Add Content Blocks in GitBook
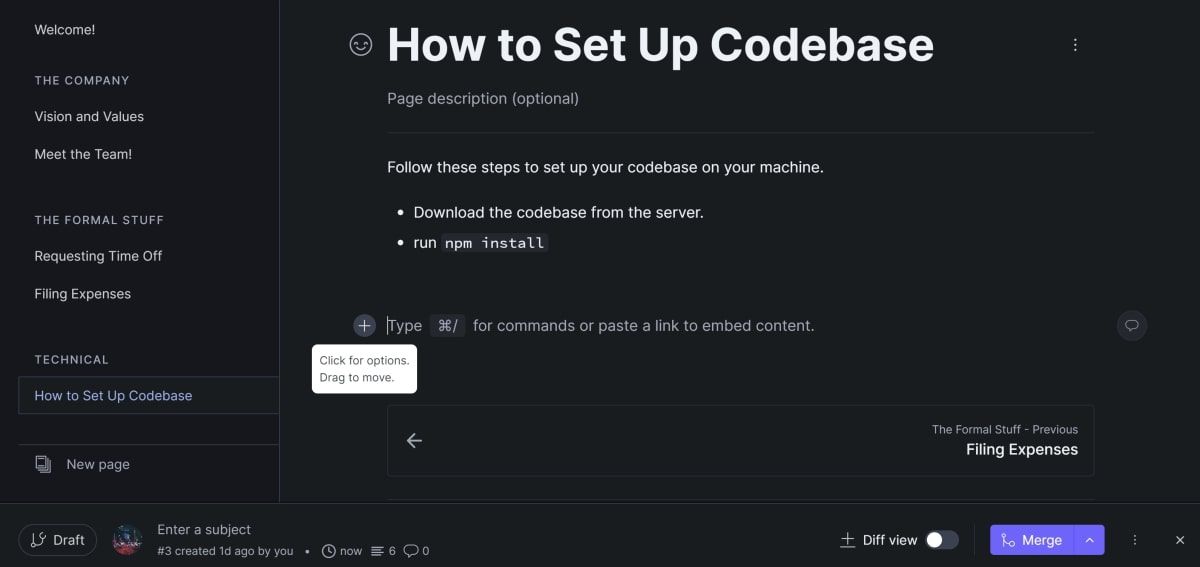
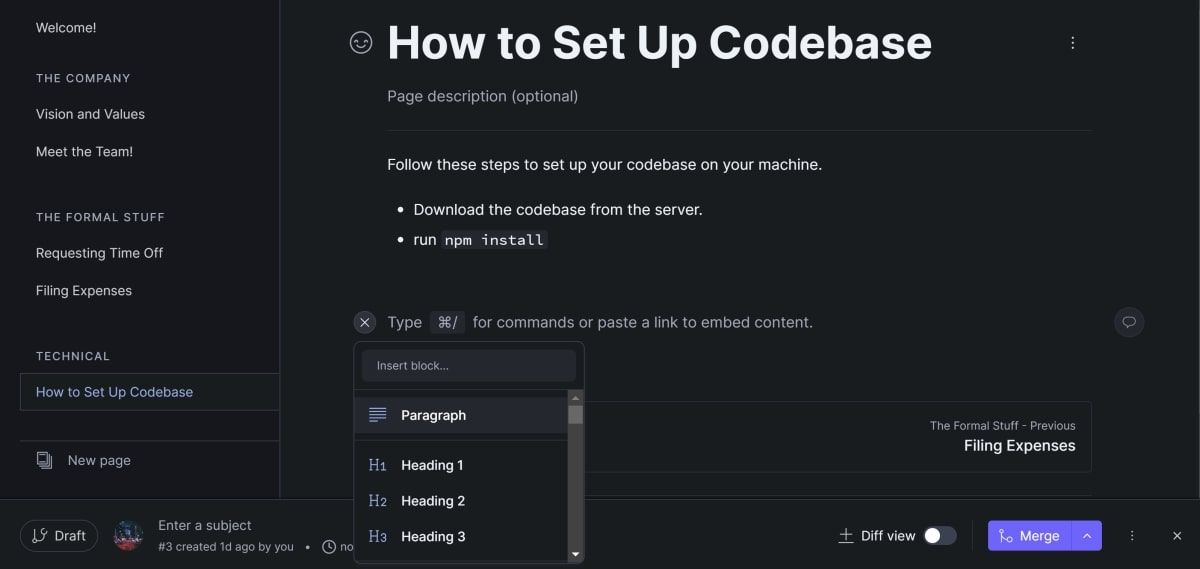
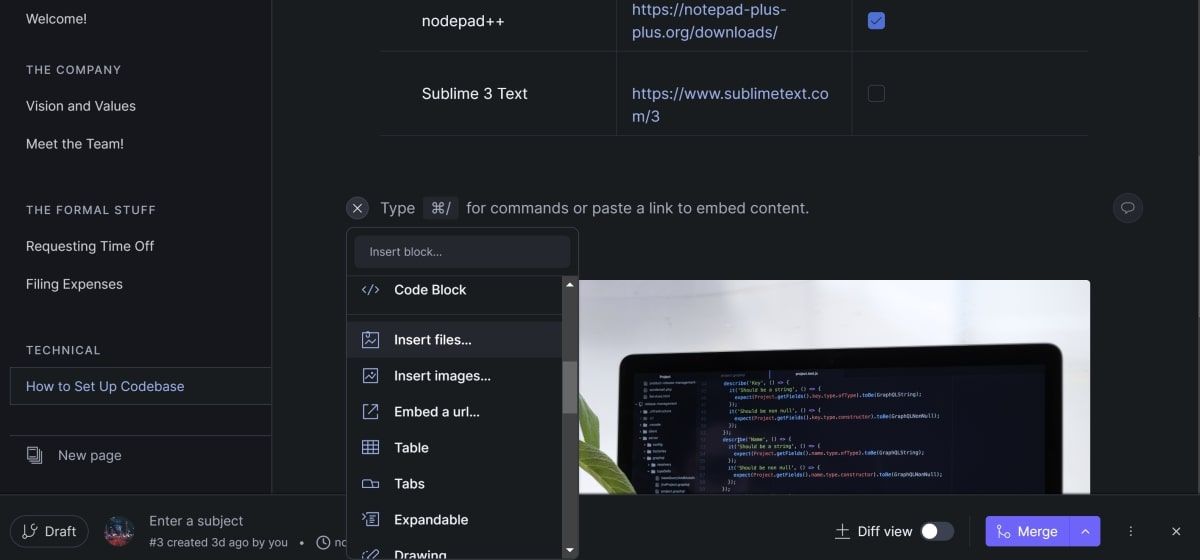
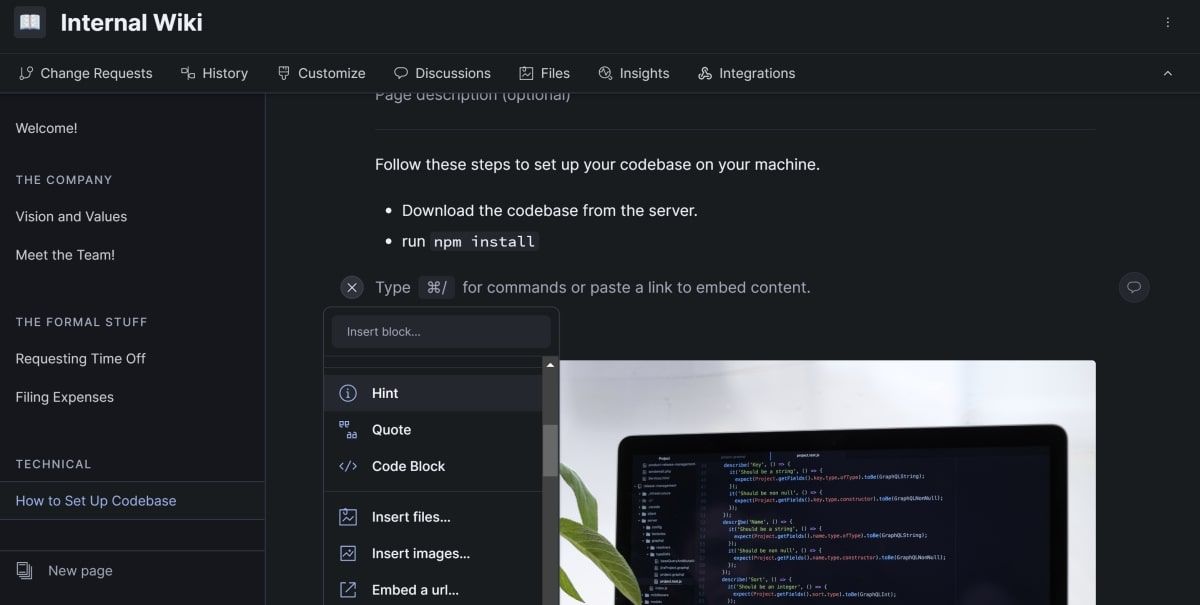
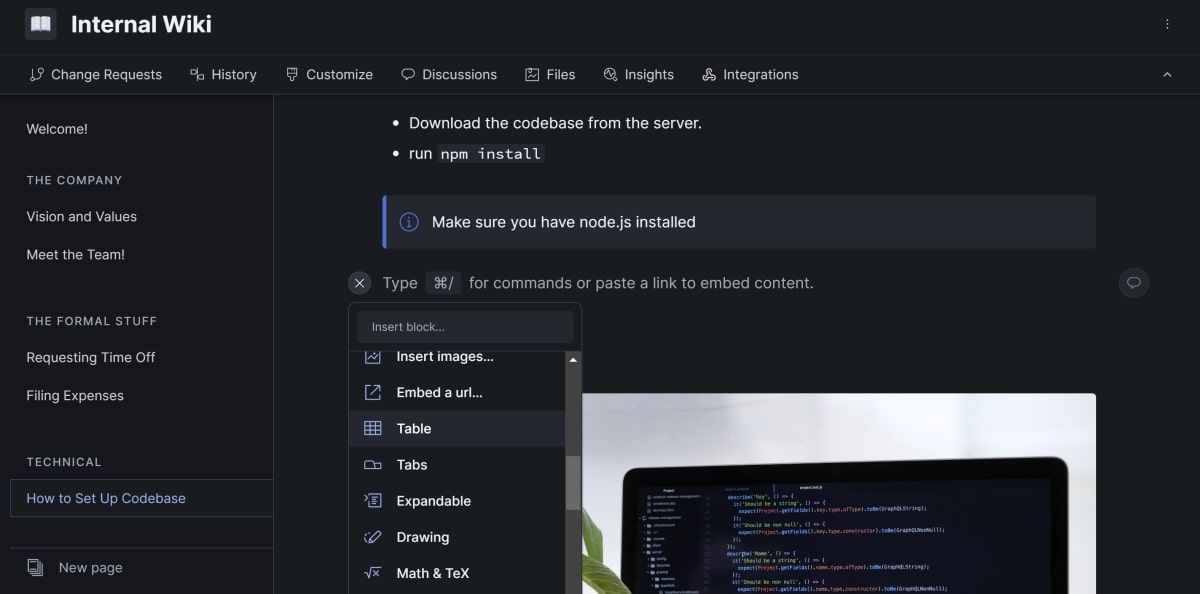
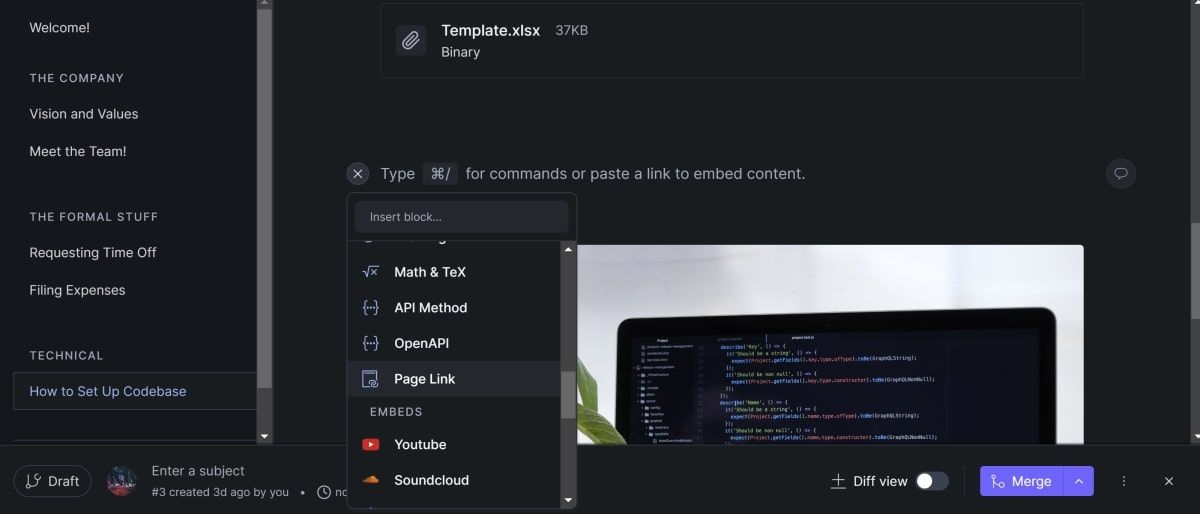
You can view a list of the available content blocks to add to a page. You can do this by clicking anywhere on the page and clicking on the plus symbol that appears. You can also directly search for a specific content block.
You can add content using Markdown. If you haven't used Markdown before, you can learn more about how to get started with Markdown. You can also read more about why Markdown is so popular.
How to Add Paragraphs, Lists, Quotes, or Code Blocks
To add lists, paragraphs, quotes, code blocks, or other simple content blocks, open the dropdown and select from the available types.
-
On a page in your documentation site, click on the plus button in the location where you would like to add your content.
-
From the dropdown, you can scroll through the list to view the different content options.
-
From here, select any simple content type, such as a paragraph, code block, heading, or quote. GitBook will automatically change the content to match the format you have selected.


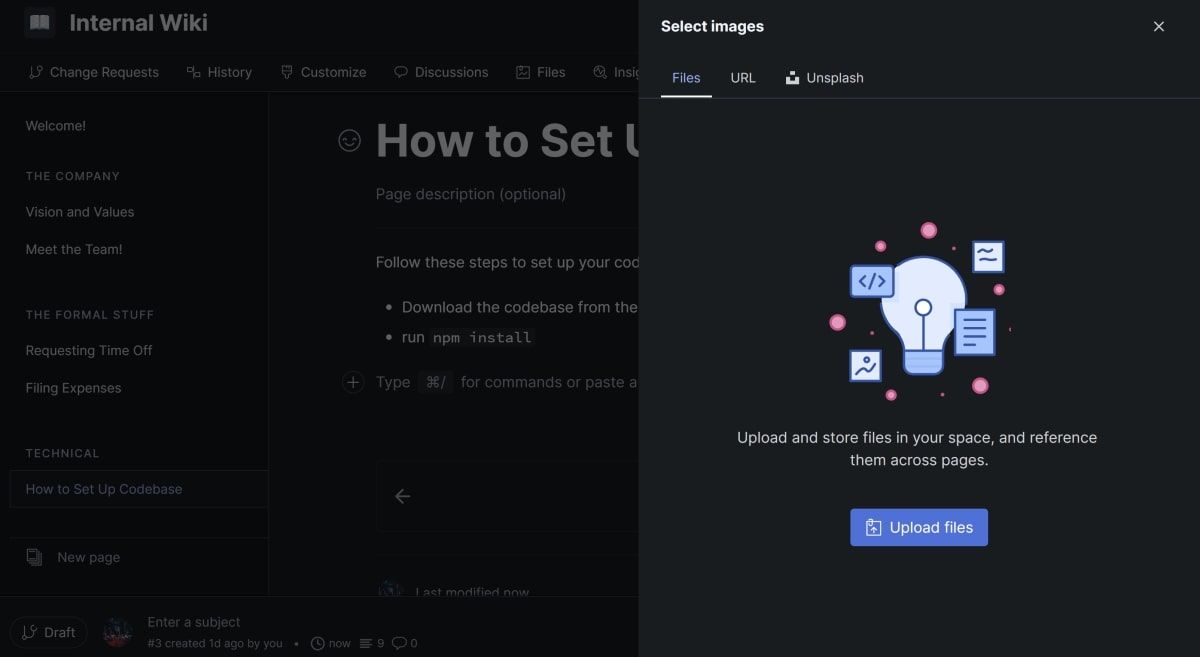
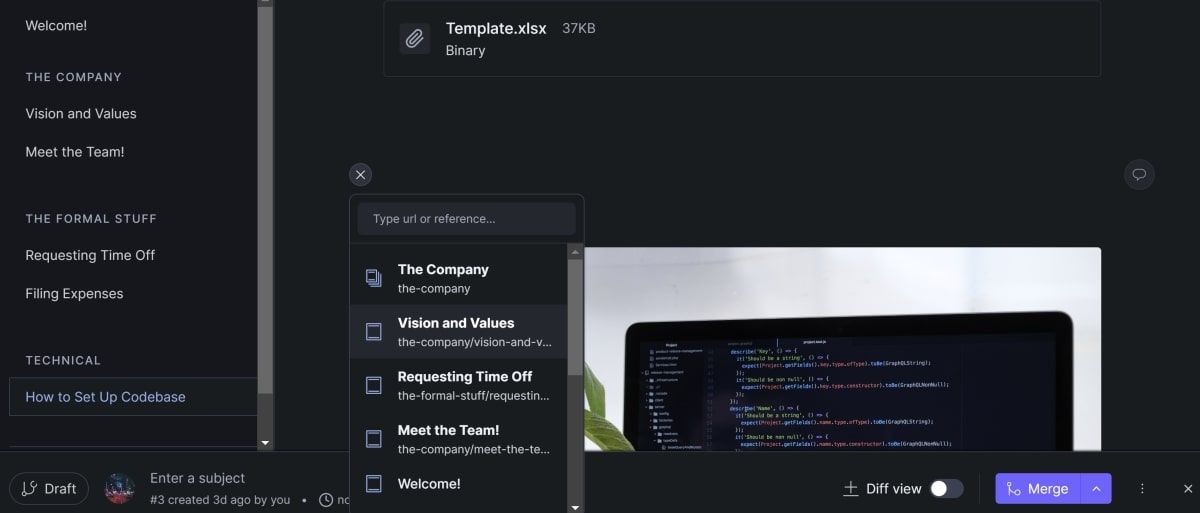
How to Add Images or File Attachments
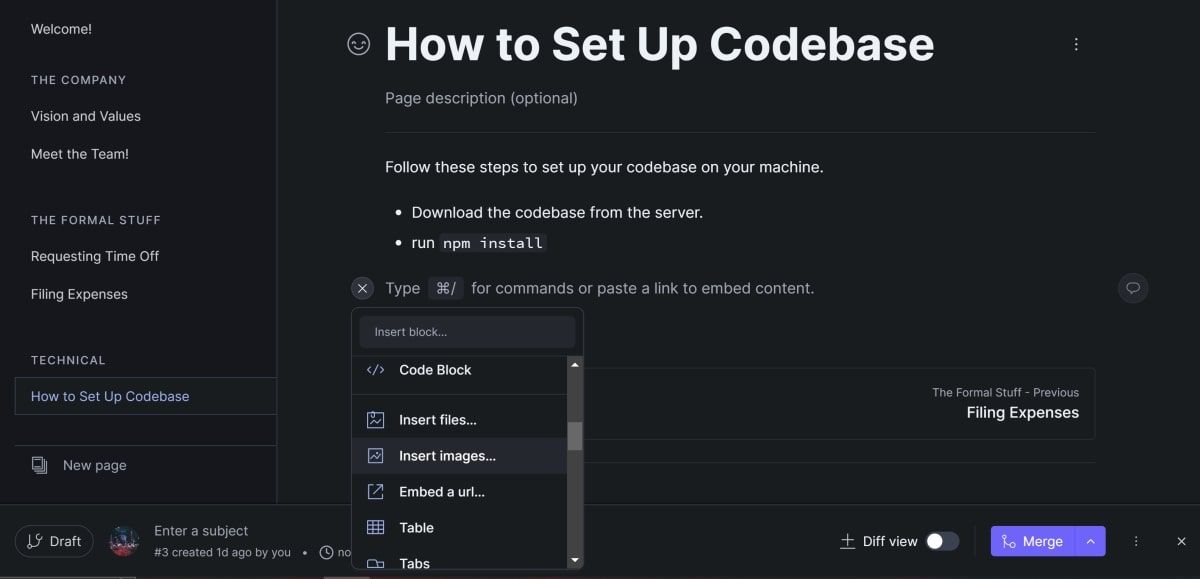
To add images, use the dropdown to select the Images content block option. To add files, select the Insert Files option instead. You can then use the right-hand panel to manage your uploaded images and files.
- Open a page on your documentation site. Click on the plus button to open the dropdown for available content blocks.
-
Select Insert Images.
-
In the right-hand panel that appears, there are three tabs. The Files tab allows you to upload your own image file. The URL tab allows you to link to an image online. You can also open the Unsplash tab. This is where you can select existing photos that do not require attribution.
-
Once you have added an image, click on the three dots button located in the top-left corner of the image. This will open a dropdown where you can align the image, or delete it. You can also give the image a caption.

-
To insert files, put your cursor anywhere on a page on your documentation site. Click on the plus button to open the content block types dropdown. This time, click on the insert files option.
-
A similar right-hand panel will appear, allowing you to upload any file attachment instead of an image. Click on Browse files to select a file stored locally on your computer.
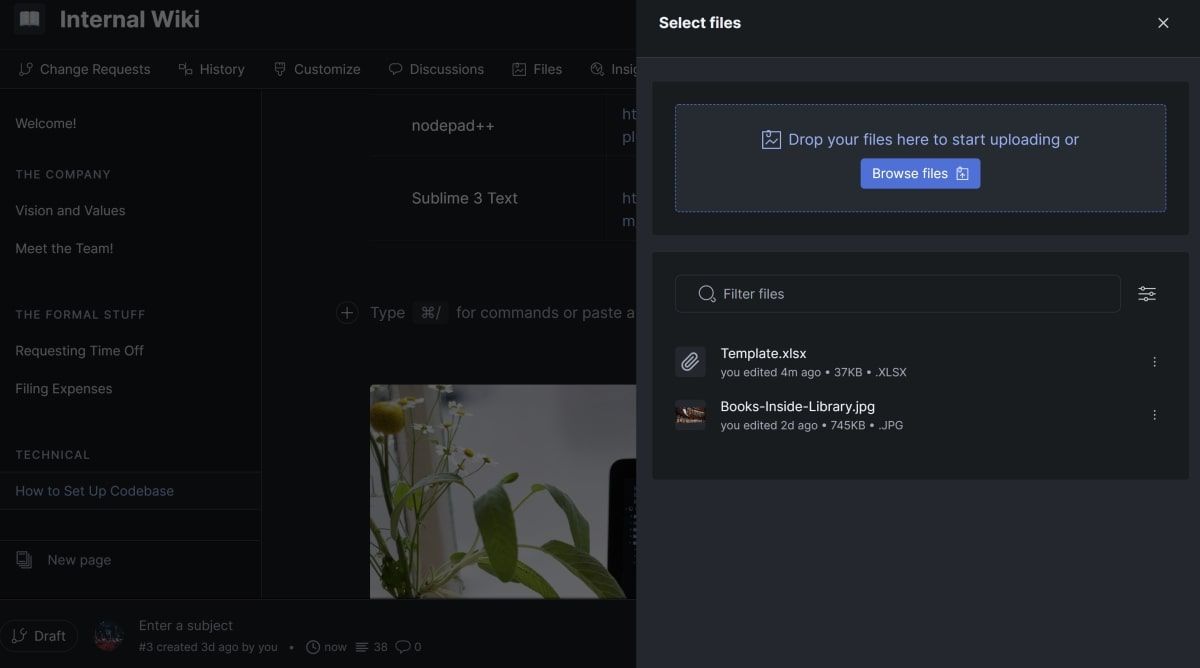
-
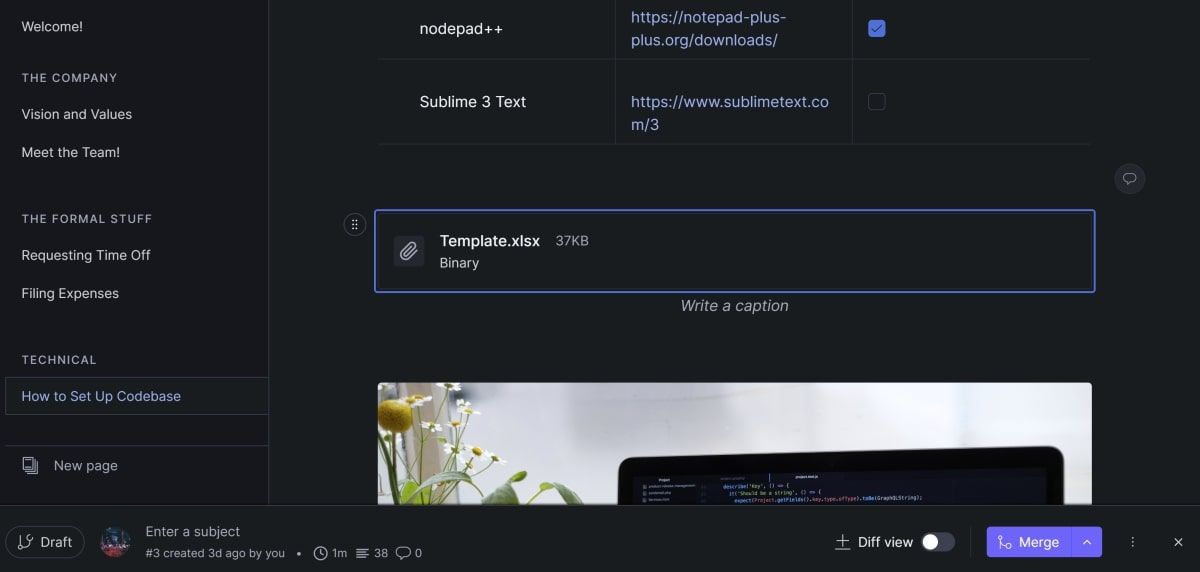
The file will appear on the list. Click on the file, and GitBook will create a content block with the file attachment on the page that you have open. Clicking on this content block will download the file attachment.


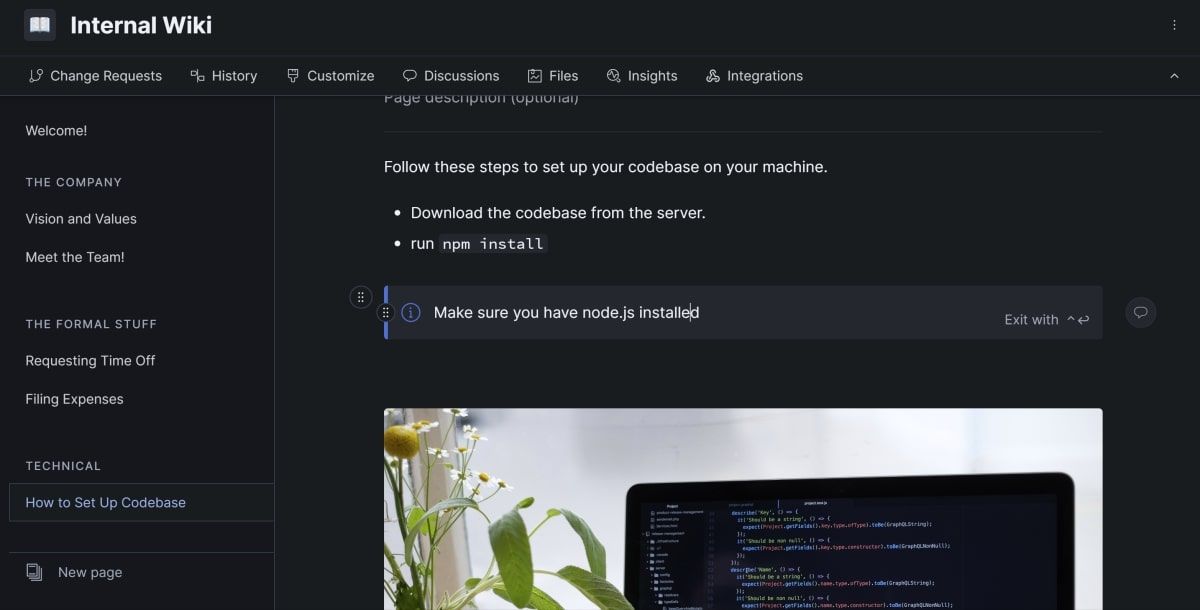
How to Add Hints
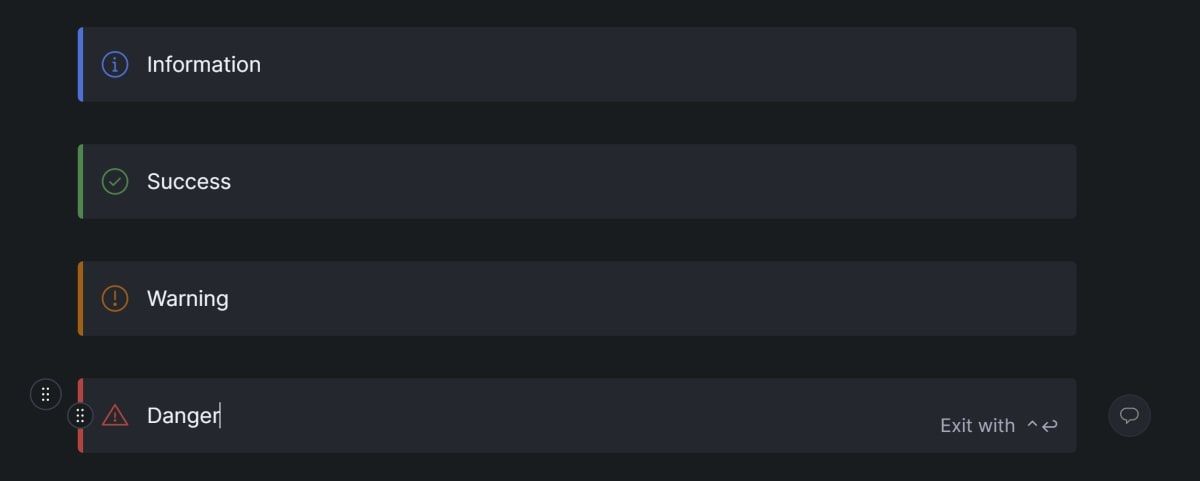
You can also add hints to your page. You can change the icon for the hints to use red for danger, orange for warning, blue for information, or green for success.
- To add a hint, click on the plus button to open the dropdown for available content blocks.
-
Select Hint.
-
This will add a hint to your page. By default, the hint type is "information", and contains a blue icon.
-
You can change the hint type by clicking on the icon. This will loop through the four different hint types.


How to Add Tables
You can add tables by selecting the table option from the dropdown list. Once you have the table on the page, you can add new rows or columns. You can also modify the names and data types of the columns, and change the data inside the table.
- Click on the plus button to open the dropdown for available content blocks.
-
Select Table.
-
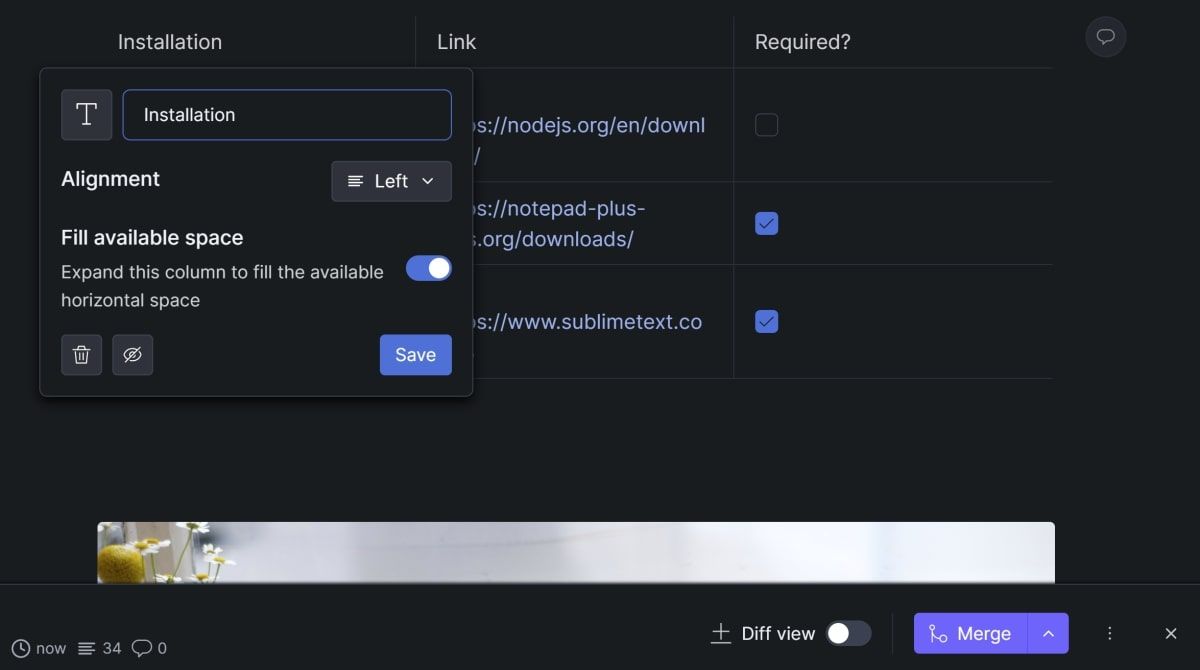
Click on the header of a column in the table. This will open a new smaller menu, where you can change the name of the selected column. This menu also allows you to delete or hide the selected column. For certain column data types, you can also align the content inside the column.
-
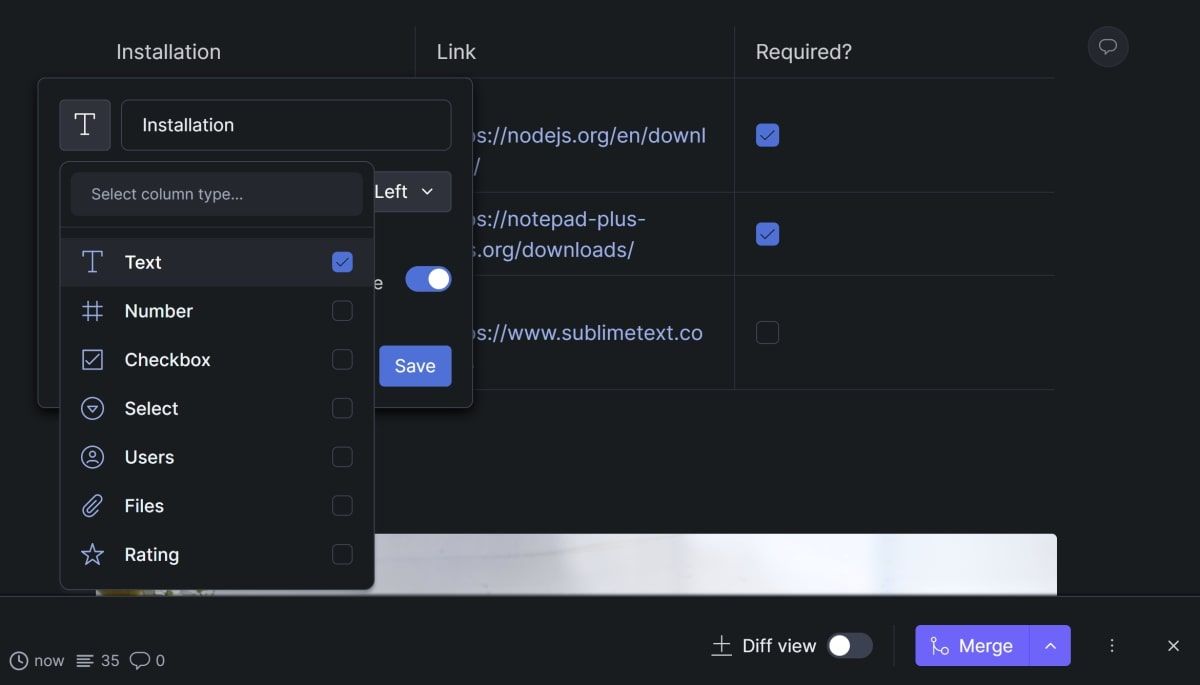
By default, the selected data type for the columns is "Text". Click on the button with the T symbol to change the data type. You can change it to a number, checkbox, dropdown, file attachment, rating, or more.
-
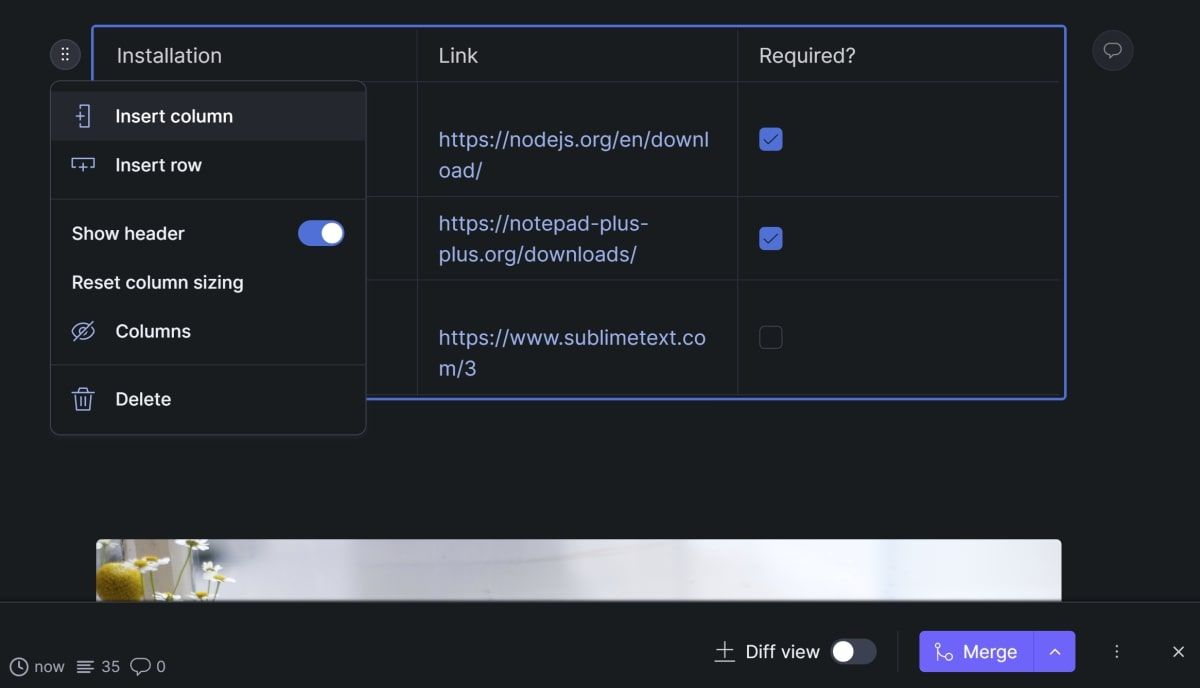
Click on the six dots icon near the top-left corner of the table. Here you can insert new columns and rows or delete the entire table. You can also hide or show certain columns, or change other properties for the table.


How to Add Page Link Blocks
Page link blocks are links that take up the entire line on the page. When you add the link, you have to link to the page that will open when someone clicks on it.
- Click on the plus button to open the dropdown for available content blocks.
-
Click on Page Link.
-
From the new dropdown, choose the page that you are linking to.
-
Your page link will appear inside a block on the page.


Using GitBook for Documentation
GitBook is a documentation tool that uses version control concepts such as branching and merging. This allows more than one member of the team to simultaneously work on the documentation. It also helps to manage any conflicts that occur.
You can add all kinds of content blocks to a page. You can use headings, paragraphs, code blocks, or bullet points to reformat your content. You can change the hint type, message, and icon type of hints, as well as customize the columns of a table.
The Files tab allows you to manage images and file attachments that you upload to the site. Page Links allow you to create large links that users can easily spot.
If you are creating documentation related to the Go language, you can use Godoc. Godoc allows you to automatically document your Go code.