WordPress has long been the default choice for creating blogs. You can also use it for e-commerce websites, forums, landing pages, event microsites, and more. But features like SEO or social sharing are only available via plugins.
Ghost is a simple blogging platform that lets you publish, share, and grow your business around content. Like every CMS, you can test Ghost on your local computer.
We’ll show you how to run Ghost CMS locally on Mac and PC.
Prerequisites of Ghost CMS
Ghost CMS requires the following:
- Node.js v16 LTS. This is a long-term support release. It should ensure Ghost can continue running with that version of Node for the longest possible time.
- Either yarn or npm to manage packages.
- Node version manager (optional).
- Enough disk space for the Ghost application, ranging between 1–2GB.
Using Node Version Manager
If you don’t need multiple versions of Node.js and are just getting started with Ghost CMS, follow our step-by-step guide to install Node.js and npm. After installing Node, you can skip this section altogether and move on to using Ghost CLI.
However, if you’re using multiple Node.js versions, Node Version Manager (NVM) can ease the installation process. It also keeps track of what version you’re using and lets you switch between them easily.
Before you proceed with the NVM installation, uninstall any existing versions of Node.js. On Windows, you should also delete any Nodejs directories to avoid potential complications. This Stack Overflow post explains the process. Also back up any global npmrc config, usually located in %AppData%\npm\etc\npmrc.
Ghost recommends steps to take if you run into problems during a local installation through NVM. You must ensure that you have installed ghost-cli in the correct environment.
Installing NVM for Windows
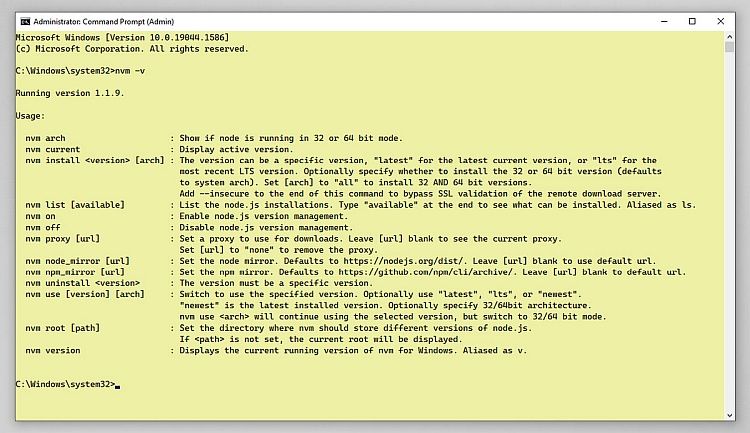
NVM for Windows is an easy-to-use, command-line tool to manage multiple installations of Node.js on Windows. Head to the releases page and download nvm-setup.zip. After finishing the installation, press Win + X and choose Command Prompt (Admin). Then type:
nvm -v
You’ll see the version number (the current release is 1.1.9) and the list of useful commands.
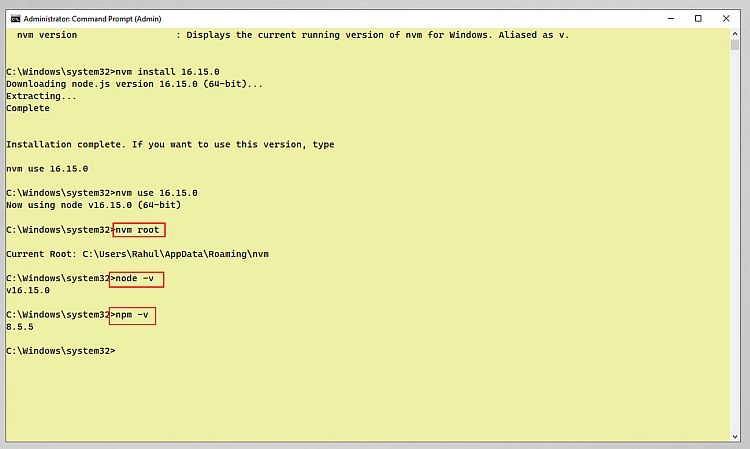
Now install Node using NVM:
nvm install 16.15.0
The package gets installed to “%AppData\Roaming\nvm” and symlinked to Program Files. Now type in:
node -v
To check the version number of Node and npm.
Installing NVM for Mac
Head to NVM for Mac webpage and install this script using Terminal:
curl -o- https://raw.githubusercontent.com/nvm-sh/nvm/v0.39.1/install.sh | bash
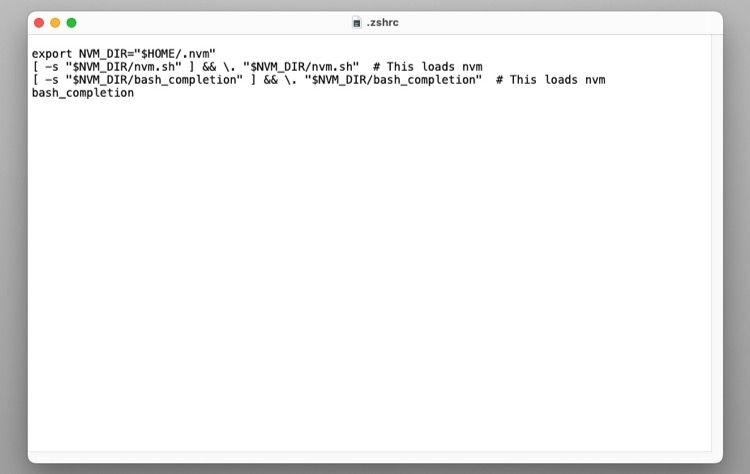
The script clones the nvm repository to ~/.nvm, a hidden folder in your home directory. It also tries to add configuration to the correct profile for bash (~/.bash_profile) or zsh (~/.zshrc). Since macOS 10.15 Catalina, the default shell is zsh, and nvm will look for .zshrc to update the configuration.
In Finder, press Cmd + Shift + Period to see hidden folders and files.
If the .zshrc file is missing, you’ll have to create it:
touch ~/.zshrc
Then run the install script again. Now enter:
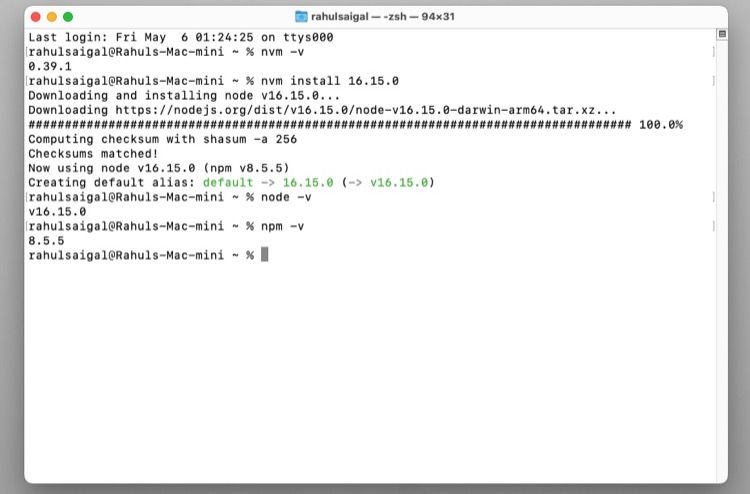
nvm -v
If you see the version number, it means the installation was successful. Now install Node:
nvm install 16.15.0
Run node -v and npm -v to check the version number of node and npm.
Installing Ghost CLI
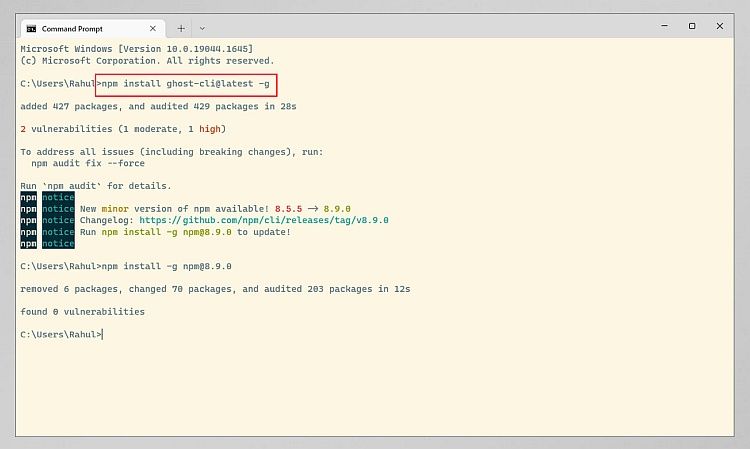
Ghost-CLI is a command-line tool to install, configure, and update Ghost with a single click. The CLI is available as an npm module and you can install it via either npm or yarn. To install the CLI, type:
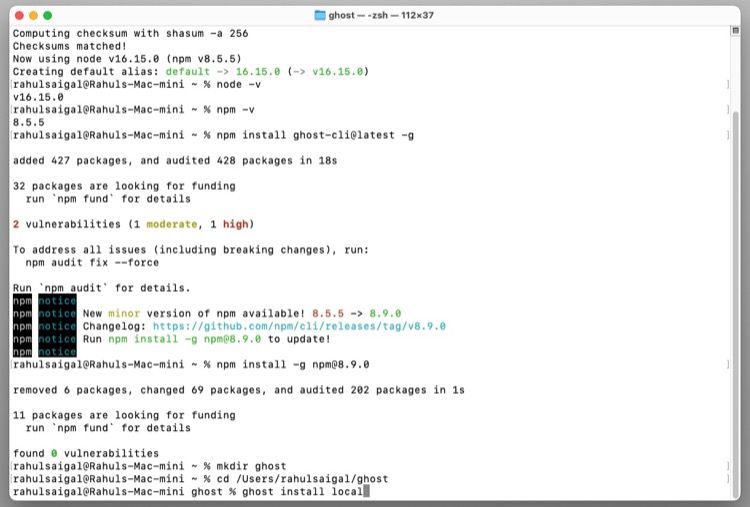
npm install ghost-cli@latest -g
As you install ghost-cli, the tool will audit the npm package and notify you of any vulnerabilities. You should then run:
npm audit fix --force
Then, take the suggested steps before installing Ghost.
The CLI tool performs various operations to maintain the Ghost CMS environment. It creates a folder structure, takes care of user permissions, and manages any existing Ghost installation.
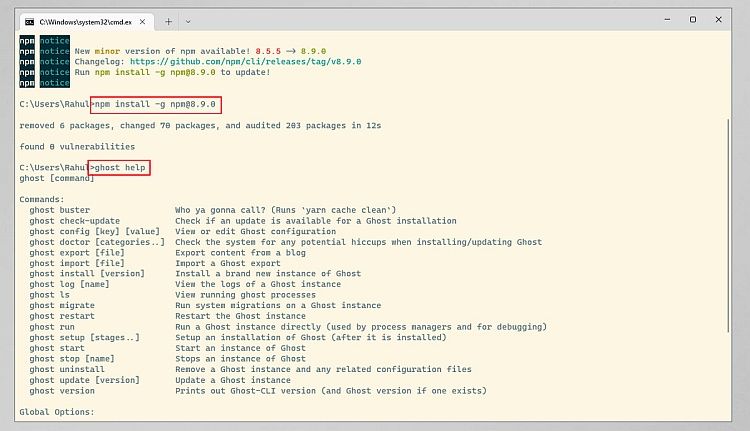
After installing Ghost CLI, run ghost help to ensure that the installation was successful and to see the list of available commands.
Install Ghost CMS on Windows 10
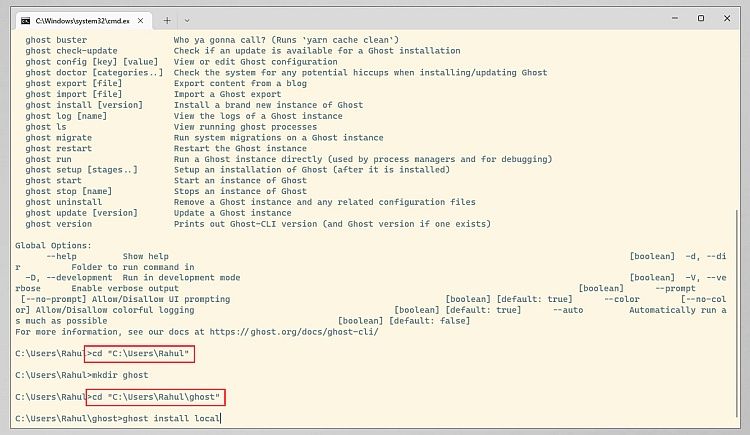
Step 1: Create a new folder where you want to install the Ghost app. Type in:
cd "C:\Users\[UserName]"
“UserName” is the user account name of your PC. Then enter:
mkdir ghost
Step 2: cd into the ghost installation folder:
cd "C:\Users\Rahul\ghost"
Step 3: Then type in:
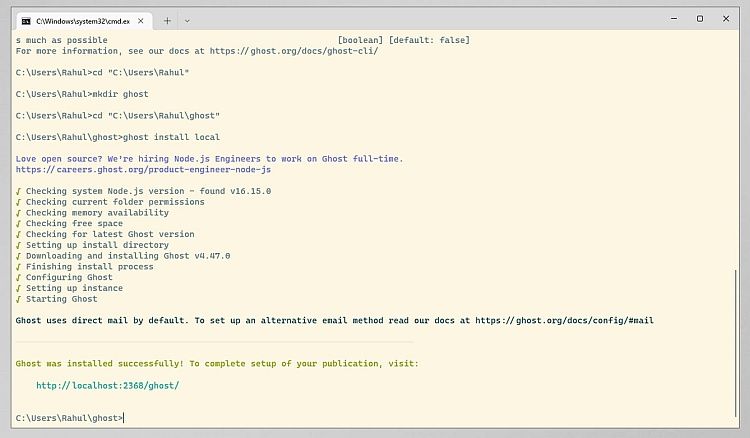
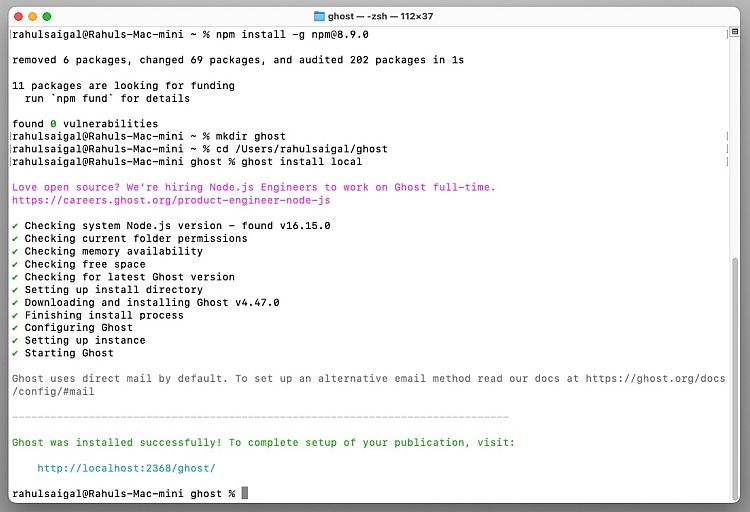
ghost install local
While installing Ghost, you’ll see the firewall prompt to allow NodeJS access to the internet. Make sure to tick the Private Network option or you won’t be able to view your Ghost blog. In addition, you’ll get a link:
http://localhost:2368/ghost/
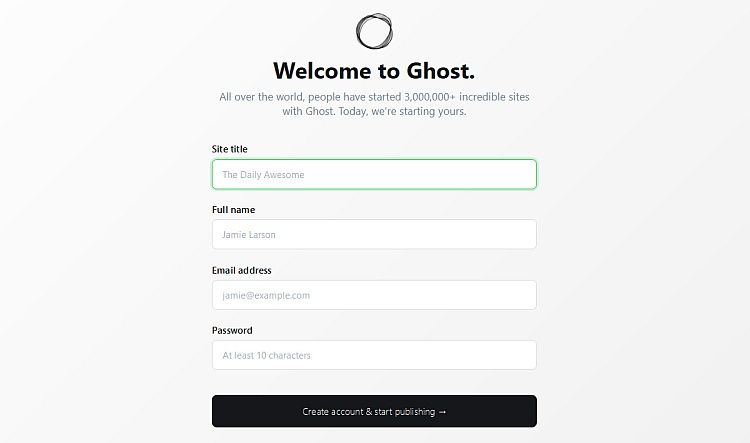
Paste it into your browser to see this screen.
Step 4: Enter the details to view your local site. To see the Ghost CMS admin panel, go to:
localhost:2368/ghost/#/admin/
Install Ghost CMS on Mac
Step 1: Create a folder and “cd” into it:
mkdir ghost
Step 2: Type in:
ghost install local
Step 4: Just like in Windows, you’ll get a link:
http://localhost:2368/ghost/
Paste it into your browser to see the setup screen.
Useful Commands to Manage Ghost
Several useful commands allow you to manage your Ghost blog. Here are some of the most important:
- ghost start: start the Ghost process. If you see any errors, try using ghost run to log any output from Ghost directly to the terminal.
- ghost stop: stop the Ghost process.
- ghost ls: list all running Ghost blogs.
- ghost restart: stop and restart your Ghost site.
- ghost update: upgrade to a new version of Ghost.
- ghost doctor: check the system for any error while installing/updating Ghost.
- ghost log: view the error logs from the Ghost site.
- ghost version: prints out the ghost-cli and Ghost version.
- ghost uninstall: completely remove a Ghost install along with the related data and configuration. You must execute this command from the Ghost installation directory.
Things to Consider Before Creating Your Website
Ghost is a simple blogging platform but it’s also a feature-rich application with a wide variety of use cases. If you follow the procedure carefully, it won’t take long to install and set up your site.
If you want to develop a professional site, you’ll need to consider usability, SEO, and more. Read our guide on things to plan out before creating your website.


