Google Docs is a great tool for creating everything from to-do lists to blog posts. And when you use Google Docs for a lot of writing, spelling and grammar mistakes are the norm.
Instead of using a separate spelling and grammar tool for basic checks, you can use the built-in checker found right inside Google Docs. This quick explainer will should you how.
How to Use the Spelling & Grammar Check in Google Docs
Google Docs pretty much comes with every tool you need to put together mistake-free, high-quality documents. For example, you can build document outlines, add images from the web, and so much more with just a couple of clicks.
The same is true for spelling and grammar checks. The built-in tool is easy to use and gives you a simple way to check for spelling and grammar mistakes as you write. To use the tool, follow these steps:
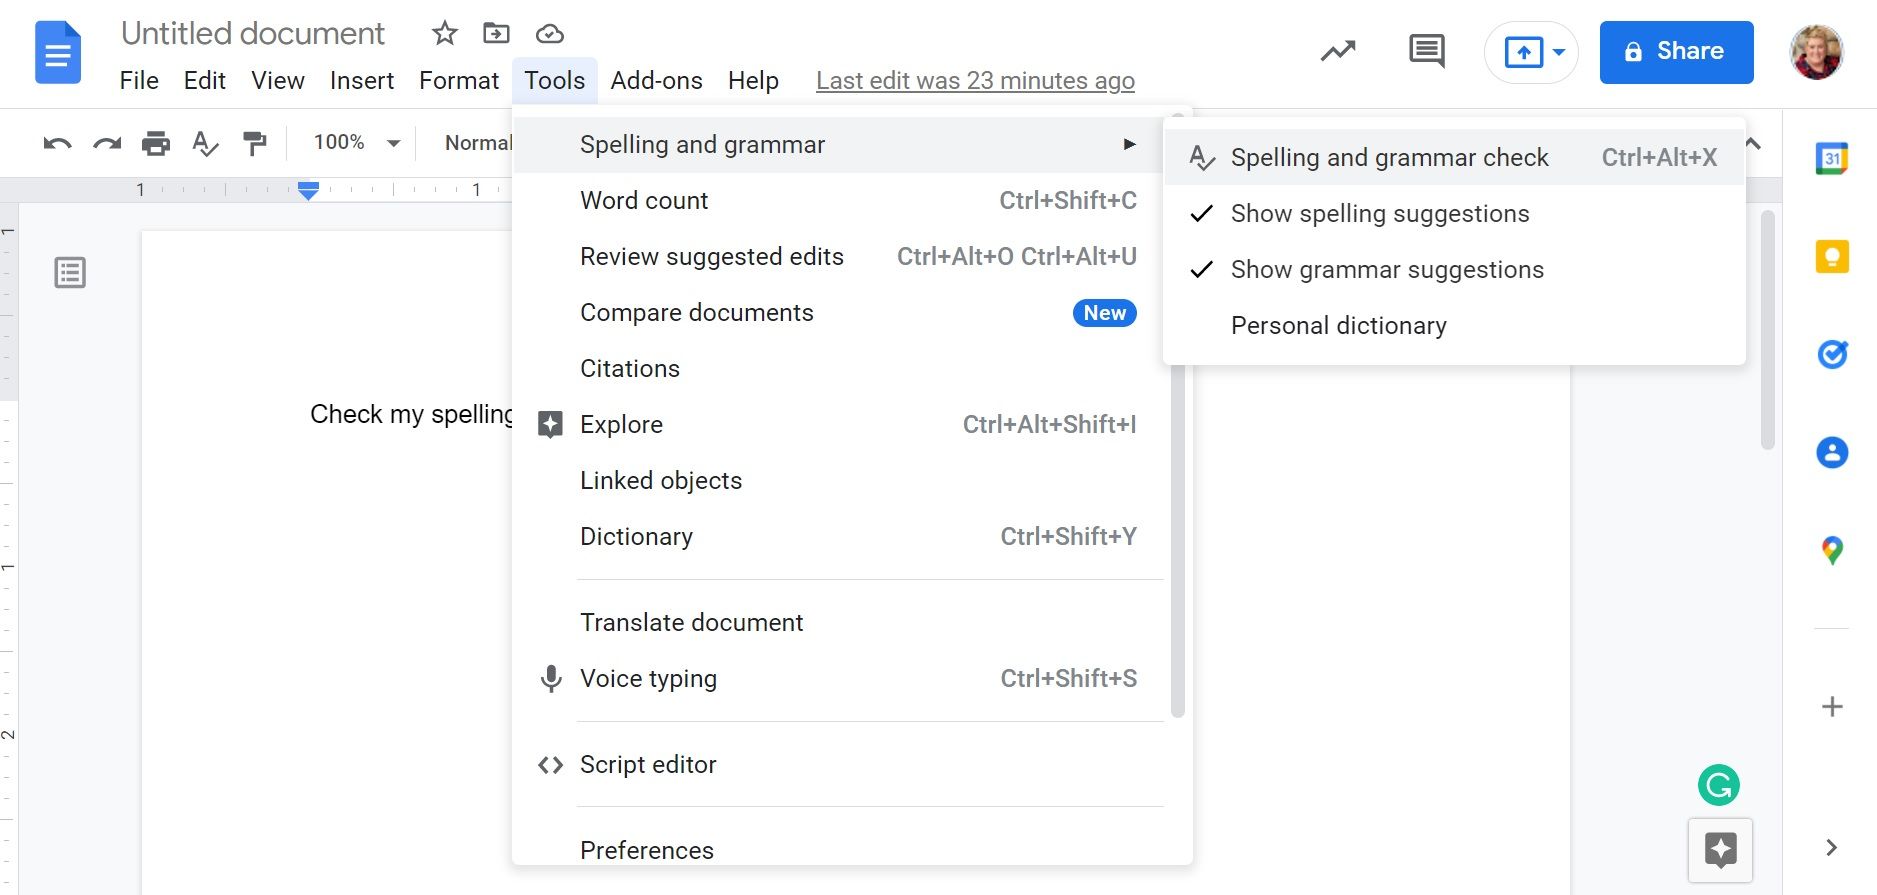
- In the toolbar at the top of your document, select Tools.
- Then, hover over Spelling and grammar to see the sub-menu of options.
- Select Spelling and grammar check to run a quick check of your document.
- After Google Docs completes the check, a window will appear that showcases changes that should be made. Or, you may see Document looks good.
- If you want to accept a suggestion, simply select Accept in the window. Or, you can select Ignore to ignore a suggestion.
If you want to accept or ignore all the suggestions, simply select the three-dot menu in the spelling and grammar check window. With this easy option, you don't have to accept or ignore every change manually.
What Else Can Google Docs Do for You?
The built-in spelling and grammar checker is only one of Google Docs' tools to improve the document creation process. Google Docs can do so much more—it can even read your copy back to you.


