In most work environments, your workflow processes are usually already in place for you to follow. As a freelancer, however, this is something that you will have to develop and implement yourself. This can be intimidating at first—but after some experimenting, the flexibility to choose your own workflow documentation can be empowering.
Why Bother Documenting Your Workflow Process?
Wait—if nobody is making you document your workflow, why bother? Isn’t that what “being your own boss” is all about?
It’s true: as a freelancer, you can decide not to document much of anything if you don’t want to. But documenting your workflow process can help you budget time, maintain better relationships with clients, and bill for your work.
You might try doing without documenting for a while. But as your freelancing career continues, you’ll probably find yourself documenting more and more. This can be a long and painful process. Taking some time to set out your documentation is definitely the easier, softer way.
Envisioning Your Workflow Process
Documenting your workflow process can seem pretty abstract and messy if you aren’t used to it. Further, it can look pretty different depending on the kind of work that you do. You might consider following along with this article using a project that you’ve already completed. That can help you understand how a project breaks down.
1. Break Down Your Task
The first step is breaking down your task into parts. As a writer or editor, this might be the outline of a book or article. If you’re an artist, these might be different planes or components of the final piece. Whatever you do, the task should usually break down into quantifiable steps that go together to create the final project.
Breaking down your task into parts is important for a number of reasons. First, it’s going to form the basic moving parts of your workflow documentation. Further, it can help you psychologically. Even if you aren’t big on documenting, breaking a task down into parts can help a big project feel more manageable.
2. Create a Checklist and a Visual Flowchart
Once you’ve broken down your task, turn each of the parts into an item on a checklist. Like breaking down your task in the first place, creating a checklist serves two purposes: it helps you monitor your own progress, and it helps you communicate your progress to clients. You might also find it helpful to turn your checklist into a visual flowchart.
This is particularly handy if your project has multiple steps. For example, if you’re editing a book, each chapter may need to be outlined, drafted, cited, and edited. Detailing something like this on a paper checklist would be messy, particularly if you’re working with multiple tasks at once, or the tasks can move the back-and-forth through steps.
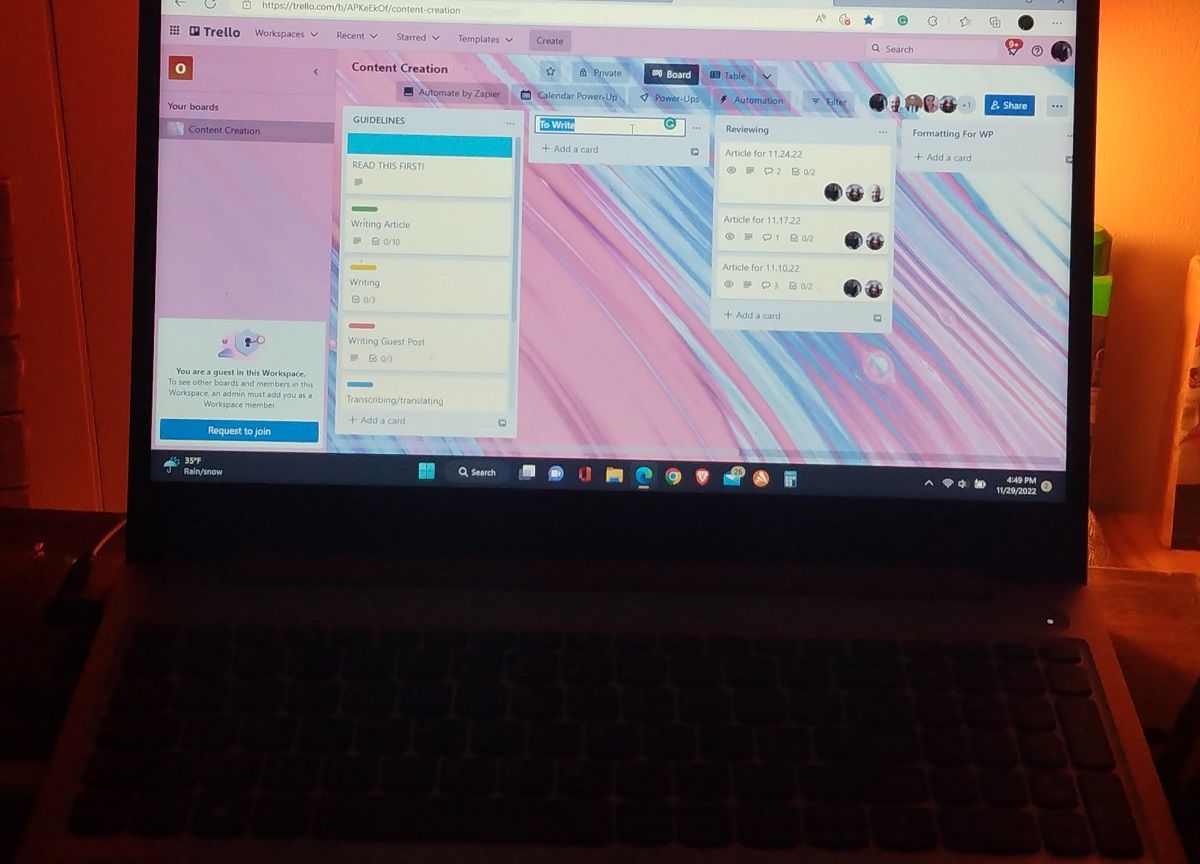
The solution that you use for this kind of setup can depend on how autonomous you are. If you’re working more or less in a vacuum (as some freelancers do), your visual flowchart might be sticky notes on a whiteboard. If you’re working closely with your client or with other contractors, you might use a shareable workflow platform like Trello.
3. Define Goals and Objectives
This step may seem a little unnecessary. Why do you need goals and objectives if you already have a checklist?
Even with a checklist, you can’t do the whole project at once. You still need to decide how much of your project you want to get done in a day or a week, or just between check-ins with your clients.
To return to the book example, do you want to outline all of the chapters before any of the chapters are drafted? Do you want to start drafting one chapter when the previous chapter has yet to be edited? These are questions that only you can answer. However, answering them in advance can help you stay organized.
Once again, having clear goals and objectives can keep you on top of your project but can also help you communicate with your client regarding how the project is coming along—and how you expect it to come along.
4. Budget and Track Time
When you have your goals and objectives decided, it’s time to start budgeting your time.
How much time do you have to complete the whole project? How much time do you have to devote to this project within that time frame? How much of that time will need to be allocated for each objective? Do you have all the time in the world, or do you need to prioritize and maybe go without some extras to meet deadlines?
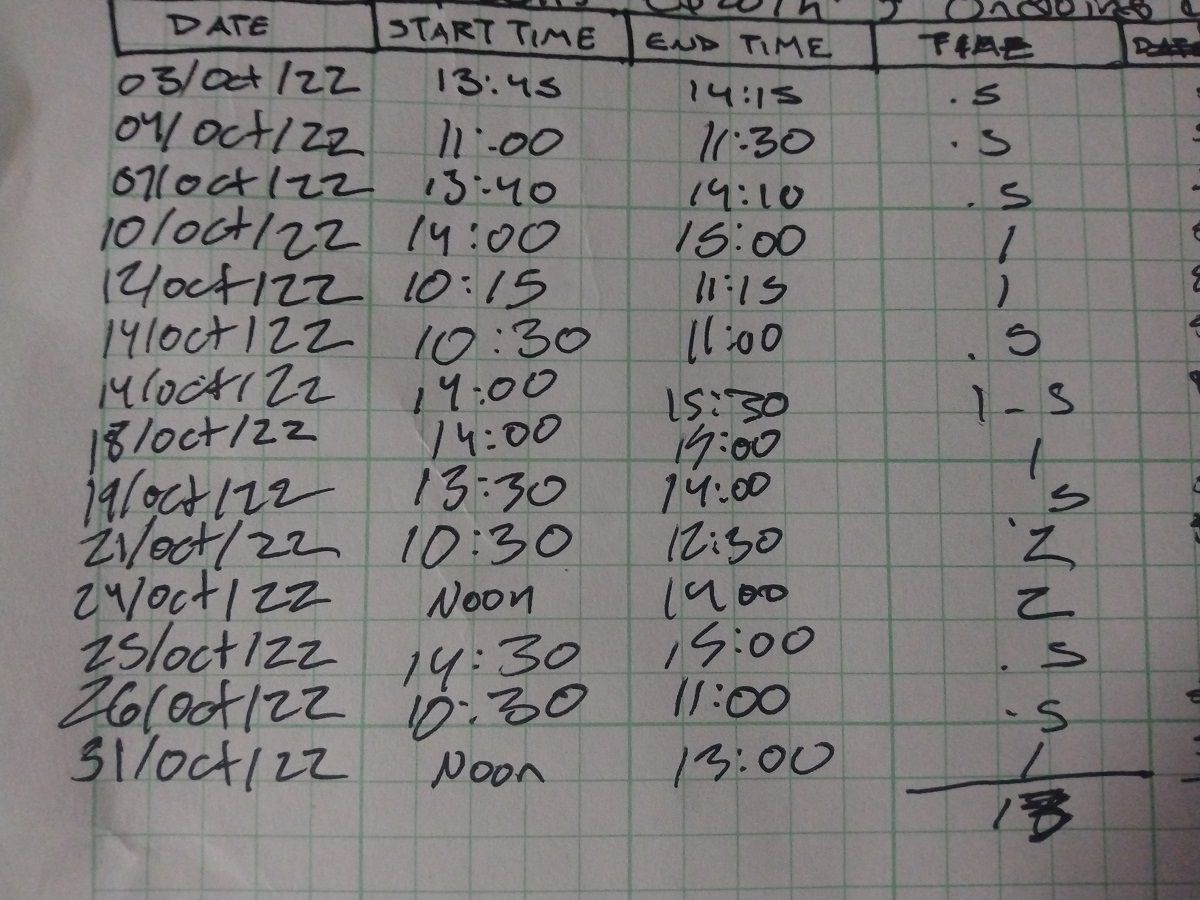
If you get paid by the hour, you’ll naturally be tracking your time. Just remember to note how much of that time went into each step of the project. That way, you’ll have a better idea of how much time you’ll need, both going forward on this project and when budgeting time for future projects.
If you get paid by project or deliverable, as some freelancers do, it can be tempting to not track time at all. However, again, understanding how you use your time can help you become a better and more efficient freelancer. So, consider tracking and budgeting your time—even when no one is making you.
Review, Monitor, and Optimize
Throughout individual projects and after each project, take time to reflect on your workflow process documentation. Were there things that you found yourself breaking down further as you went along? Did some tasks take you more or less time than you anticipated? Were your goals too large to be realistic or too small to be helpful?
Doing this kind of work during a project can help you to work as efficiently as possible for the rest of the project. Doing this kind of work between projects can help you give more accurate quotes to future clients, along with budgeting your own time in manageable and effective ways.
You’re Worth the Work
Most clients don’t explicitly request workflow documentation. It can be easy to get “freelancer tunnel vision”, which is the compulsion to not do anything beyond what the client explicitly demands. But doing some extra work to fine-tune your scheduling can help you become a more efficient freelancer. And that’s good for everyone.


