Amazon Lightsail is a powerful virtual cloud server platform aimed at small businesses, startups, students, and other users who need to build and host their website or other solutions, including managed database. We will learn to set up a WordPress website on Amazon Lightsail server and host our website for free.
Advantages of Using Amazon Lightsail for the Website Hosting
Unlike the Amazon EC2, Amazon Lightsail is a simplified VPS that empowers users to quickly deploy and manage applications and websites. It offers a range of services including:
- Virtual servers (Linux & Windows)
- Managed databases
- Storage
- Networking
With just a few clicks, anyone can host their WordPress website or application on Amazon Lightsail. And one of the key features of Amazon Lightsail is free website hosting. It is also scalable, meaning you can easily upgrade your hosting plans or server configurations (RAM, storage, & processor) as your website or business grows.
If you are a startup, individual or small business looking to create an online presence without spending much, Amazon Lightsail's free website hosting is what you need.
Setting Up a Free WordPress Website on Amazon Lightsail
Setting up free WordPress website hosting on Amazon Lightsail is a simple process. You can follow the below steps to create an instance on Amazon Lightsail to host your website.
1. Sign Up to Amazon Lightsail
Visit the Amazon Lightsail page and sign up using your email account. If you already have an Amazon or AWS account, you can sign in using your registered email and password.

2. Create a New Instance
After signing in to the Amazon Lightsail, follow these instructions to create and launch a new instance on the Amazon Lightsail:
- Under the Instances tab, click the Create Instance button.
-
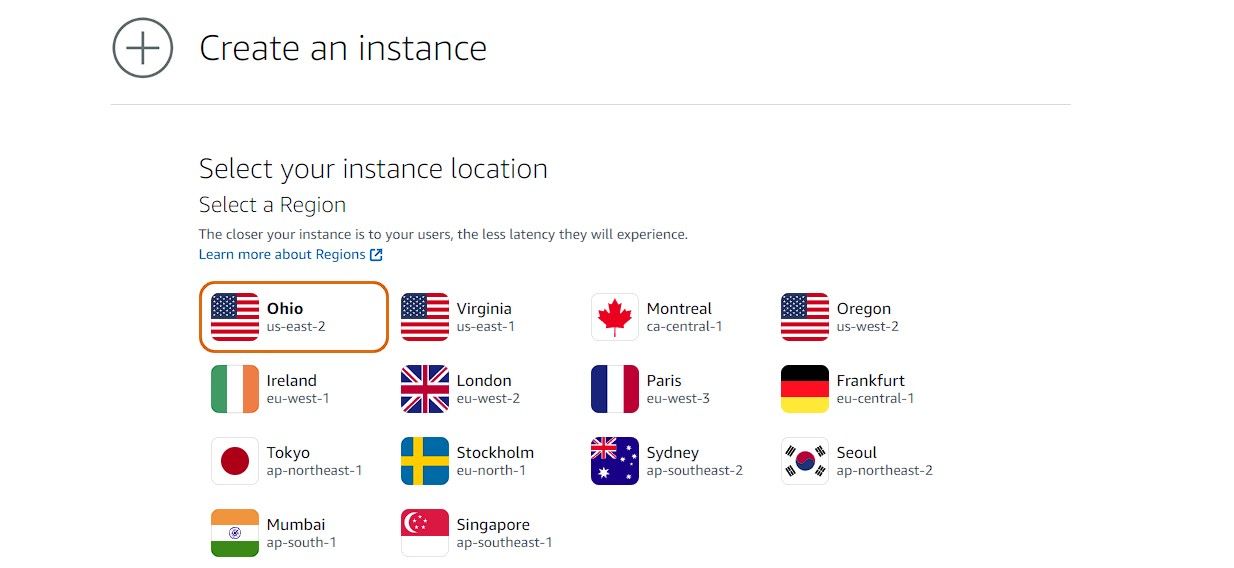
First, select a region or location for your instance (webserver). Amazon Lightsail offers servers across the globe. You can choose from any location that is geographically close to your target audience and ensure optimal site performance.
-
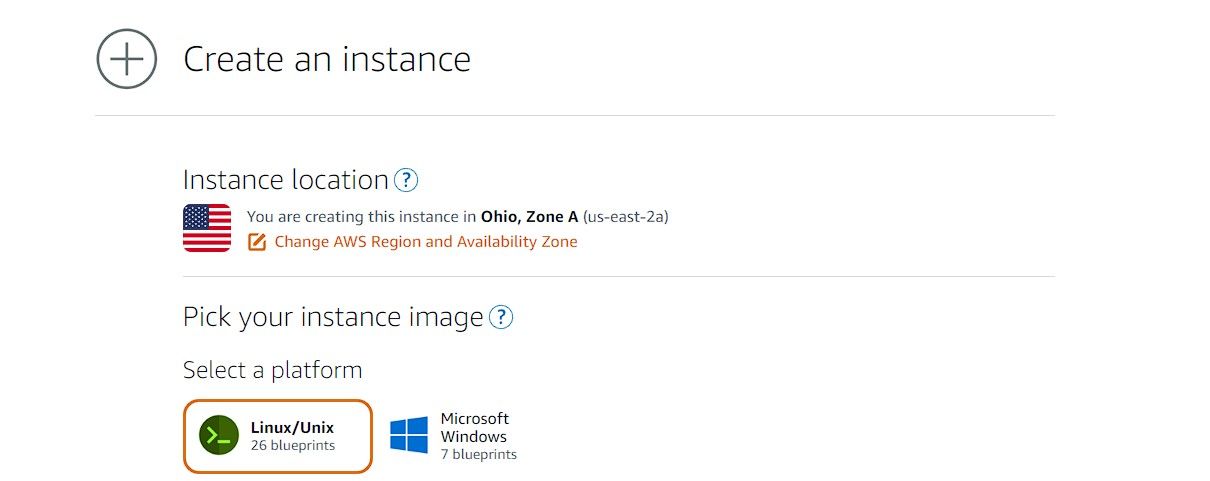
Under the Pick your instance image section, click on the Linux/Unix option and then click on the App + OS option listed under the Select a blueprint section.
-
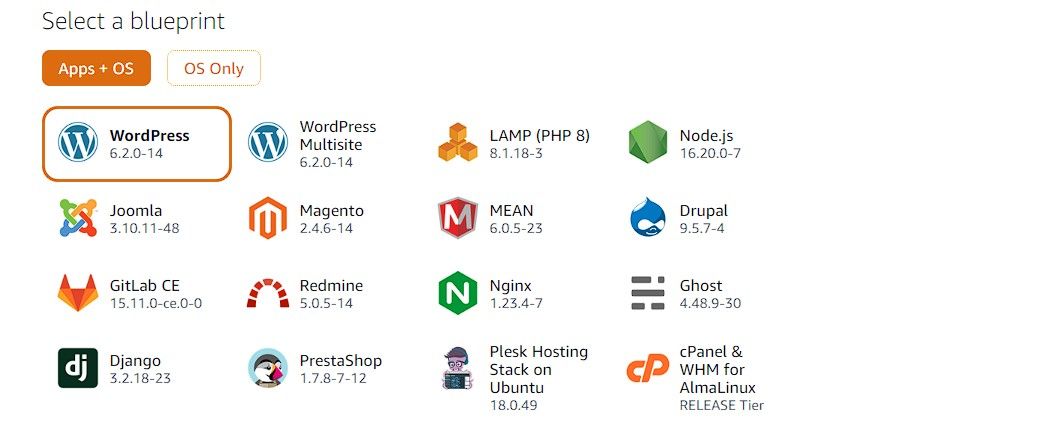
Then select WordPress, if you want to launch a single website on one instance or VPS server. You may also select WordPress Multisite, which allows you to host more than one website on a single server. For this guide, we will select WordPress.
-
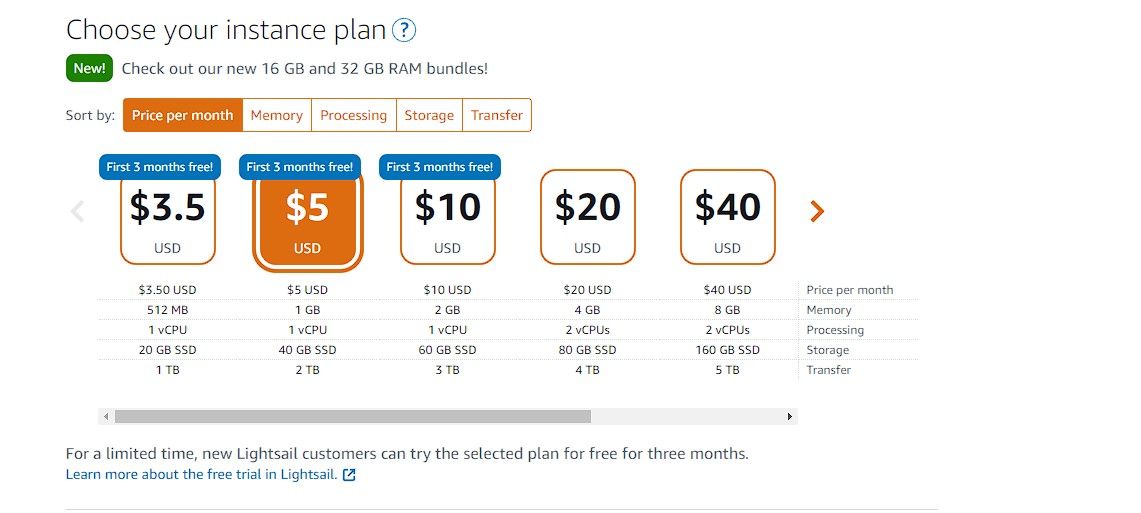
Then select a plan. For free website hosting, choose the lowest-cost plan available. You may choose any of the first three plans, which are free for the first three months. After the first three months, you will be charged the amount mentioned under Choose your instance plan section.
-
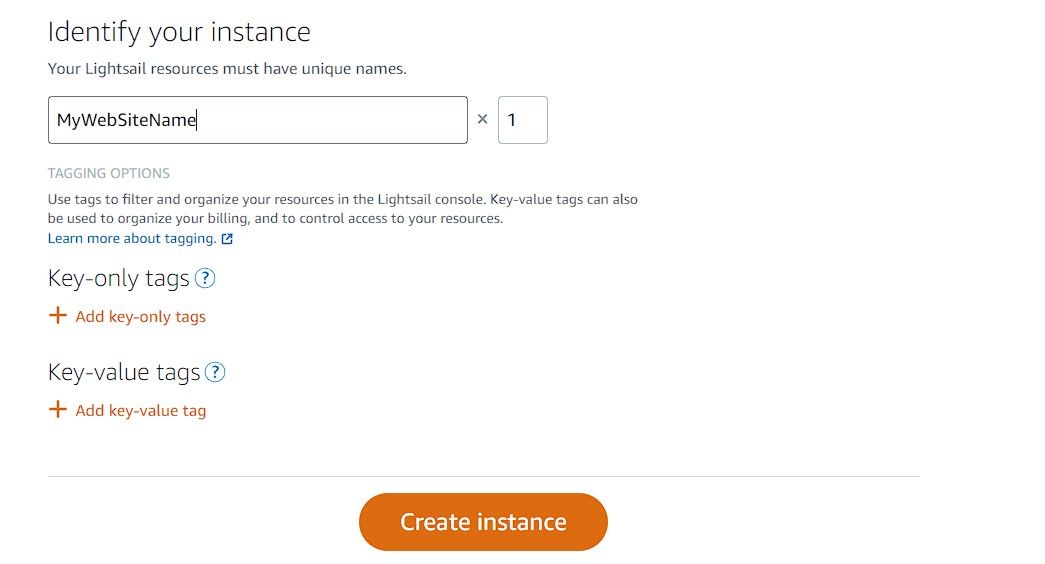
Type the name for your instance, preferably the website name, and click the Create instance button. This will initiate the process of setting up your free website hosting environment.


Wait for a while and allow Amazon Lightsail to deploy your website instance. This may take between five and ten minutes. Once it’s done, you can visit the IP address of your instance to access and view the default website.
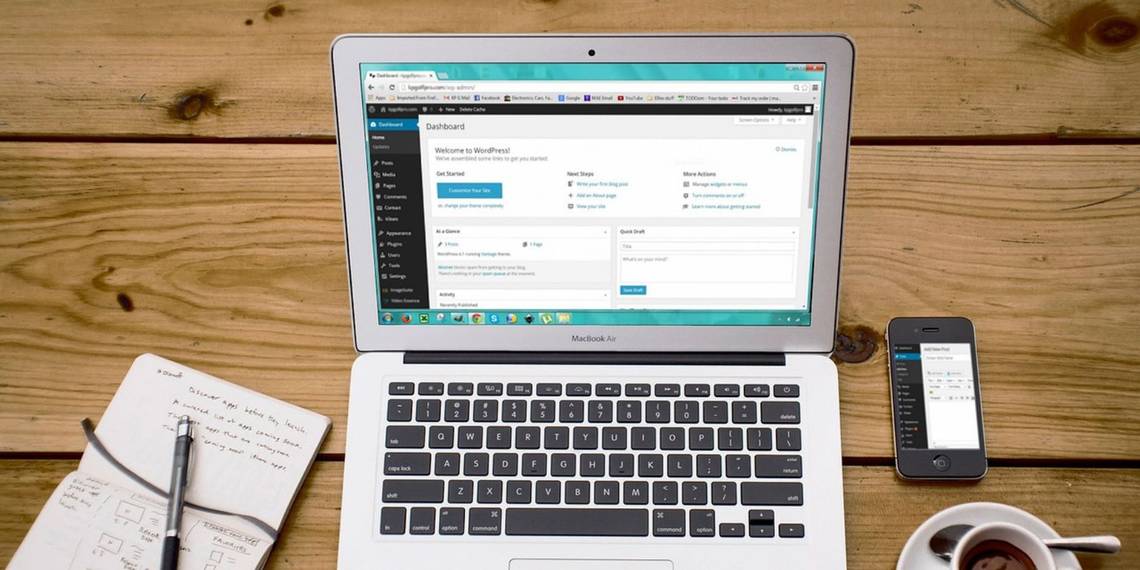
Log In to WordPress' Admin Panel
Once your WordPress instance is up and running, you can access the backend (yoursitename.com/wp-admin) by using the default credentials. To get these credentials, follow these steps:
- After creating the instance, you will be taken to the Amazon Lightsail home page.
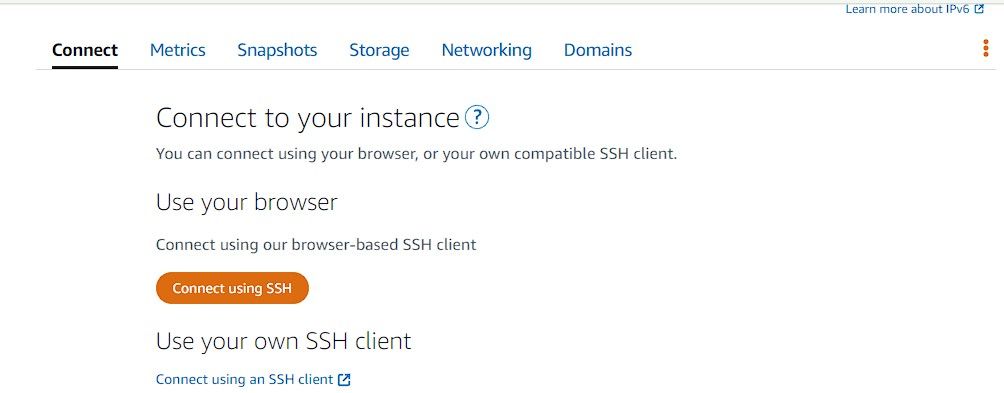
- Click on your instance. This will open a new page.
-
Click on the Connect using SSH button.
-
This opens a terminal window tab when you need to execute the following command to view the WordPress admin username and password.
cat bitnami_credentials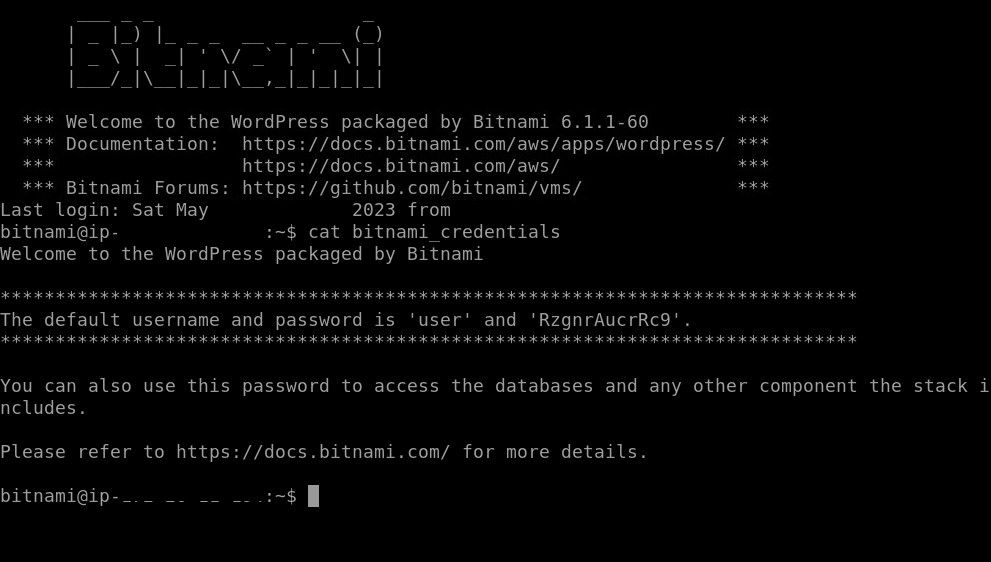
- Enter the username and password to log in to the wp-admin panel, where you can upload the website themes and customize the website as per your needs.


Configure Your Domain and SSL Certificate
The next step is to connect the domain to the website server and set up SSL. We recommend you add your domain name to Cloudflare with a free account. This will add an extra layer of protection against spam and attacks.
Once added, follow these steps to connect the domain to the Amazon Lightsail website server.
1. Set Up a Static IP address
To ensure that your domain remains connected to your Amazon Lightsail instance, you must set up a static IP address.
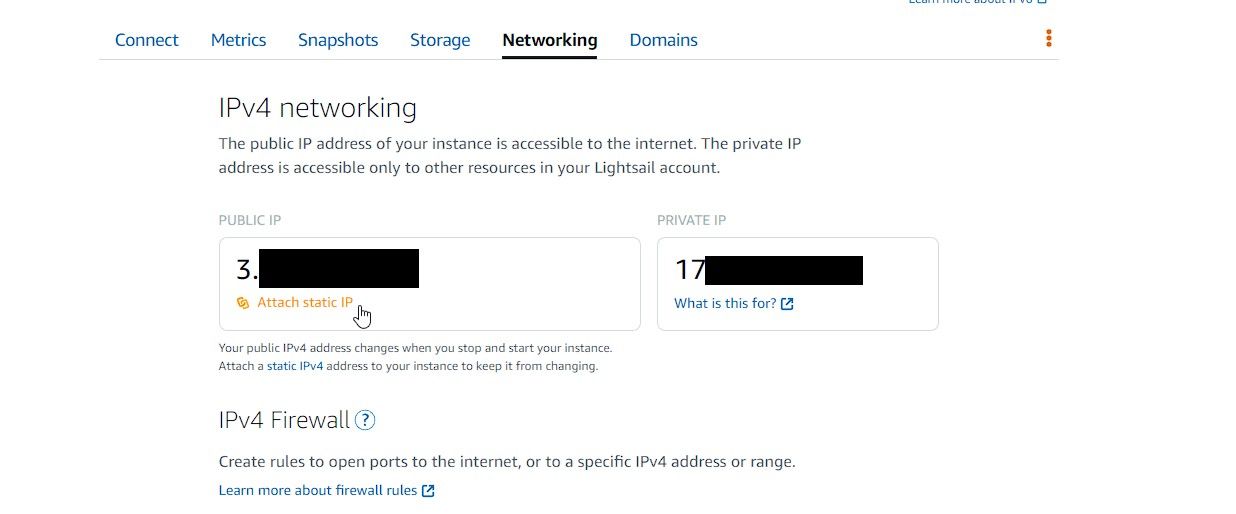
- On the Amazon Lightsail instance page, click on the Networking tab
-
Click Attach static IP.
-
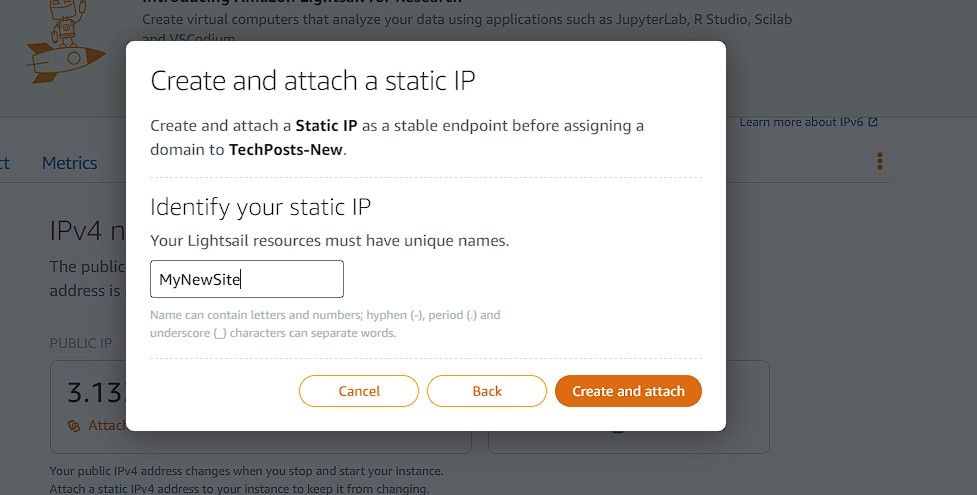
From the drop-down, choose Create a new static IP and then type a name for the static IP. Click Create and attach.
-
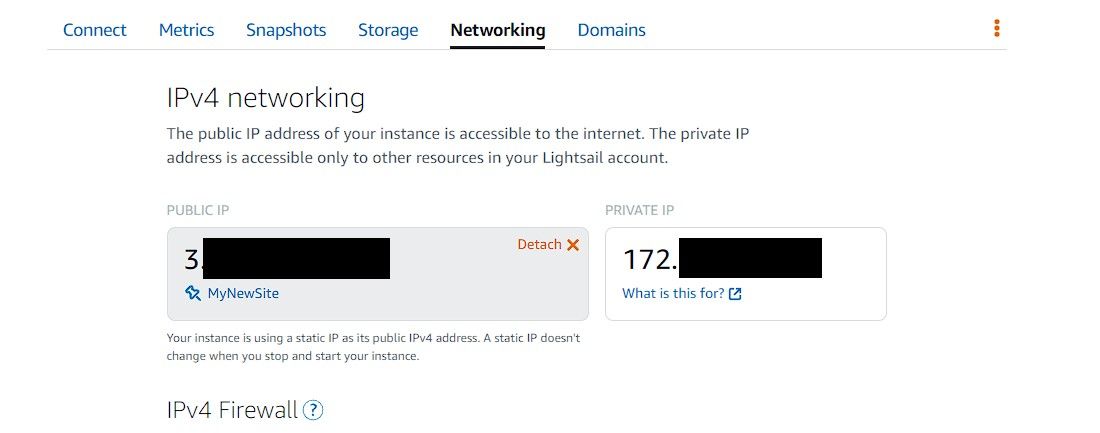
This will attach a new permanent static IP to your server instance. You can visit this new IP address to view your website.


2. Update DNS Records on Cloudflare
Log in to your Cloudflare account and go to the DNS option. Here, update the IP address in the A record with the IP address of your Amazon Lightsail instance (after attaching the static IP). If the A record is not added yet, follow these steps:
-
Click +Add Record, select A in Type, type @ in Name, and then paste the static IP address of your Amazon Lightsail instance.
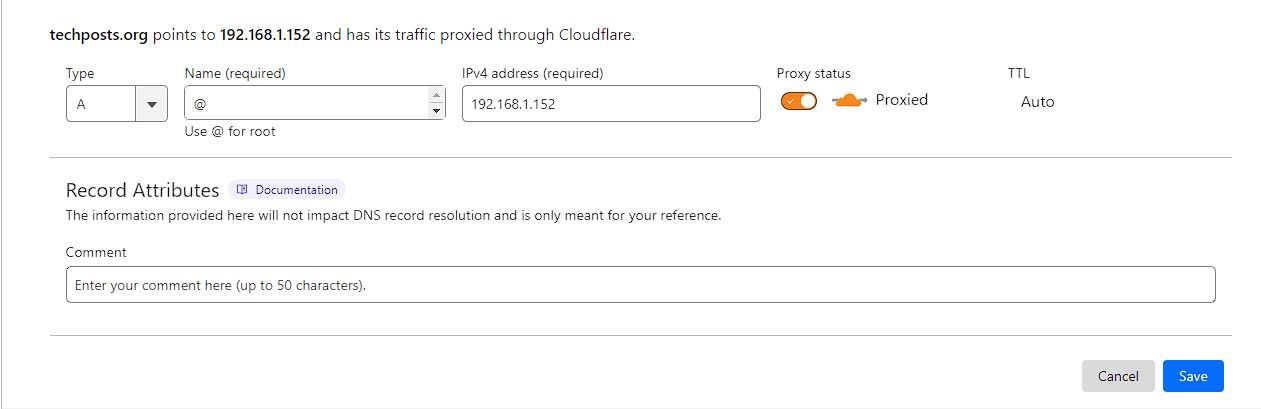
- Click the Save button.

After a few minutes, you can visit your domain name to access the new website hosted on Amazon Lightsail.
3. Configure an SSL Certificate
You must secure your website and protect user data with an SSL certificate. Follow these steps to set up SSL on your Amazon Lightsail using Cloudflare:
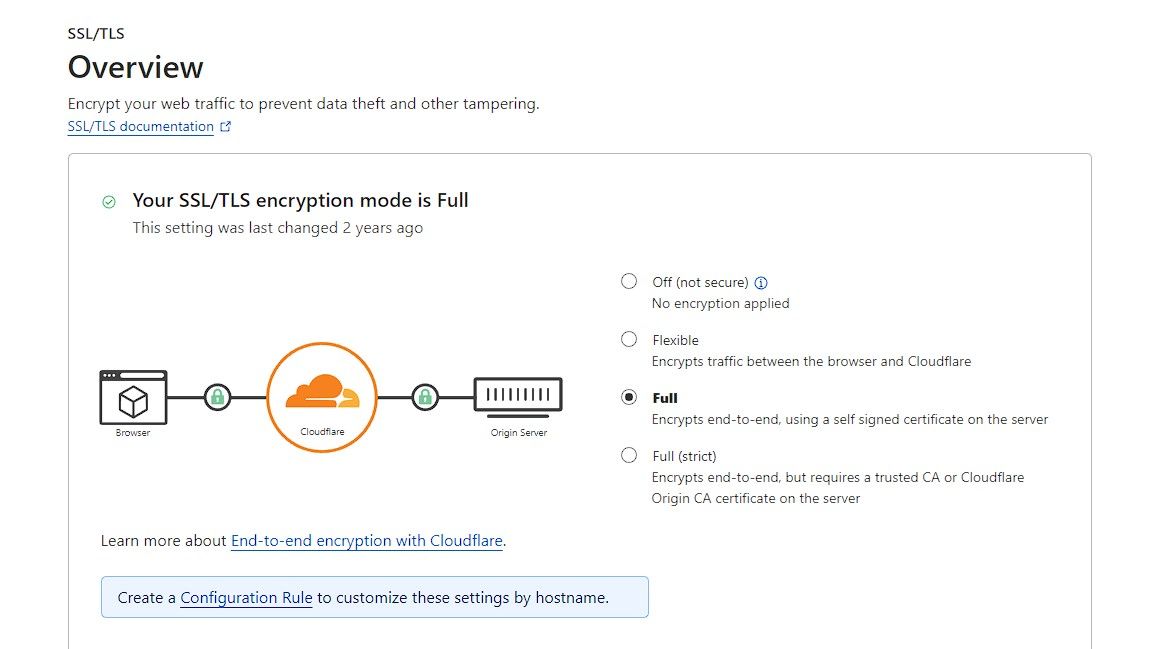
- In Cloudflare, click on the website and then click SSL/TLS option.
-
In the Your SSL/TLS encryption Mode, select Full.
- Login to your WordPress admin panel and install the Really Simple SSL plugin.
- Activate the plugin.
- Make sure to change the site URL under Settings > General with https://.

For detailed instructions, refer to our previous guide on how to set up a free SSL certificate on WordPress.
Alternatively, you can follow Bitnami’s official documentation to install and configure the Let’s Encrypt SSL on the Amazon Lightsail instance. Alternatively, you can also host a secure website on a Raspberry Pi with no recurring charges or hosting fees.
Amazon Lightsail Is Ideal for Getting Started
Amazon Lightsail is one of the quickest and most reliable ways to launch a website within a few minutes. It does not require any technical expertise and thus, anyone with little to no experience in launching or setting up a website on Linux or Windows server can host their business or individual websites for free.
You can also host a free DIY Bitwarden password manager server at home using a Raspberry Pi to manage all your passwords without paying a subscription fee.