Gmail’s SMTP server is a free service offered by Google to send emails from an app or website. It allows for the delivery of transactional emails and gives users the ability to send automated messages.
You can also use it to send a message from an email client using your Gmail address. Here’s everything you need to know about Gmail’s free SMTP server.
Getting Connected to the Gmail SMTP Server
Connecting with Gmail’s SMTP server is simple. All you’ll need to get started is a few basic pieces of information and the same credentials you use to log in to Gmail.
First, you’ll need to activate some options within the Google developer panel and grab a few pieces of info. You’ll need this information to establish a connection between any app and Gmail, so you can start sending.
Step 1: Gmail SMTP Connections
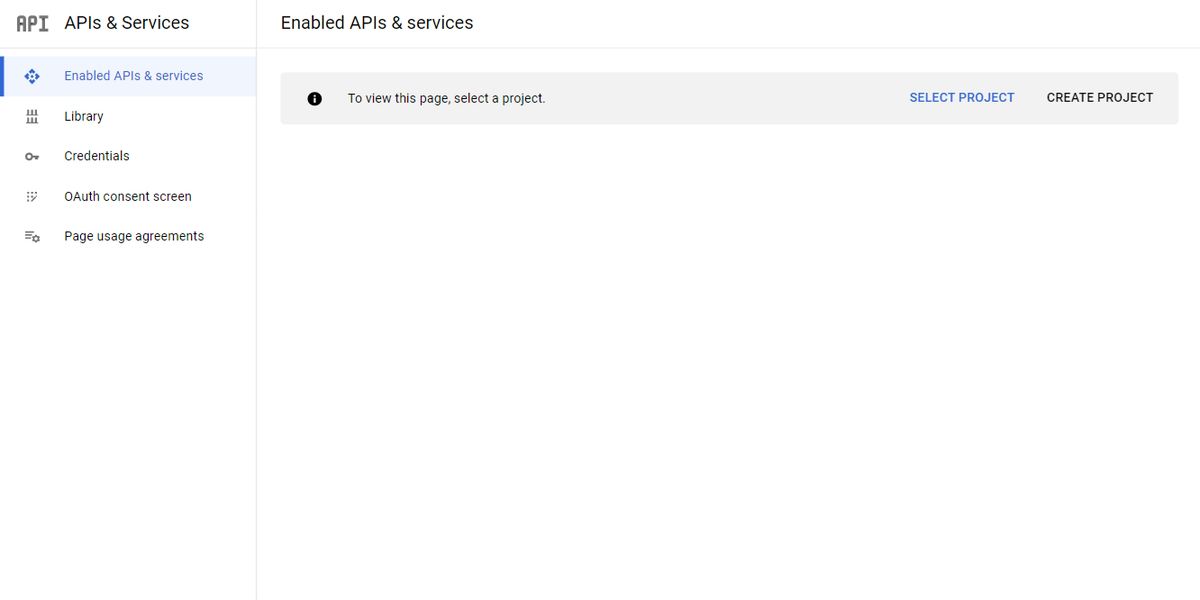
The first thing to do is activate the Gmail SMTP server for your email address. Login to your Google account and navigate to Google’s Admin Dashboard:
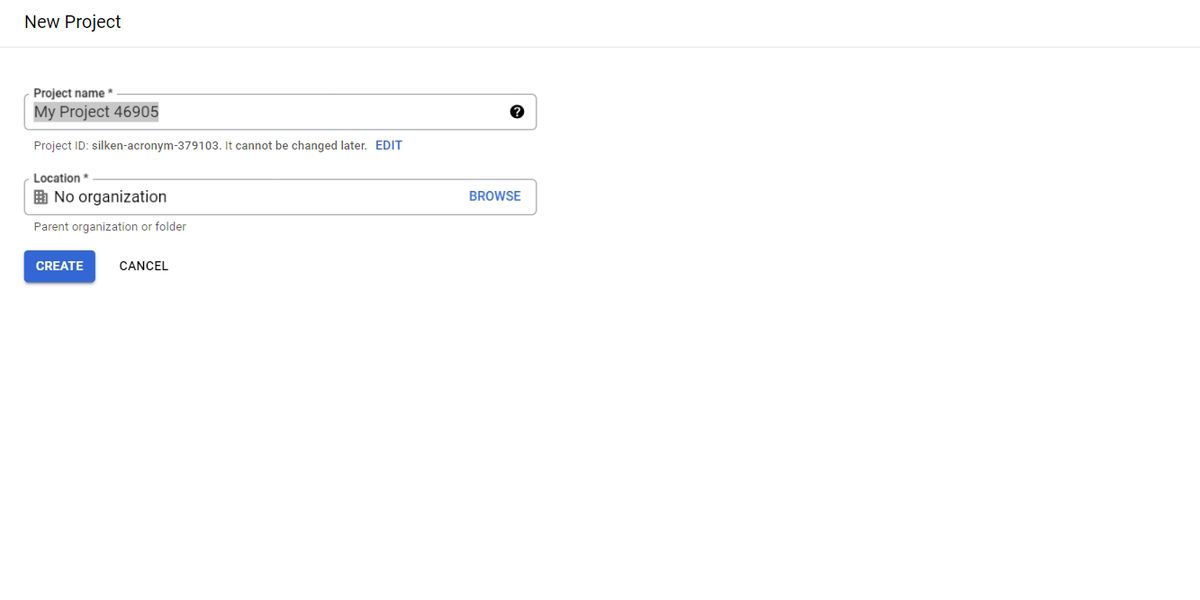
To establish a connection, create a new project. Click the CREATE PROJECT button and fill out the following form:
You’ll need two pieces of information to create a new project, a Project Name, and a Location. The name is simply a way to identify one project from another, while the location groups multiple projects together.
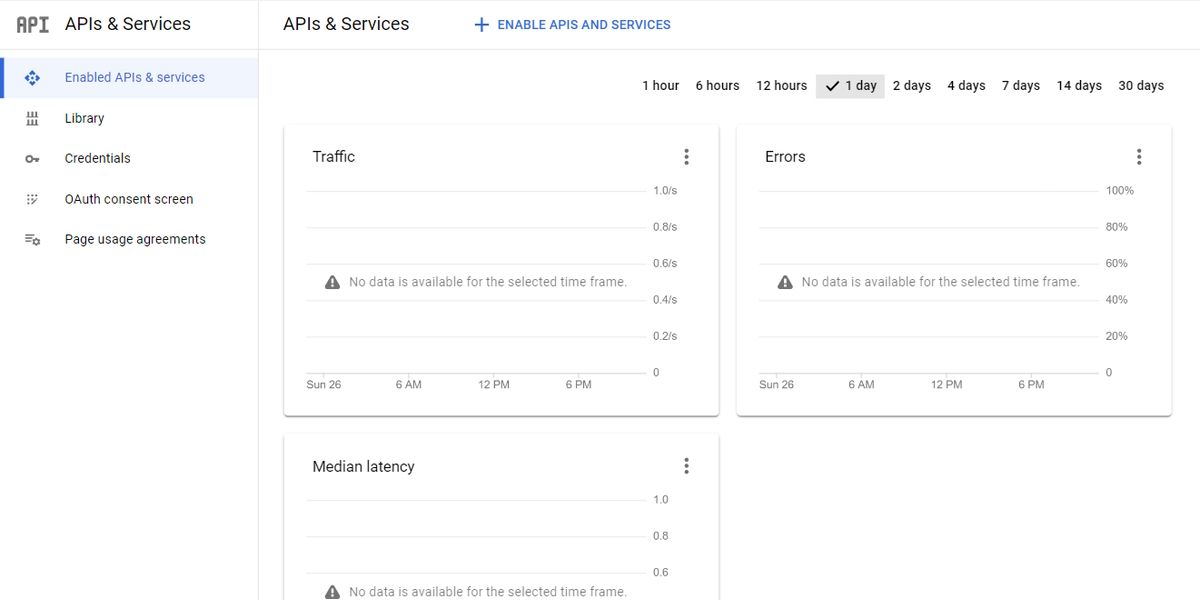
Once satisfied with the name and location, click the CREATE button to start a new project. With your project created, you’ll need to enable the Gmail SMTP API (Application Programming Interface). From your Google Admin Dashboard, click the ENABLE APIS AND SERVICES button:
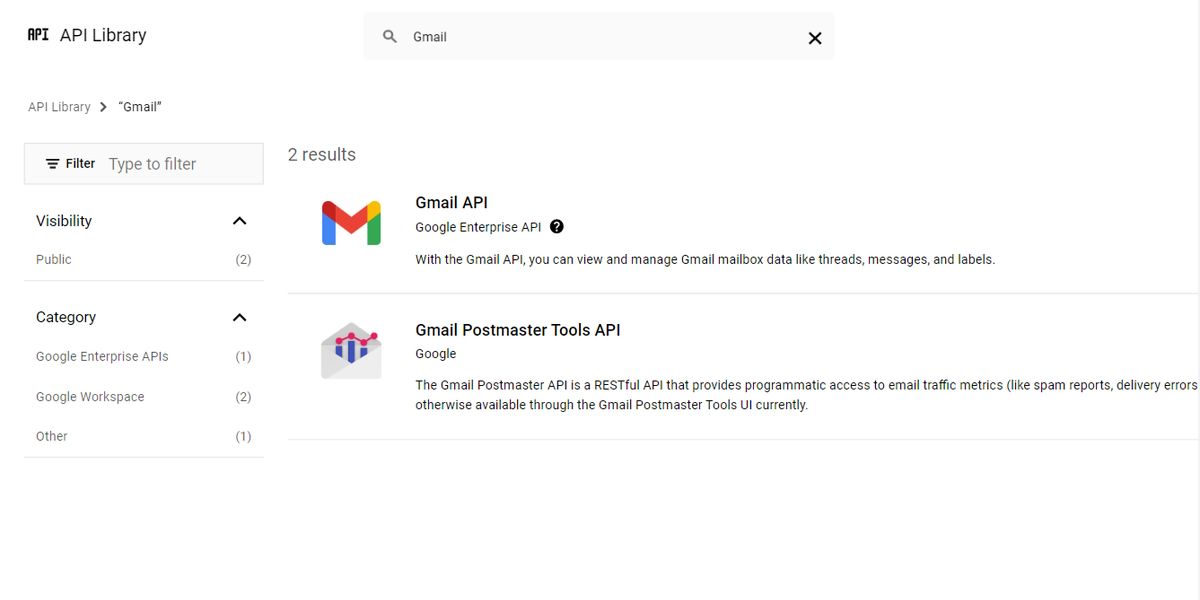
From the APIs & Services page, you’ll need to locate the Gmail API in the list. The easiest way to do that is with the search bar at the top of the page:
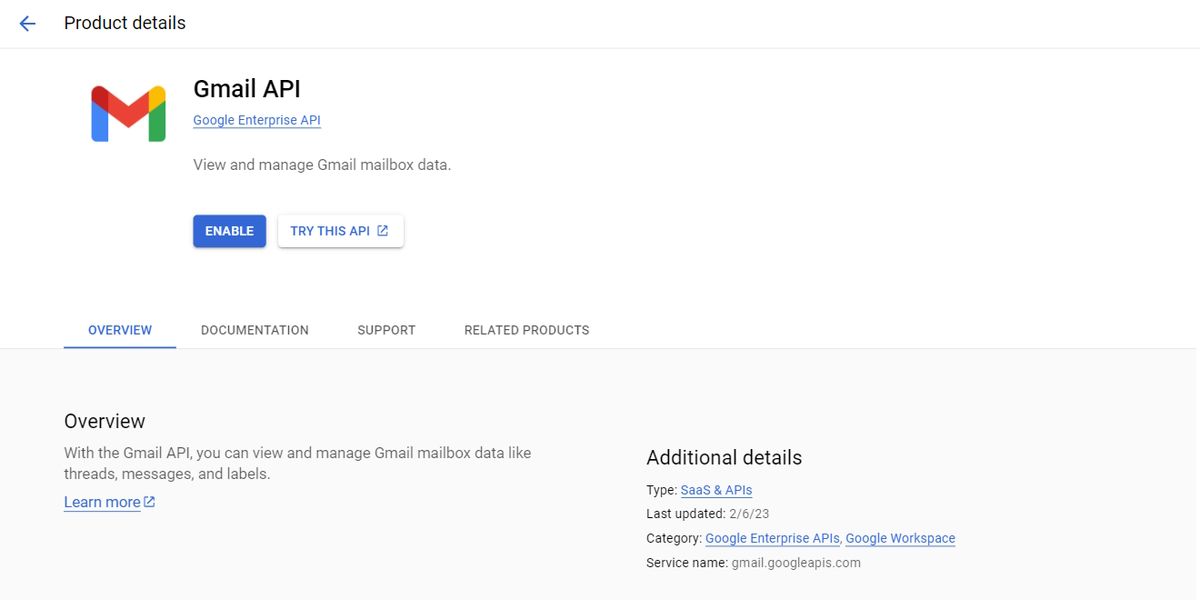
Select the Gmail API option from the list and select the ENABLE button on the page that pops up:
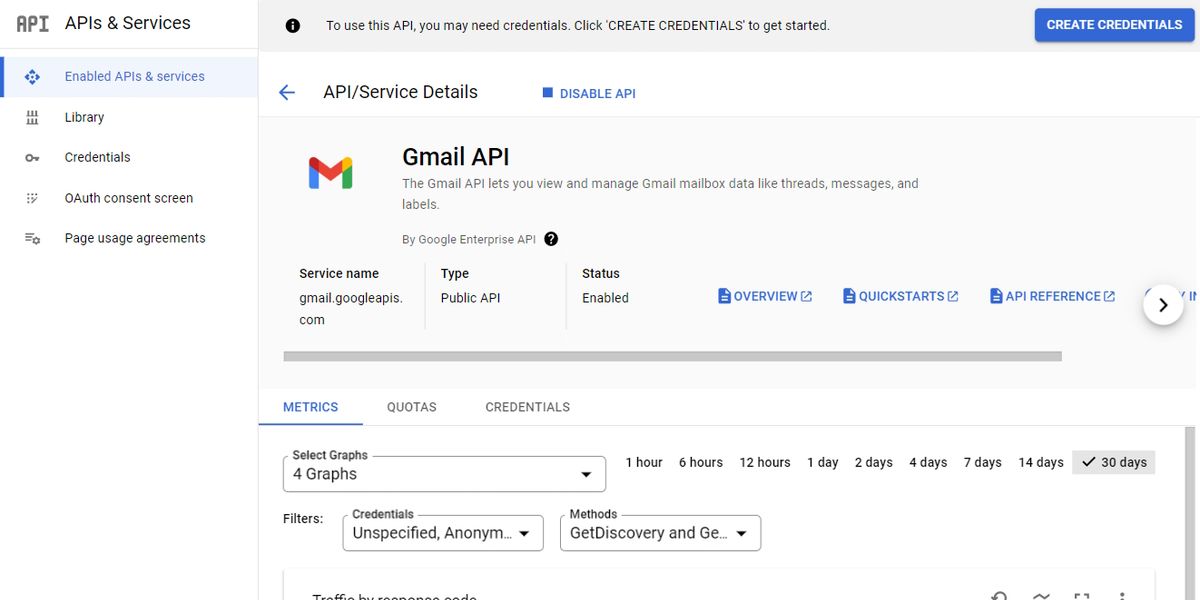
The Gmail API is now active for your project. The page will now shift to the Gmail API dashboard, showing your settings and usage statistics. Bookmark this dashboard for later use and monitoring.
Step 2: Configuring Gmail SMTP Settings
The next step in the process of getting started is to create a set of credentials to use to access the API. From the dashboard in the last step, click on the Credentials link in the nav bar on the left-hand side:
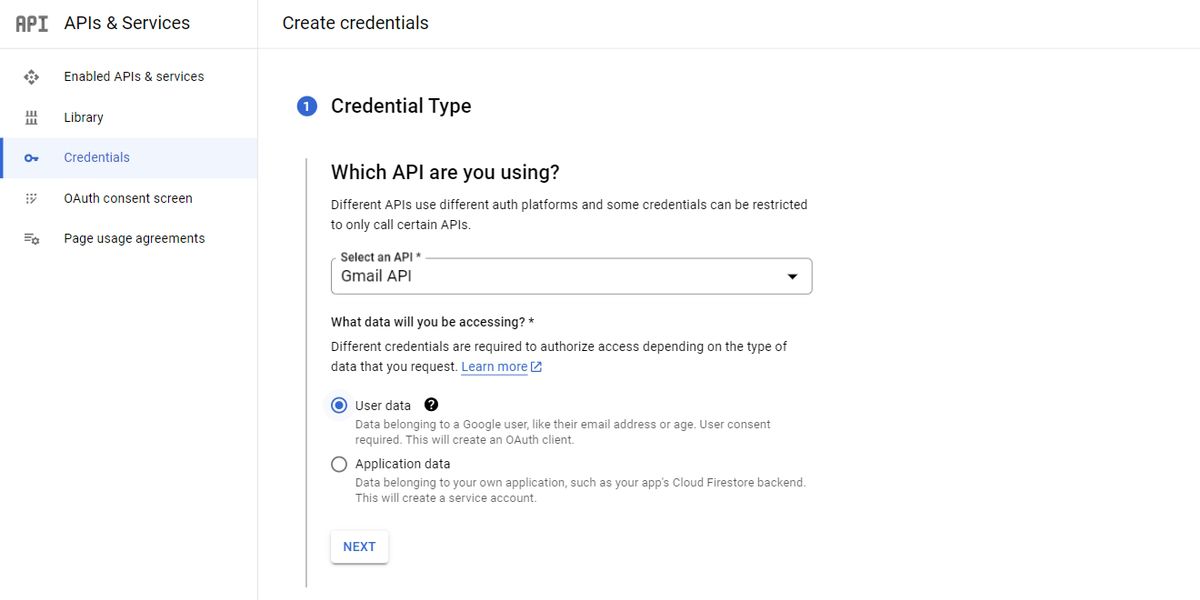
From the top of the credentials page, click the Create Credentials button. Next, select the Help Me Choose option from the bottom of the list. This will take you to a form where you must fill in some information.
Select Gmail API as the API that you are using. Select User data when asked what data you’ll be accessing. Click on the next button below the data question.
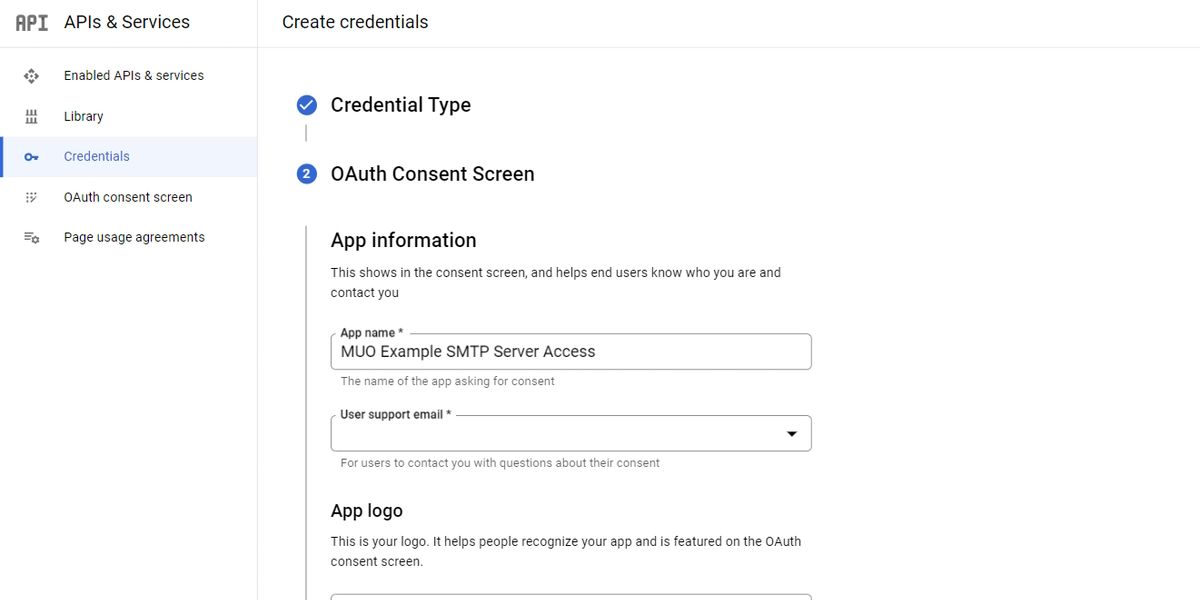
The next part of the form will load, prompting you to set up an OAuth Consent Screen. You’ll need to enter a few pieces of information to set it up completely. You can assign any name you would like to be the App name.
You should use the address you plan to send messages from as the User support email. Optionally, you can add a logo to display as well. Finally, you’ll have to put in a developer email. It can be the same email listed above or a separate email where someone can reach you:
Once you’ve completed the OAuth Consent Screen form, click the NEXT button. It will take you to the Scopes form. The Scopes form is optional. Click on the SAVE AND CONTINUE button at the bottom of the form.
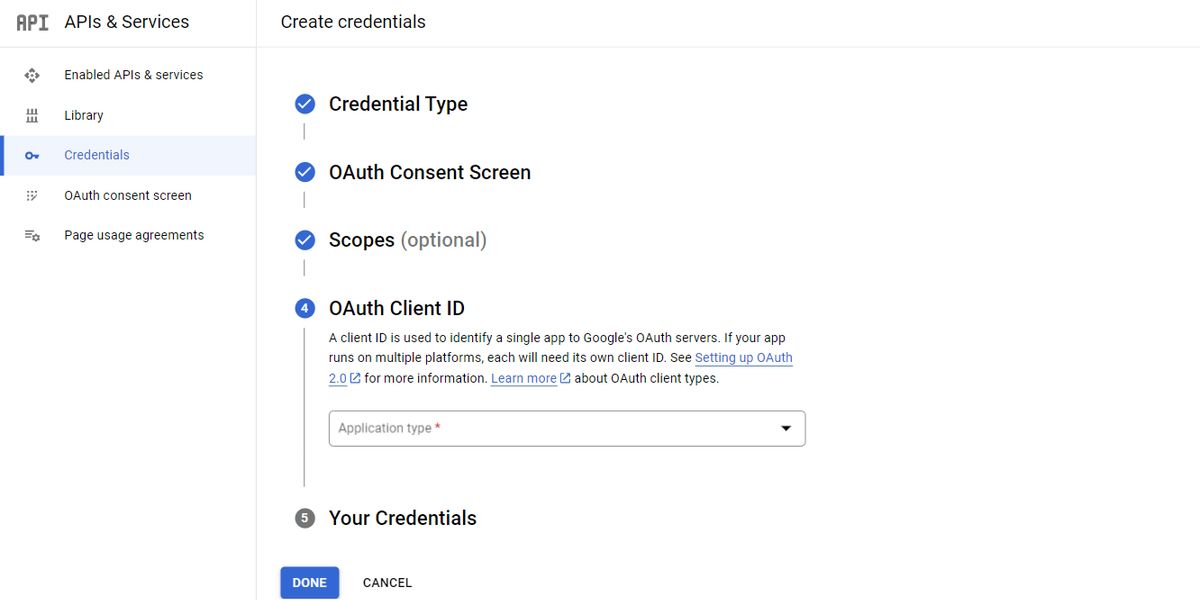
The next screen is the OAuth Client ID screen. The first thing you’ll need to put in is the type of app you are accessing the server from:
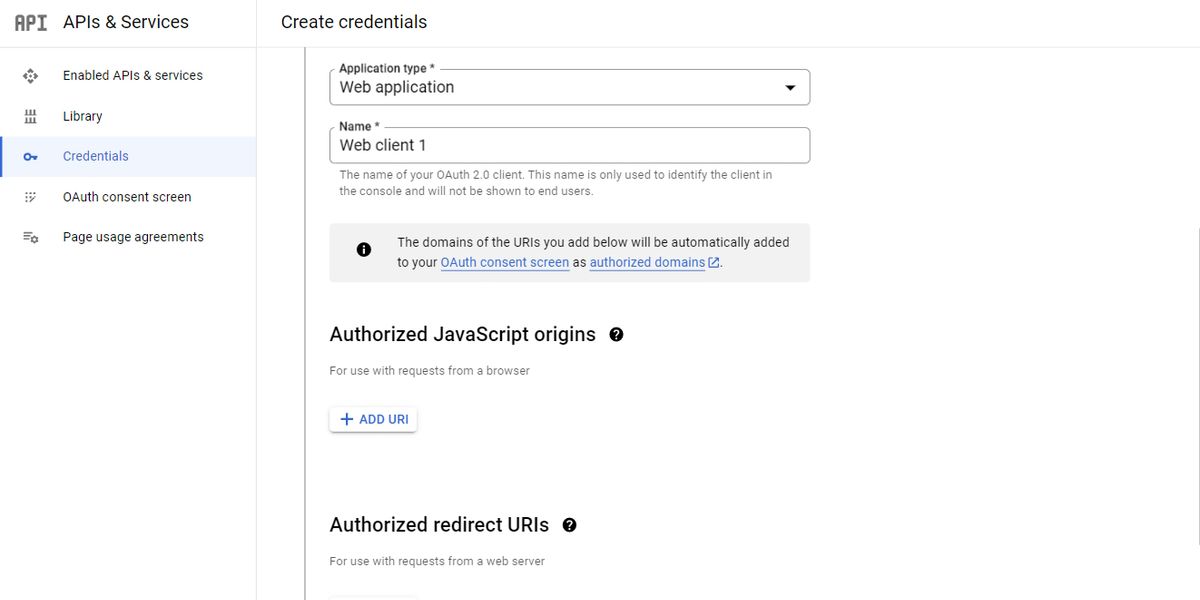
For most uses, select Web Application, and it will bring up a new form with additional options:
First, you will need to enter a Name for the app. The name can be any identifier you would like. Next, the form will prompt you for Authorized JavaScript origins and Authorized redirect URIs. The system that you are using will provide both of these.
WordPress Plugins, private apps, and mail servers will require different information. You will need to check your system to add these items.
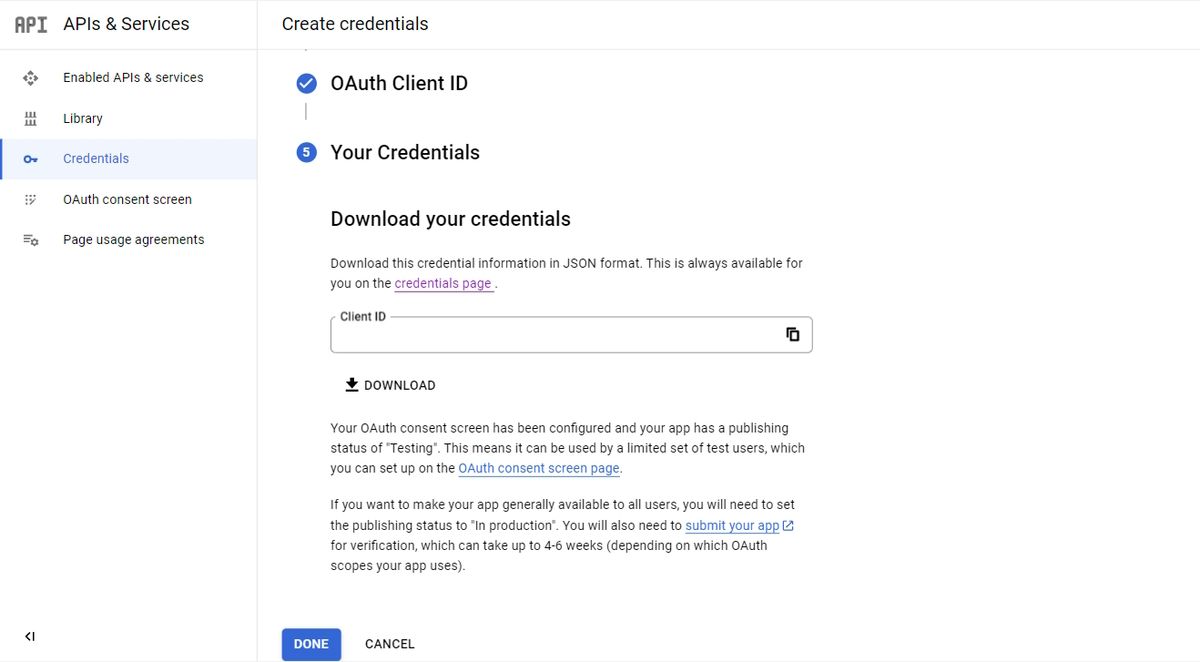
Finally, once finished, click on the CREATE button to show the SMTP server credentials for your connection:
Step 3: SMTP Server Credentials
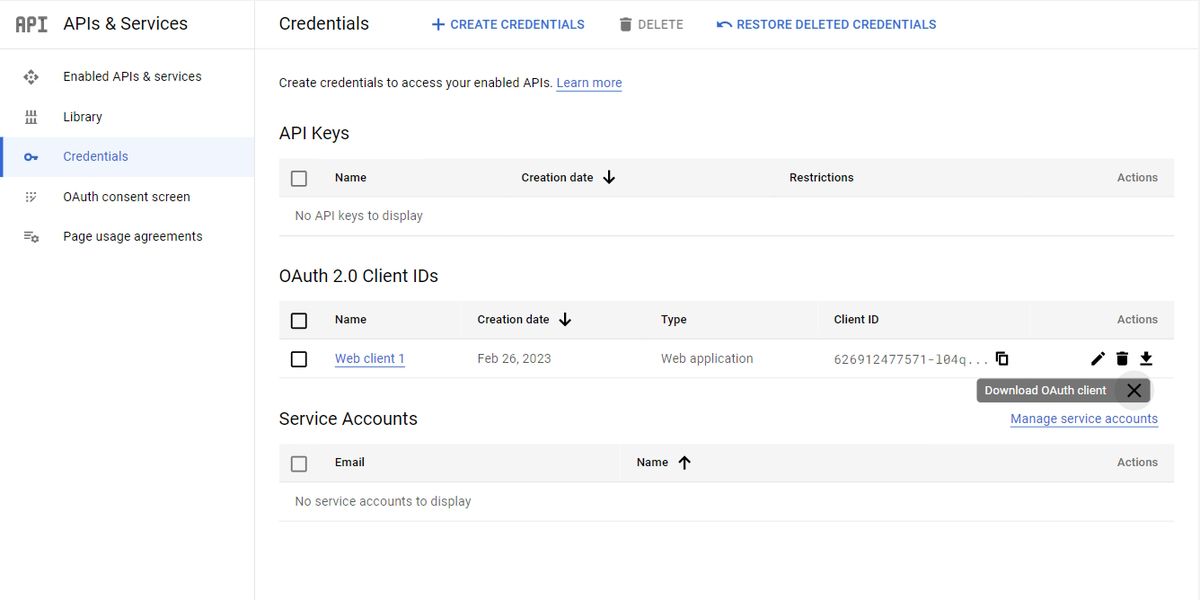
You are returned to the credentials page once you click the DONE button. Click on the Download OAuth client button:
The dialog box that comes up will contain several items. Copy the Client ID and the Client Secret, as you need them later. In addition, you will also need the following information:
- Gmail SMTP Username: Your Gmail Address
- Gmail SMTP Password: The password to your Gmail account
- Gmail SMTP Server: smtp.gmail.com
- Gmail SMTP Name: Your full name
- Gmail SMTP Port (TLS): 587
- Gmail SMTP Port (SSL): 465
- Requires SSL: True
- Requires TLS: True
- Use authentication: True
- Use secure connection: True
Using all of the above information, in conjunction with your Client ID and Client Secret, you can connect any system to Gmail’s SMTP server.
Step 4: Sending Emails With Gmail’s SMTP Server
Any system can connect to Gmail’s free SMTP server with the above credentials. From there, many apps can send emails. Once you enter these credentials, many systems already have methods to send a message to the SMTP server to dispatch an email.
There are libraries in many languages for sending these messages. Most website publishing CMSs, like WordPress and Shopify have plugins for doing so. Many mail programs allow you to enter the details to hook them directly to Gmail’s SMTP server. Any of these methods will allow you to send emails from your email address directly to recipients.
Use Cases for Gmail’s Free SMTP Server
There are several ways in which you may use SMTP servers. The most common is Transactional emails. There are other situations, however, wherein one may wish to use an SMTP server.
Sending Free Transactional Emails
Transactional emails are messages automatically sent by a system for various reasons. These include account verification emails, system outage emails, and automated alert emails.
If you are creating an App or Program and need to send emails to your users, an SMTP server is the preferred method. Using Gmail’s SMTP server lets users receive emails from a trusted provider. It also allows you to use your email address to send messages rather than a generated one.
There are numerous libraries for different languages to attach an app, website, or program to Gmail’s SMTP server. Many CMSs can connect to an SMTP server, either by default or via extensions.
Sending Emails From an Email Client With an SMTP Server
In addition to custom apps and websites, you can configure your email client of choice to use an SMTP server. Doing so allows you to send emails from your Gmail account remotely.
Each email client will have methods and requirements, but most are easy to configure. Some even allow one-click configuration by logging into your Gmail, allowing you to skip many of the steps from above. This can be useful if you plan to send emails from a single account, but wish to receive emails from multiple accounts in a single inbox.
Gmail SMTP and WordPress
WordPress is one of the most common places where SMTP servers like Gmail’s get used. There are a variety of plugins that allow you to replace WordPress’s default mailer. They allow you to send transactional emails, private messages, and marketing letters from your Gmail address.
Limitations on Gmail’s Free SMTP Server
While Gmail’s SMTP server is free, it does have several limitations of which users should be aware. The primary limit is one shared by all SMTP servers. SMTP servers are one-way systems. They send emails but cannot receive them. That means that any emails sent using Gmail’s free SMTP server will need to contain additional information if you want the reader to be able to respond.
The second limitation is a sending limit. Google limits the emails sent by free accounts to 500 emails per 24-hour period. Note that this is a rolling period, so you won’t be able to send more than 500 messages within 24 hours of one another, not just per day. Google does offer a paid subscription if you need to send additional messages that raises that limit to 2000.
Gmail’s Free SMTP Server Makes Sending Emails Simple
Overall, Gmail’s free SMTP server is a quick and easy way to send emails. It has a straightforward setup you can accomplish in a few minutes.
It can be hooked up to different systems or integrated with a custom solution, making it highly versatile. This makes Gmail’s SMTP server an essential asset for anyone looking for a way to send transactional emails from an automated system.

