When Windows 10 struggles to find your Wi-Fi network, it could be down to a multitude of different reasons. There could be a problem with your computer or your Wi-Fi network, or your computer might detect other Wi-Fi networks but will not detect your home or work network that you want to connect to.
No matter the problem, we will walk you through the Wi-Fi troubleshooting process so you can get back online as quickly as possible.
1. Turn Off Airplane Mode
If your Windows 10 laptop can't connect to Wi-Fi network but your phone can, the first thing you need to check is if your computer is stuck in Airplane mode. You might’ve turned it on involuntarily from Action Center or pressed a key or button that toggles Airplane mode on or off.
To fix this, open Action Center and turn off Airplane mode. Then, wait a few seconds and check if your computer detects the Wi-Fi network. If the Airplane mode tile is missing, you should check Windows Settings. Here is how you can do it:
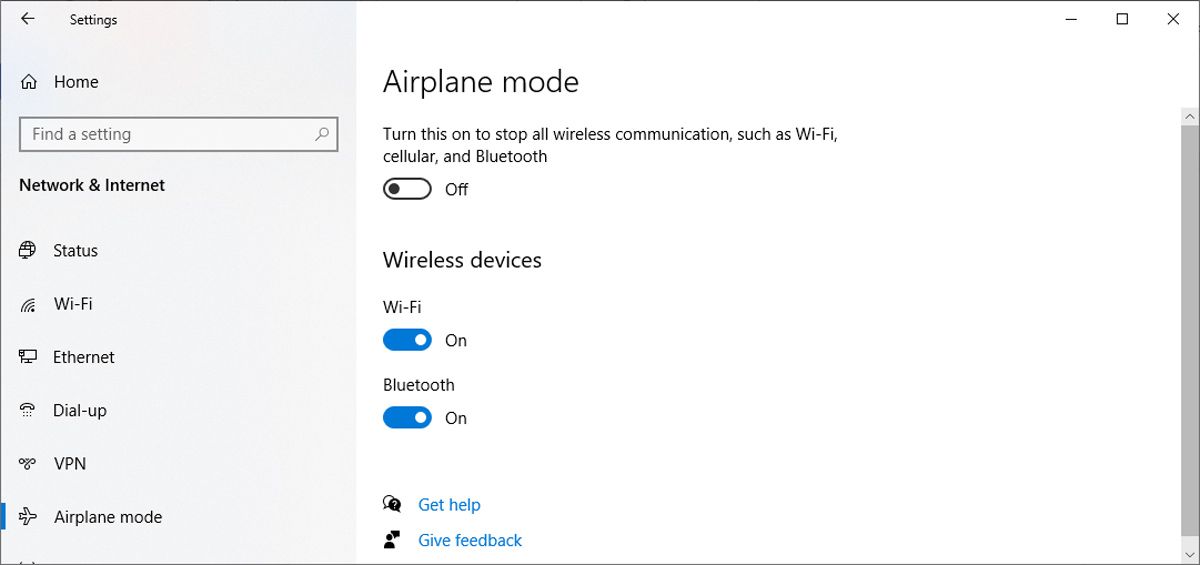
- Click Start, then head to Settings > Network & Internet. If you don't know how to access Settings, it's the little cog icon to the left of the Start menu.
- From the left-hand pane, select Airplane mode.
- Turn off the toggle for Airplane mode.
-
Check Wireless devices and make sure Wi-Fi is turned on.

2. Run the Internet Connections Troubleshooter
Fortunately, you can run built-in Windows troubleshooters you can use to solve a variety of problems, including issues with your internet connection. Follow these steps to run the Windows 10 internet troubleshooter:
- Open the Start menu, then head to Update & Security > Troubleshoot.
- Click Additional troubleshooter.
- Select Internet Connections > Run the troubleshooter.
- Follow the displayed instructions.

If this didn’t fix the issue, you can try running the Network Adapter troubleshooter. Follow the first two steps above to access the troubleshooter list. Then, scroll down to Network Adapter and select Run the troubleshooter.
3. Forget the Current Wi-Fi Network
This may seem odd, but sometimes Windows will detect a network if you make it forget the network's settings and re-add them. If you are using this method, make sure you know the Wi-Fi password, or you won't be able to reconnect to it again.
Here's how to proceed:
- Press Win + I to open the Settings menu.
- Go to Network & Internet > Wi-Fi > Manage known networks.
- Select the Wi-Fi network you want to use and click Forget.

4. Check Your Wi-Fi Network Adapter's Properties
If you've tried multiple ways to connect to Wi-Fi on a Windows device and had no luck, you should take a look at your network adapter properties. When your laptop has a low battery and turns on Battery Saver mode, Windows 10 will turn off certain features to save energy.
If you can’t detect Wi-Fi networks on your laptop when your battery runs low, you need to check the adapter properties to see if it's allowed to run during Battery Saver mode.
- Click Start > Device Manager.
- Extend the Network adapters list.
-
Right-click the Wi-Fi network adapter > Properties.

- Open the Power Management tab and uncheck Allow the computer to turn off this device to save power.
- Click OK to save the new changes.
- Restart your computer.

5. Update the Wireless Network Driver
If your computer can’t connect to the Wi-Fi but other devices can, there might be something wrong with your wireless network driver. An outdated or corrupted driver might cause all sorts of issues, including the inability to detect a Wi-Fi network. In this case, you should update the driver.
Launch Device Manager (see how to open the Device Manager) and extend the Network adapters list. There, right-click the wireless adapter and select Update driver. In the pop-up window, choose the Search automatically for drivers option, then Search for updated drivers on Windows Update.

If Windows fails to find any drivers, search online for your wireless network device's manufacturer and download them from there.
6. Disable and Re-Enable Your Network Interface Card
The Network Interface Card (or NIC) is responsible for both wireless and wired communications. If your network issues are caused by the NIC, you should disable and enable it.
- Open Control Panel.
- Go to Network and Internet > Network Connections.
- Right-click the wireless adapter and select Disable.
- Right-click it again and select Enable.

7. Enable the Dynamic Host Configuration Protocol
In Windows 10, the Dynamic Host Configuration Protocol (or DHCP) is a process used to customize and assign an IP address to a suitable wireless device, which includes your computer. If the process is turned off, you can’t connect to a Wi-Fi network on your PC.
As such, follow these steps to enable DHCP on your computer:
- In the Start menu search bar, search for network connections and select the Best match.
- Right-click your Wi-Fi network.
-
Select Diagnose.
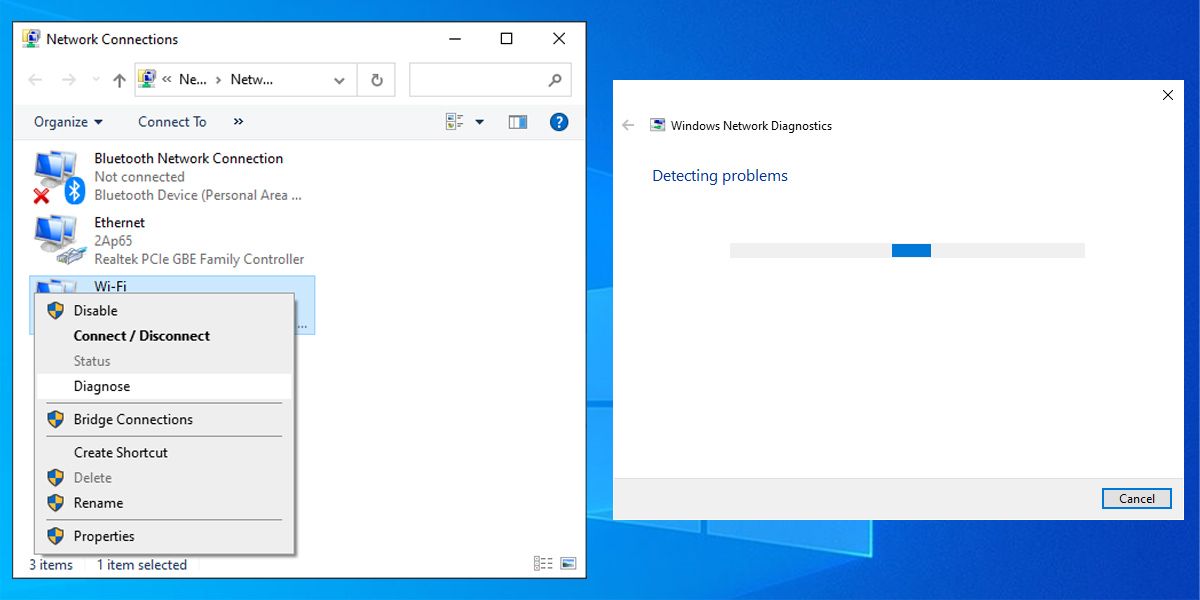
- Wait until Windows finishes the process. This will enable DHCP and fix your network issue.

8. Set the Wi-Fi Channel Width to Auto
If there are a lot of routers using the same channel width, it will interfere with your connection. You can try changing your PC's channel width and see if this quick solution fixes your problem. Here is how you can do it:
- Open Device Manager
- Right-click the Wi-Fi network adapter and select Properties.
- Select the Advanced tab.
- Set Value to Auto.
- Click OK to save the new changes.

If the Auto option is missing, you can try other options and see what works for you. Before making any changes, take a screenshot or write down the default settings, so you can revert to them if something goes wrong.
9. Restart Your Router
If your computer won’t connect to the Wi-Fi but other devices can, there’s a chance you might be dealing with router issues. By rebooting your router, you give it a chance to clear its memory, end running tasks, and reload its firmware.
However, simply unplugging it for a couple of minutes might not be enough. Check out how to correctly restart your router for the best results.
10. Remove the Wireless Profile
A corrupted or bugged wireless profile might cause you the current network issues. The easiest way to fix it is to remove your wireless profile using Command Prompt.
Run Command Prompt as administrator (see how to run the Command Prompt as an administrator) and type "netsh wlan delete profile name =NetworkName." Then, press Enter.
After Windows 10 removes your wireless profile, it will create a new profile and you can connect to the Wi-Fi network as long as you are in range.
11. Enable WLAN AutoConfig
WLAN AutoConfig is responsible for configuring, discovering, connecting, and disconnecting from a wireless area network. If it stops functioning properly, you will experience all sorts of network issues. Here is how you turn on WLAN AutoConfig:
- In the Start menu search bar, search for services and select the Best match.
- In the Services window, right-click WLAN AutoConfig and select Properties.
- If the Service status is Stopped, click Start.
- Set Startup type to Automatic.
- Click Apply > OK to save the new changes.

Windows 10 needs more than one service for the Wi-Fi networks to work properly. Here is a list of services you need to check and make sure they are running:
- Network Location Awareness
- Network List Service
- Application Layer Gateway Service
- Remote Procedure Call (RPC)
- Network Connections
- Remote Access Connection Manager
- Remote Access Auto Connection Manager
12. Change Your Wi-Fi Network's Name and Password
A common solution for fixing Wi-Fi network issues is to change the network’s name and password. How you can change the name and password depends on the router’s manufacturer, so check the router’s manual or look online for more information.
13. Change the DHCP Users Number
Another solution involving your Wi-Fi router is increasing the number of DHCP users. In general, the limit is around 50 DHCP users. If you go above it, it could lead to Wi-Fi issues.
If you decide to set a new number of DHCP users, you will have to check the manufacturer’s site for detailed instructions.
No More Undetectable Wi-Fi Networks on Windows
While this is a frustrating problem, you can easily fix it by following our guide. As we discussed, you can start by checking the settings on your computer. If this didn’t work, you can move on to configuring the settings on your Wi-Fi router.
If you’re connecting to a network with multiple access points, it might be worth it to turn on Windows’ roaming aggressiveness. This way, your computer will automatically scan for better connection without any manual input.