
Windows Update Error 0x800f080a is an annoying problem that you may encounter when trying to update your system. The error indicates that the system has failed to download and install important updates for Windows, often due to problems with corrupt or missing files.
Fortunately, there are several possible fixes for this error. You don't need technical knowledge to apply them. In this article, we will discuss the causes of Windows Update Error 0x800f080a and suggest some possible solutions to help you get your Windows update running again. So, if you’re stuck in this problem and need some help, read on!
What Causes Windows Update Error 0x800f080a?
The most common cause of Windows Update Error 0x800f080a is an issue with the system file. If certain key system files become outdated or corrupted, it can prevent Windows from properly downloading and installing updates.
Another possible cause could be an issue with the Windows Update components themselves. If these components are corrupted or disabled on your system, you may experience this error when trying to update your computer. In some cases, the error might also be triggered if there is a conflict between different third-party applications.
Having read the above causes, perhaps you have a better understanding of what it is all about. Now let's figure out how to fix this issue.
1. Restart Your Computer
If you're experiencing error 0x800f080a while updating Windows, this indicates there's something wrong with Windows Updates, possibly due to a conflict between software or corrupted files. Restarting your computer gives it a chance to reset all its settings and processes, which can help resolve this error code quickly and easily.
To restart your machine, you'll need to open the Start Menu on the bottom left-hand side of your screen, select Power from the pop-up menu, then click Restart. Once you've restarted, you should open Windows Update again and check if the issue has been resolved.
2. Run the Windows Update Troubleshooter
Windows Update Troubleshooter is a powerful tool designed to help diagnose and fix common problems associated with Windows Updates. If restarting doesn't help, try using this tool.
- Press Win + I on your keyboard to open the Settings app.
- On the left side of the Settings menu, click System.
- Then select Troubleshoot > Other troubleshooters.
-
Click the Run button next to Windows Update.
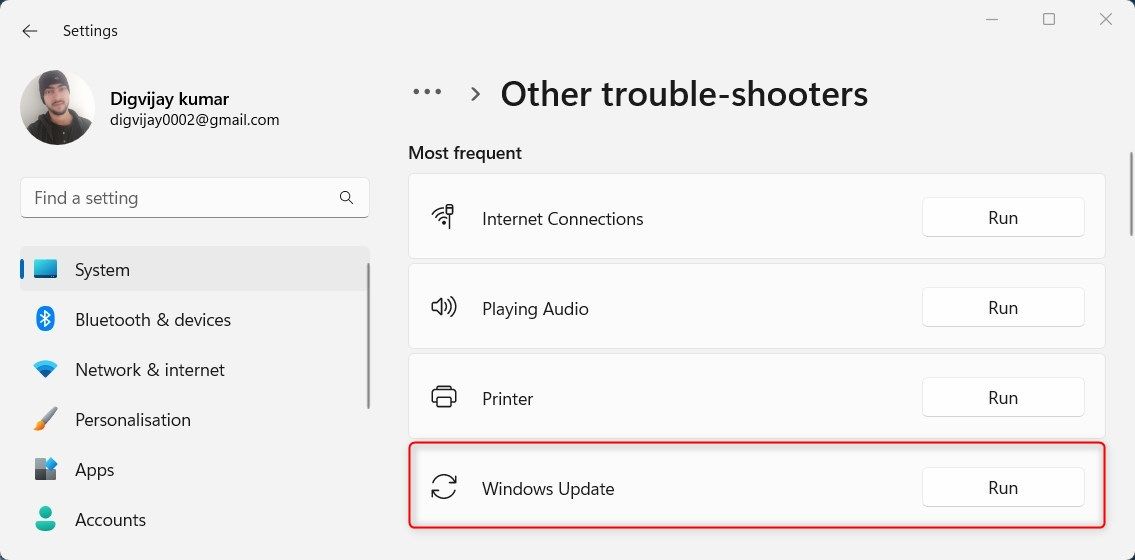
- Wait for the troubleshooter to scan for issues and automatically fix any it finds.

As soon as you have completed the steps above, restart your computer, and then try updating Windows again to see if it fixes the issue.
3. Check Date & Time Settings
A date and time setting error on your computer may also lead to Windows Update Error 0x800f080a. If so, make sure your clock is set correctly to ensure Windows downloads and installs updates properly. Here’s how to sync your PC's date and time settings.
- Click on Start and choose Settings from the pinned items.
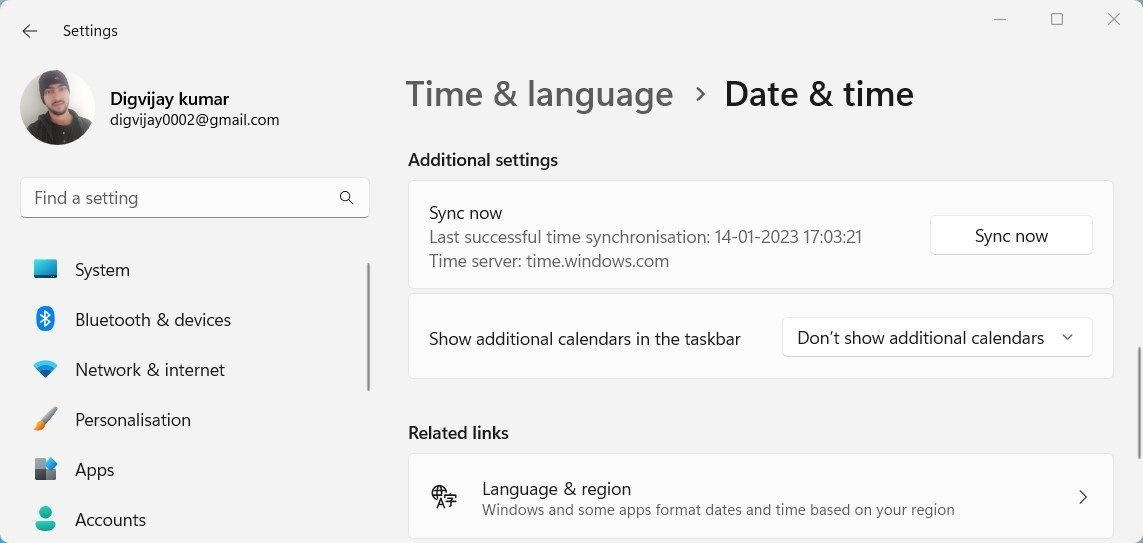
- In the Settings menu, go to Time & language > Date & time.
-
Under Additional settings, click the Sync now button.
- Turn on the toggle next to Set the time automatically.

Also, make sure your time zone is correct, otherwise Windows may ignore new updates.
4. Run SFC and DISM Command
If the error still persists, there might be a corrupt system file. As such, try running SFC and DISM to see if that helps. The System File Checker (SFC) scans and repairs damaged files on your system while the Deployment Image Servicing and Management (DISM) tool handles more critical system errors.
To get started, follow these steps:
- Search for "Command Prompt" and select Run as administrator.
-
If UAC appears on the screen, click Yes to continue.
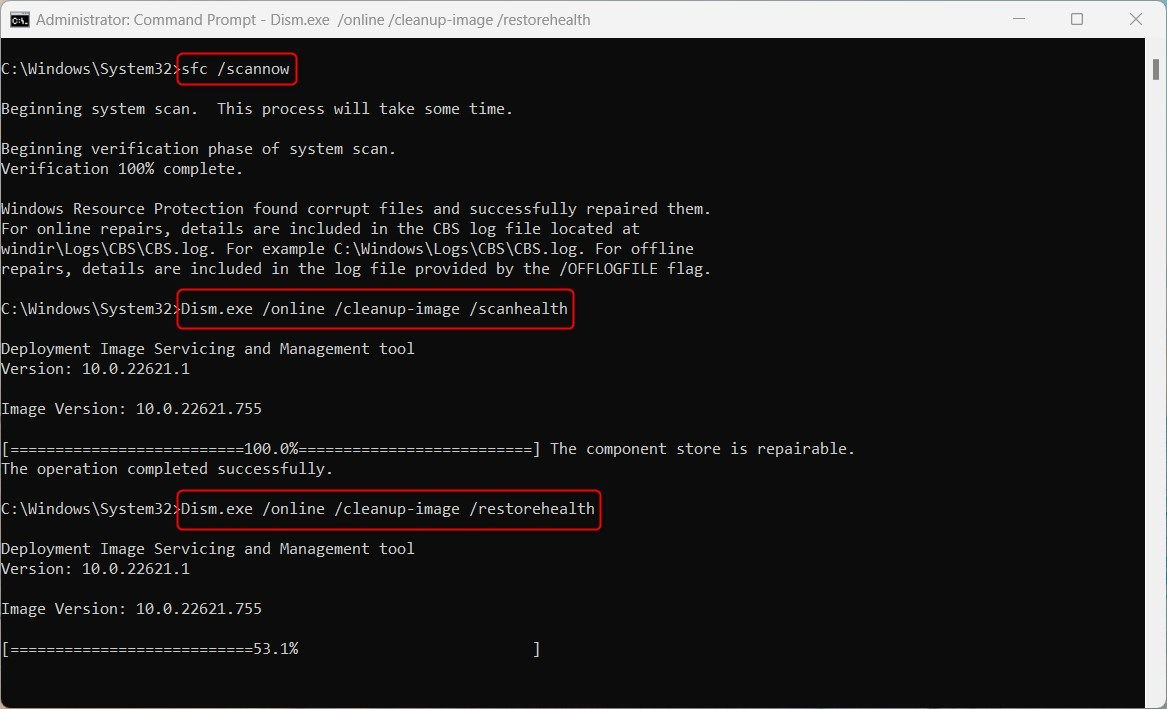
- Type sfc /scannow in Command Prompt window and press Enter.

It will take some time for the process to be completed. After the update is complete, restart your computer and try updating Windows again. If the update still fails, run the DISM command to repair corrupted images and restore system files. Here's how to do it
- Open the Command Prompt with admin access.
-
In the Command Prompt window, type the below command and hit Enter.
Dism.exe /online /cleanup-image /scanhealthDism.exe /online /cleanup-image /restorehealth
It may take a while for the process to complete. Once the DISM command has been run, restart the computer to see if the error has been fixed.
5. Reset Windows Update Components
Is the error still occurring? There may be corrupted update components causing the installation to fail and causing further issues. To clear out previously downloaded updates, you can reset the Windows Update Components.
In this way, you will be able to start over with new downloads to ensure that everything runs smoothly.
To reset Windows Update Components, follow these steps:
- Press Win + X on your keyboard and select Terminal (Admin).
-
Next, type the following commands, and press Enter after each one:
net stop bitsnet stop wuauservnet stop appidsvcnet stop cryptsvcren %systemroot%\SoftwareDistribution SoftwareDistribution.oldren %systemroot%\system32\catroot2 catroot2.oldnet start bitsnet start wuauservnet start appidsvcnet start cryptsvc
After you run the above commands, close the Command Prompt and try running Windows Update again.
6. Perform a Clean Boot
In case the problem persists, perform a clean boot procedure on your computer. A clean boot is a process of starting your computer in a minimal state and disabling all startup programs and services that don't ship with Windows.
This helps to narrow down the cause of the error by eliminating any third-party software as a potential source of it.
To perform a clean boot, follow these steps:
- Right-click on Start and select Run from the menu list.
- Type "MSConfig" in the dialog box, then press Enter. The System Configuration window will open.
-
On the General tab, click the Selective Startup checkbox.
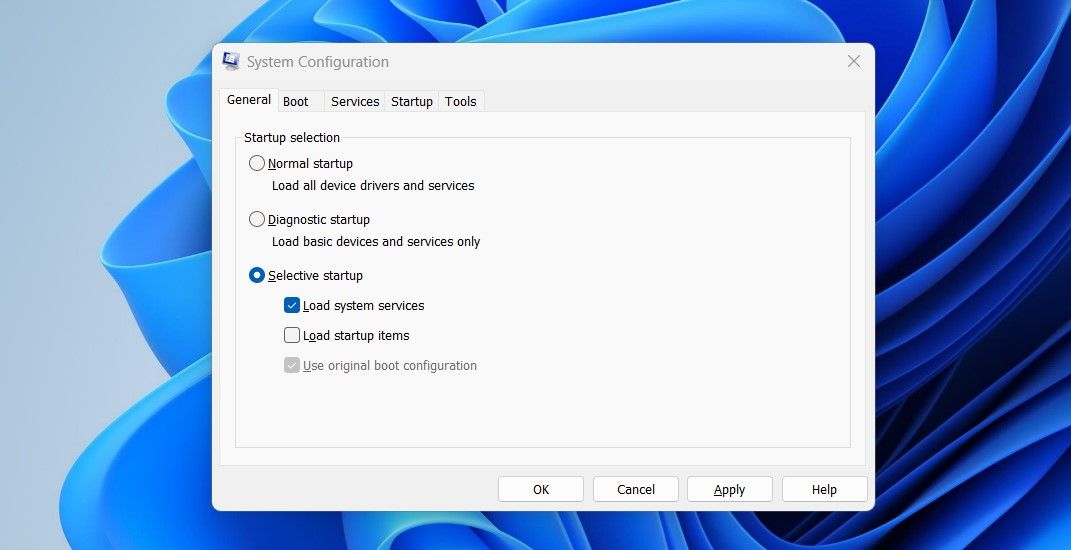
- Then clear the Load startup items checkbox and ensure that Load system services are checked.
-
On the Services tab, check the Hide all Microsoft services box.
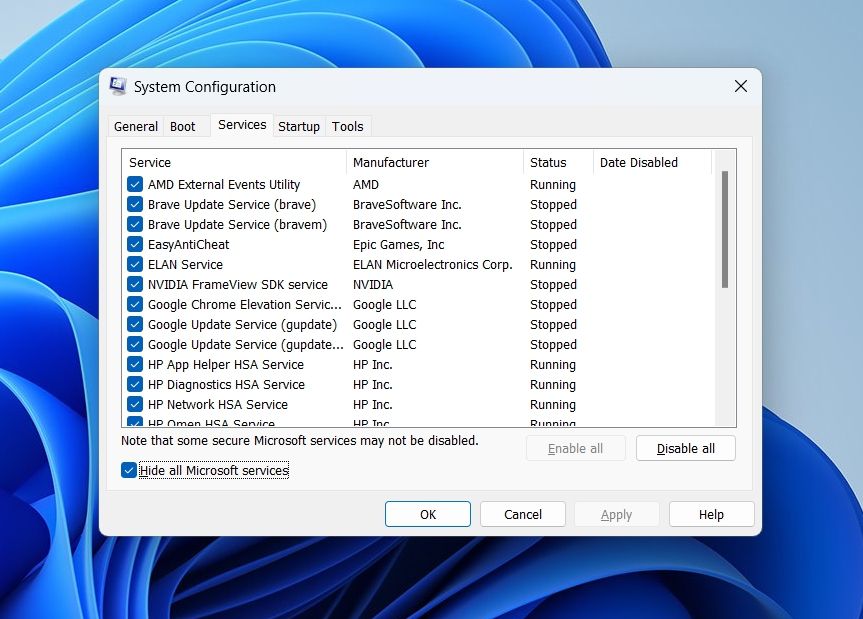
- Then click on the Disable all button.
- Now go to the Startup tab and click on Open Task Manager.
- In the Task Manager window, select each startup item and click Disable.
- Close the Task Manager and go back to the System Configuration window.
- Click on Apply and OK to save the changes.
- Restart your PC and check to see if it works.


Once you have completed the steps above, and it resolves the problem, you can re-enable the services and startup items that you have disabled one by one in System Configuration. If the problem reappears, the item you just re-enabled is the culprit; uninstall or update it and see if that fixes things.
An Easy Fix for Windows Update Error 0x800f080a
Windows Update error 0x800f080a can be a frustrating issue to resolve, particularly when the exact cause is unclear. However, following the steps outlined in this article should help you troubleshoot and fix this problem.