
Have you encountered the "the tag present in the reparse point buffer is invalid" error when altering a folder or deleting it on your Windows device? You may have encountered this error when accessing a folder via Command Prompt or File Explorer, mainly for files and folders synced to OneDrive. How does this error occur? OneDrive is the source of the error.
In this article, we'll explain the causes of this error and provide you with possible solutions to resolve it.
What Causes "The Tag Present in the Reparse Point Buffer Is Invalid" on Windows?
As mentioned earlier, the error is caused by a problem with OneDrive sync. It could be that the folder you're trying to access is corrupt, or that there is an issue with other system files preventing OneDrive from syncing successfully.
There are several ways in which the "the tag present in the reparse point buffer is invalid" error can appear. Here are the two most common ones:
- Error 0x80071129: The tag present in the reparse point buffer is invalid
- Location not found: The tag present in the reparse point buffer is invalid
"Error 0x80071129" or "Location not found" appears as the title of the error window, while the main part of the error appears in the error window. Any variation of this error has nearly the same causes, regardless of its nature. In light of that, similar fixes are effective in resolving the issue. Let's see how you can fix it.
But First, Some Preliminary Checks...
Apply the following preliminary checks before attempting the major fixes:
- Pause the OneDrive sync and try opening the folder again.
- Restart your device once.
- Log out of your OneDrive account.
- If you have made any changes to the problematic folder on OneDrive, go back and revert them for a while.
If the above preliminary checks do not solve the problem and the issue persists, start implementing the remaining fixes.
1. Run a CHKDSK Scan
For Windows users, CHKDSK is a go-to utility for scanning and fixing hard drive problems. Whenever users encounter a hard drive error or an issue with the data stored on their drive, the CHKDSK scan proves to be a godsend.
This scan may be helpful to fix the issue under discussion since "the tag present in the reparse point buffer is invalid" is also associated with an inability to access a particular file correctly. Therefore, follow the steps below to run the CHKDSK scan before you attempt any other repair or fix:
- In the Windows Search box, type "Command Prompt."
- Right-click the Command Prompt app and click Run as administrator.
-
Enter the following command in the Command Prompt app:
Chkdsk C: /f /r -
Then press Enter.
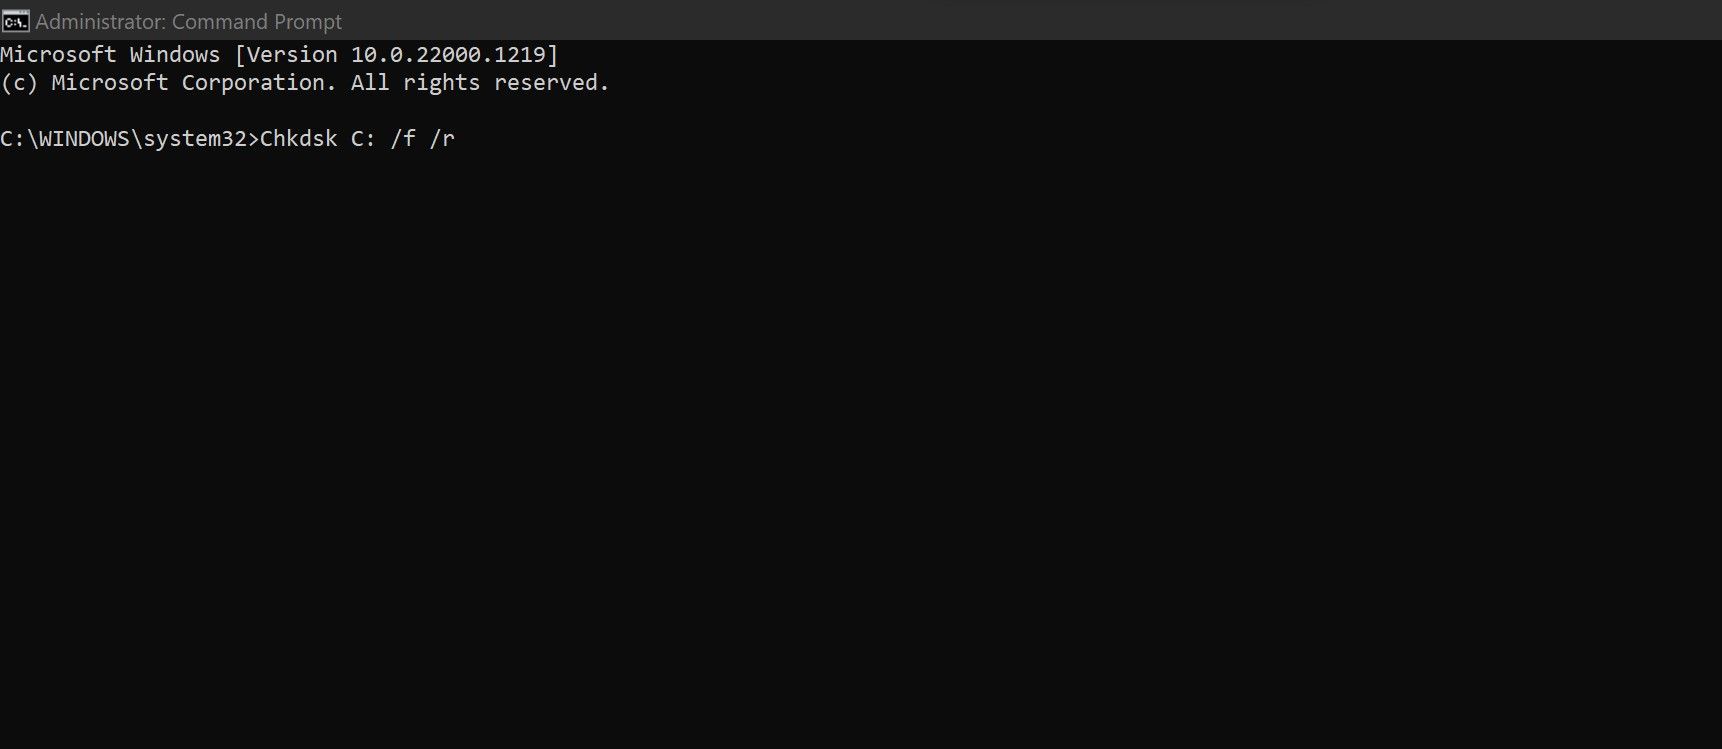

Here, C: refers to the drive where your operating system is installed. If your operating system resides on a different drive, change the command accordingly. Also, don't forget to enter the "/f" and "/r" parameters since these are needed to fix errors, locate bad sectors, and recover corrupted information.
The CHKDSK scan has the greatest chance of adequately fixing the error under discussion. However, if it doesn't resolve the problem, you can move on to the next solution.
2. Run the DISM and SFC Scan
Like CHKDSK, SFC and DISM scans can be used when your system behaves strangely. Initially, you should run the SFC scan because it usually resolves the issue. However, if it fails to diagnose the problem or run, you should run a DISM scan.
Performing both scans ensures that your device does not have corrupted system files causing the trouble. To run both scans, follow these steps:
- Open Command Prompt as an administrator.
-
To run the SFC scan, type the following command and press Enter:
SFC /scannow -
To run the DISM scan, type the following command and press Enter:
DISM /Online /Cleanup-Image /RestoreHealth

To better understand the results of these scans, see our article about the differences between CHKDSK, DISM, and SFC. If the error persists after running the above scans, move on to the next fix.
3. Check for File-Specific Issues
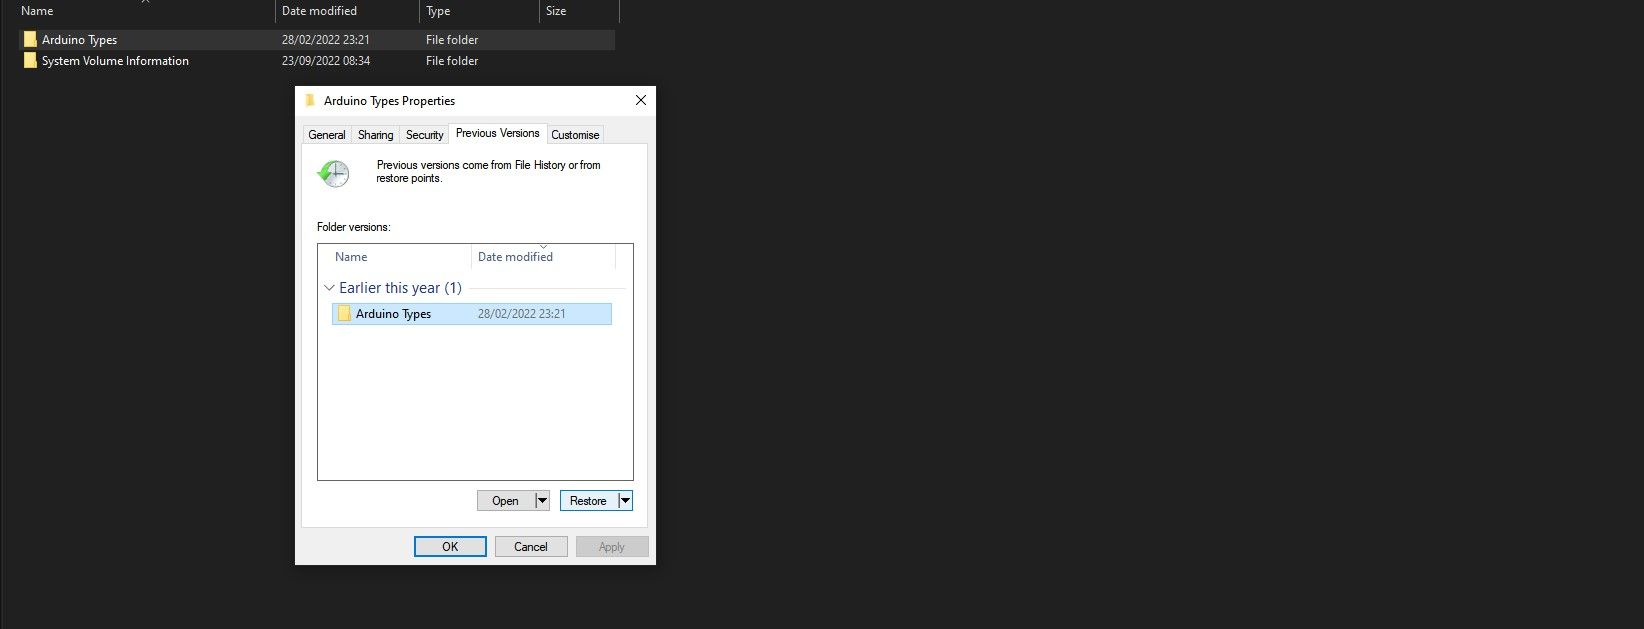
Next, you should check whether the error occurs for a particular file or all files synced on OneDrive. Attempt to make the exact change that caused the error in a different folder and see if the problem repeats. If the issue is file-specific, it is recommended that you restore the file to its previous version, if possible. Here are the steps you need to follow:
- Right-click on the file you're experiencing the error with and open Properties.
- Click on the Previous Versions tab.
- Select the previous version, if available.
-
Click the Restore button, then click Apply and OK.

4. Remove the Passwords From the Problematic Files
Has this error occurred after password-protecting a synced file on OneDrive? In this case, you should go to OneDrive, check the history of modified files, and restore the problematic file to a previous version. Our article on recovering OneDrive files from version history explains how to roll back a file. Reset OneDrive if this fix does not solve the problem.
5. Reset OneDrive
Resetting the app or service is a good troubleshooting step for problems that don't resolve with general fixes. Therefore, if none of the fixes have worked so far, you should reset OneDrive. Remember that resetting OneDrive will not delete your data, but you'll have to set up the sync connection again.
In our article on how to fix OneDrive when you can't open the files, we have explained how to reset OneDrive. Follow the instructions in the article to reset OneDrive, and hopefully, you will be able to fix the issue. However, if that also fails to work and the error appears periodically, you can delete or relocate the problematic file or folder.
6. Delete or Relocate the Problematic File
If all else fails, delete or relocate the problematic file. However, before you do that, you need to pause the OneDrive sync and leave it for an hour. Then, access your OneDrive online and remove the synced file from there.
Once done, you should turn off your device's internet connection and start Windows 11 in Safe Mode (or Windows 10 if you're using an older version). Afterward, navigate to your local drive, where the problematic file is located. Delete it from there and restart your device normally.
If the file you are experiencing the error with has value to you and you cannot delete it, move it to another computer and delete it from your primary device. Hopefully, relocating or deleting the file will prevent the error from occurring again.
Keep Annoying OneDrive Errors at Bay
It can be very frustrating to encounter the "The tag present in the reparse point buffer is invalid" error when making changes to our files. If you apply the fixes in the article, hopefully, you'll be able to fix the error and reaccess your files. If nothing works, you can move it elsewhere and delete it from your primary drive.