Windows updates often bring exciting new features and bug fixes. However, it's ironic that sometimes even the Windows updating process itself needs improvement.
If you're unlucky enough, you might have noticed the disk and CPU usage going to 100% every time you hit the update button. This may be due to your slow hard disk performance or many other reasons.
Whatever the reasons, such situations can cause your computer to become unresponsive. So, let's dive into some ways to fix the high disk and CPU usage while updating Windows.
Why Does Windows Update Cause Heavy Disk and CPU Usage?
Don't worry, as the heavy disk and CPU usage issue is not permanent. This issue rarely occurs for Windows users and might be a routine for you if your system is low-end.
The main question is: why does the heavy disk and CPU issue occur? To answer this, we've explained some common causes below.
- Existence of malware: It is a no-brainer that malware can corrupt system files. Therefore, it may disrupt the services responsible for efficient Windows updates, ultimately resulting in high system resource usage.
- Slow Hard Disk Drive: A slow Hard Disk Drive (HDD) is the main reason for slow Windows updates. Therefore, ensuring a speedy hard drive should be on your checklist.
- Background apps running actively: When too many background apps are running, Windows distributes the system resources accordingly. In such a case, starting a Windows update is, of course, not the best approach.
- Too many active Windows services: While you should not tweak Windows services alone, we recommend disabling those you never use. This gradually lowers disk and CPU usage.
- A corrupted Windows update: A corrupted update can cause the process to loop in the background. It will thus consume more CPU power and slow down your system.
Now that you know the common causes, it'll be easier to follow this guide until the end.
1. Perform a Complete Malware Scan
If malware infects your computer, the first step should be a full malware scan. This will give you an idea of what kind of malware resides inside your Windows OS.
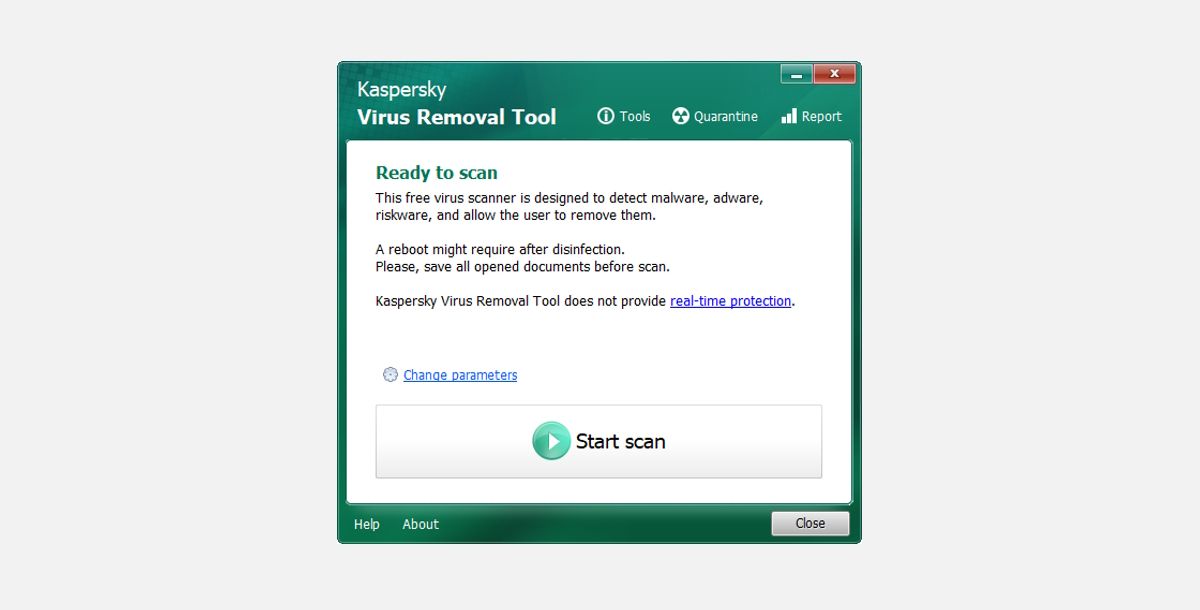
There are many different ways to run a complete malware scan. You can use Microsoft Safety Scanner or Windows Defender for this. However, we will use the Kaspersky Virus Removal utility for a full malware scan as it is way more effective than both tools in detecting malware.
Here's how you can use the Kaspersky tool to remove any malware:
- Download and install the Kaspersky Virus Removal tool.
-
Accept its terms and conditions and click Start scan.
- Let the tool scan your system for any existing malware first.
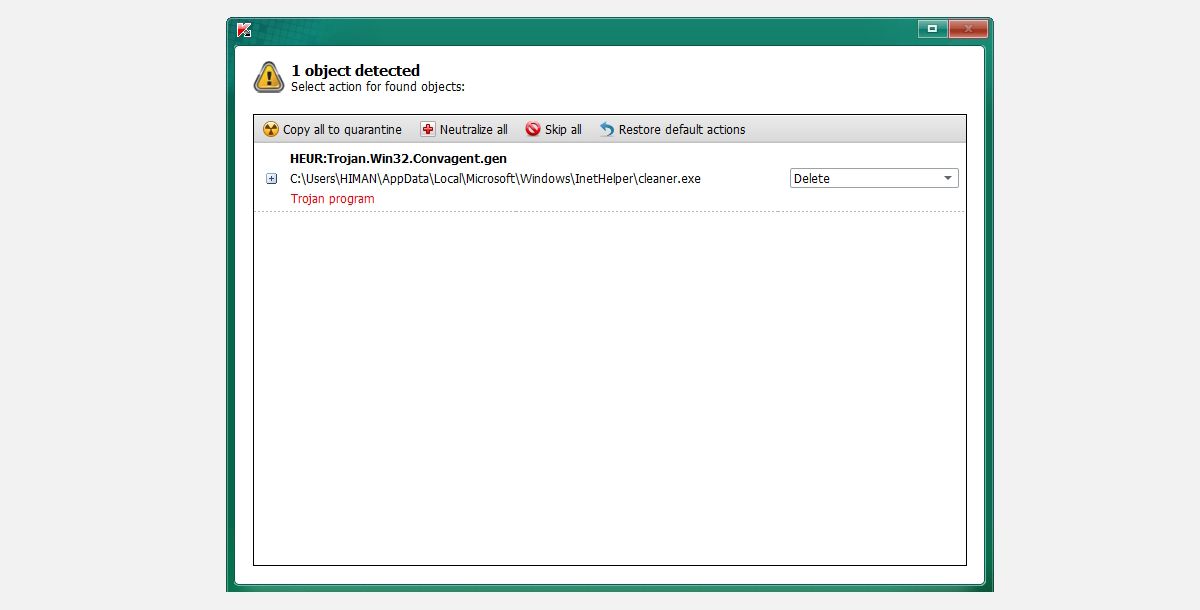
- After the scan, click the Disinfect and restart the computer button.
It will automatically display any existing malware or virus after the scan. You can either delete the infected items one by one or click Neutralize all to remove all of them at once effectively.
2. Configure Windows Update Settings
Did you know you can customize Windows updates to your liking? There's so much to do in the Windows Update settings. You can limit the bandwidth for updates, opt-in for additional updates, change active hours, etc.
We'll configure some of those options to change the Windows updating behavior. It will ultimately reduce the load on your computer, fixing the heavy disk and CPU-related issues in no time.
Here's how to configure Windows update settings:
- Press Win + I on your keyboard to access the Windows Settings.
- Click Windows Update from the left-hand sidebar and then go to Advanced options.
-
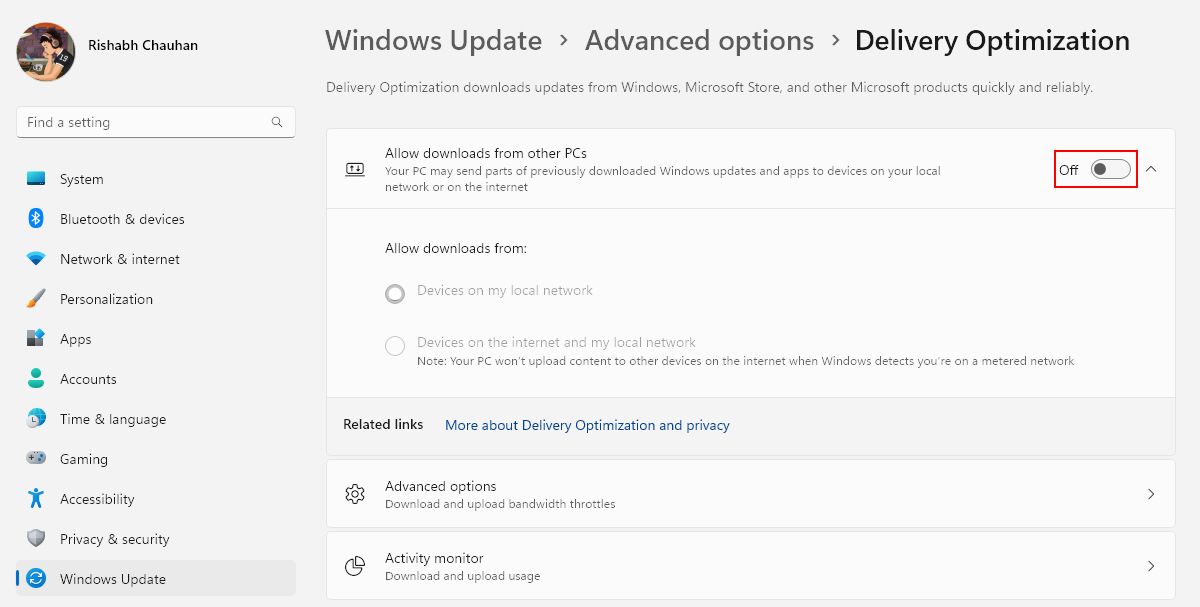
Under the Additional options category, click Delivery Optimization. There, toggle the Allow downloads from other PCs option to disable it.
-
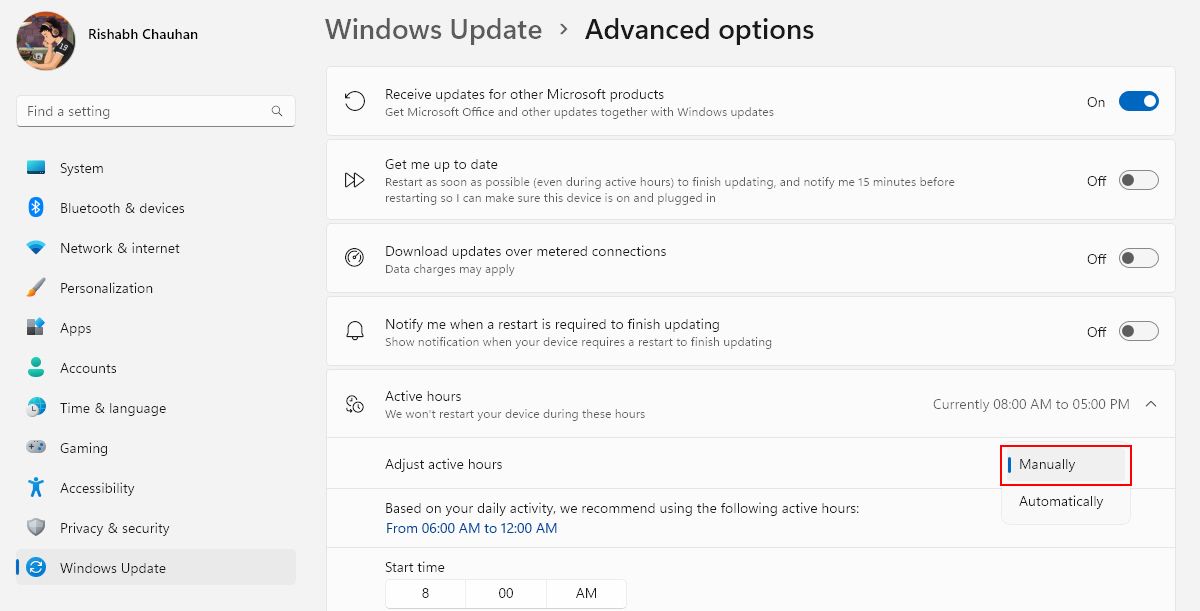
Navigate back and change Adjust active hours to Manual. Adjust the Start and End time depending on when you use your computer actively.
Configuring the above settings allows you to limit the resources during the update process.
3. Launch the Windows Update Troubleshooter
The Windows Update Troubleshooter is specifically designed to troubleshoot any serious issues related to the update process. Running the update troubleshooter can help you pinpoint and fix any problems causing high disk and CPU usage.
Follow the below-given steps to launch the Windows Update troubleshooter:
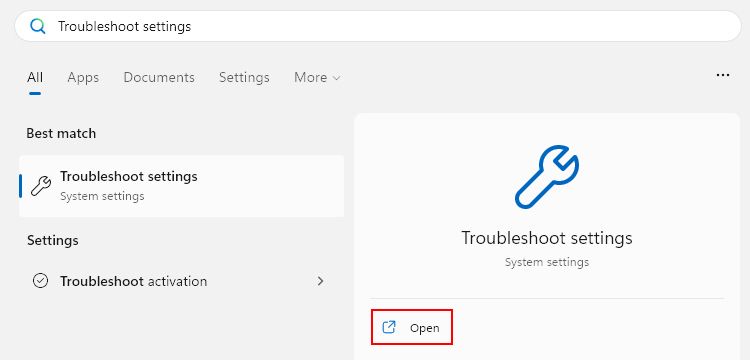
- Press Win + Q on your keyboard to open the Windows search panel.
-
In the Type here search box, type Troubleshoot settings and click Open.
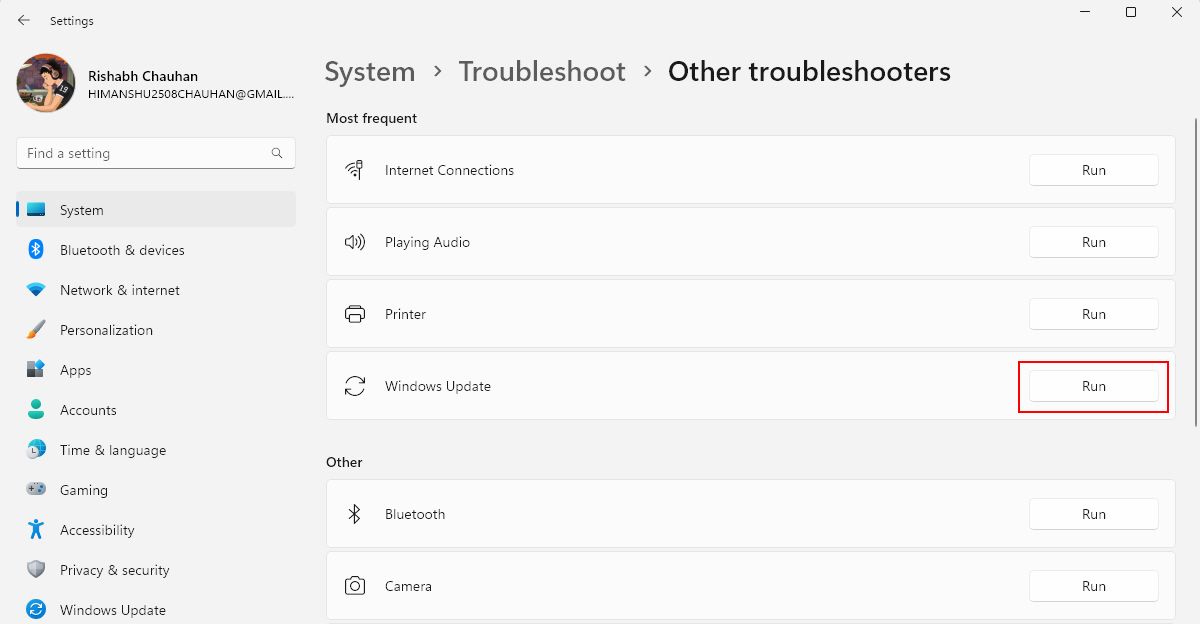
- Click Other troubleshooters on the Troubleshoot window.
-
Click on the Run button next to Windows Update to launch its troubleshooter.
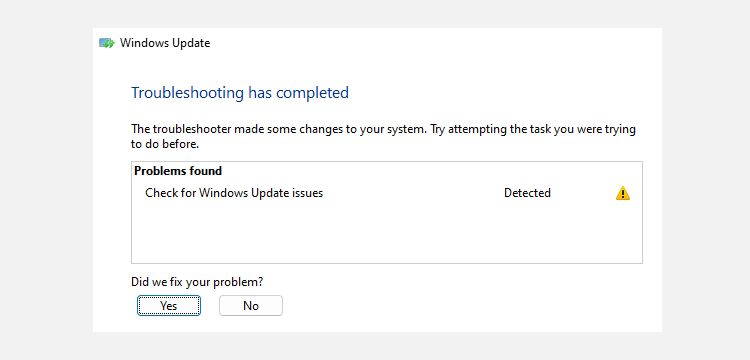
- Let the troubleshooter scan for the problems and apply the related fixes.
Don't close the troubleshooter immediately after the results! First, switch to Windows Settings and start the update again. Simultaneously, open the Windows Task Manager and check the disk and CPU usage there.
If the results are unsatisfactory, click No on the troubleshooter window and rerun it using the same steps above.
4. Restart Core Windows Update Services
Almost half of the time, a Windows service must be behind its cause when you face a Windows error. The same goes for your case as well.
Windows Update, Update Orchestrator, and Windows Modules Installer services are crucial to the update process. So, restarting these services can resolve high disk and CPU usage issues.
Here's how to restart all the core Windows update services:
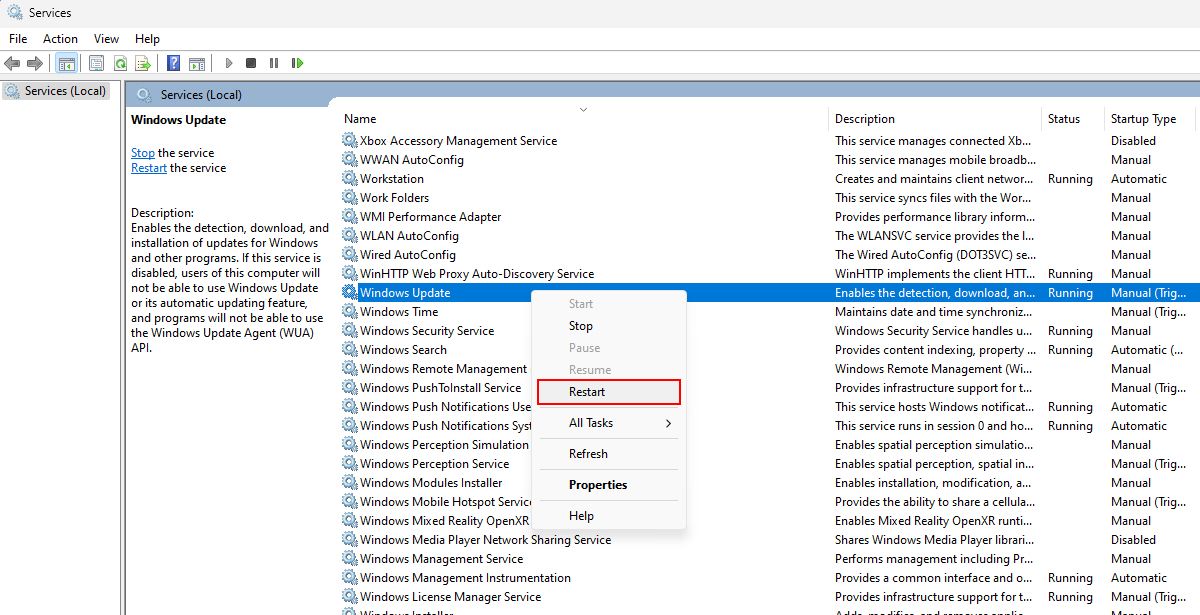
- Open the Windows Services app on your computer. You will see a list with various names in alphabetical order.
-
You must do three simple things: find the service name in the list, right-click each name, and click Restart.
- The services you need to restart are Update Orchestrator Service, Windows Modules Installer, and Windows Update.
It's simple to do, right? Now that all the core services are running correctly, check for the high disk usage issue.
5. Defragment Your Hard Disk Drive
Before moving further, if you own a Solid State Drive, proceed to the following method, as defragmenting an SSD is not a good move. After all, they are already fast enough that defragmenting SSDs is unnecessary. Furthermore, defragmenting an SSD will reduce its lifespan.
But you can safely perform defragmentation if your computer runs on an HDD. Follow our guide on how to defragment a hard drive for detailed steps.
A fragmented hard disk drive can contribute to slow performance and high disk usage. So, you can either defragment it regularly or invest in an SSD.
6. Check and Fix Disk Errors
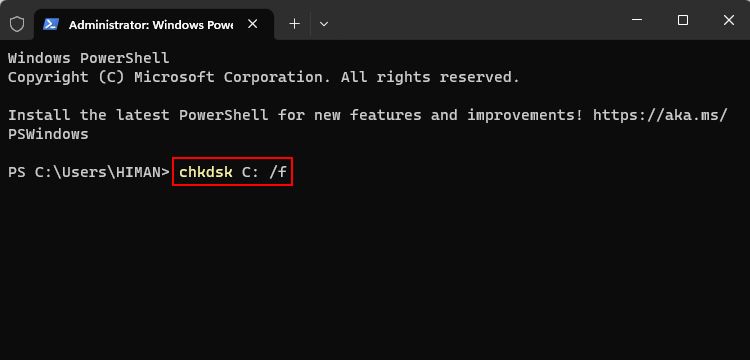
To check and fix disk errors, you can get help from the CHKDSK utility. The CHKDSK utility can fix severe issues with your hard drive in minutes.
Here's how to use CHKDSK to fix your hard drive-related errors:
- Press Win + X and select Terminal (Admin) from the context menu. If it's not there, you can open the Command Prompt instead.
-
Type the command below as it is and press Enter to execute it: chkdsk C: /f
-
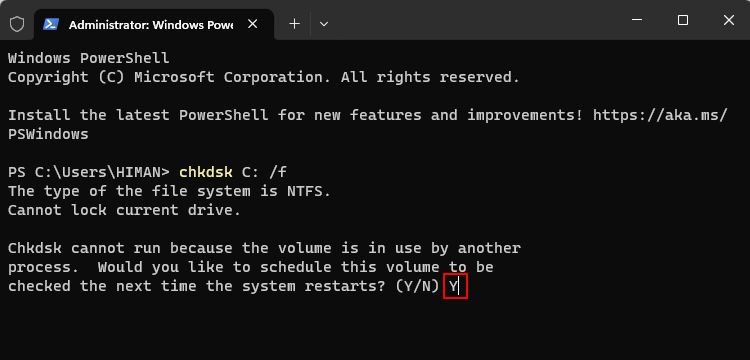
The Terminal will prompt you to schedule a disk check during the next system restart. Type Y and press Enter again.
- Restart your computer to start the disk check and repair process.
CHKDSK is not the only tool for your purpose; you can refer to our guide on how to fix hard drive issues for more such useful utilities.
Bring Down the Windows Update's Disk and CPU Usage Back to Normal
Without a doubt, Windows updates help maintain your computer's stability. However, the update process can sometimes lead to heavy disk and CPU usage. We're sure you wouldn't expect an update to act like a downgrade because of this.
To avoid such situations in the future, make sure to keep your hard drive optimized and prevent malware from entering your computer.


.jpg)
