
Power modes on Windows are a mix of hardware and system settings that determine how and where your device will spend its power. Windows has three power modes by default; Balanced, Best performance, and Best power efficiency.
Changing these modes is quite simple, but in some cases, users can face difficulty jumping from one mode to another. So, we examine what might be causing the problem and how to troubleshoot it.
Why Can't You Change the Power Mode in Windows 11?
Several factors can prevent you from changing the power mode in Windows. Here are the most common reasons behind this problem:
- You are using a custom power plan. When on a customized power plan, Windows does not allow you to switch to a different power mode in Settings. This problem can be fixed by choosing the Balanced power plan, which is recommended for Windows.
- The current power plan is faulty. In some cases, the users found out that the issue was caused due to some restriction related to their current power plan. This problem can be resolved by simply switching to a different plan, as we will discuss below.
- A corruption issue within the system is causing the problem. The best way to rule out such problems is by running the Power troubleshooter built into Windows.
Now that we know what can cause the problem, let's look at what you can do to solve it.
1. Change the Power Plan
The first thing we recommend you do is switch to a different power plan, especially if you are using a custom power plan. We suggest shifting to the Balanced plan and checking if that fixes the issue. This plan optimizes the performance automatically. This means it will activate the full performance mode when you are actively using the computer and switch to the power-saving mode when you are not.
Here is how you can proceed:
- Open a Run dialog box by pressing the Win + R keys together.
- Type control in the text field of Run and click Enter.
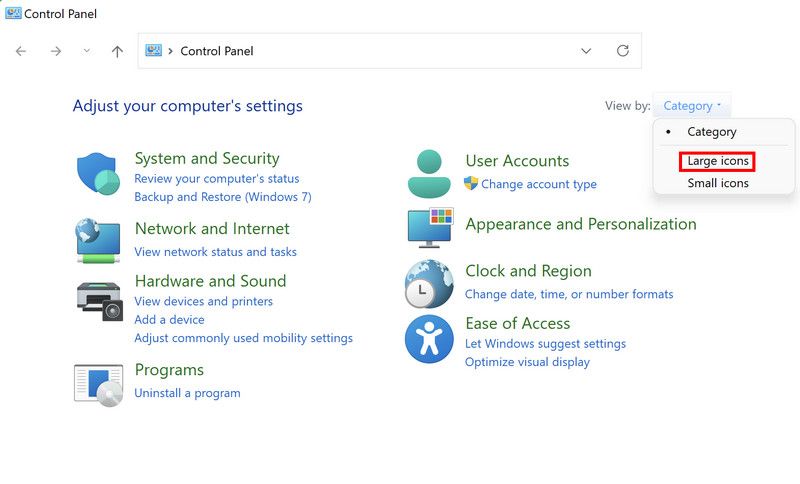
-
In the following window, expand the View by category at the top and choose Large icons.
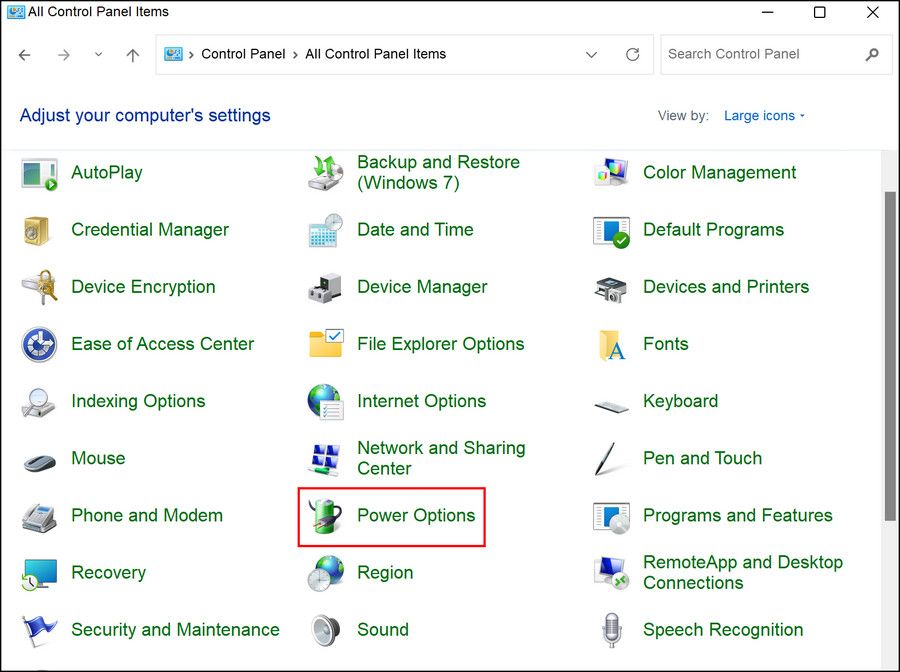
-
Now, look for Power options and click on it.
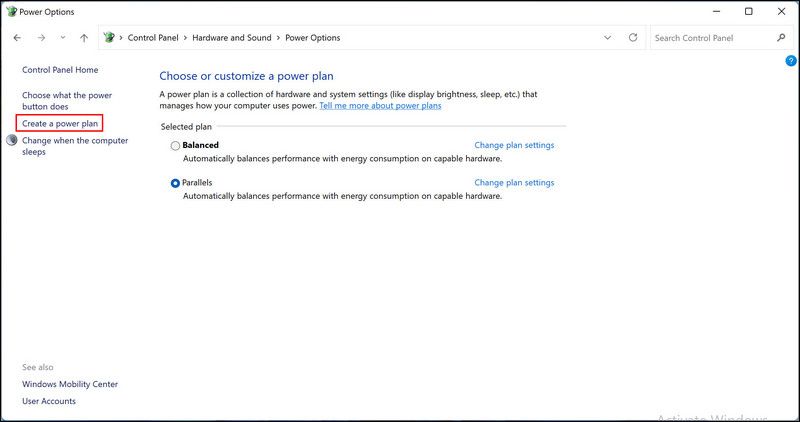
-
You should now be able to see your current power plan. Click on Create a power plan in the left pane.
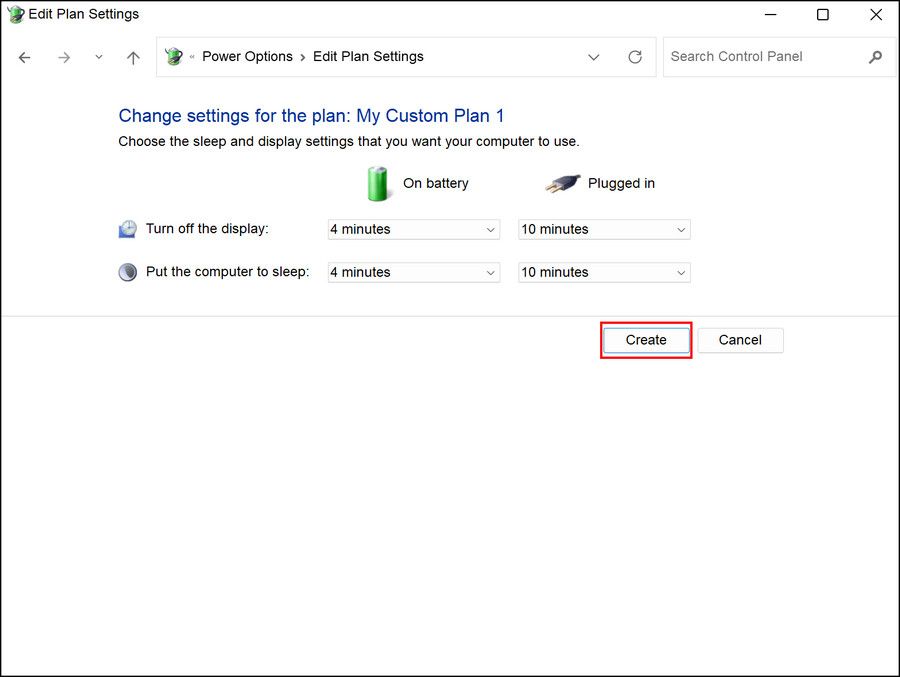
-
Choose the Balanced power plan and click Next > Create.


Once done, check if you can now change the power mode successfully.
2. Run the Power Troubleshooter
Your system can also be dealing with some kind of corruption issue that is causing the power modes and plans to act up. In this scenario, the best way to proceed is by running the Power troubleshooter.
This utility is located in the Troubleshoot section of Windows Settings and works by scanning the system for potential issues. If a problem within the system is identified, it will notify you and then suggest relevant fixes.
Here is how you can run the troubleshooter:
- Press the Win + I keys together to open the Settings app.
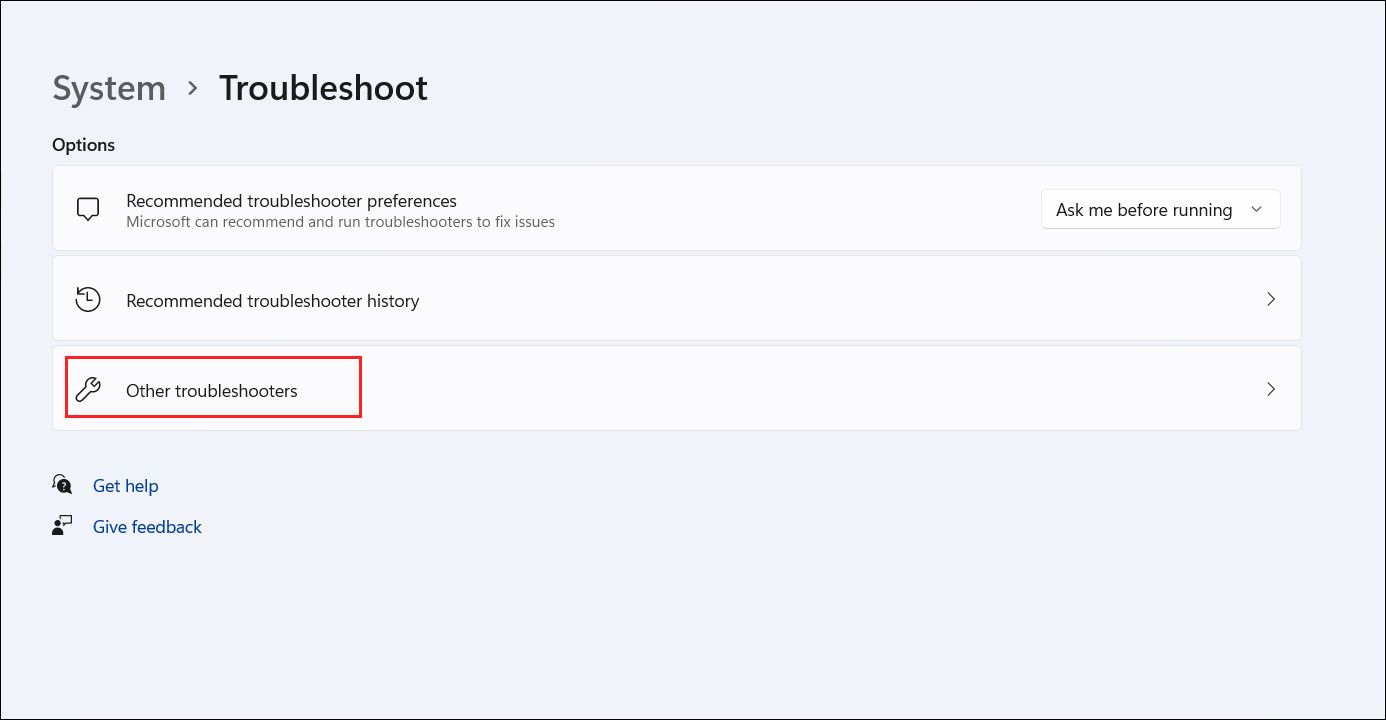
- Choose System > Troubleshoot in the following window.
-
Click on Other troubleshooters.
-
Now, look for the Power troubleshooter and click on the Run button for it.
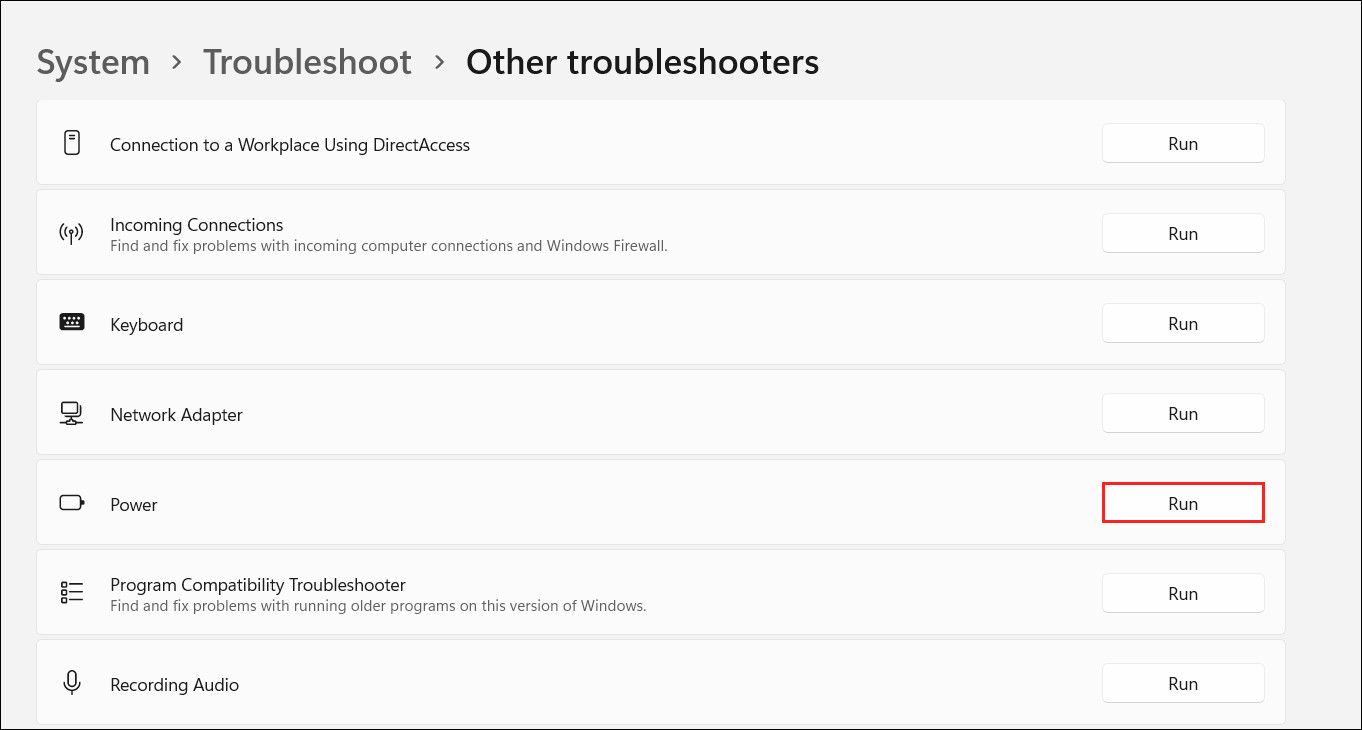
- Wait for the troubleshooter to complete its process, and then check the results. If the troubleshooter has found any issues, click on Apply this fix to proceed with the relevant solutions. Otherwise, click on Close the troubleshooter and move to the next method below.


3. Reset the Power Settings
If changing the power plan did not do the trick for you, you can try resetting the power settings to their default state. They will revert to how they were when you began using Windows, thus fixing the error at hand.
Follow these steps to proceed:
- Press the Win + R keys together to open a Run dialog.
- Type cmd in the text field of Run and press Ctrl + Shift + Enter to open Command Prompt with administrative privileges.
- Click Yes in the User Account Control prompt.
-
Once you are inside the Command Prompt window, type the command mentioned below and hit Enter to execute it:
powercfg –restoredefaultscheme

- Once the command is executed, check if you can change the power mode successfully.

In case the power plan changes again after a short while of executing this method, you will need to make changes as an administrator in the Group Policy Editor.
Here is how you can do that:
- Open the Group Policy Editor as an administrator.
-
Now, head over to the following location:
Computer Configuration -> Administrative Templates -> System -> Power Management
-
Locate the Select an active power plan option in the right pane and double-click on it.
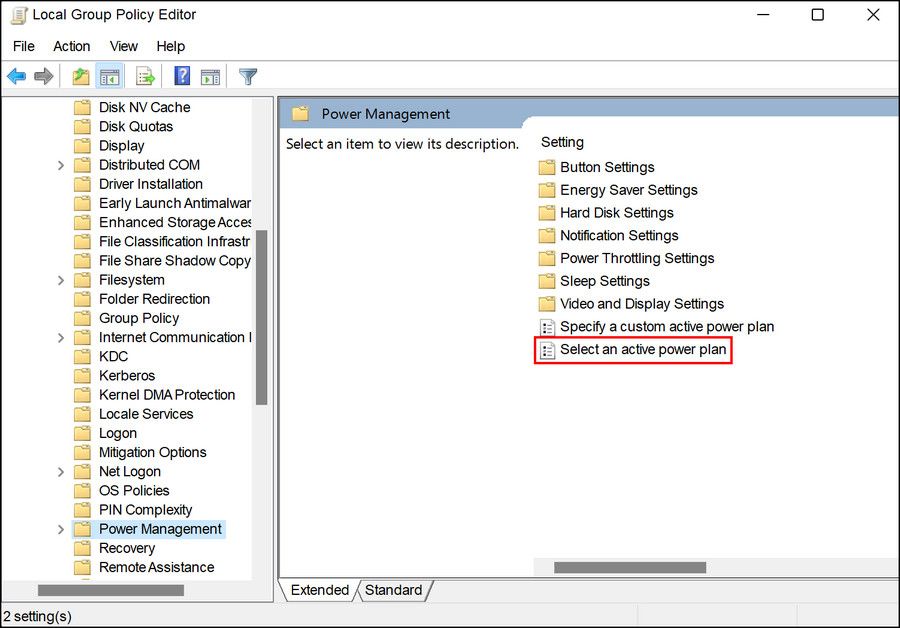
- Choose Enabled and then choose the targeted power plan from the dropdown.
- Click Apply > OK to save the changes, and then restart your computer.

Hopefully, this will resolve the issue.
4. Revert the System to an Older Working State
Another way to fix the problem is by reverting the system back to a state where you can change the power modes without any issues. This can be achieved using the System Restore feature, one of the most important PC-Saving Windows Tools available, which periodically creates restore points on the system.
The restore points represent a point in time when the system was in a certain state, and by choosing one, you can return the system to that point in time.
In this case, you can choose a state where the current issue is not present.
Switch Power Modes Easily
By now, you should be able to switch the power modes successfully. However, if you are still experiencing the problem and cannot find a way around it, then you can contact the official Microsoft team and report the issue to them. They will likely be able to find the root cause of the issue and suggest a fix.
If nothing really works, you can always clean install Windows to give it a fresh, error-free start.