
You're ready to develop your Android app, but Android Studio surprises you: it fails to start. It's frustrating, isn't it? But don't worry; you're not alone.
We'll show you the detailed steps to resolve the Android Studio not working problem on Windows.
What are the Requirements for Android Studio?
Android Studio can be demanding on your system while working on large projects. To avoid any performance issues, ensure your computer meets the following requirements:
- Operating system: Windows 8/10/11 (64-bit)
- Processor type: Intel Core 2nd gen or higher
- RAM: 8GB or more
- Minimum disk space required: 8GB
You might encounter crashing issues if your computer doesn't meet these specifications. In that case, consider upgrading your hardware.
Now that you know the system requirements, let's move to the steps to fix Android Studio not working on Windows.
1. Install the Latest JDK Version
JDK (Java Development Kit) is a package of files that allows Android Studio to build and run Android apps on your computer correctly. If Android Studio crashes frequently, try installing the latest available JDK.
Refer to our guide on how to install JDK on Windows for the steps. After installing the JDK, configure the JAVA system environment variables.
2. Configure JAVA System Variables
Setting up JAVA system variables helps your system recognize the JDK installation directory. We've explained the procedure in our setting up environment variables guide. You can refer to that to adjust the JAVA system variables for Android Studio.
Make sure to double-check the path when modifying system variables. With your JAVA system variables configured, Android Studio should run without issue.
3. Invalidate Cache from Android Studio Settings
You may not know this, but Android Studio allows you to clear its cache with just one click. While you do not need to remove the cache every time, sometimes it becomes necessary, for example, when Android Studio is frequently crashing.
So, let's clean up the Android Studio cache first. Here's how you can clear Android Studio's cache:
- Restart Android Studio if it's already running on your computer.
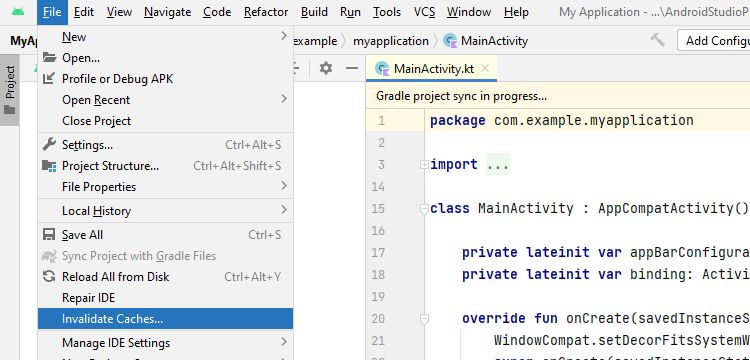
- Click on File in the top-left corner of your current project window.
-
Select Invalidate Caches from the drop-down menu.
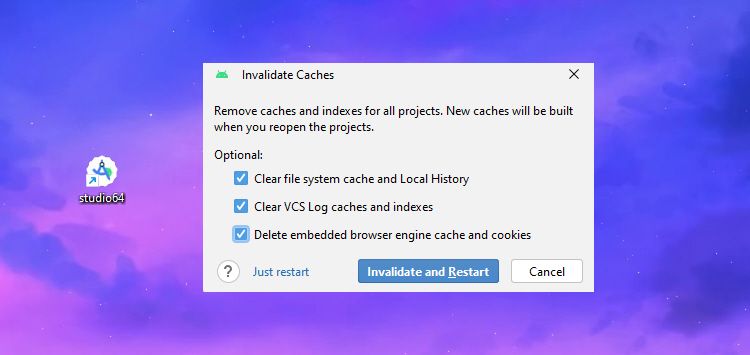
- Select or check all the boxes under the Optional text on the following popup window.
-
Click on the Invalidate and Restart button to clear its cache.


The invalidate cache option clears the cache files and helps refresh the IDE's internal index and other cached data. Doing so can resolve issues related to outdated or corrupted cache files and fix Android Studio crashing issues.
4. Rename the Android Studio Directory
Clearing the cache only helps in case of a corrupted internal index; what if the Android Studio directory is corrupted? In this case, renaming the corrupted directory is the way to go. It'll force Android Studio to reset to the default configurations.
Renaming the Android Studio directory will cause you to lose custom configurations, such as code style settings and keymaps. Make sure to create a backup of all the required settings.
Now follow the steps below to rename the Android Studio directory:
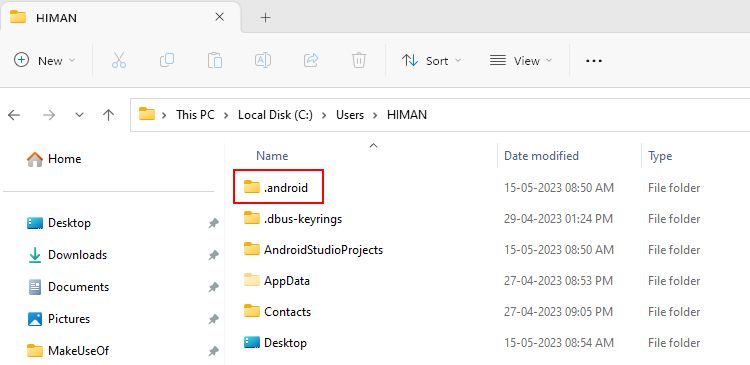
- Press the Win + E shortcut keys to open the Windows File Explorer. Navigate to your user folder location, i.e., C:\Users\{User account name}.
-
On the top, right-click the folder named .android.
-
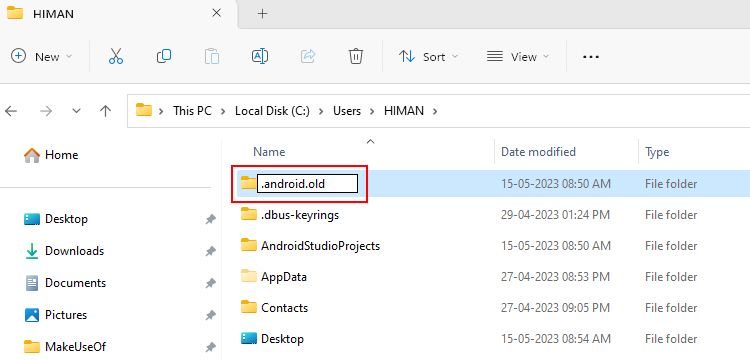
Select Rename from the context menu, add .old to the end of the folder name (e.g., .android.old), and press Enter. This way, you can rename it back to .android if you want to restore your old Android Studio configuration.
- Now, relaunch Android Studio. It should create a new directory with fresh configuration files.


This process may take a few minutes as Android Studio sets up the new environment. Hopefully, Android Studio should work now without any issues.
5. Launch Android Studio with Compatibility Mode
Compatibility mode is an old Windows feature that forces any program to run in a mode that simulates earlier versions of Windows.
Sometimes, Android Studio may not work well with the latest version of Windows, but running it in compatibility mode could resolve the issue.
Here's how to launch Android Studio in compatibility mode on Windows:
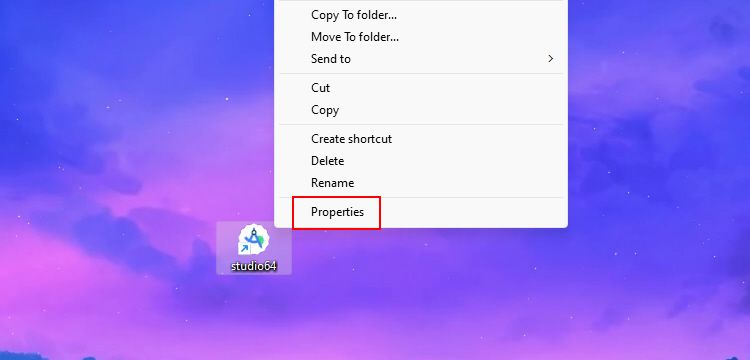
- Right-click on the Android Studio shortcut (studio64) on your desktop.
-
Select the Properties option from the context menu.
- On the Properties window, click the Compatibility tab.
-
Tick or check the box next to Run this program in compatibility mode for.
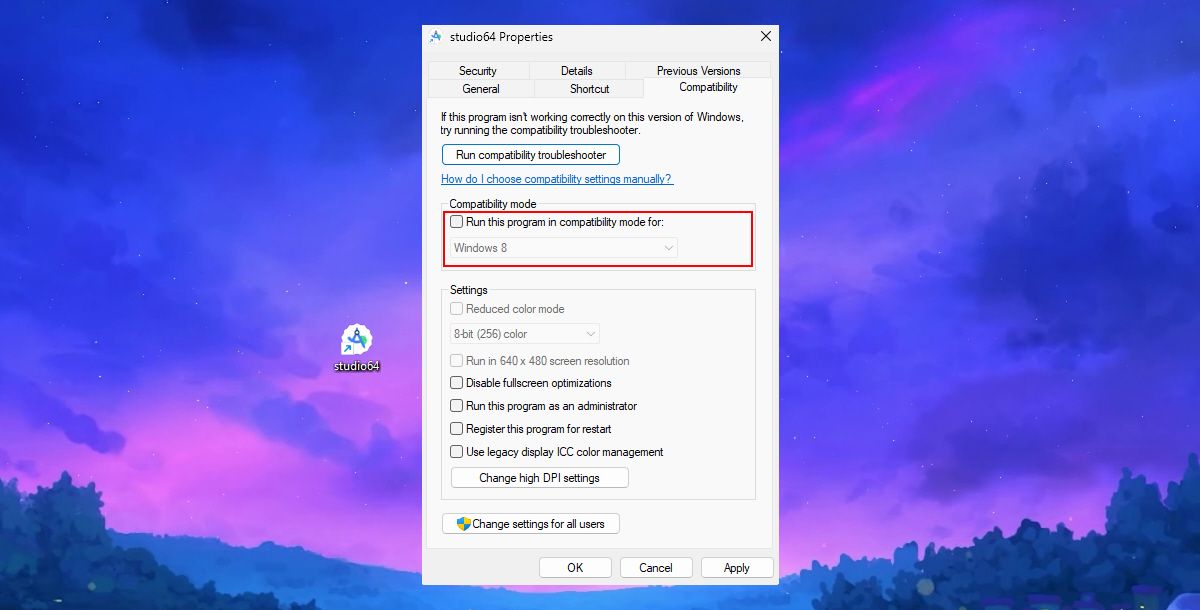
- Click Apply and then OK to save the changes.


Now, give it a shot! Launch Android Studio using the modified shortcut. If all goes well, it should open without any issues.
If Android Studio still doesn't work, try changing the compatibility mode to a different Windows version and see if that resolves the problem.
6. Disable Android Studio Plugins
Android Studio plugins can sometimes create conflicts or consume excessive resources, leading to crashes or the app not launching.
You can disable unnecessary or recently installed plugins to check the issue. You can disable Android Studio plugins from File > Settings > Plugins section.

To disable a plugin, uncheck the box next to it. Once you are ready, you can restart Android Studio.
7. Reinstall Android Studio
If all the previous methods are not working, reinstalling Android Studio is the last resort.
Before reinstalling it, uninstall it from the control panel or Settings > Apps > Installed apps. You can also use one of the best uninstallers for Windows for complete removal.
Here's how to freshly install Android Studio on Windows:
-
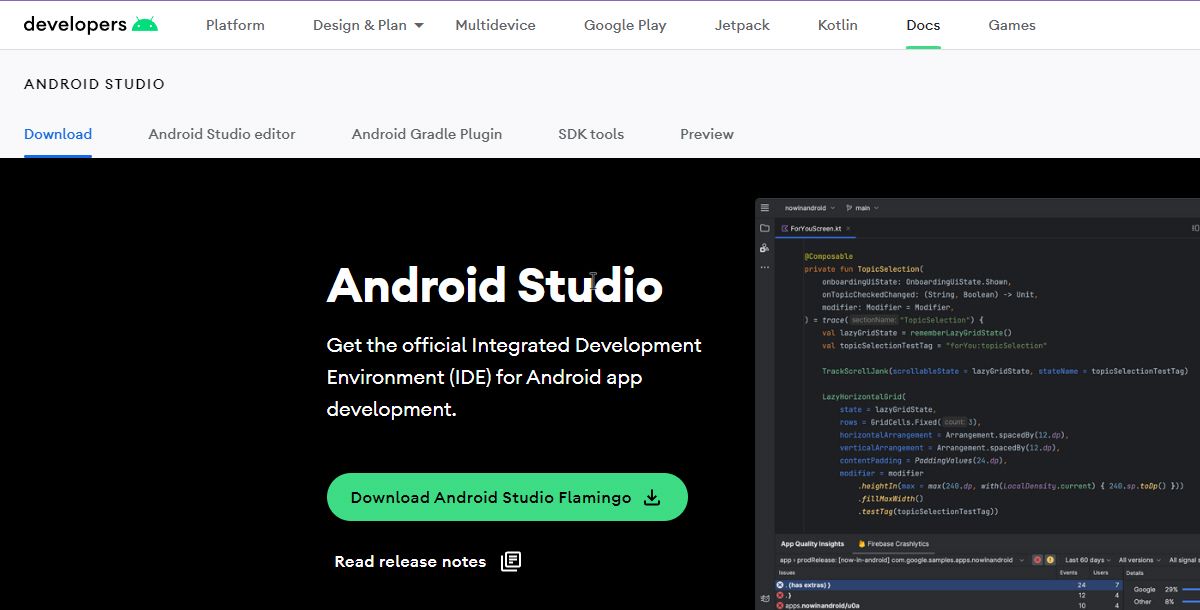
Open the Android Developers website and download the latest version of Android Studio.
- Run the installer file from the Downloads folder and follow the setup guidelines.
- Wait for the installer to unpack the required files. Click Finish to open Android Studio for further setup.
-
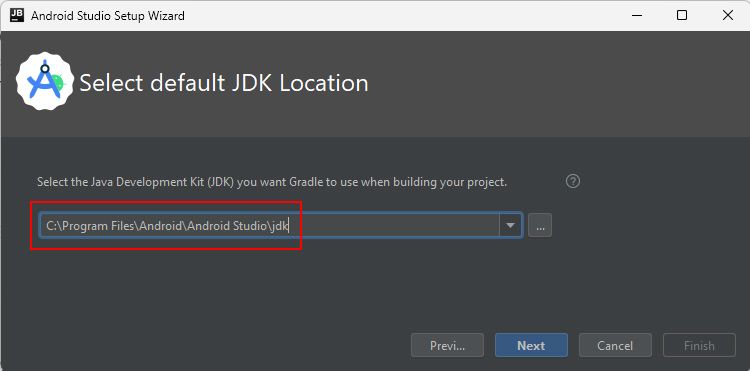
Select the default JDK location to the location where you've installed the JDK, i.e., C:\Program Files\Android\Android Studio\jdk.
- Continue onboarding and click Finish to download the required components.


Once the installer downloads all the files, it will prompt you to open Android Studio. You can continue your work after that without any crashes.
8. Edit the vmoptions File
The .vmoptions file is a config file that allows you to tweak the RAM allocation and heap size (storage, in simple words). Tweaking both can help resolve issues like crashing or random freezes in Android Studio.
Follow these steps to edit the .vmoptions file on Windows:
- Navigate to the Android Studio installation folder, i.e., C:\Program Files\Android\Android Studio\bin.
- Locate a file ending with .vmoptions. In our case, the file is studio64.exe.vmoptions.
- Right-click on it and open it with any text editor. You can refer to our list of the best code editors for Windows to choose one for your PC.
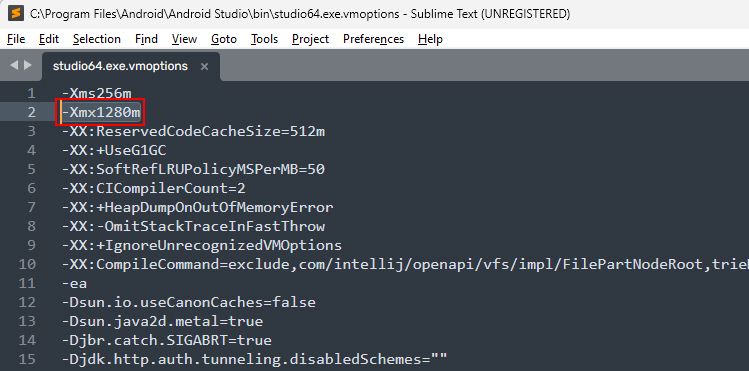
-
Increase the RAM allocation by modifying the -Xmx value. For example, change -Xmx1280m to -Xmx4096m to allocate 4GB of RAM and -Xmx6144m for 6GB RAM (if your system has enough RAM available).
- After making the desired changes, press Ctrl + S to save the changes.
- Reopen Android Studio and check if the issues have been resolved.

Be cautious when making changes, and ensure you don't allocate more RAM than your system can handle.
Get Your Android Studio Running in No Time
Android Studio is the first step in your development journey. So, don't let it become an obstacle in your way! Applying these troubleshooting steps can easily overcome Android Studio's not working issues.
Moreover, an incorrectly installed Android Studio is, of course, the beginning of crashes and errors. So, to avoid crashing issues in the first step, you should set up Android Studio properly.