Finder is Apple’s file management application for macOS. At first glance, the app looks like any other tool you’d use to browse the contents of your operating system, much like Windows File Explorer, and in many ways it is. If, however, you dig beneath the surface, you’ll discover several useful features that make Finder special.
Knowing what your apps can do creates a more satisfying macOS experience and helps you get the most out of Apple’s built-in tools. Here, we’ll list 10 Finder tips you may or may not already know.
1. Create a New Folder With Selected Files
Perhaps you’ve got a pile of photos or documents that need to form their own folder. You can either do this the easy way, or the easier way.
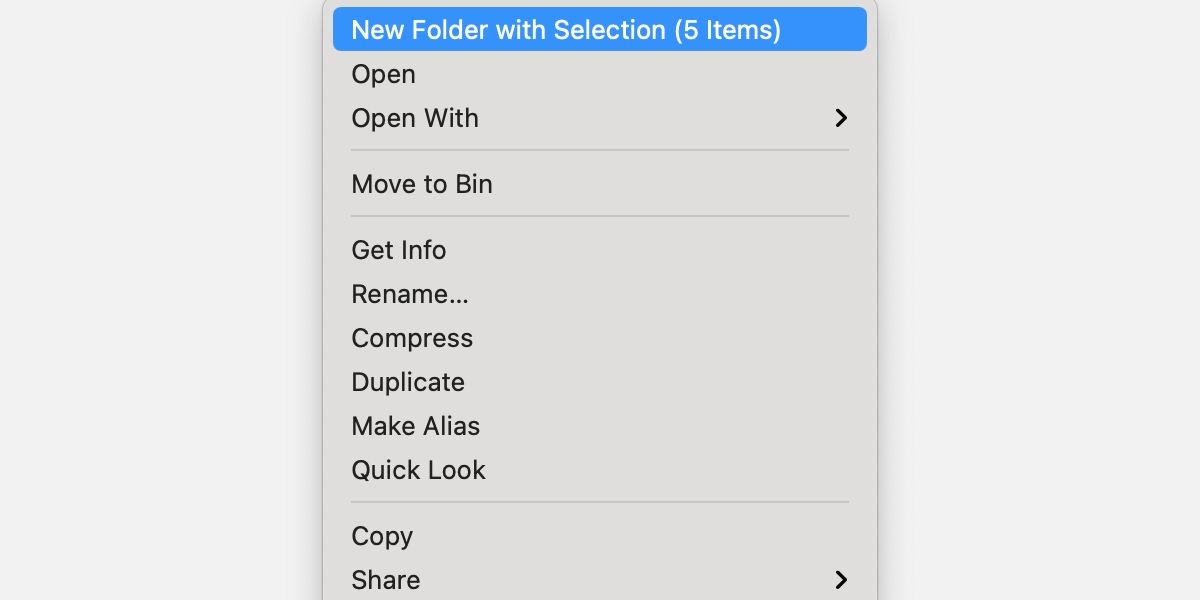
Traditionally, you might create a new folder and then drag and drop the files inside. This method is simple enough, but it could be simpler. Instead, you can select all of the relevant files and have them create their own new folder by following these steps:
- Select each relevant file.
- Control-click any selected file or navigate to the File menu.
- Choose New Folder with Selection.
- Enter the new folder name.
- Press Enter.
Your files will now move to the newly created folder.
2. Cut or Move Files in Finder
While copying and pasting in Finder is an easy enough process, the method for cutting or moving isn’t obvious. Fortunately, once you have the know-how, using this feature is as simple as pressing a few buttons. To cut or move in Finder, follow these steps:
- Select the file you want to move.
- Copy using Cmd + C or Edit > Copy “File name”.
- Navigate to the target destination.
- Move the file using Cmd + Option + V. Alternatively, click the Edit menu while holding the Option key and choose Move Items Here.
As you can see, Finder doesn’t have a cut option, but moving achieves the same result.
3. Rename Multiple Files
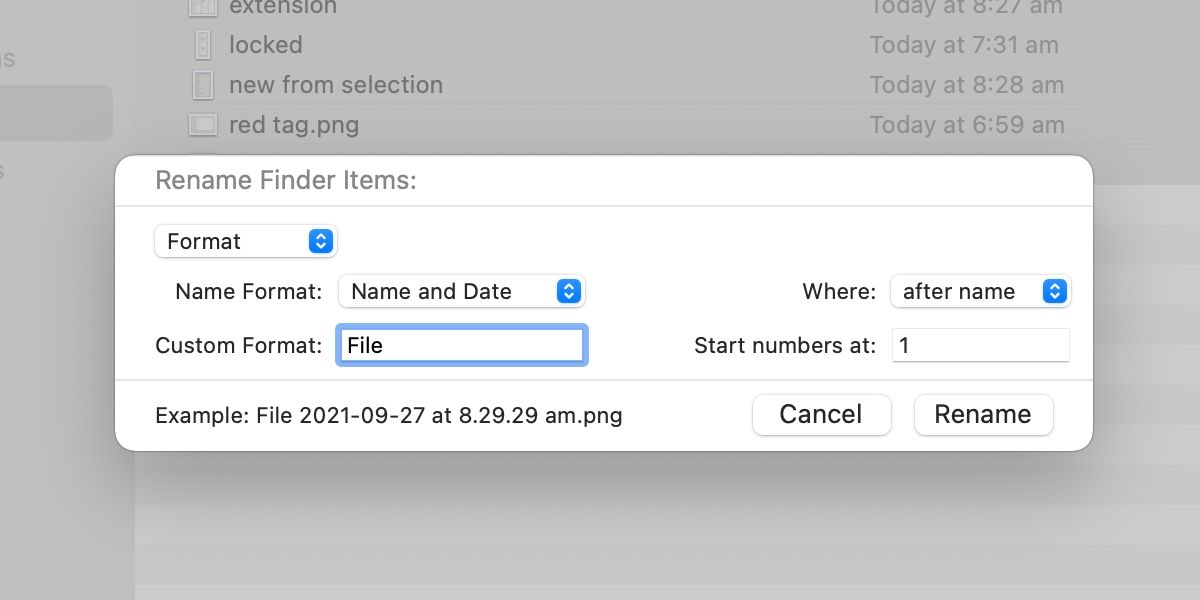
You may occasionally find yourself in a situation where you need to rename multiple files at once. Typically, you might process each file individually, but, in some cases, batch renaming is a more useful solution. You can replace text, add text, or opt for a custom format.
To rename multiple files in Finder, follow these steps:
- Select the relevant files.
- Control-click any selected file or navigate to the File menu.
- Choose Rename.
- Select a rename type: Replace Text, Add Text, or Format.
- Complete all fields.
- Click Rename.
4. Change File and Folder Icons
Sometimes you may want an item to stand out among the rest, or perhaps you’re an agent of chaos and want to confuse someone by making files look like folders and vice versa. Whatever your goal, you can change icons in Finder with these simple steps:
- Copy an item with the desired icon, or another image, to the clipboard.
- Select the file or folder you want to change.
- Control-click the item or navigate to the File menu.
- Choose Get Info.
- Click the icon in the Get Info window.
- Paste with Cmd + V or Edit > Paste.
The icon should now change to the image you’ve pasted in its place. When using a picture, you’ll need to open the file itself and copy the image. If you only copy the icon, that’s what will appear when you hit paste.
5. Use Tags to Color Code
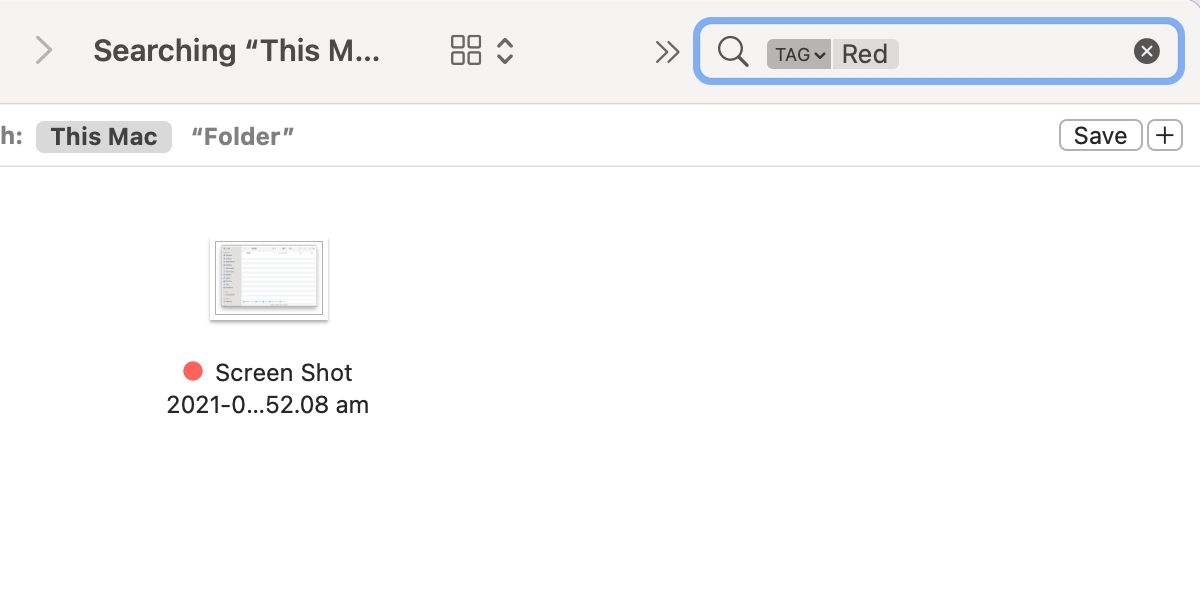
Tagging is an excellent way to keep track of files. Firstly, color-tagged items are easy to identify in big lists, and, secondly, Finder’s search function allows you to locate files with the same tags. Here are the steps for tagging:
- Select the relevant item.
- Control-click the selection, navigate to File, or click the Edit Tags icon in the Finder control bar.
- Choose the desired tags.
To locate tagged files, type the tag name—red, blue, important, etc.—and select the suggestion that appears below the search box.
6. Create Smart Folders
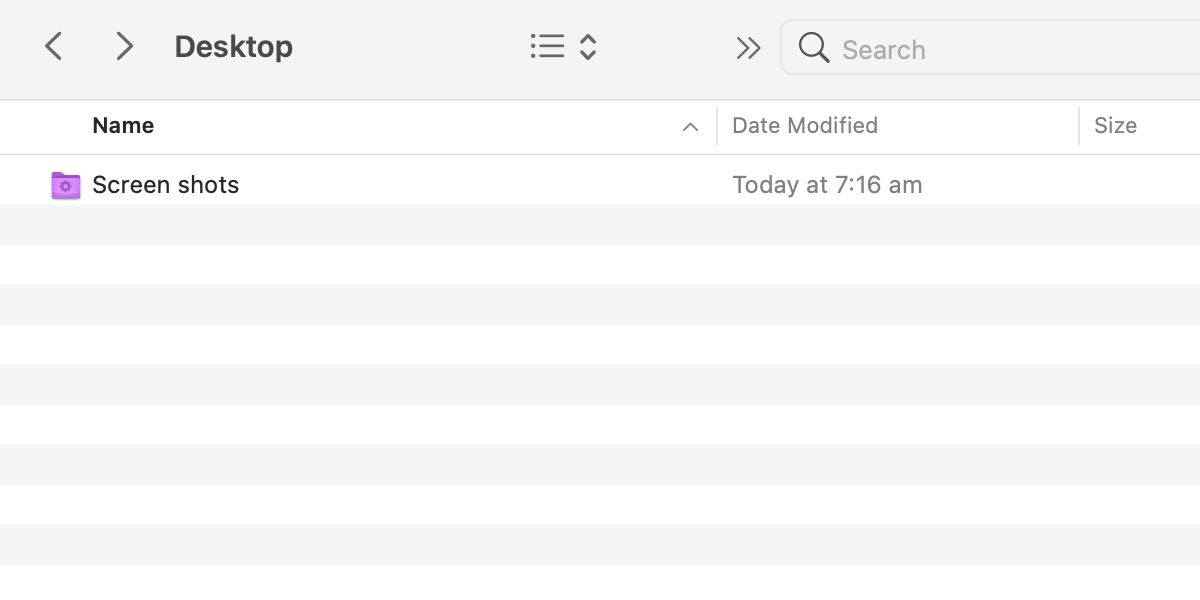
Smart folders are a useful way to automatically manage files. For example, you could set parameters that state all PNG images with “screen shot” in the file name should appear in a certain folder. When you add additional items to your Mac with the same variables, macOS will automatically include them with the other files. Follow these steps to create a smart folder:
- Navigate to Finder’s File menu.
- Click New Smart Folder.
- Type the desired parameters into the Search box.
- Select the desired variables.
- Click Save.
- Enter a folder name and location.
- Click Save.
Automation is the key feature here, and you can set multiple conditions and make some fairly complex smart folders when required.
7. Lock Folders
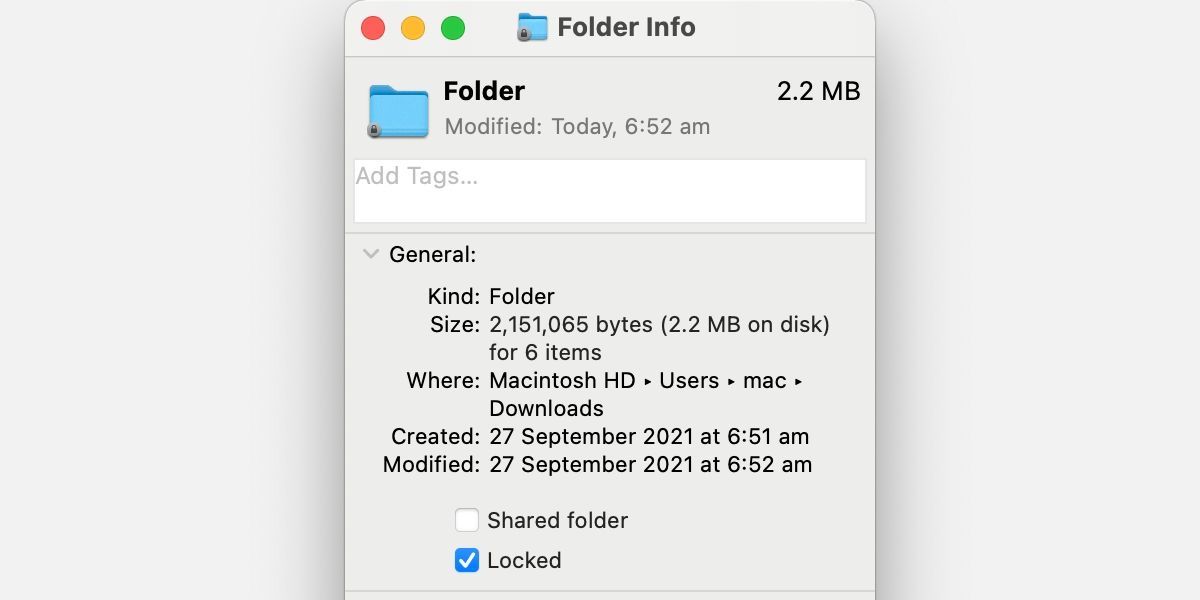
Locking folders is useful when multiple people use the same login or if you’re prone to accidentally trashing your files. A locked folder will prompt you for an admin password if you try to delete anything within it, and it won’t let you add new items until unlocked.
To lock a folder, follow these steps:
- Select the relevant folder.
- Control-click or navigate to the File menu.
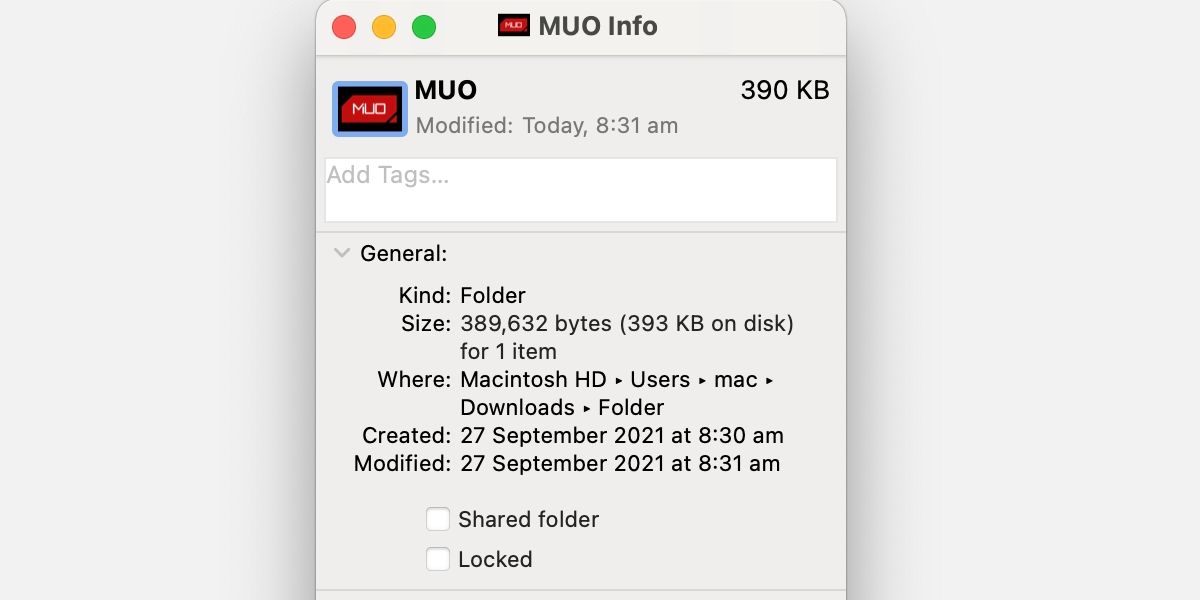
- Choose Get Info.
- Tick the Locked box in the info window.
To unlock the folder, you can untick the option when needed.
8. Compress Files
The compression tool in macOS serves multiple purposes. Firstly, as the name suggests, the feature reduces file sizes by compressing items into a ZIP archive. Secondly, the tool allows you to quickly combine multiple items, which is useful when sending a large number of attachments.
Follow these steps to compress your files:
- Select all relevant files.
- Control-click or navigate to File.
- Click Compress.
Your compressed items will appear as Archive.zip, which you can rename if needed.
9. Check and Access the Folder Structure
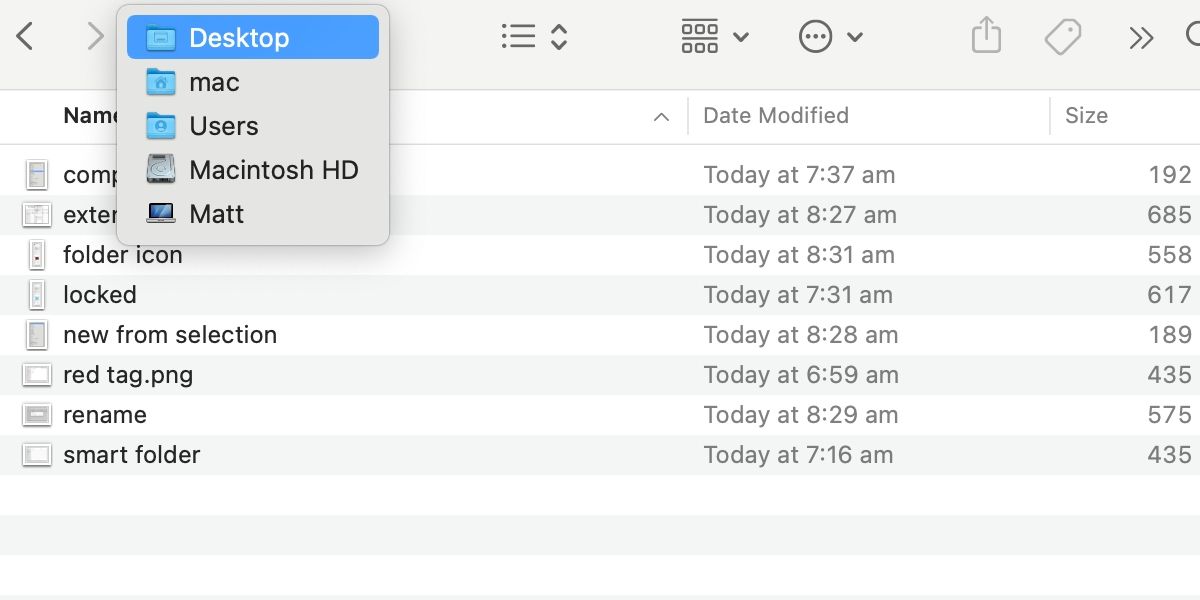
Navigating to other locations within the current folder structure may seem like a simple tip, but the method for doing this isn’t obvious. To view and access the folder structure in macOS, follow these steps:
- Control-click the name of the current folder in the Finder control bar.
- Select the folder within the structure you wish to view.
That’s it. Simple but sweet, this tip can save a lot of time if you’re someone who has to frequently jump from folder to folder. Knowing the right Finder shortcuts can make life a lot easier.
10. Show or Hide Filename Extensions
If you need to change a file name, having the extension visible can be useful. Sometimes, however, the extension can get in the way and make renaming items tedious. Fortunately, in macOS, you can adjust the way Finder displays file names. Use these steps to change the setting for all files:
- Navigate to Finder > Preferences > Advanced.
- Tick or untick Show all filename extensions.
If you want to change the setting for just one file, the steps are a little different:
- Control-click or select the relevant file.
- Click Get Info from the Control-click or File menu.
- Tick or untick Hide extension.
You Could Always Know More
While finder is an intuitive tool, some of the more useful features aren’t obvious. Creating new folders with selected items makes filing easy, and knowing how to cut or move files can save time and effort. Additionally, the batch rename tool in macOS helps label bigger collections, and tagging and smart folders make it simple to locate items.
Changing icons for practical or nefarious purposes is another useful feature, as is the ability to lock folders. In addition, the macOS compression tool makes for smaller file sizes and ease of distribution. The ability to show or hide file extensions is another useful feature.
Finally, using a simple Control-click on the current location name to access the folder structure is a true time-saving tip.
We’ve covered several handy Finder features, but, as with anything, there’s always more to learn. Continue to read, explore, and tinker, and you’ll quickly become a macOS master.

