
Macs are pretty decent workstations, thanks to their power, sleekness, and security. If you just decided to buy one for school or work, then you made the right decision.
While in its default settings, your Mac still offers a good range of features and versatility. However, you can still squeeze more out of it by enabling some other not-so-obvious features.
Here, we've compiled a few of them for you. So, without further ado, let's take a look.
1. Three-Finger Drag
The three-finger drag gesture lets you move windows around in macOS without clicking and dragging on your MacBook's trackpad. All you have to do with this enabled is simply hover your mouse on the window's top frame and drag it with three fingers.
Simply follow the instructions below to enable it for your Mac:
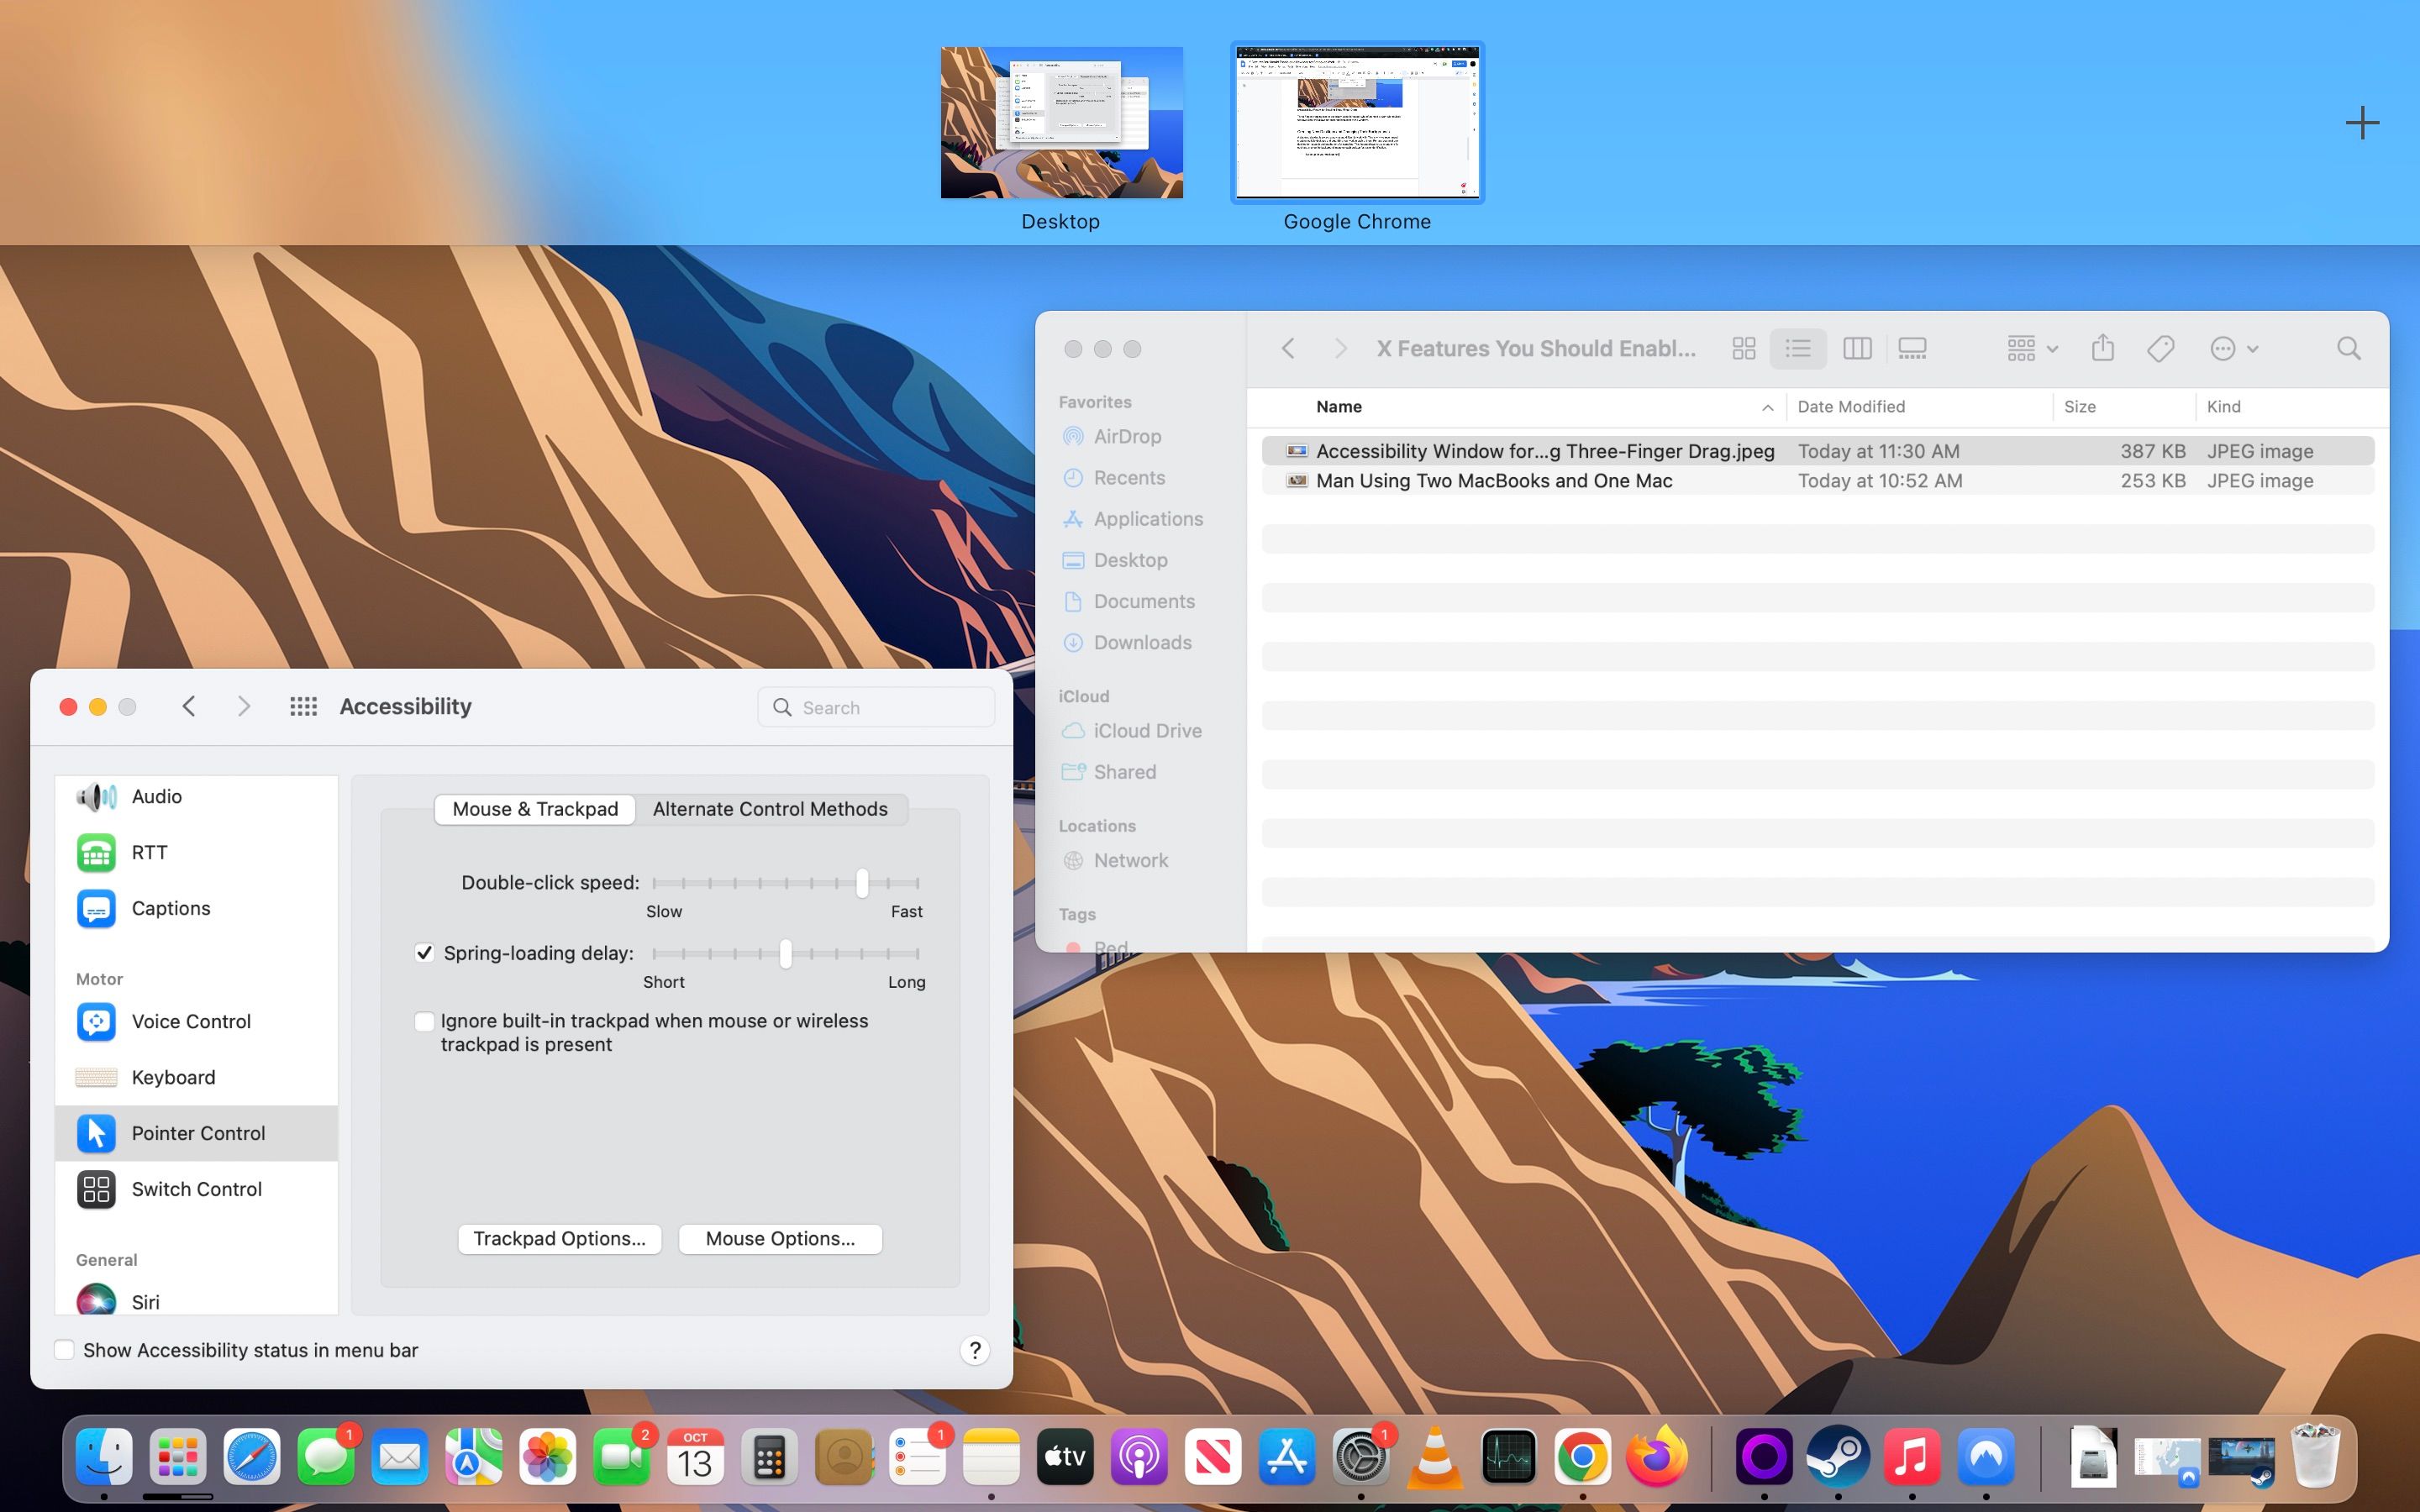
- Go to the Apple menu from the macOS menu bar.
- Select System Preferences and choose Accessibility.
- Now scroll down the sidebar till you see Pointer Control and click that.
- Select Trackpad Options in the lower part of the Pointer Control window.
- Toggle on Enable dragging and choose three finger drag from the dropdown menu beside it.

The three-finger dragging gesture can be handy for people who often need to work with multiple windows since this allows for easier manipulation of the windows.
2. Create New Desktops and Changing Their Backgrounds
A cluttered desktop is always annoying and difficult to work with. This is why we recommend creating multiple desktops and organizing your work in each of them. Perhaps you need one desktop for research and another one for compiling.
This feature allows you to create one for each and change the background image on each desktop for easier identification.
-
Swipe up on your trackpad until the desktop summary menu appears.
- Click the plus (+) sign and add as many desktops as you need.

Follow the next steps to change the desktops' backgrounds:
- Open the desktop you wish to change by selecting it in the desktop summary or swiping four fingers horizontally across your trackpad.
- On that desktop, click the Apple Menu in the menu bar and select Preferences.
- Choose Desktop & Screensaver, then choose whatever image you like.
If you want to use a photo from your album as your wallpaper, you can learn more about changing your desktop background on Mac.

3. Hot Corners
Everyone knows about keyboard shortcuts, but Hot Corners are a hidden gem that works just as great. You can make your computer activate a predetermined action by moving your mouse to one of the four corners of your screen.
Here's a list of things you can do with Hot Corners:
- Start screensaver
- Disable screensaver
- Open Mission Control
- View application windows
- Pop out the notification center
- Bring up the Launchpad
- Create a Quick Note
- Put the display to sleep
- Lock the screen
Unfortunately, you can only do these nine things with Hot Corners—it has no further customizable options yet.
Now, follow these steps to easily enable Hot Corners on your Mac:
- Click the Apple menu in the menu bar and select Preferences.
- Choose Desktop & Screensaver, then click Hot Corners in the lower right.

If you have a Windows 11 PC you would like to replicate this feature in, feel free to learn how to add the Hot Corners from macOS to Windows 11.
4. Now Playing
This feature is for those who need to keep track of various audio sounds in a work or study session. For instance, let's say you're doing some research with audiobooks, a podcast, and a YouTube video; you can cycle through various windows juggling pause buttons—or you can use Now Playing to manage all your audio from one place.
The Now Playing icon resides on your menu bar once your Mac detects a sound from your device. This is only to show you how to keep it there, whether or not there's audio playing.
- Choose the Apple menu in the menu bar and select Preferences.
- Select Dock & Menu Bar, scroll down the sidebar, and click Now Playing.
- Make sure that the Show in Menu Bar toggle is on.
- Open the dropdown menu and select Always.

With this activated, you can enjoy some sound control versatility and properly explore podcasts on your Mac. You can take advantage of this feature with some of the best podcast apps for your Mac.
5. Hide the Dock and Menu Bar
There's something inspiring and aesthetic about a clean desktop, with no menu bar or busy dock to spoil the view.
So, if you're a minimalist, here's a step-by-step guide on how to keep your desktop free of icons and menu items:
- Open the Apple menu in your menu bar.
- Select System Preferences and choose Dock & Menu Bar.
- Choose Dock & Menu Bar in the sidebar.
- Turn on the Automatically hide and show the Dock toggle.
- Scroll further down, turn on the Automatically hide, and show the menu bar on desktop toggle.

6. Turn Off the Startup Sound
Yes, we know how embarrassing it is to have your computer making a loud noise in the middle of a class or at an important business meeting. While most other noises are avoidable (as long as you don't click something you're not meant to), we know you may have little non-proactive control over your Mac's startup sound.
The good news is that you do have proactive control by simply disabling the startup sound before you shut it down again. Here's what you need to do:
- Open the Apple menu in your menu bar.
- Select System Preferences and choose Sound.
- Turn off the Play sound on startup toggle in the Sound Effects tab.

Remember, It's Your Mac!
This list is by no means exhaustive or compulsory! It's your Mac, so do what you want with it. If you prefer to have the startup sound on, do so, but if you think Hot Corners are annoying, don't use them.
Our list is merely a guide for new owners who need some ideas on features and settings that might improve their quality of life. Congratulations on your new Mac, and remember to treat it as well as you want it to last!