Have you heard of exposure bracketing? Maybe you’ve heard of high dynamic range photos—well, they’re the same thing.
Let’s talk about what exposure bracketing is, how to use it in your camera, and what it's best used for. You can easily step up your photography and post-production game with exposure bracketing. It’s simple to do and has plenty of uses to yield great results.
What Is Exposure Bracketing?
Camera bracketing, photography bracketing, or exposure bracketing are terms used for taking multiple photos at once, each shot set to different exposures. You might not know that there’s already a setting in your camera to do this, but you can also do manual bracketing.
The best thing about your camera’s bracketing setting is you barely have to do anything to use it. Once it’s switched on, just press your shutter as normal, and you’ve taken bracketed photos.
Once you learn about exposure bracketing, you’ll also want to know about focus stacking. This is a similar process, except instead of layering exposure differences, you’re layering differences in the depth of field.
How to Use Exposure Bracketing on a DSLR
Most DSLRs have a bracketing setting. Some point-and-shoot cameras could also have one. And smartphones that create HDR photos use bracketing to render the final HDR image—although phones don’t tend to have a manual bracketing function.
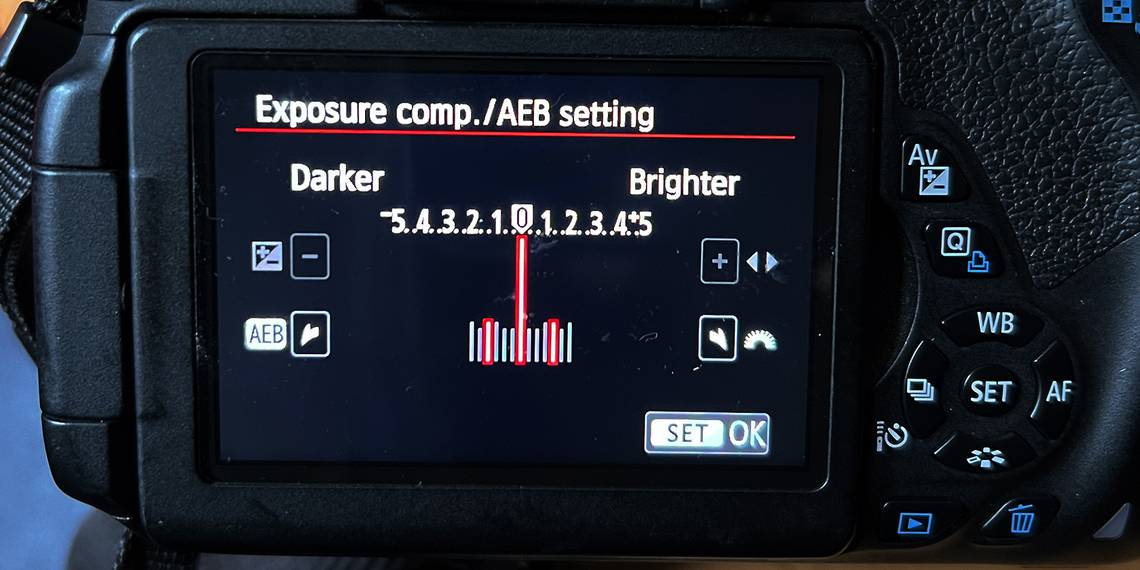
Find the Exposure Bracketing Setting

Most cameras don’t use the word “Bracketing” as a label in their settings. You might have seen the bracketing setting but didn’t realize what it was. Most DSLRs label their bracketing feature as AEB.
AEB stands for Automatic Exposure Bracketing. Since this is the function itself, the A—automatic—takes care of the grisly details for you.

The setting might be in different places in different camera models—it should be somewhere among the camera features in your camera’s menu. Any setting labeled AEB will be what you’re looking for, and there should only be one. Once you find it, select it.
How Many Shots Should You Take?
Unless you’re manually bracketing, your camera settings should take care of the number of shots in your bracketing exposure. Most DSLRs automate to either three or five shots upon the shutter click.
If your camera allows you to set a certain number for AEB, then we’d suggest three. If you’re experimenting or want to make a complex HDR, go for five. This will give you a broader range of exposure values to edit together.
Set Your Exposure Settings

Your camera’s AEB setting gives you options for exposure levels. One photo will be at the correct exposure based on your manual settings.
For three shots, use your main dial to push the outer two shots a few steps left and right from the center. If you’re set up for five or more shots, you can have steps in the extreme ends of the exposure as well as just out of the realms of the correct exposure.
Depending on whether you’re using bracketing to find the perfect exposure or to create an HDR later, you should decide how extreme you want your overexposed and underexposed shots to be. For an HDR, extreme amounts will yield great results. But if you’re using bracketing to ensure perfect exposure in at least one shot, don’t push the exposure steps too far.
How to Take Bracketed Photos
Once you’ve set up the AEB settings for your bracketed photos, you need to figure out the best way to take the photos. For most cameras, there are two options: taking each shot manually or using the continuous shooting mode. Whichever number of shots you’ve set for the AEB—three or five—you’ll need to shoot that many photos for the bracketing to work.
For manual photos, you need to hold the camera steady and ensure your subject doesn’t move. Using a tripod correctly will help ensure a steady photo. Then press the shutter three (or five) times in a row. The AEB setting will ensure the first photo is underexposed, the middle photo is correctly exposed, and the third photo is overexposed.

Setting your camera to continuous shooting mode will likely yield better results. In this case, ensure the exposure meter reads correctly for the middle indicator, then hold your shutter down, and the camera will take as many shots as your AEB is set to. You don’t need to count them or pause between each frame.

Using continuous shooting helps minimize camera movements or subject movements since they are taken in such quick succession. Exposure bracketing is just one of many uses for continuous shooting mode.

Once you’ve taken your photos with the exposure bracketing setting switched on, you’ll have three (or five) new photos of the same subject in your photo gallery. The only differences with these images will be the exposure levels—provided you didn’t have any camera or subject movement when taking the photos.
When to Use Exposure Bracketing
Switching on your AEB settings and taking photos with exposure bracketing allows you to capture dynamic lighting that isn’t always possible in a correctly exposed photo. You can use bracketed images to create HDRs of landscapes, real estate photography, and many other subjects.
For real estate photography, HDRs—born from bracketed photos—allow the images to have the correct lighting in all corners of a room and even out of the windows at the same time. While this may be sneaky as it shows an untruthful view of internal real estate, it also allows viewers to see the potential of the lighting in a space. See our beginner’s guide to real estate photography for more on this.
A bracketed landscape photo means your sky won’t be overexposed or blown out, and the shadows in the landscapes won’t be so dark that they lose textured detail. Using a still subject is great for exposure bracketing as you know nothing will move between shots.
Now, if you’re not creating HDRs with your exposure bracketed photos, you can still use them to your advantage. If you’re learning how to set the correct exposure, then the AEB setting can act as insurance for you. If you accidentally incorrectly expose the image, the extra bracketed photos offer a higher chance of a correct exposure as backup.
You can use the underexposed or overexposed images as an artistic choice, too. While being underexposed or overexposed is technically incorrect, there’s nothing that says you can’t make great artistic photos from them. There are plenty of fun artistic ways to play with exposure, including long exposure photography.
Get Perfectly-Exposed Shots With Exposure Bracketing
You may have heard of bracketing, but since the word isn’t very descriptive, you might not have known what it meant; now you do.
Turning on the Automatic Exposure Bracketing setting in your camera will help produce more dynamic photos, help you learn how to get the best exposure, and, overall, save you time with exposing images correctly. And you can do many creative things with your bracketed photos.