When you try to shut down or restart your PC, you may encounter an error that reads "the exception breakpoint has been reached." This error can also occur when you try to open specific apps on your PC.
Issues with your system files, glitchy apps, memory leaks, and bad disk sectors are common contributing factors to this error. If you experience this error, here is a quick troubleshooting guide to help you fix the "the exception breakpoint has been reached" error on your PC.
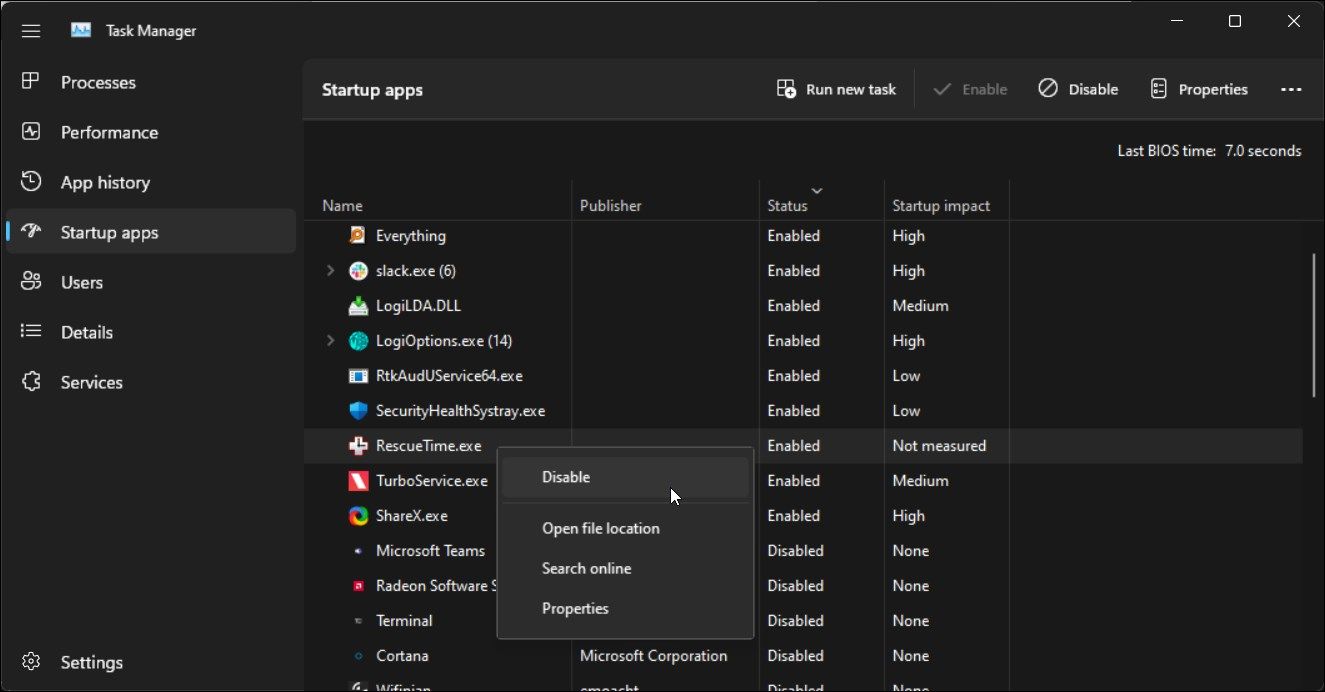
1. Disable Any Automatic Startup Apps
Apart from the essential Windows services, third-party apps enabled to run during startup can cause conflicts and cause problems. To determine the cause, disable all the automatic startup apps and restart your PC.
To disable startup apps on Windows:
- Press Win + X to open the WinX menu.
- Click on Task Manager to open the app.
- In Task Manager, open the Startup apps tab.
- Click the Status column to sort the table with the enabled apps at the top.
-
Select all the apps one by one and click Disabled.

Once done, restart your PC and check if the error persists. If not, enable the apps again one by one until you find the problematic application. Depending on the use, you can update, uninstall or find an alternative for the app.
2. Run the System File Checker and the DISM Tools
The Deployment Image Service Management (DISM) tool is a command-line utility that can find and fix issues with your Windows image. If your error is triggered by a corrupt system image, the DISM command can help you fix the error.
In addition, we'll also run the System File Checker utility. Like DISM, the System File Checker is a built-in command-line utility to detect and fix corrupted or missing system files on Windows computers.
Follow these steps to run the DISM and System File Checker tools:
- Open Command Prompt as an administrator (see how to run the Command Prompt as an administrator if you need help).
-
In the Command Prompt window, type the following command to check your system health:
Dism /Online /Cleanup-Image /CheckHealth -
Next, type the following command and press Enter to scan your PC's health:
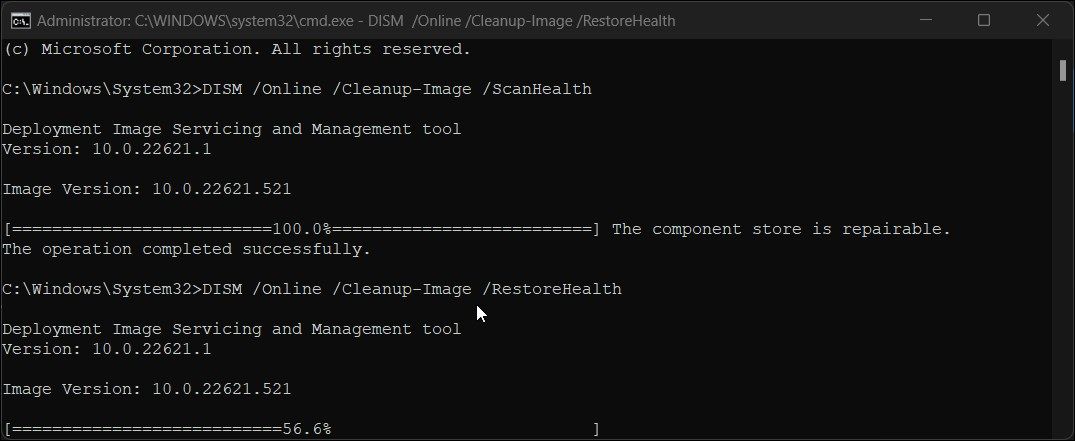
Dism /Online /Cleanup-Image /ScanHealth -
Once done, type the following command to repair the system image:
Dism /Online /Cleanup-Image /RestoreHealth - This process may take several minutes, so wait till the verification reaches 100%.
-
Once done, type the following command to execute the System File Checker utility:
sfc /scannow - This process can take some time to complete. Once the verification reaches 100%, it will display the result and any actions taken.
- Type exit and press Enter to close Command Prompt.

3. Check Your Hard Drive for Errors With CHKDSK
Check Disk (CHKDSK) is a Windows command-line utility to find and fix issues on your hard drive due to bad sectors. You can run the tool on your traditional mechanical hard drive and Solid State Drives (SSDs).
You can use the CHKDSK utility with multiple parameters. Here we'll use the /r parameter to locate bad sections and recover readable information.
To run the CHKDSK tool:
- Open Command Prompt as administrator, as you did in method two.
-
In the Command Prompt window, type the following command and press Enter to run the CHKDSK utility:
chkdsk C: /r

When executed, it will scan and check your system drive (C:/) for bad sectors. Wait for the scan to finish and close the Command Prompt window.
4. Turn Off Any GPU Overclocking
If the error is triggered while performing a graphic-intensive task (such as playing a game or rendering 3D models), it can be due to an overclocked GPU.
While an overclocked GPU offers performance benefits, it can cause your system to crash and trigger multiple errors if not done correctly. Whether you have used a third-party GPU overclocking tool or a proprietary app from your GPU manufacturer, undo all the recent instances of GPU overclocking to see if that helps fix this error.
If you need help with overclocking, check out the best GPU overclocking tools to get the best results.
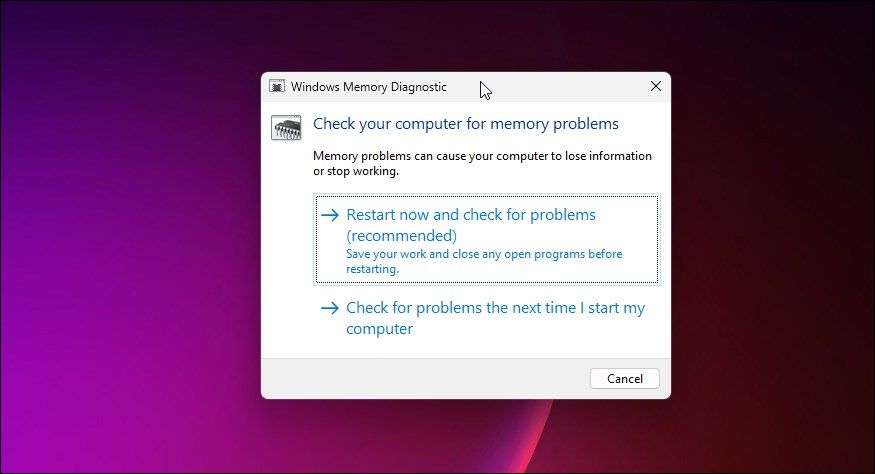
5. Check for Memory Leaks
The "the exception breakpoint has been reached" 0x80000003 can occur if your system fails to efficiently utilize the available memory resulting in a memory leak. Fortunately, Window comes with a built-in Memory Diagnostic Tool to check your computer for memory problems. Here's how to do it.
- Make sure to save all the work and close all the running apps.
- Press Win + R to open Run.
- Type mdsched.exe and click OK.
-
In the Windows Memory Diagnostic dialog, click Restart now and check for problems (recommended).
-
Your computer will restart and boot into the Windows Memory Diagnostic Tool menu, and the system will start a test automatically.

- You can also perform Basic, Standard, or Extended test manually. To do this, press F1 to access the Options menu and select from the Basic, Standard, and Extended option under the Test Mix section.
- If a problem is detected, you can view it under the Status section. Even if the test appears inactive or stuck, do not shut down your computer until testing is complete.
- Once done, the PC will start, and the Windows Memory Diagnostic Tool will display the test result after you log on.


6. Create a New Windows Local Account
A corrupted user profile may cause the "the exception breakpoint has been reached" error. To fix the error, you can create a new user local user profile on Windows 11 and give it administrator privilege. Sign into your new user profile and launch the app to see if the error is resolved.
7. Update or Uninstall the Problematic App
If specific apps trigger the error, such as the Origin launcher or the Steam client, consider reinstalling the app to solve the issue.
Before you uninstall it, check if your app has any pending updates. Install any update available and check for any improvements. If the issue persists, reinstalling the app may be necessary.
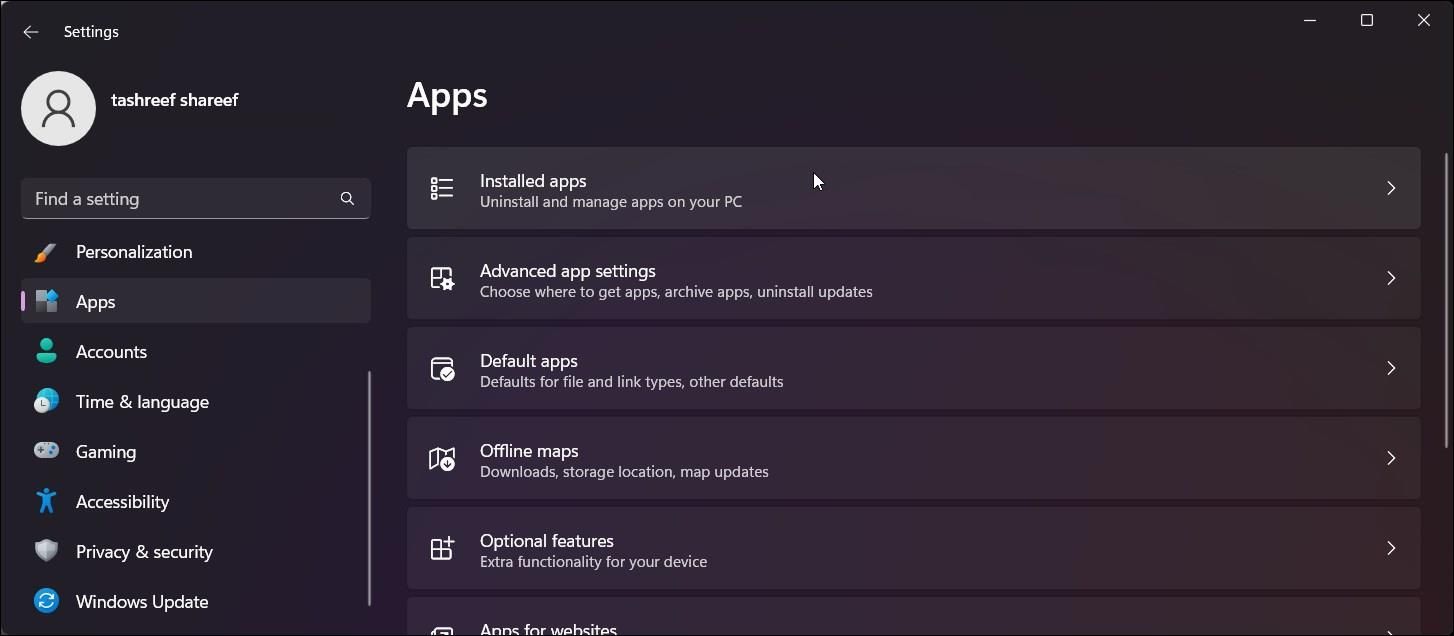
To uninstall an application on Windows:
- Press Win + I to open Settings.
- Open the Apps tab in the left pane.
-
Click on Install apps.
-
Type the name of your app in the search bar.
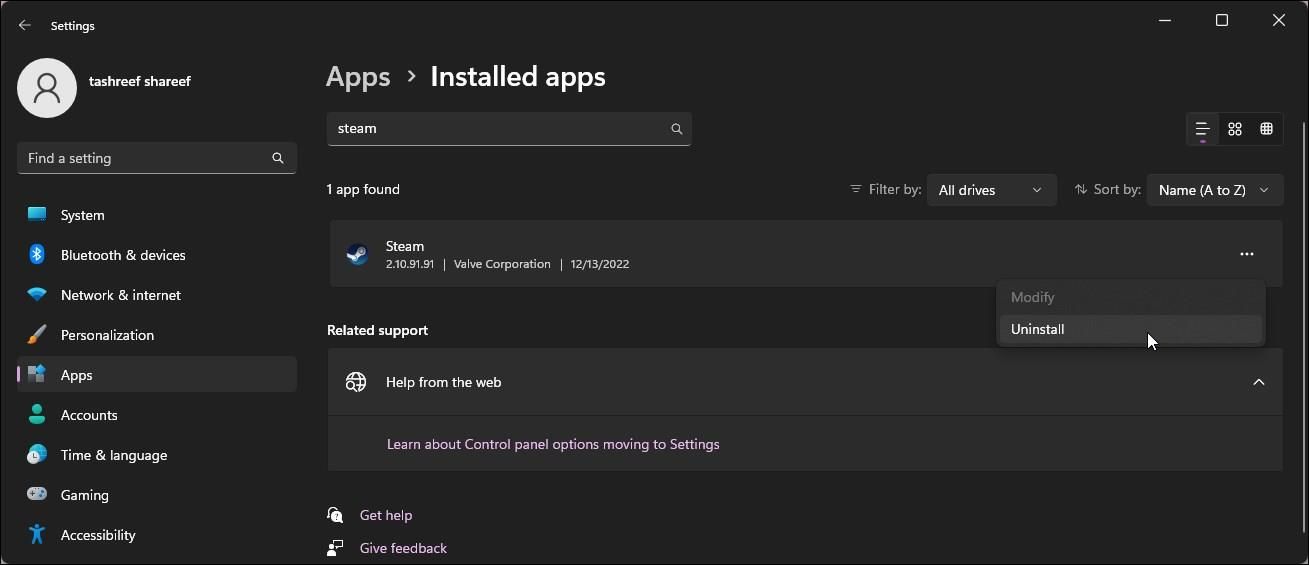
- Next, click the three-dots menu next to the app name and Uninstall.
- Click on Uninstall again to confirm the action.
- Once uninstalled, download the app installer and install the app. Restart your PC and check for any improvements.


Note that, at times, the issue can be with a specific version of the app. To fix this, try to install an older version of the app to see if that works.
Fixing the "The Exception Breakpoint Has Been Reached" Error on Windows
This error is often related to your system's inability to utilize the memory resources available due to system file corruption or issues with your hard disk. Use the built-in Windows image repair and System File Checker too to resolve system issues. Also, install pending updates for the app or reinstall the problematic app to fix the problem.