Signatures give your emails a professional look, while also mentioning your personal details in the email. You'd want to add a different signature for each account if you have multiple email accounts for different jobs or businesses.
eM Client lets you set different signatures for every email account you have configured in the client, so let’s check out how you can make use of it.
How to Add Different Signatures for Each Email Account in eM Client
In order to add signatures to your email accounts, you can follow these three steps.
1. Locate the Signatures Menu
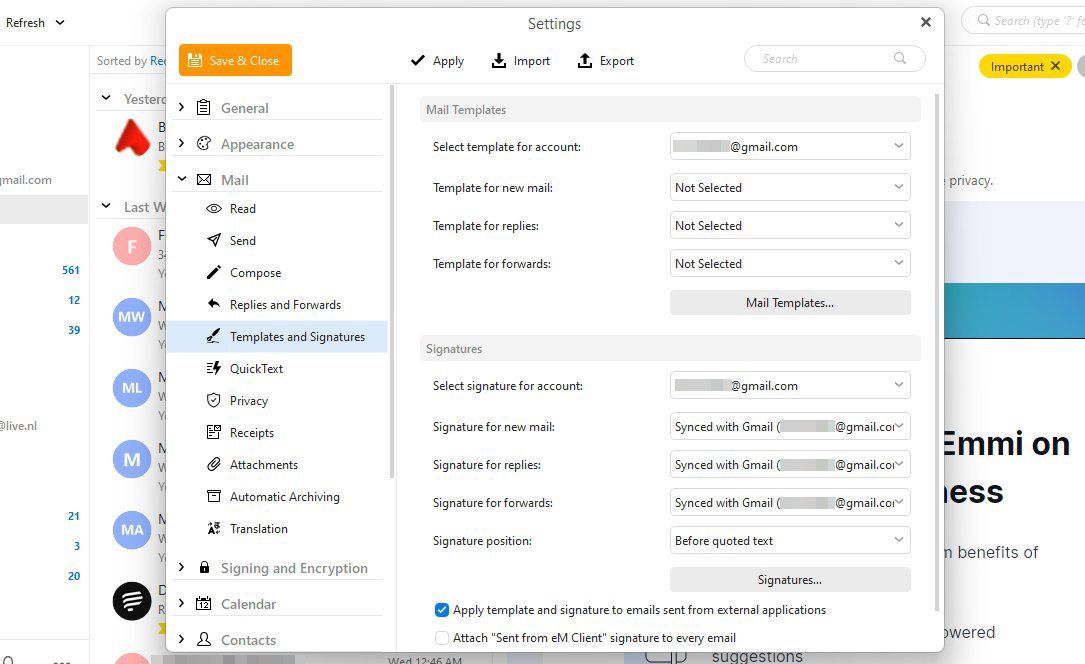
First of all, open eM Client and, to access the signatures option, go to Menu (in the top-left corner) > Settings > Mail > Templates and Signatures. Here you’ll find the Mail Templates menu at the top and the Signatures menu at the bottom.
2. Create New Signatures
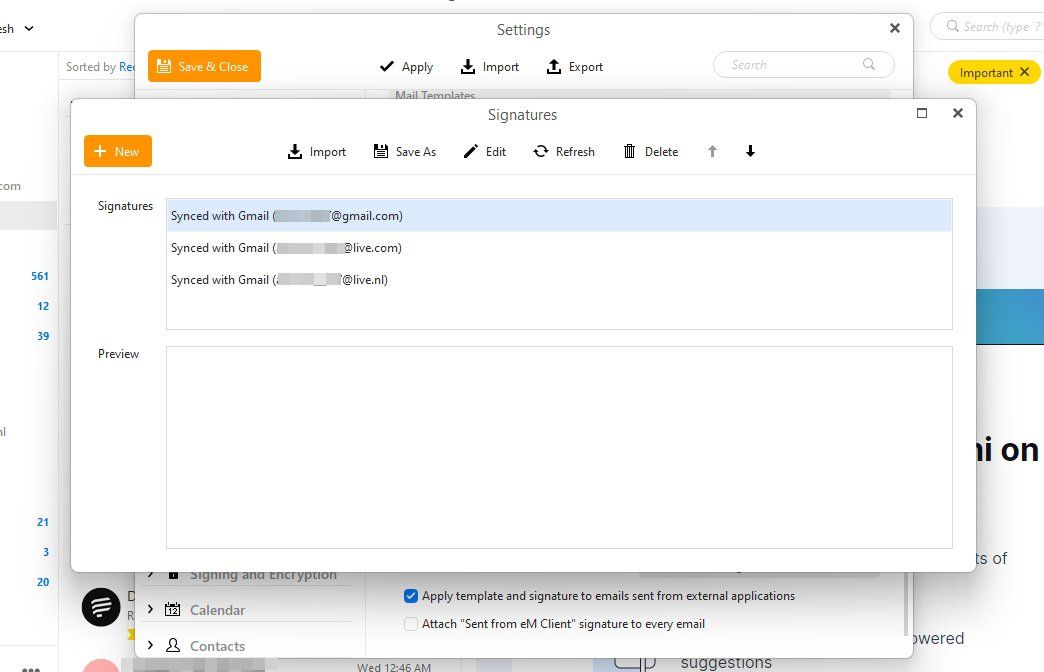
Just below the Signatures menu, you’ll see a Signatures button. Click on it, and a new pop-up window will appear.
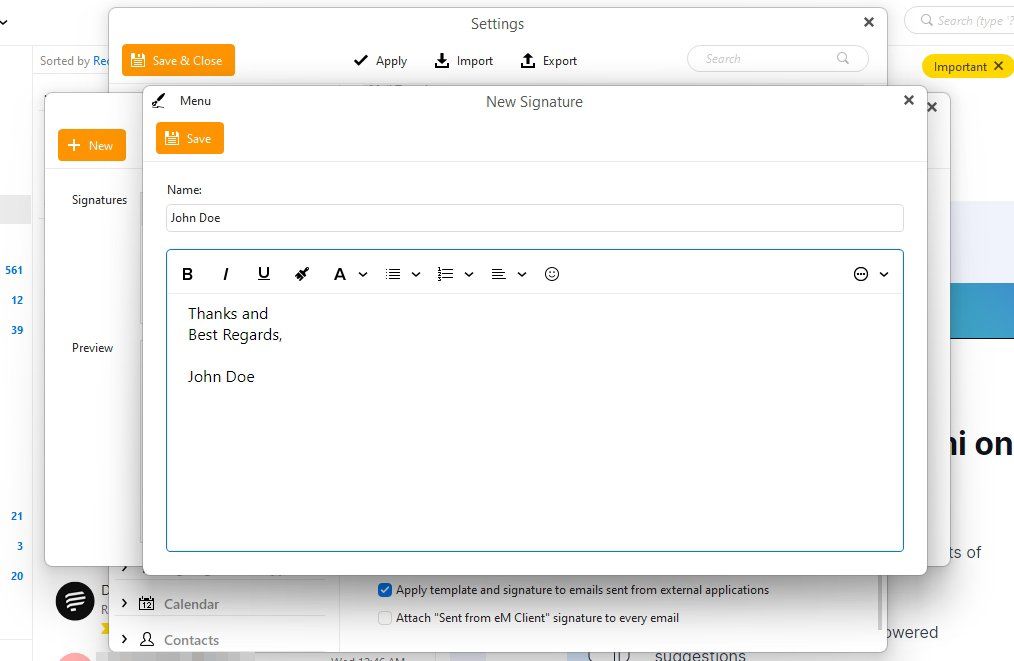
In this window, click on New to create a signature and fill out its name and content in the name and body sections. You can format the text the way you want and add links, images, or symbols if required.
If you're not sure how to design one, you can create a signature using Rocketseed. Alternatively, you can also use Canva for designing your email signature. Create as many signatures as you want using this method. Once done, move on to the next step.
3. Assign Signatures to Email Accounts
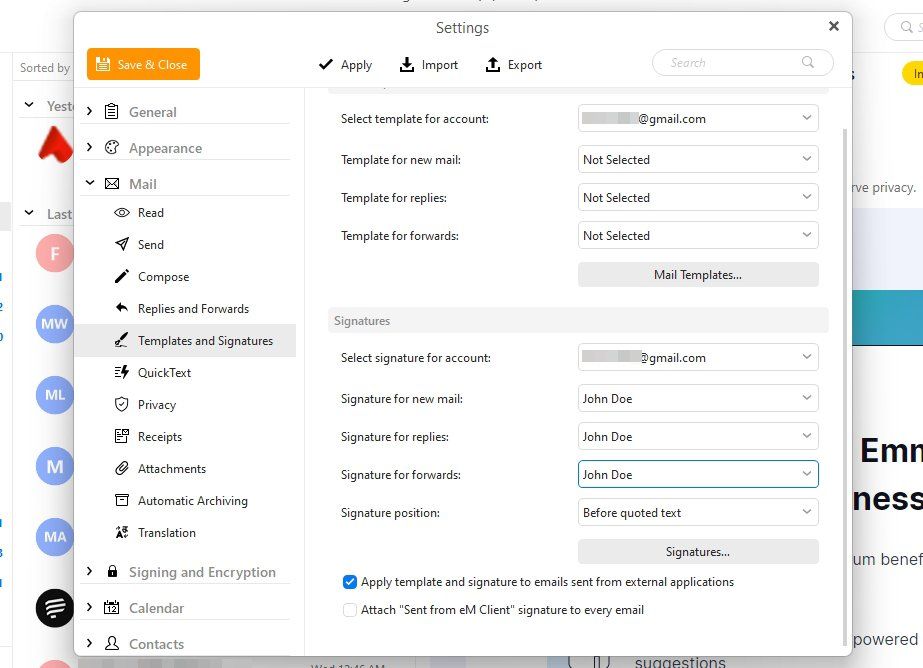
You can now close the window where you were creating new signatures and return to the Templates and Signatures menu. Here, you’ll have to assign those newly created signatures to each of your email accounts.
Next to Select Signature for Account, select the email account from the dropdown menu to which you want to add a signature. Now, the next three options are for selecting the signature for new emails, replies, and forwards.
For each of these, select the suitable signature from the drop-down menus. In the end, you can also select the position where the signature will be placed in your emails.
Repeat this process for each of your email accounts. And that’s pretty much it. Do press the Apply button at the top to save all the changes.
Customize Your Signatures Easily With eM Client
eM Client lets you customize your email communication by setting different signatures for each of your email accounts.
As you’ve seen, the process is pretty straightforward, which is another reason why it’s one of the most popular email clients in the world. But there are other clients you can try as well.


