Photographing sunsets can be tricky for even more experienced photographers. The sheer amount of light available and how our cameras process it makes it difficult.
The truth is, even if you expose the highlights when photographing a sunset (another discussion entirely), a good portion of your image will likely be too dark. Additionally, sunset images can become oversaturated at the point of capture.
In this tutorial, we will show you several different ways to edit a sunset in Photoshop, covering three very common scenarios.
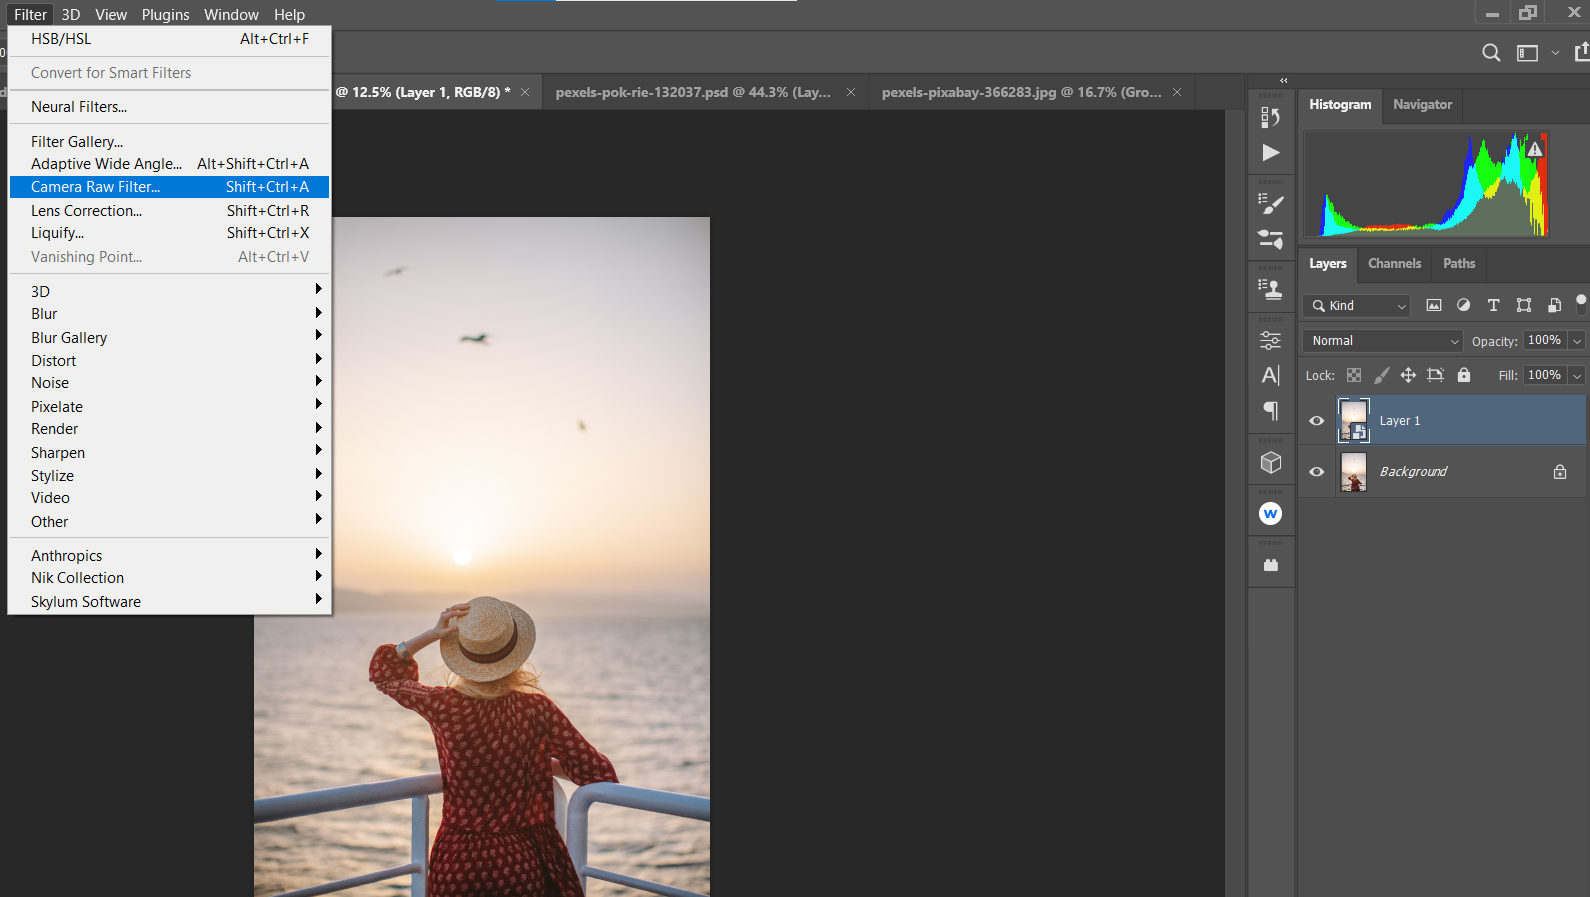
How to Edit a Whitewashed Sunset in Camera Raw
When we let our smartphone camera's automatic adjustments make the decisions for us, our sunset images run the risk of turning out way too bright or "whitewashed." It’s also easy to make this mistake in the editing process.
In the following example, we make use of the Radial Filters available in Adobe Camera Raw to darken the image selectively. This will help make your sunset photo more interesting, and not so flat in appearance.
You can download the same image from Pexels and follow along.
Let’s get started!
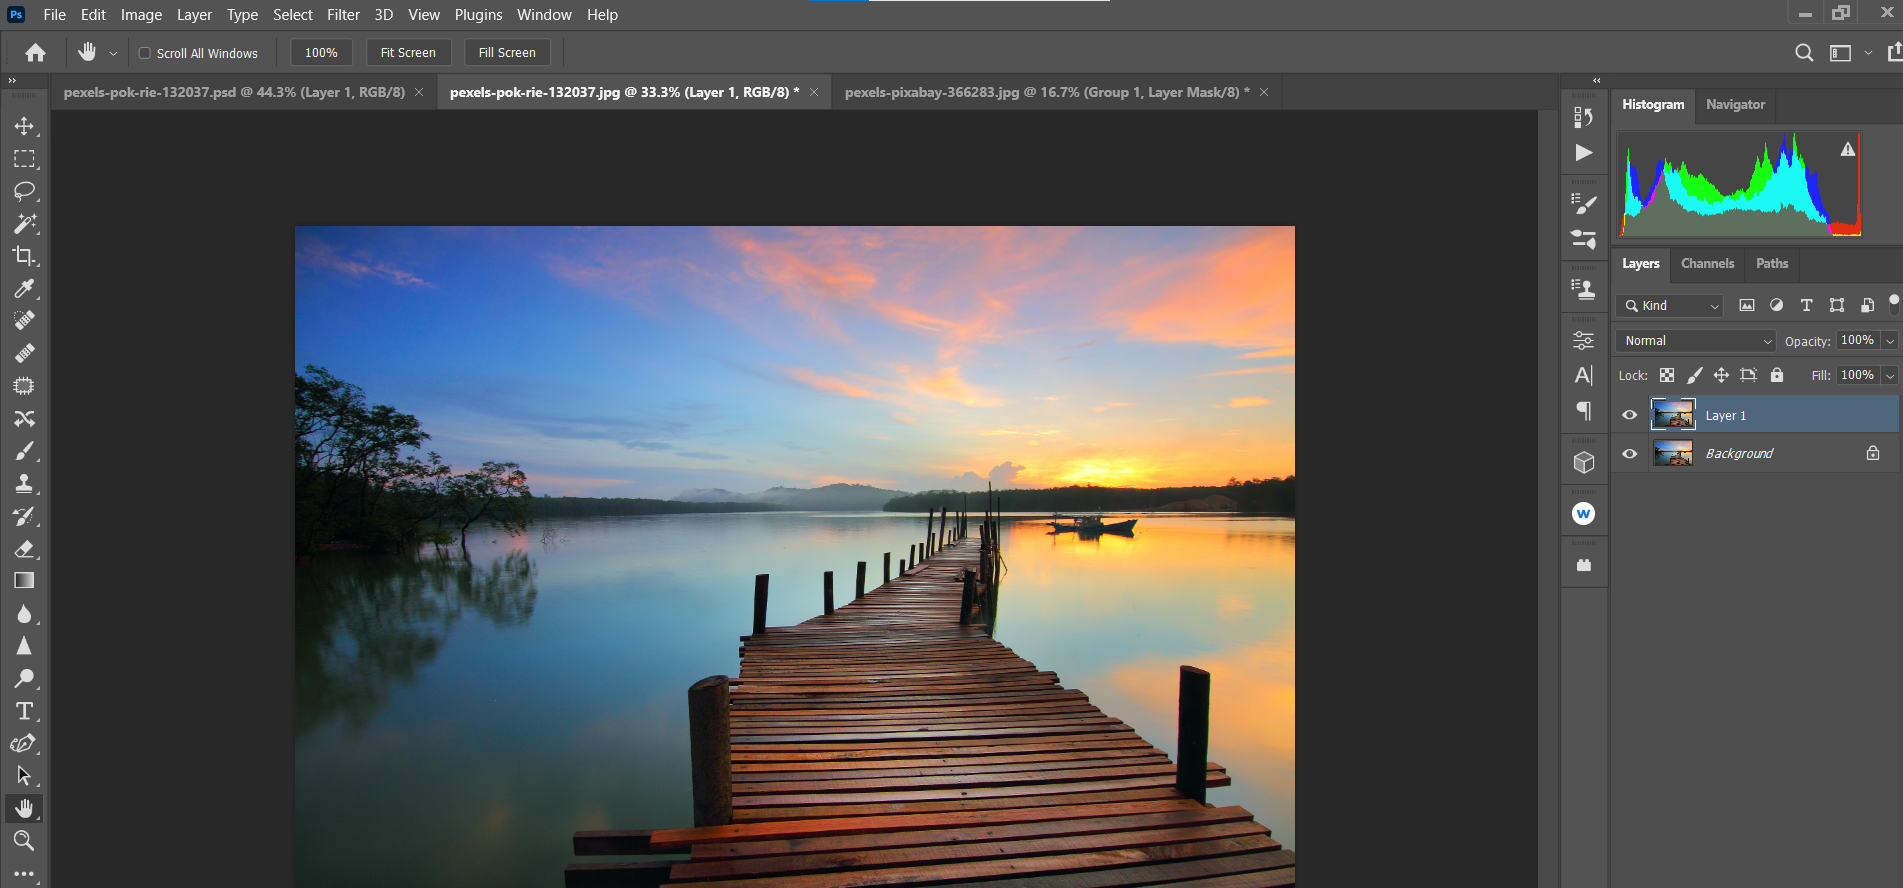
-
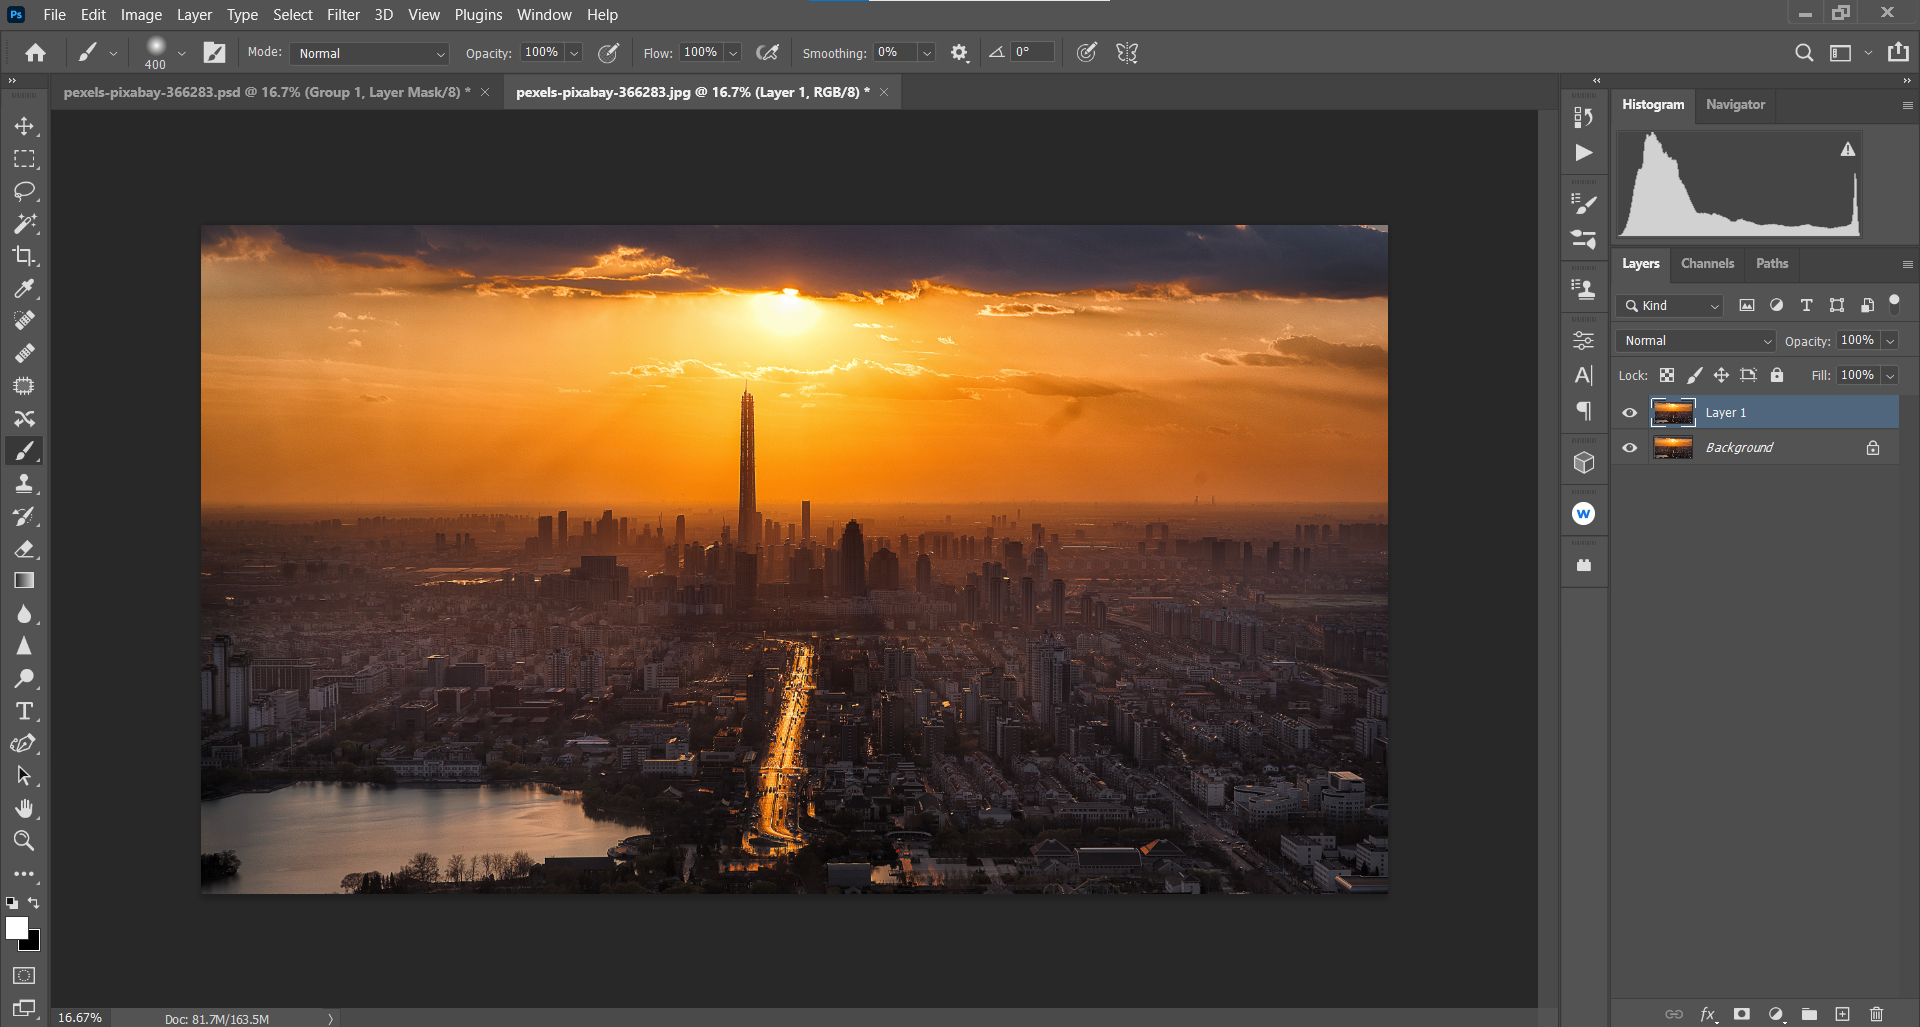
Press Ctrl + J to create a duplicate layer.
-
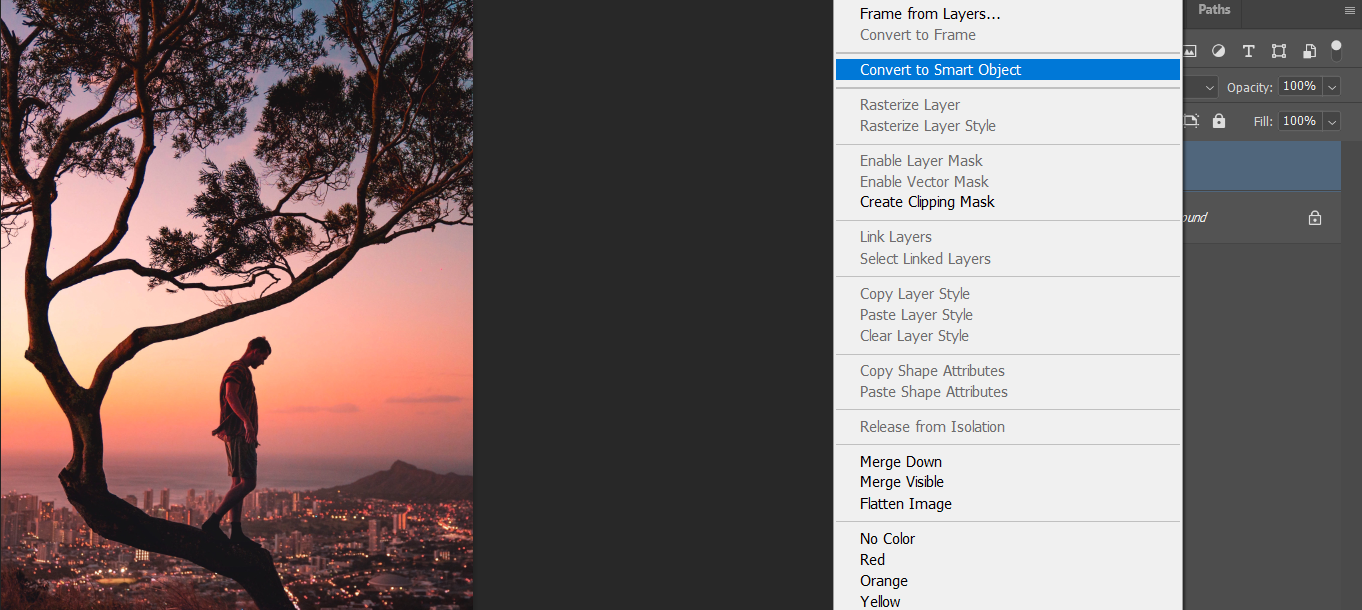
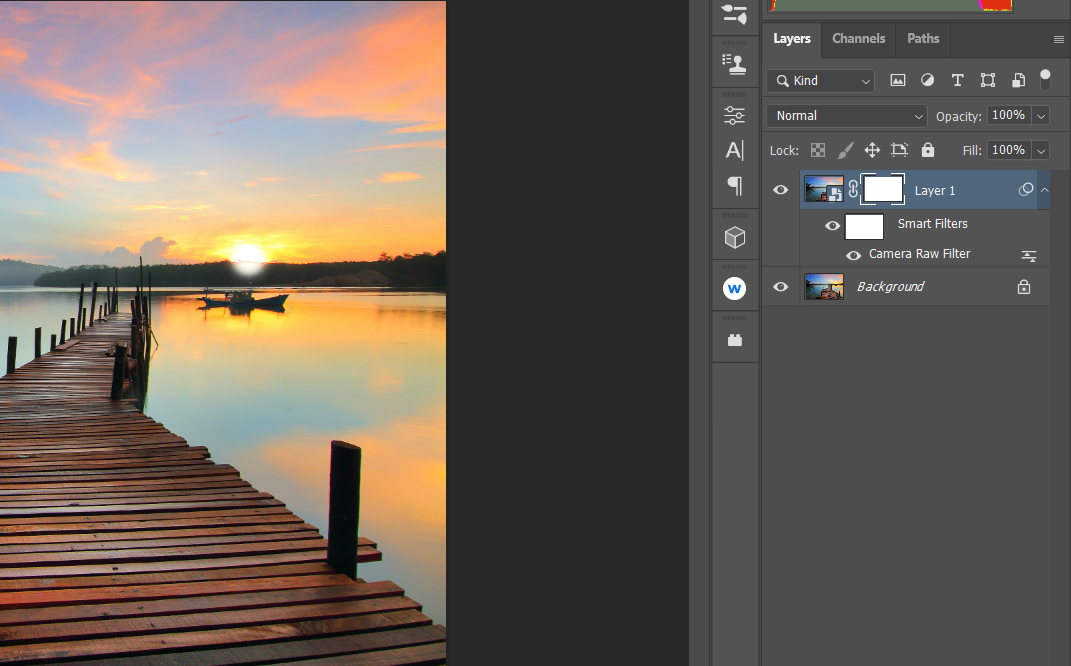
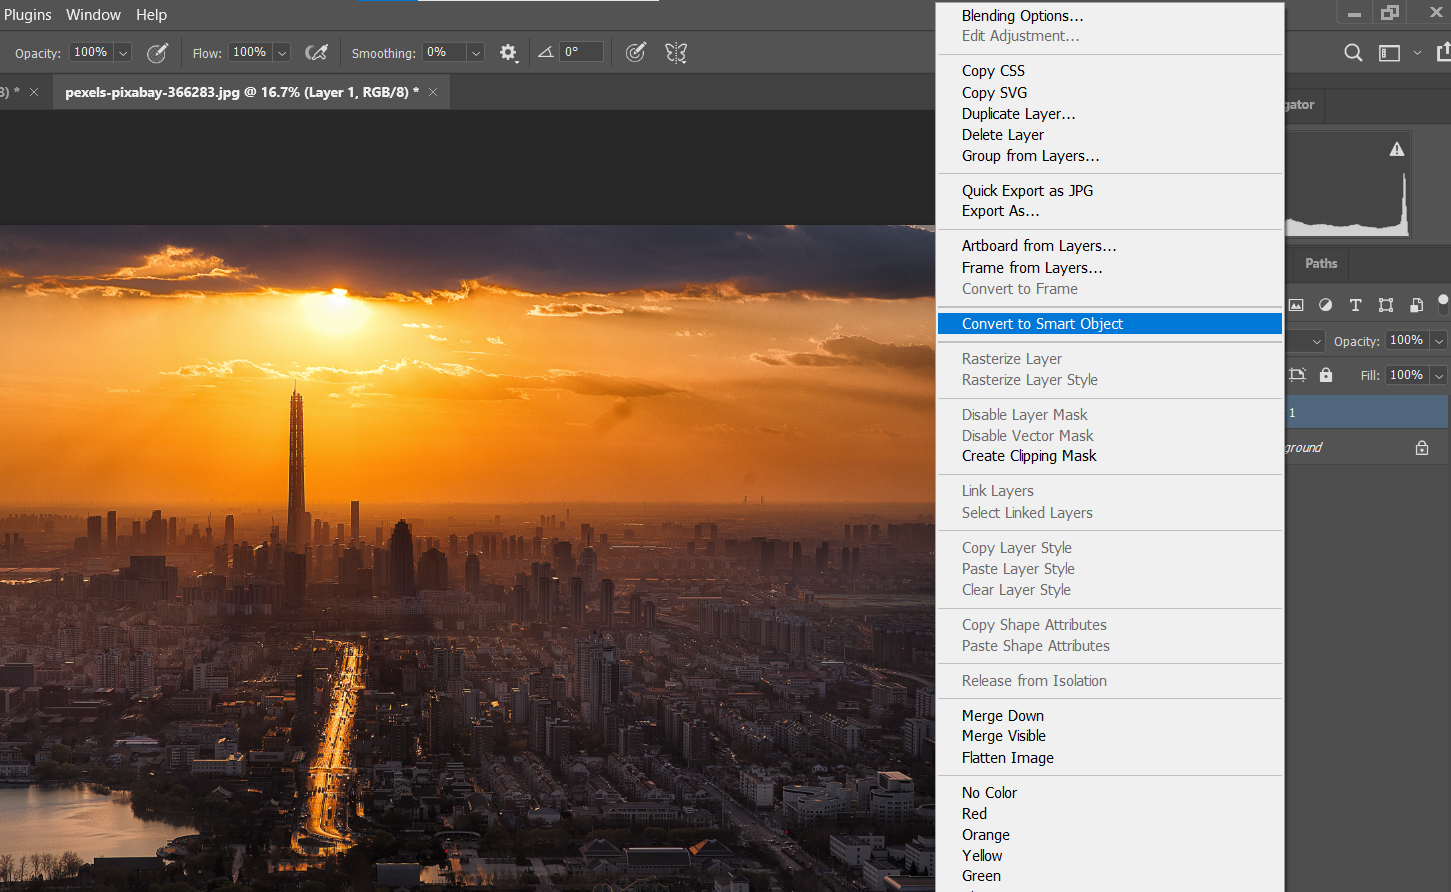
Right-click on the duplicate layer, and select Convert to Smart Object.
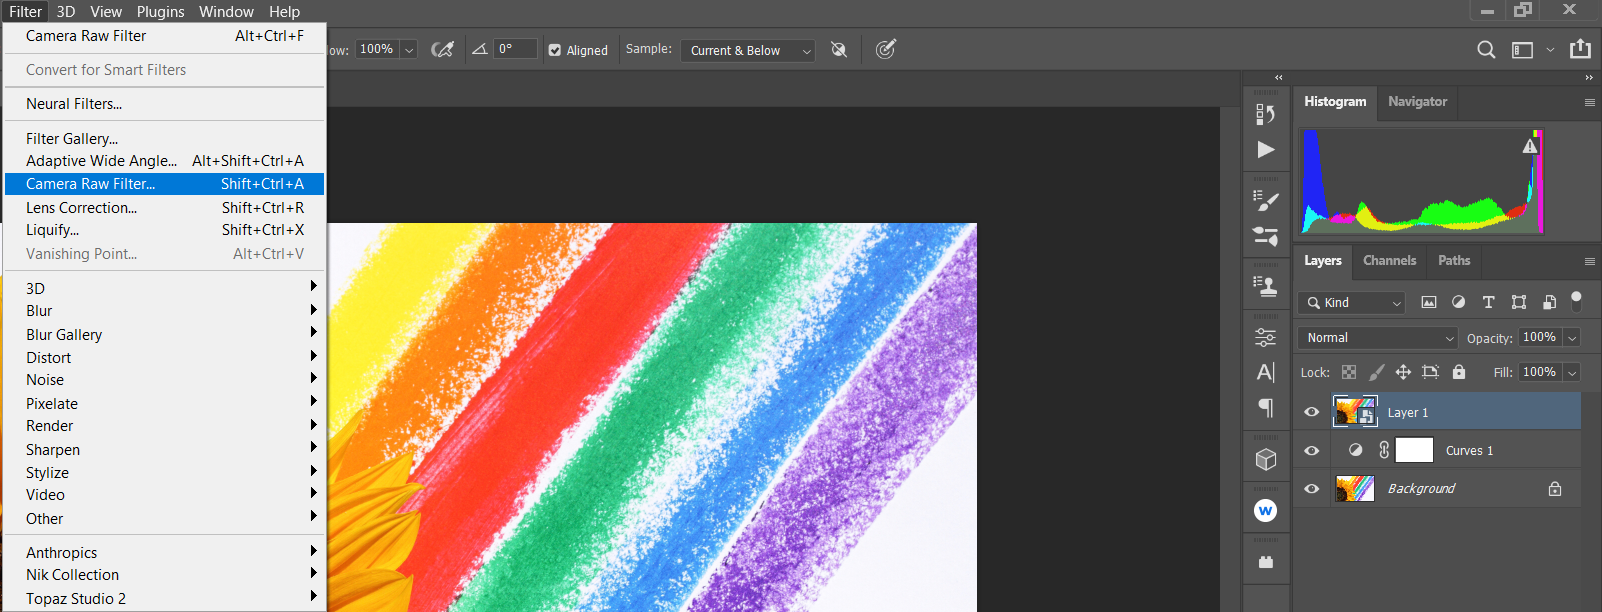
-
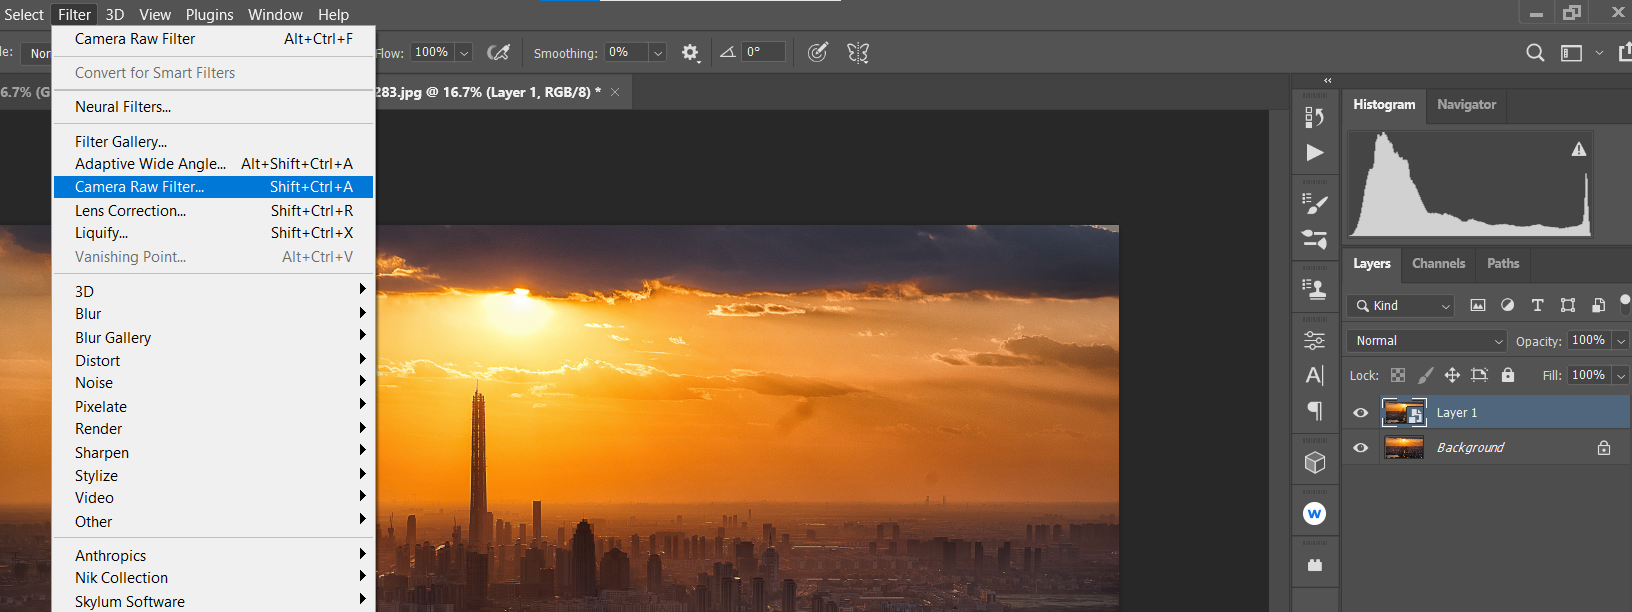
Go to Filter > Camera Raw Filter.
-
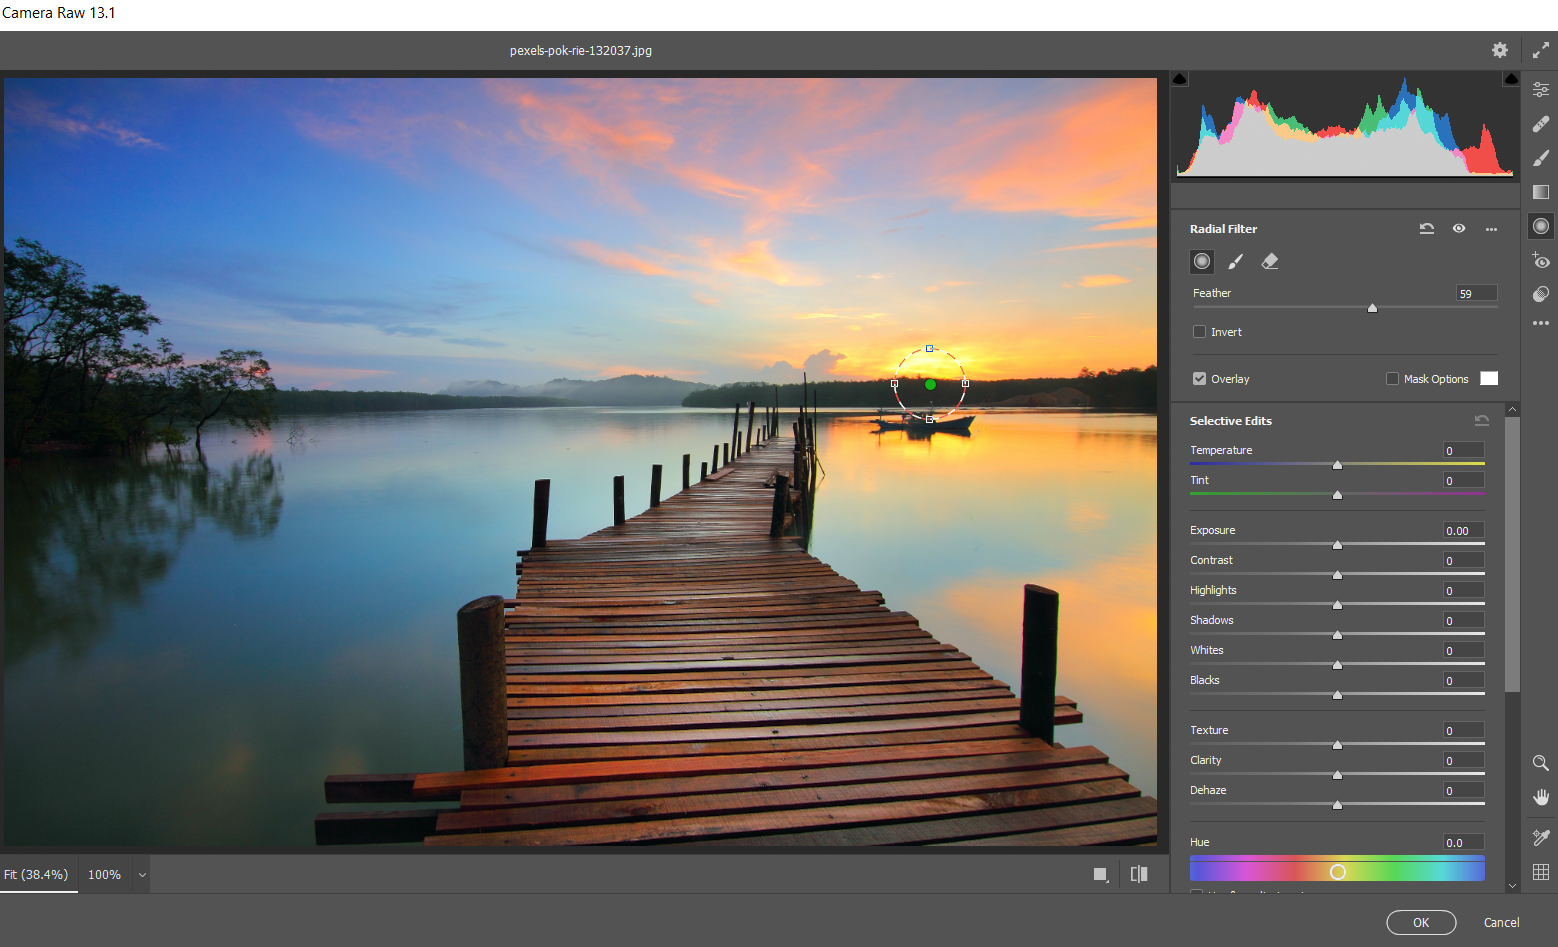
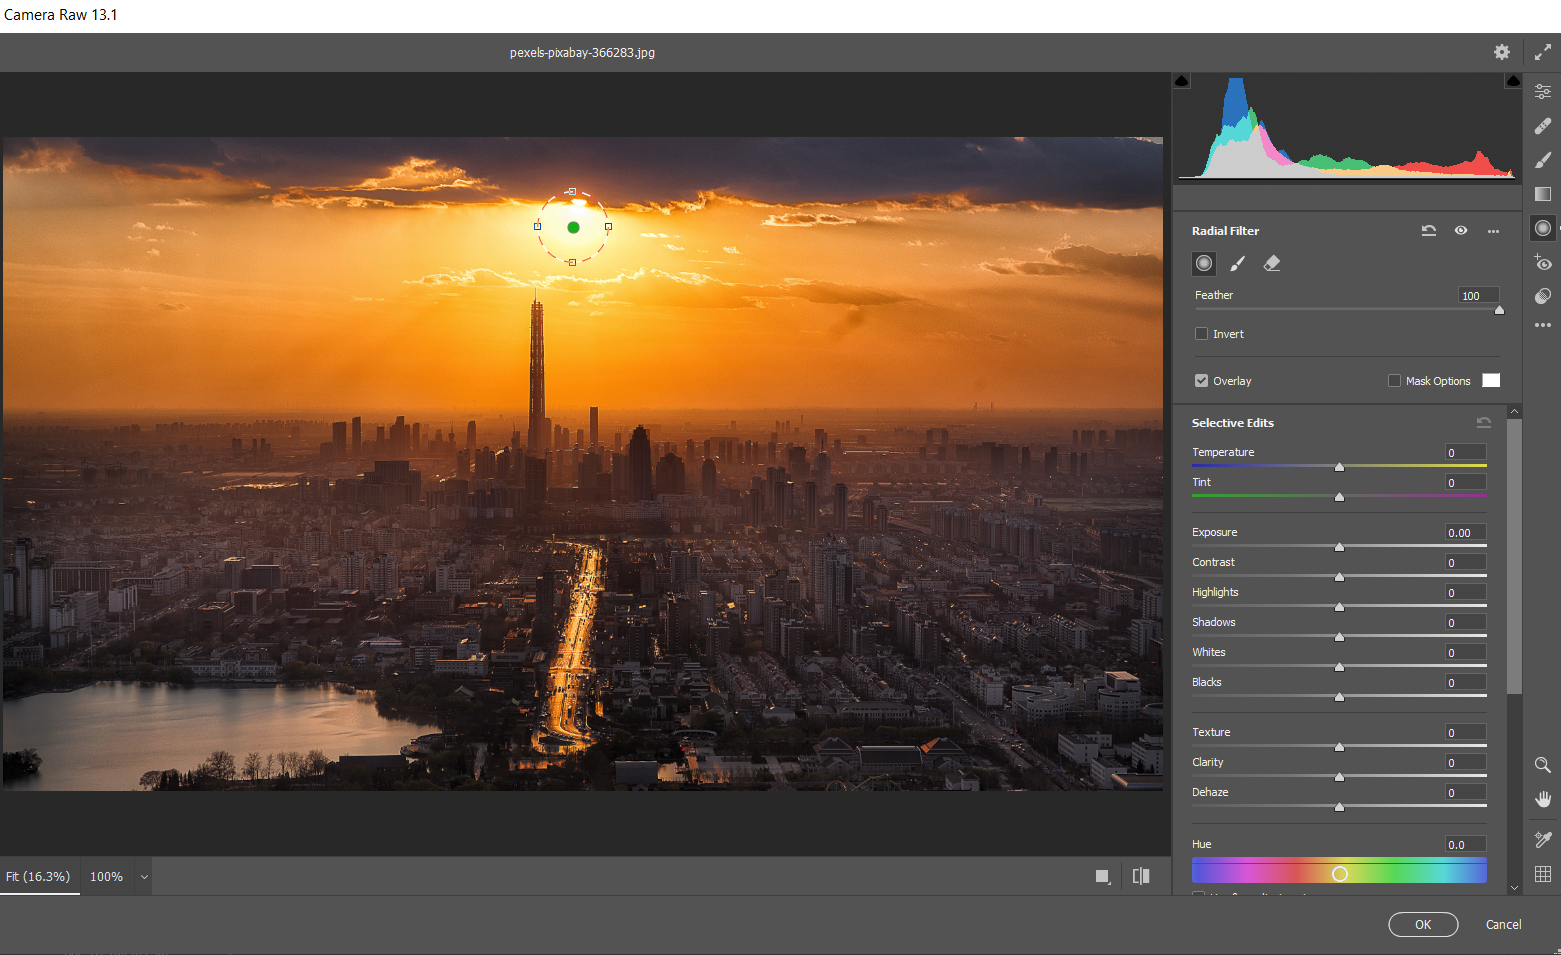
Select Radial Filter in the far-right vertical menu. Left-click on the middle of the sun.
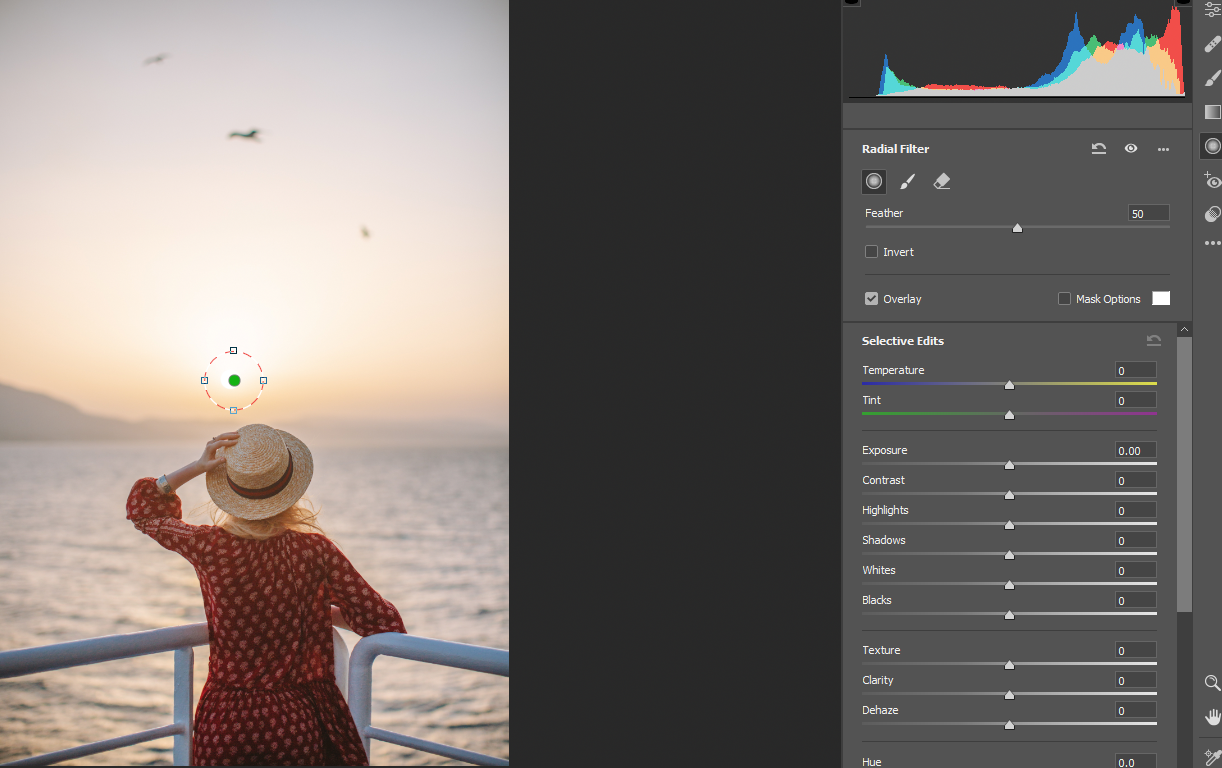
-
Using the four Box Handles, expand the Radial Filter until the circle fills the screen, and the top and bottom portions vanish outside the frame.
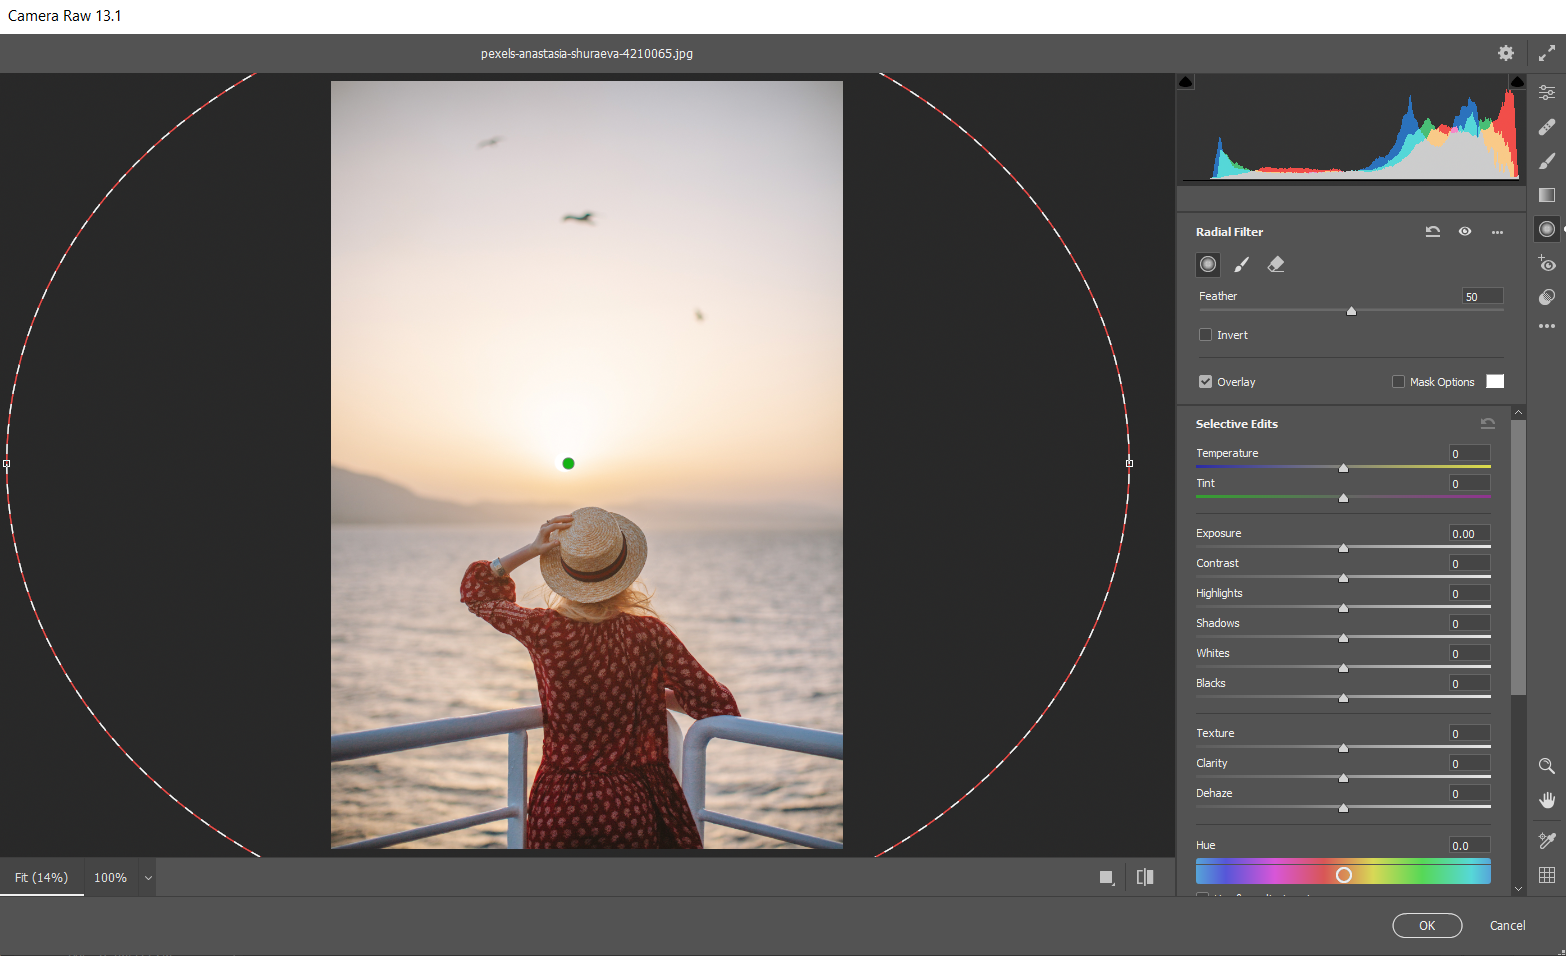
-
Enter these values for each of the following sliders: Temperature +59; Exposure -.45; Contrast +69; Highlights -60; Shadows -20; Whites +18; Blacks -46; Saturation +16.

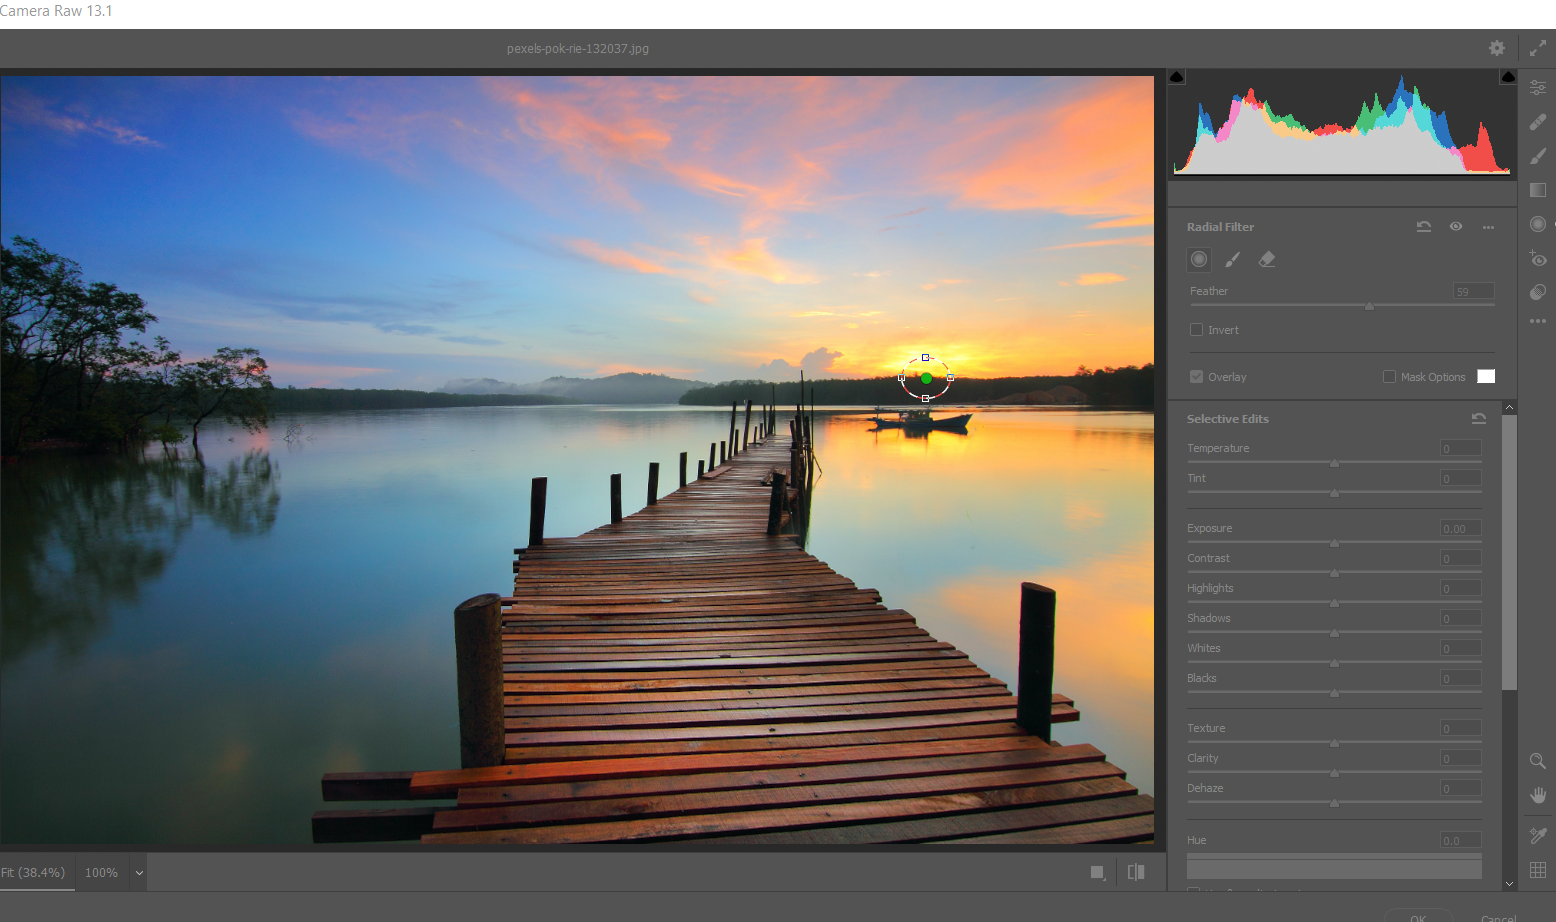
-
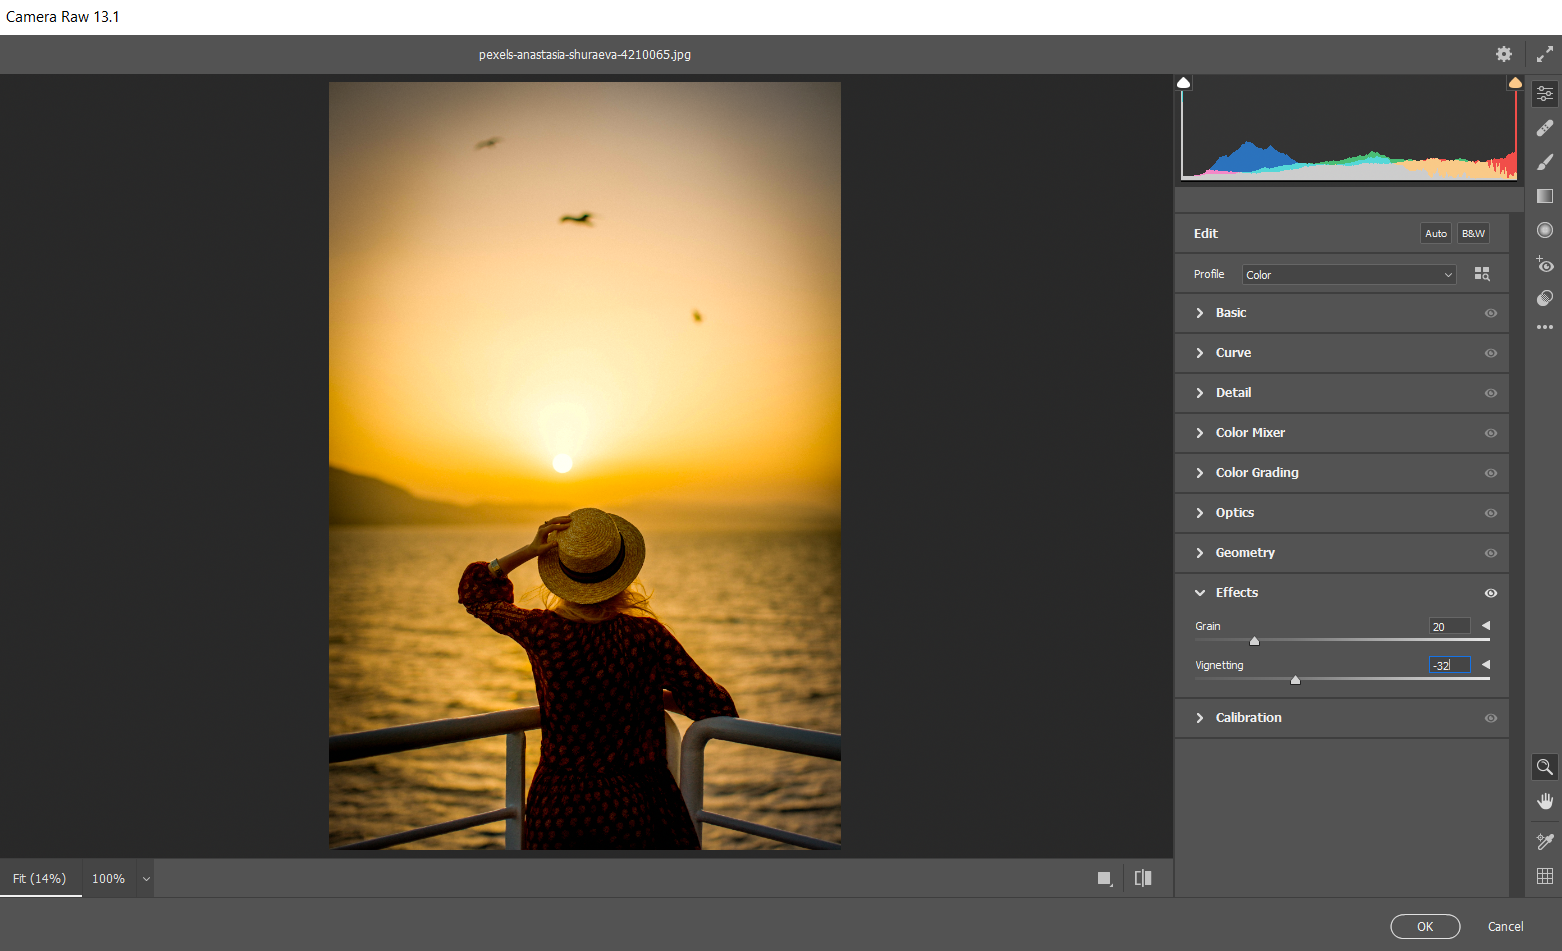
Click on Edit. Next, scroll down to Effects and enter these values: Grain 20; Vignetting -32. Then, click Ok to return to Photoshop.
-
With the duplicate layer highlighted, reduce the Opacity to 82 percent.
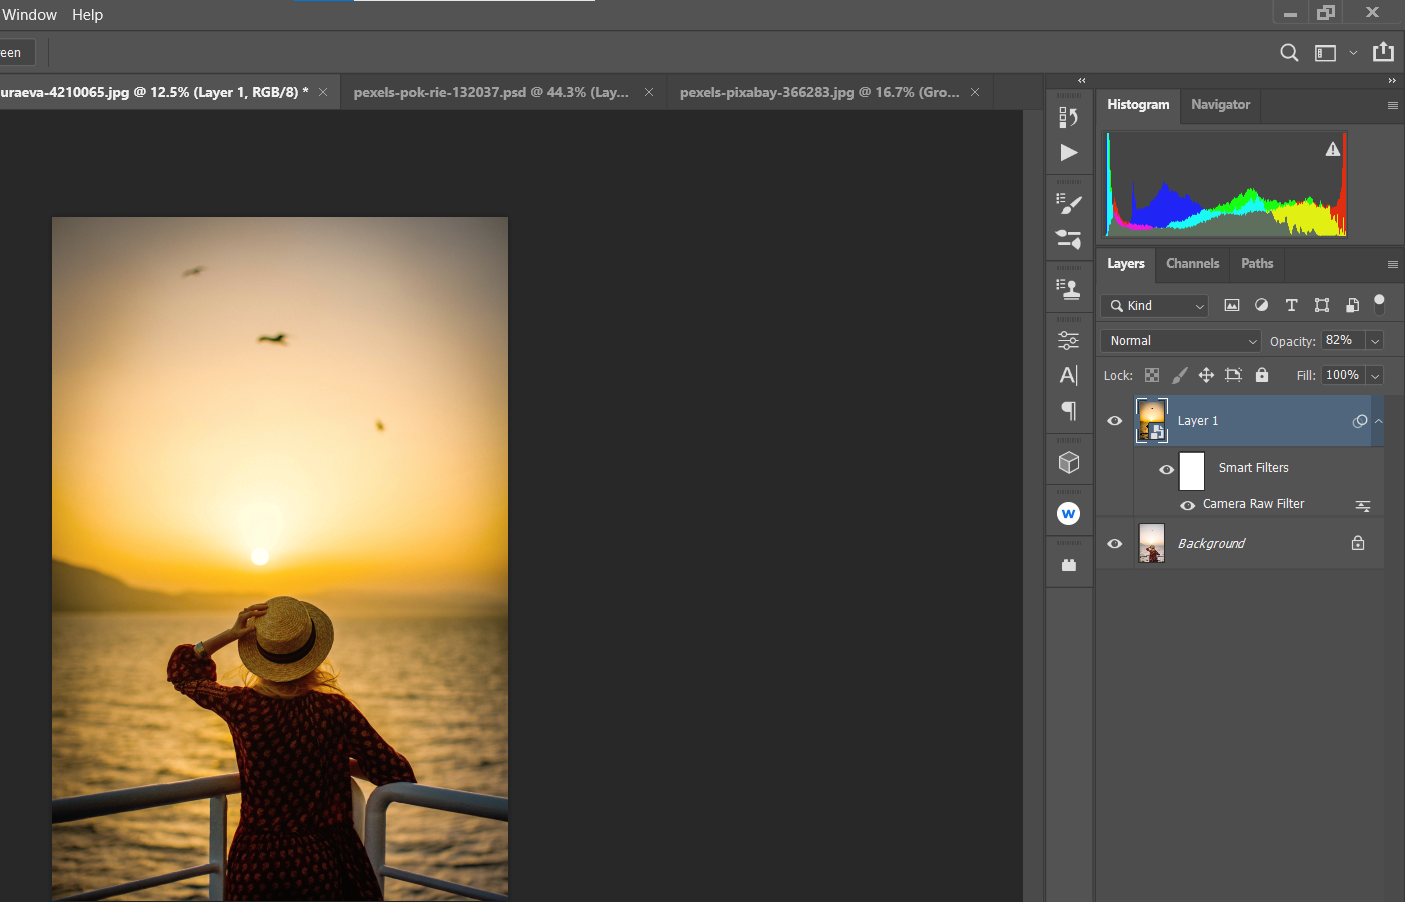


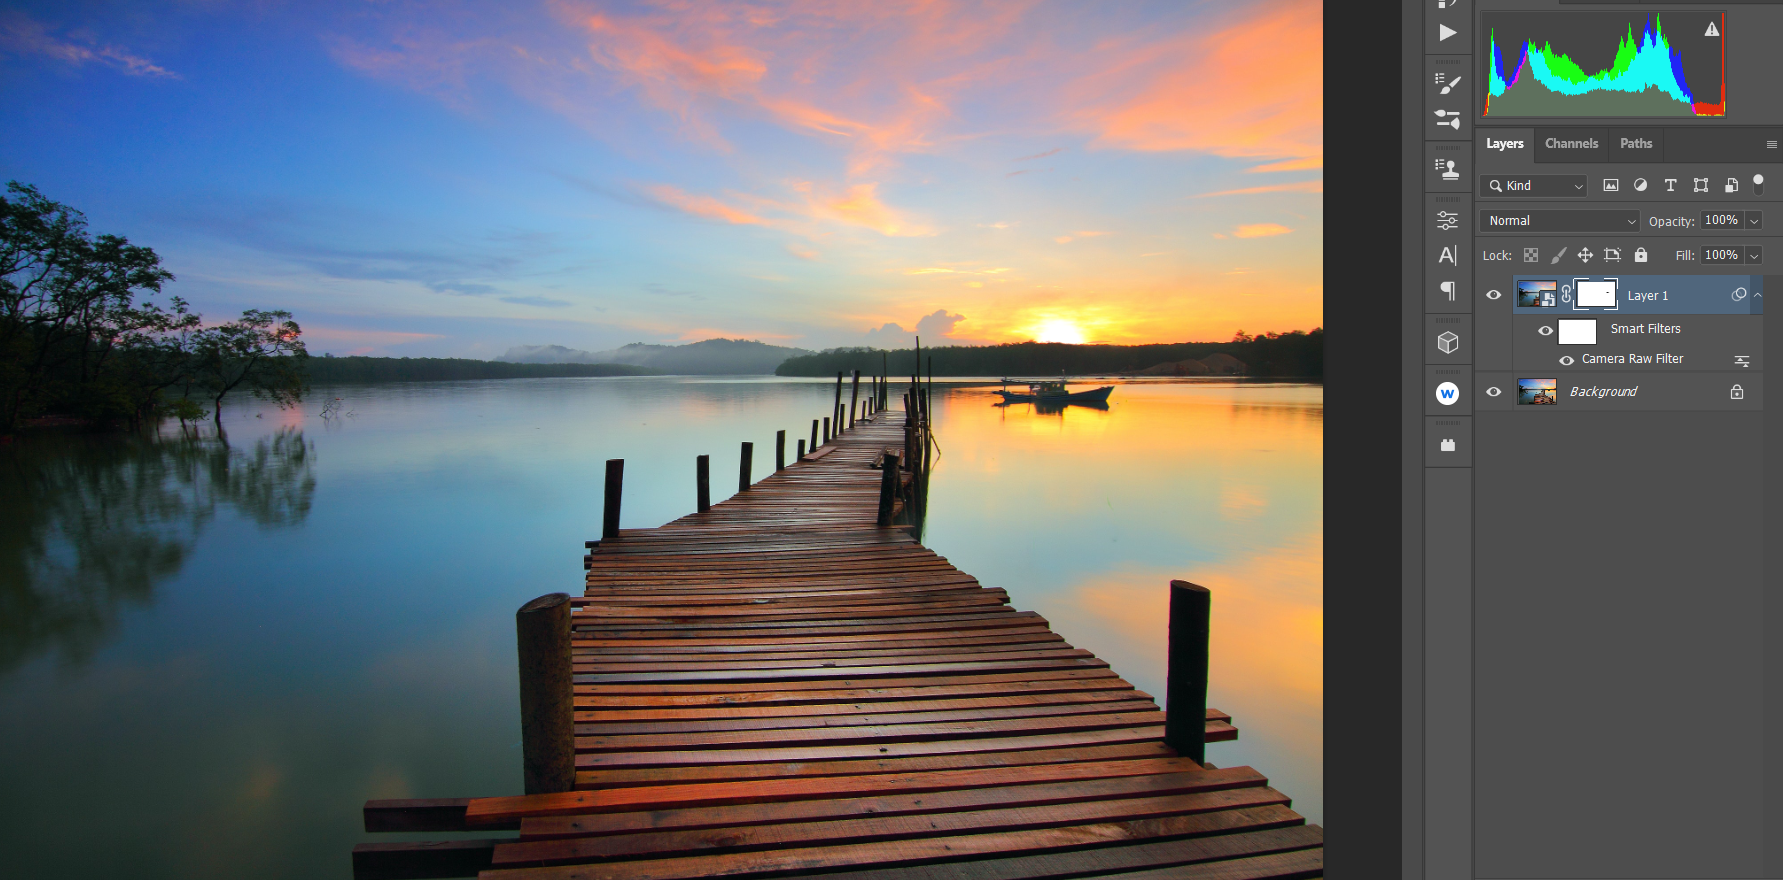
Since we have created a Smart Object, it’s possible to return to Camera Raw and make further adjustments. All you have to do is double-click on the Camera Raw Filter in the layer.
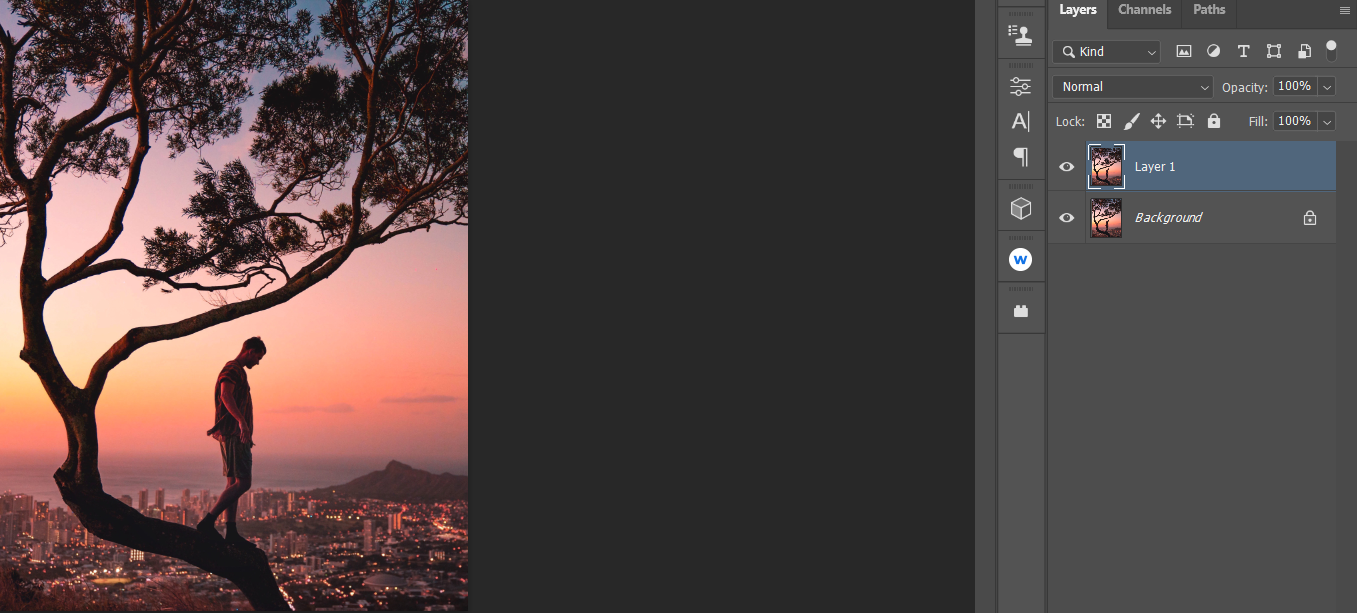
How to Add the Sun Using Camera Raw
There will be times when you'll want to create the sun from scratch if it’s completely missing or obscured by elements in the background.
Once again, we will make use of Radial Filters to get the job done. We will also use the Brush tool to shape the sun realistically.
You can download the same image from Pexels and follow along.
-
Press Ctrl + J to create a duplicate layer.
-
Right-click on the duplicate layer, and select Convert to Smart Object.

-
Go to Filter > Camera Raw Filter.
-
Select Radial Filter in the far-right vertical menu. Left-click where you estimate the middle of the sun would be just below the horizon.
-
Using the four Box Handles, reduce the Radial Filter until the circle is accurate enough to portray the actual size of the sun.
-
Enter these values for each of the following sliders: Feather 59; Exposure +4.00; Contrast +65; Highlights +34; Whites +36; Saturation +21. Then, click Ok to return to Photoshop.

-
With the duplicate layer highlighted, create a Layer Mask by clicking on the Add a Layer Mask icon at the bottom of the screen.
-
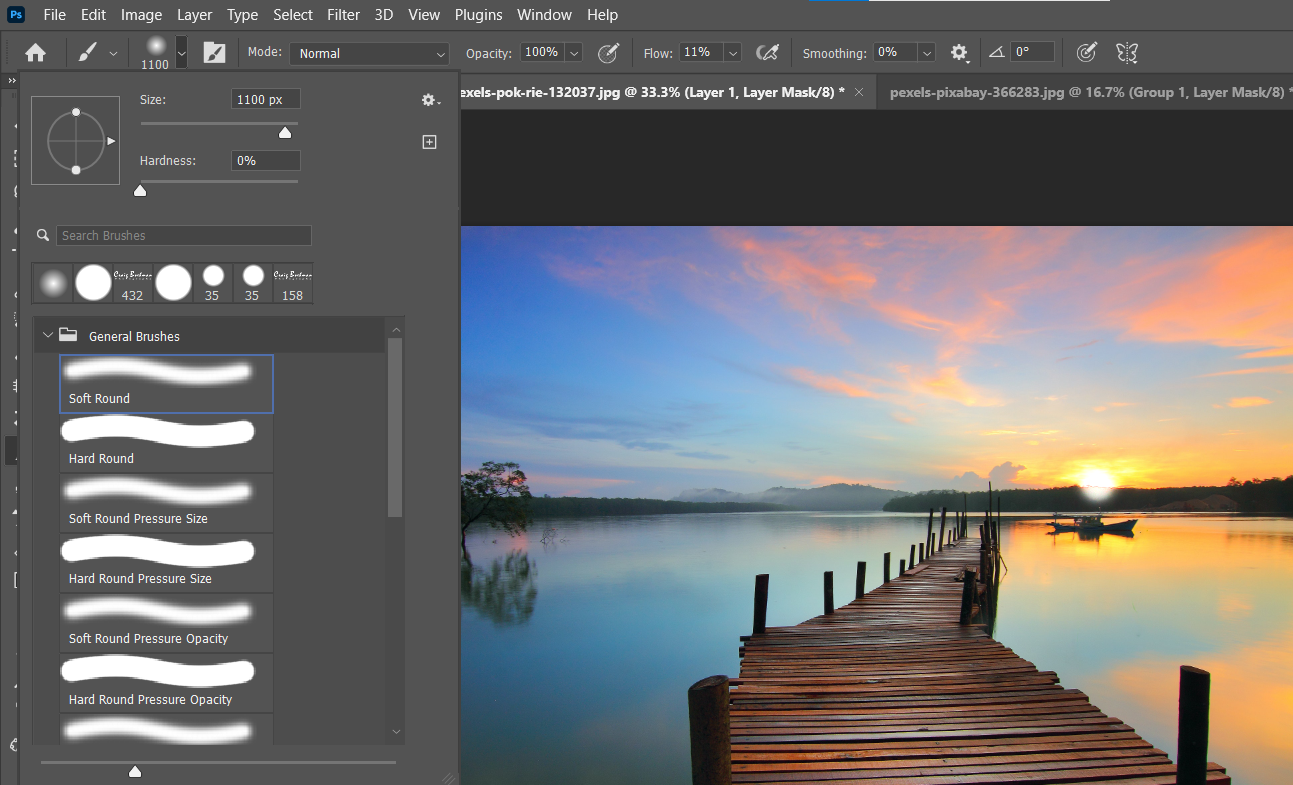
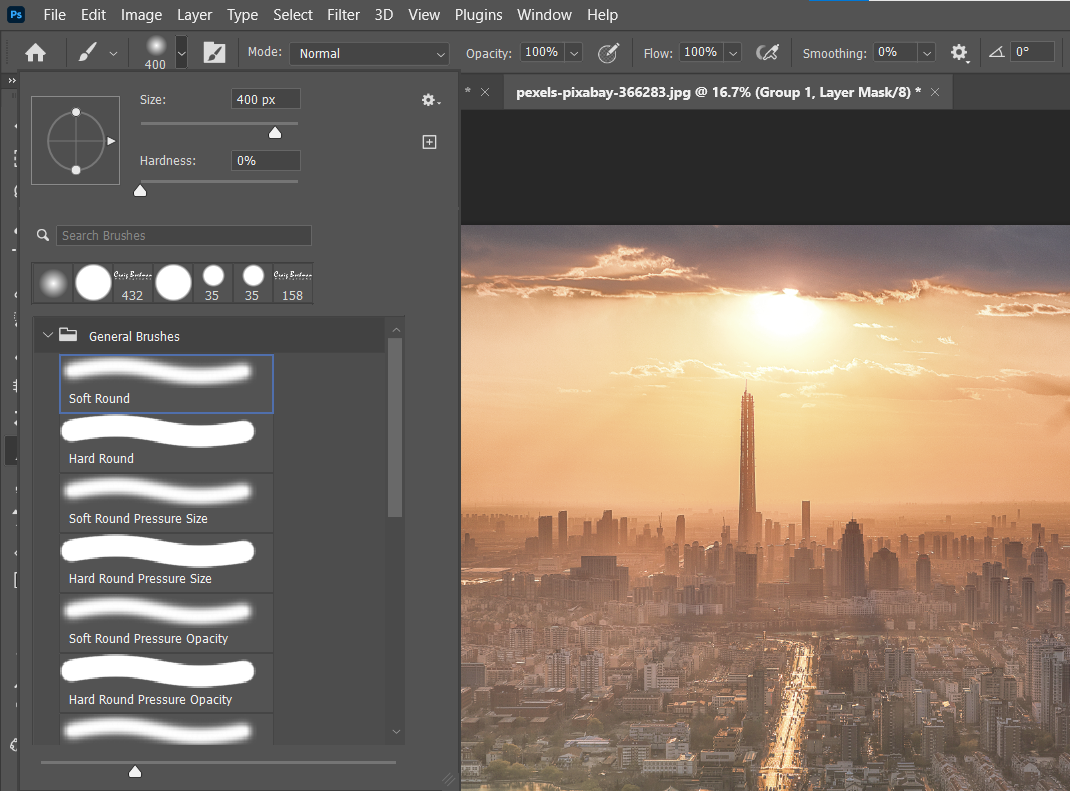
Press B for the Brush tool. Then, select Soft Round Brush in the brush settings.
-
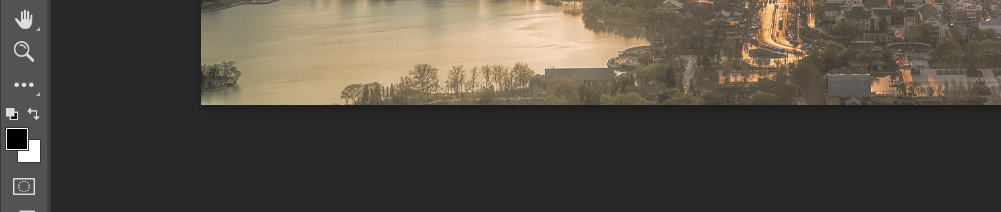
Toggle the X key to make the Foreground Color Black.
-
Using your mouse, paint out the sun from the mountains to give the appearance of a setting sun.


As you do this, here are some tips to keep in mind:
- You can zoom in on the image to make painting easier by clicking Ctrl and the + key. To decrease zoom, click Ctrl and the - key. To return to full screen, click Ctrl + 0.
- To navigate around the screen using the Hand tool, keep the spacebar pressed and move your mouse.
- Use the bracket keys [] to increase or decrease the size of your Brush.
- You can press Ctrl + Z to easily undo any mistakes.
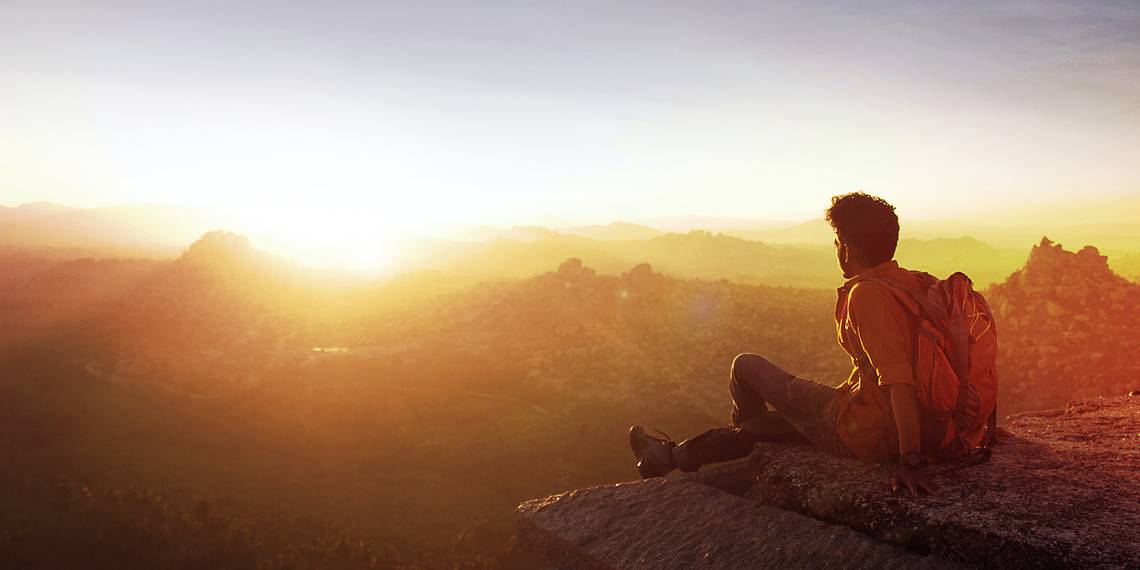
How to Edit an Underexposed and Oversaturated Sunset
One of the most common problems with sunset photos is a combination of underexposure and oversaturation. This is to say, there are portions of the image that are way too dark and have too much of a certain color, either in the reds, yellows, or both.
In this example, we will build upon what we’ve already learned using Radial Filters by adding a second one. Additionally, we will add Graduated Filters to finesse the fine details out of the darkened areas of the photo.
You can download the same image from Pexels and follow along.
-
Press Ctrl + J to create a duplicate layer.
-
Right-click on the duplicate layer, and select Convert to Smart Object.
-
Go to Filter > Camera Raw Filter.
-
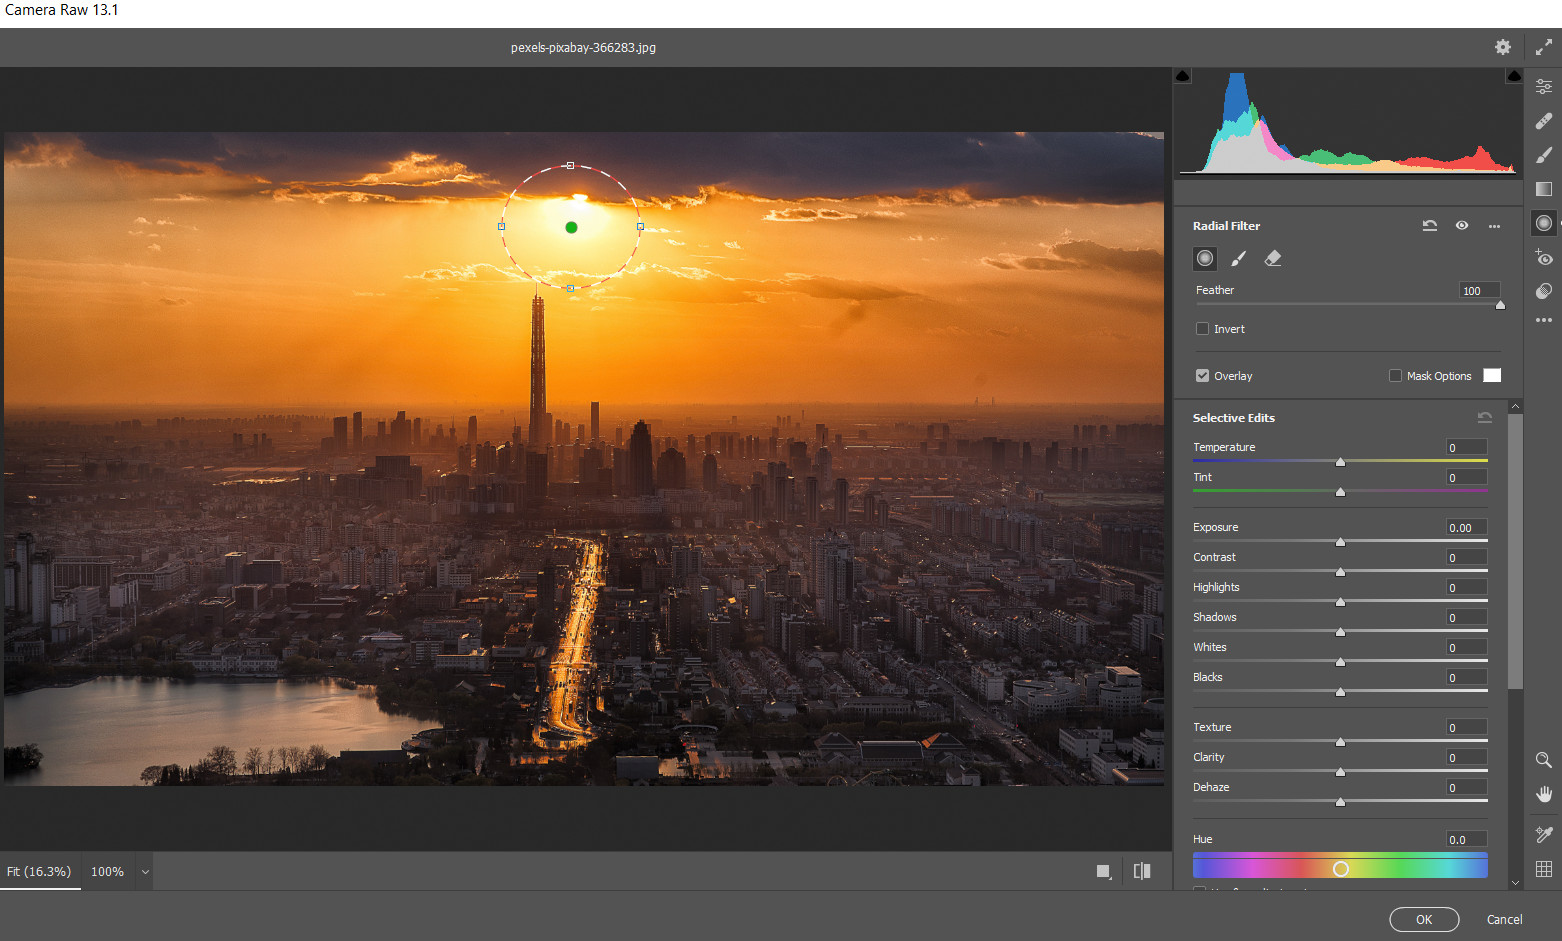
Select Radial Filter in the far-right vertical menu. Left-click to place your first Radial Filter near the middle of the sun.
-
Using the four Box Handles, increase the size of the filter so it’s slightly larger than the sun.
-
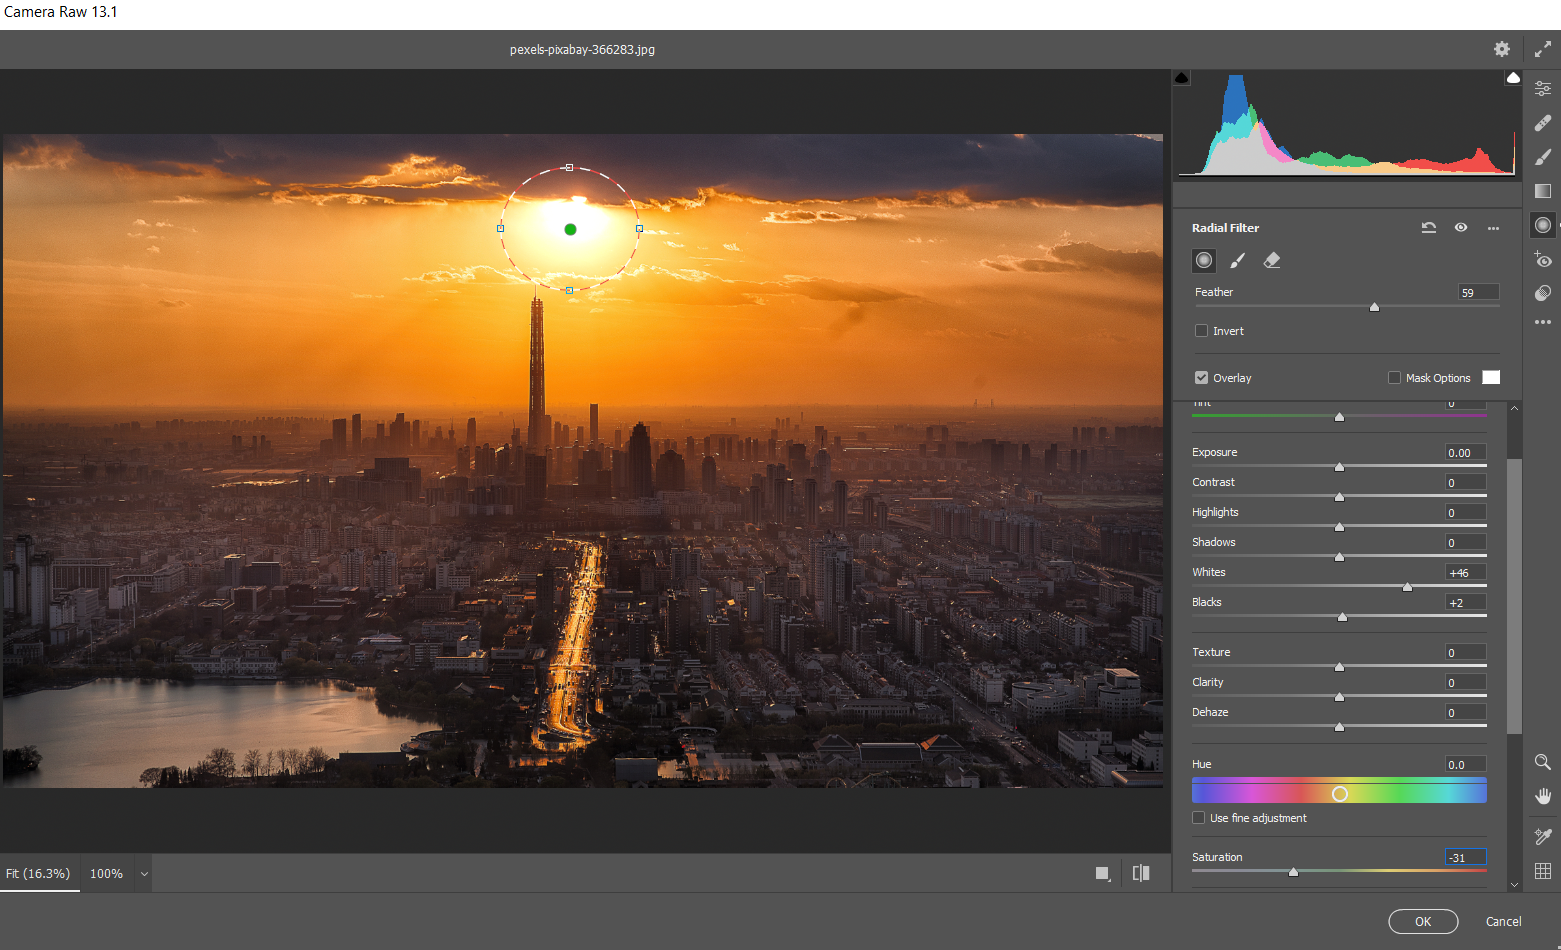
Enter these values for each of the following sliders: Feather 59; Whites 46; Blacks +2; Saturation -31.
-
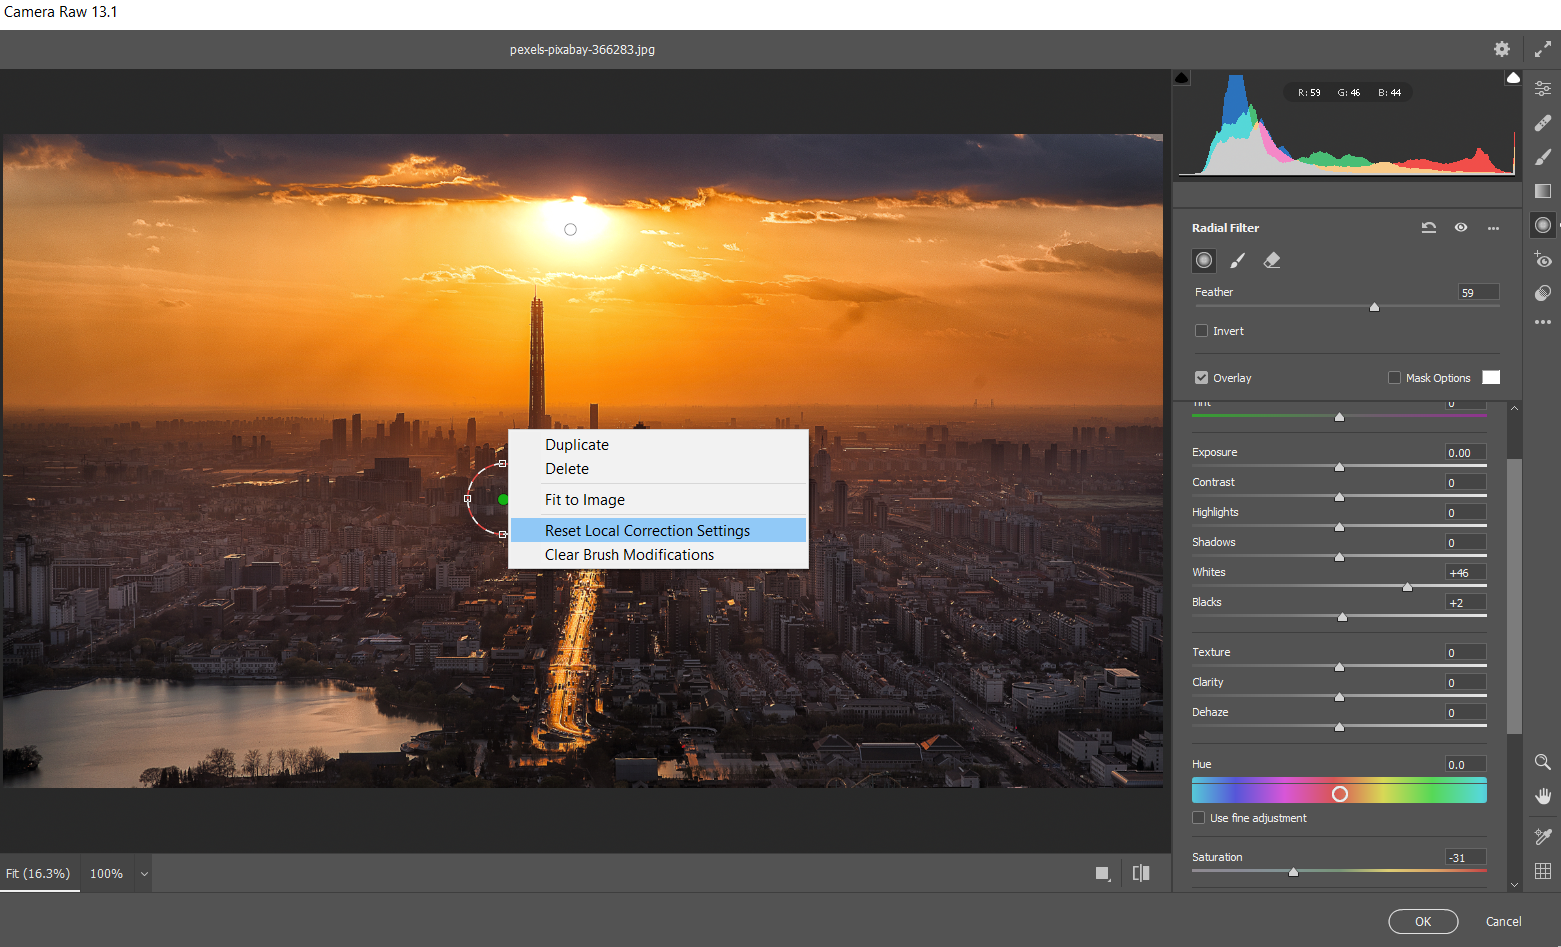
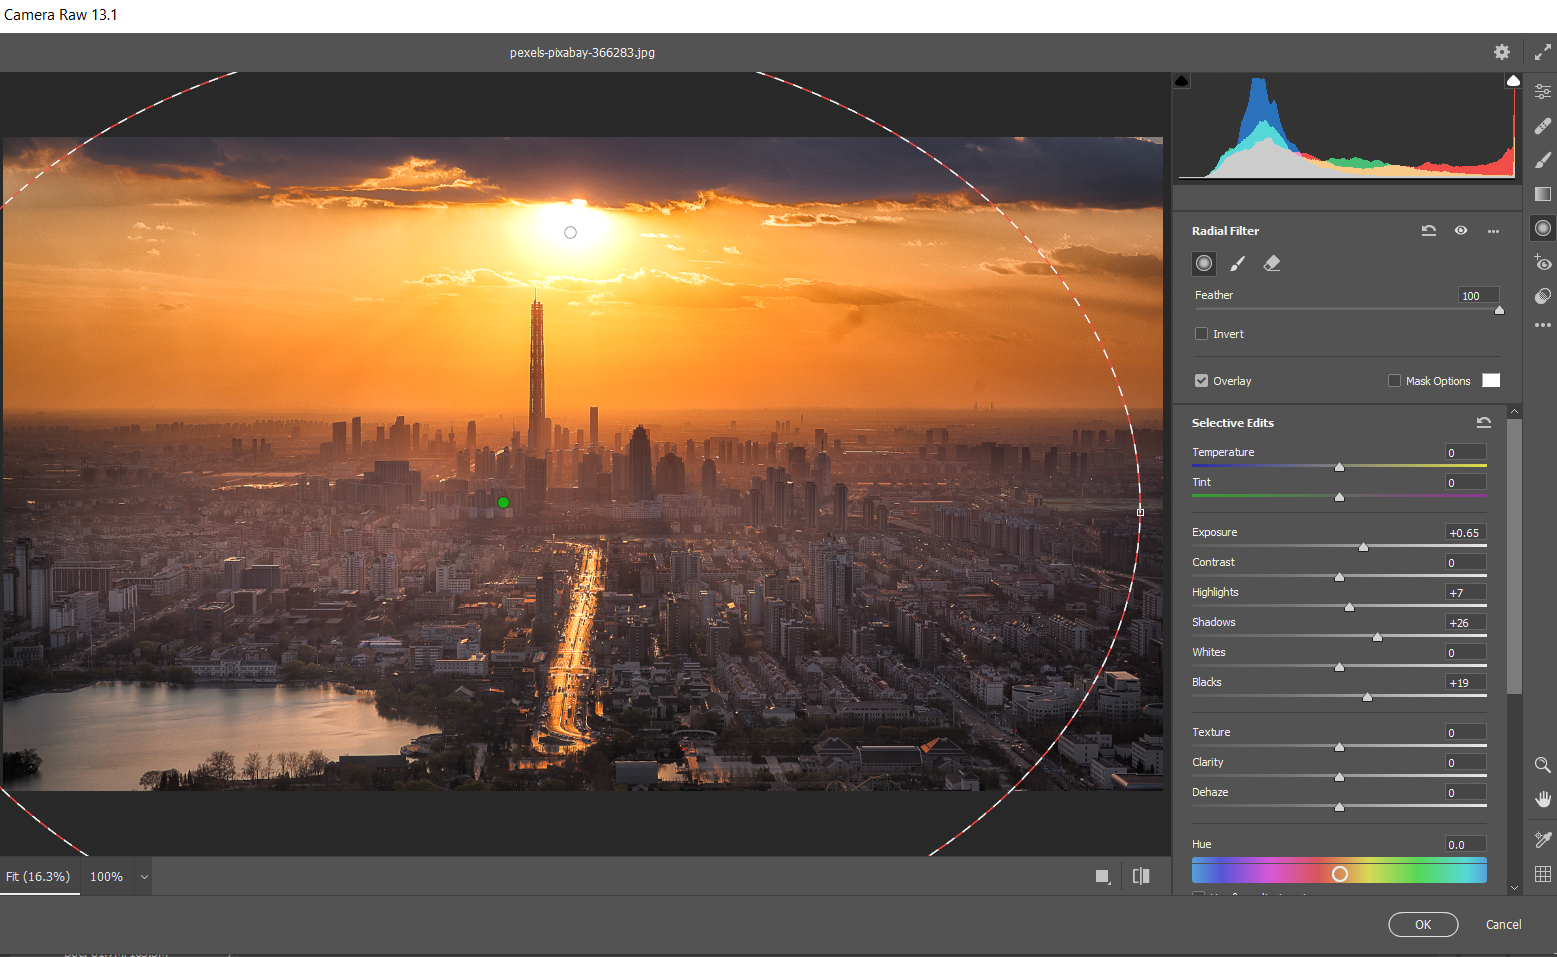
Left-click to place another Radial Filter among the buildings in the midground. Right-click and select Reset Local Correction Settings.
-
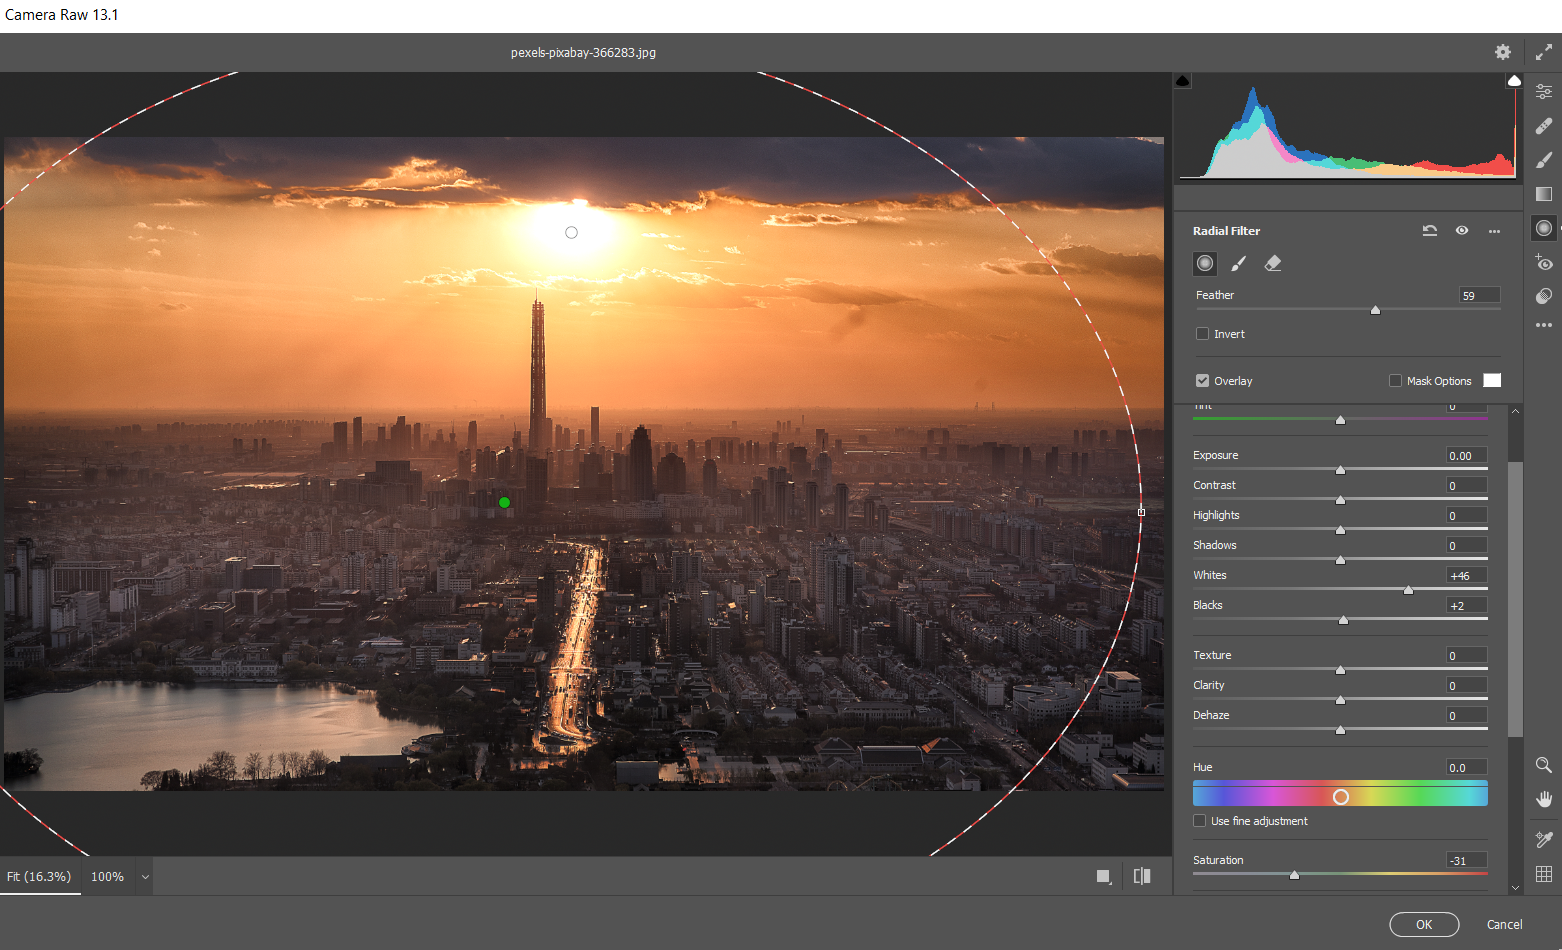
Using the four Box Handles, increase the size of the filter so it expands well outside the screen in order to cover the entire image.
-
Enter these values for each of the following sliders: Feather 100, Exposure +.65; Highlights +7; Shadows +26; Blacks +19; Saturation +17.
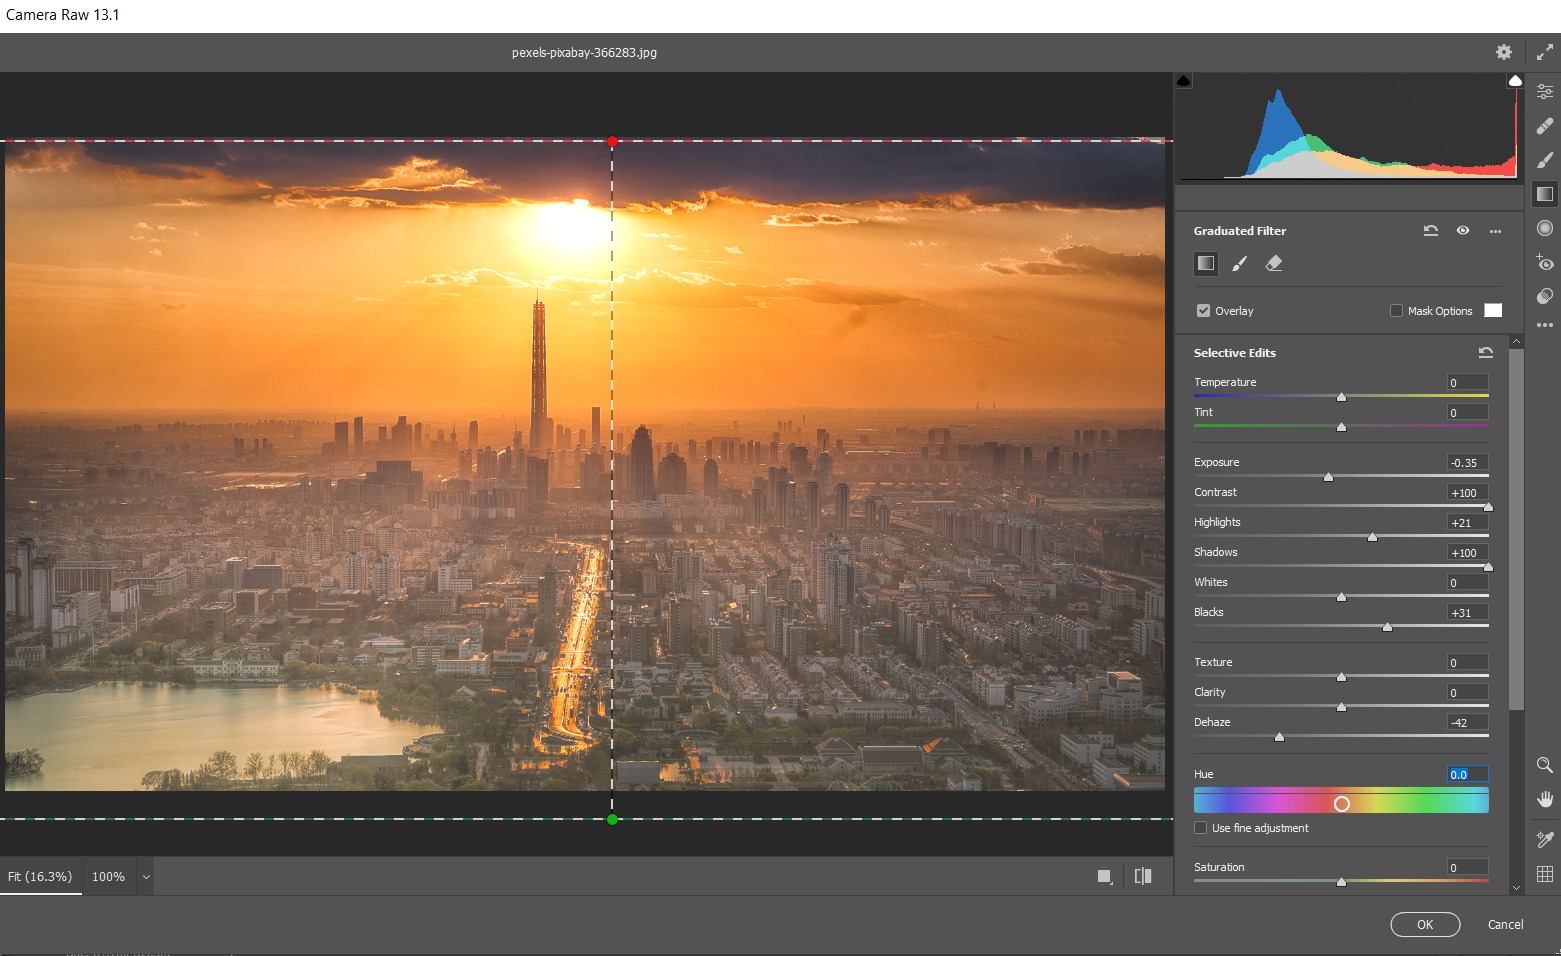
- Click on the Graduated Filter icon in the far-right vertical menu. Create your first Graduated Filter by clicking on the bottom of the screen and dragging the handle all the way to the top of the screen.
-
Then, enter these values for each of the following sliders: Exposure -.35; Contrast +100; Highlights +21; Shadows +100; Blacks +31; Dehaze -42.
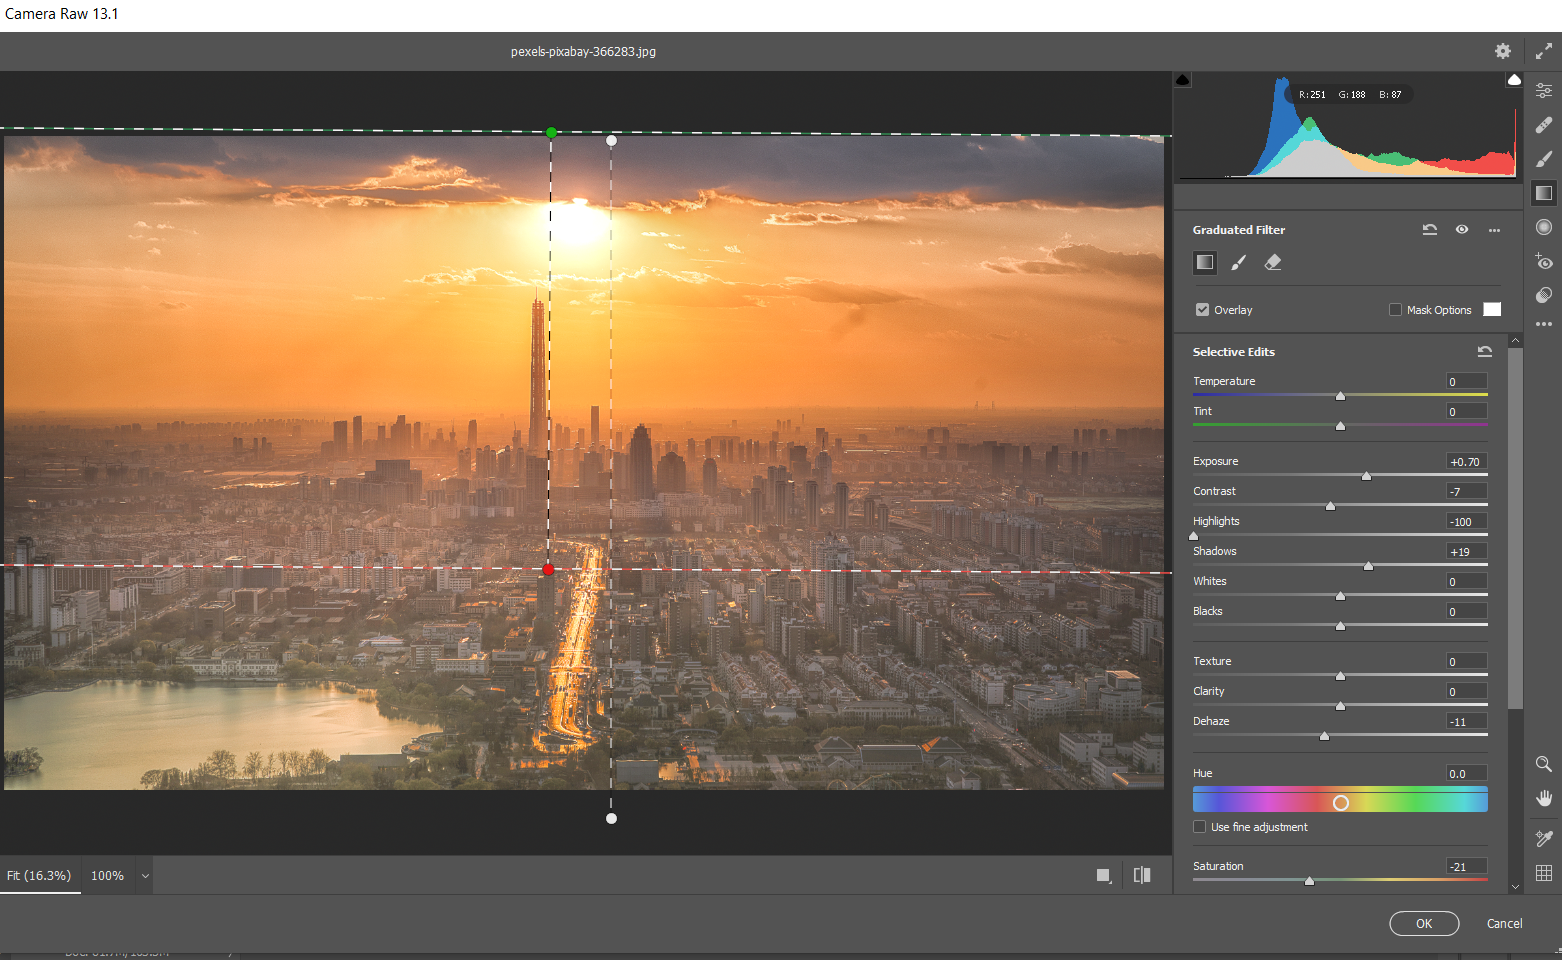
- Create your second Graduated Filter by left-clicking the top of your screen. Then, drag the filter down towards the middle of the image. From here, right-click and select Reset Local Correction Settings.
-
Then, enter these values for each of the following sliders: Exposure +.70; Contrast -7; Highlights -100; Shadows +19; Dehaze -11; Saturation -21. Click Ok to return to Photoshop.


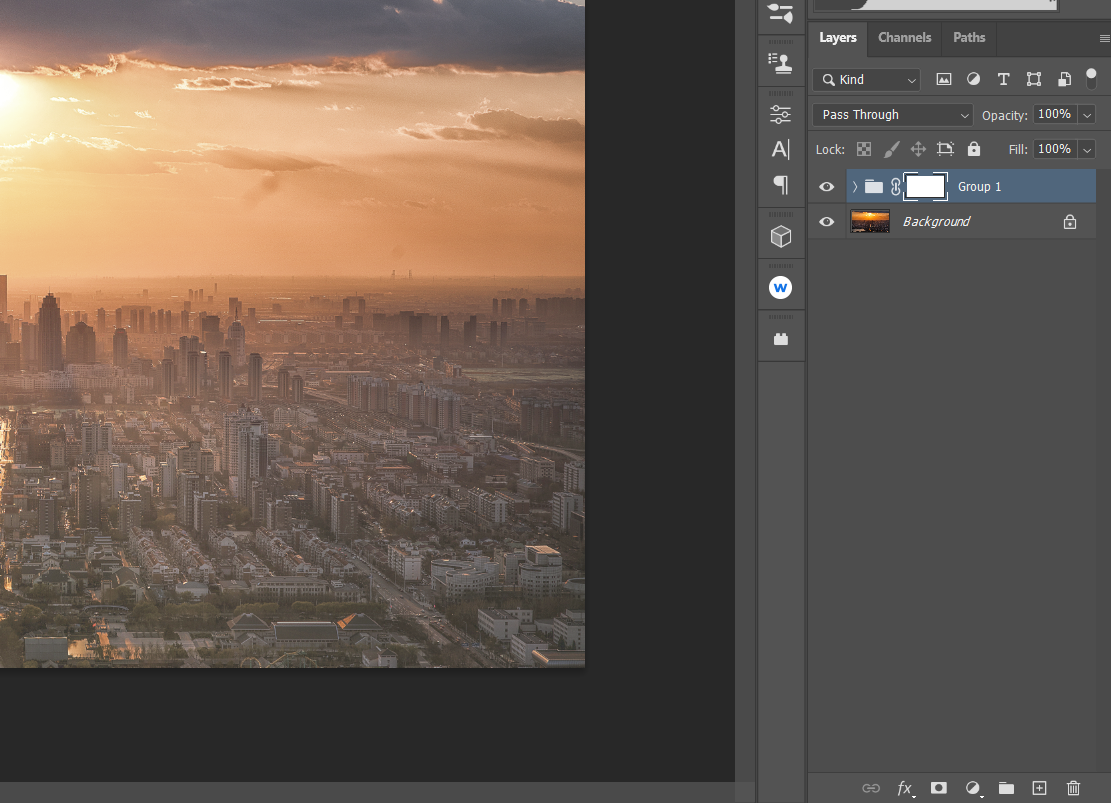
Let’s continue editing in Photoshop. We’re going to create a Saturation Mask and then group our layers together in order to mask out some of the effects.
Adding a Saturation Mask and Grouping Layers
-
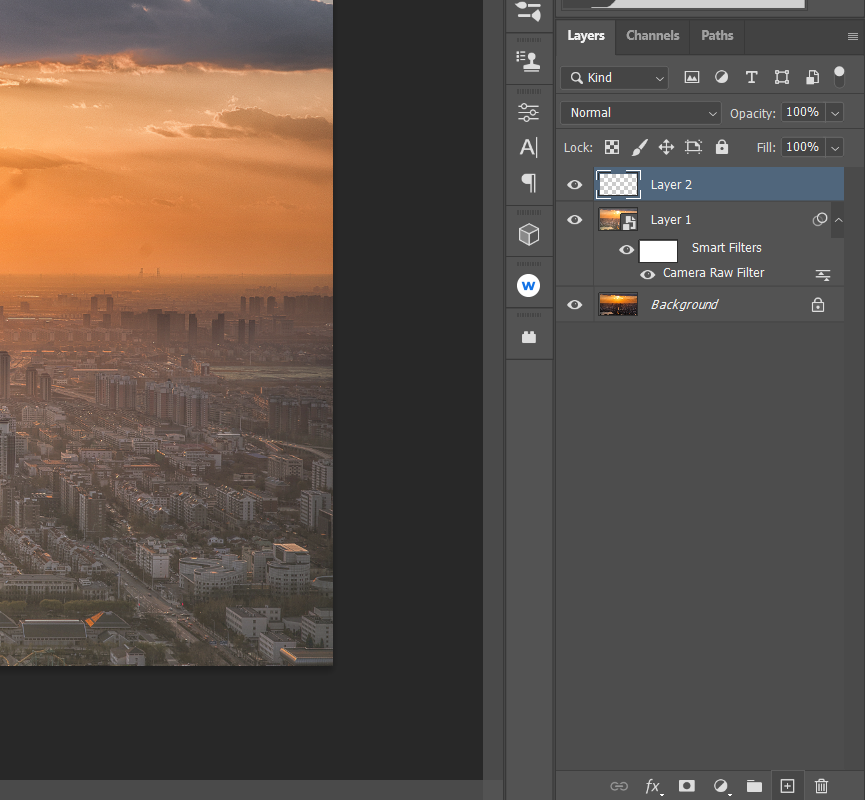
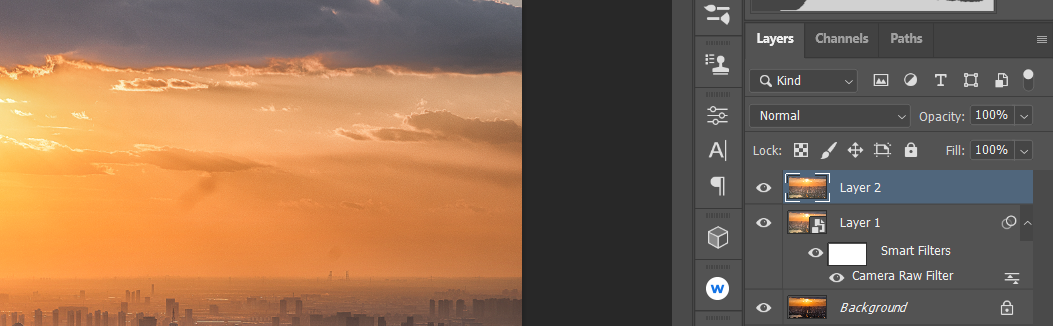
Make sure the duplicate layer is highlighted, then click on the Create a New Layer icon.
-
Create a Stamp Visible layer by hitting Shift + Ctrl + Alt + E.
-
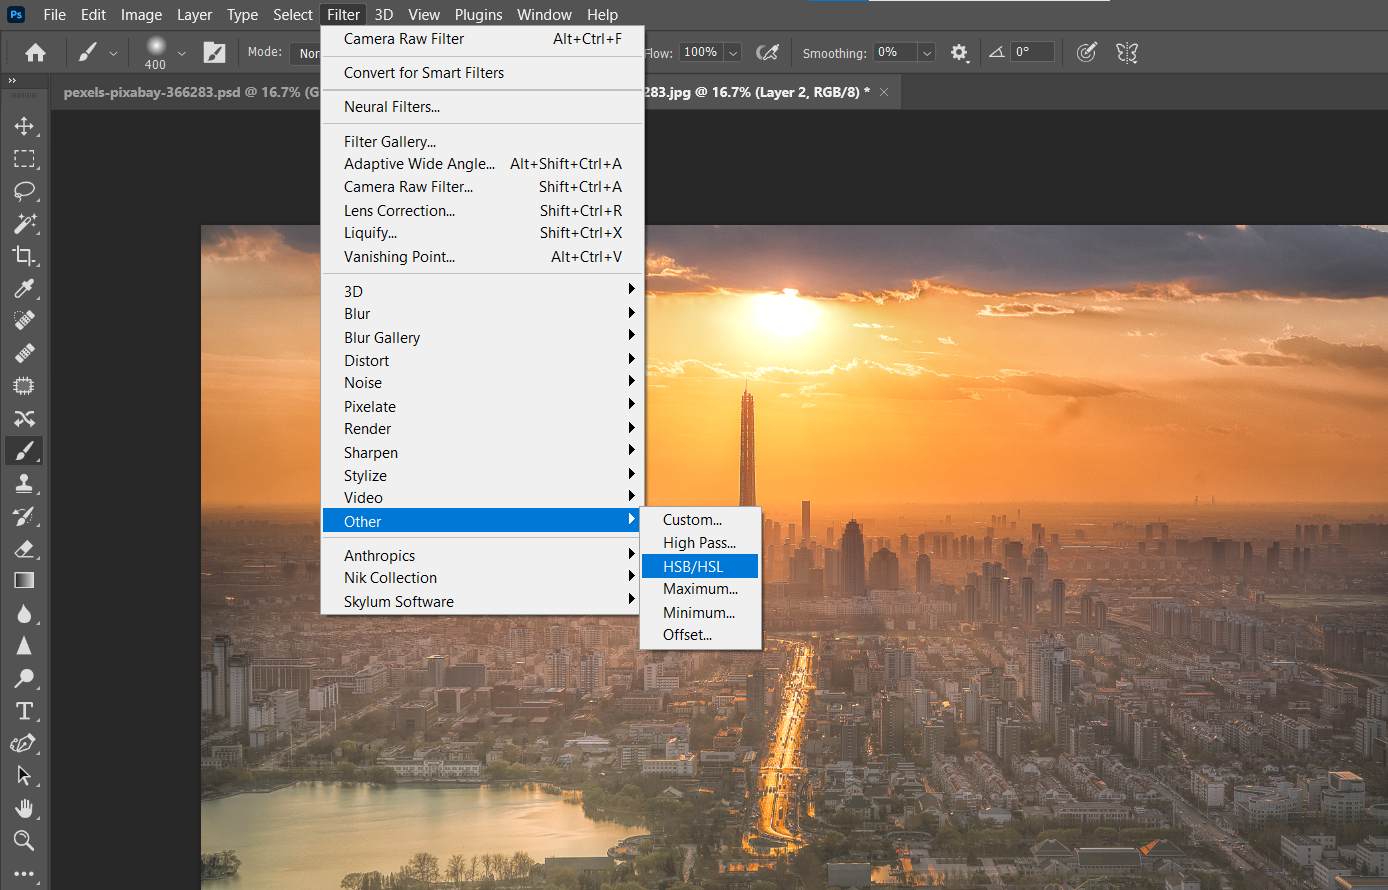
Go to Filter > Other > HSB/HSL.
-
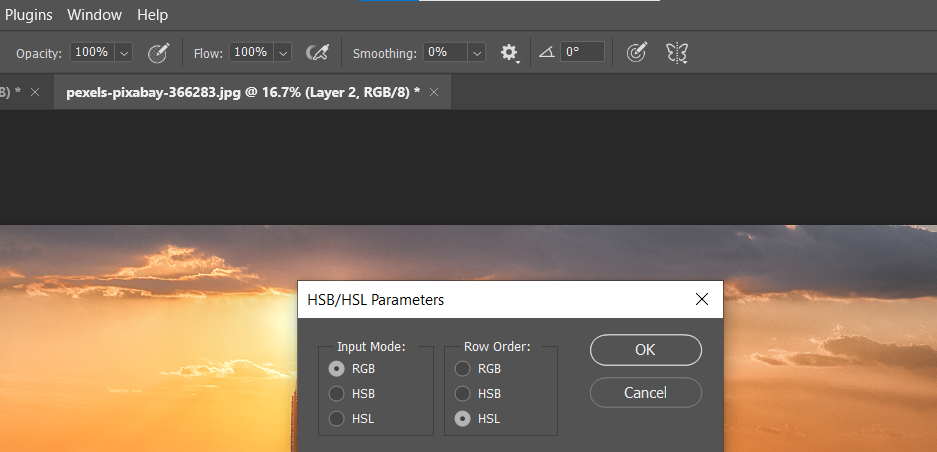
In the popup dialogue box, make sure RGB is selected under Input Mode. Under Row Order, select HSL, and then click Ok.
-
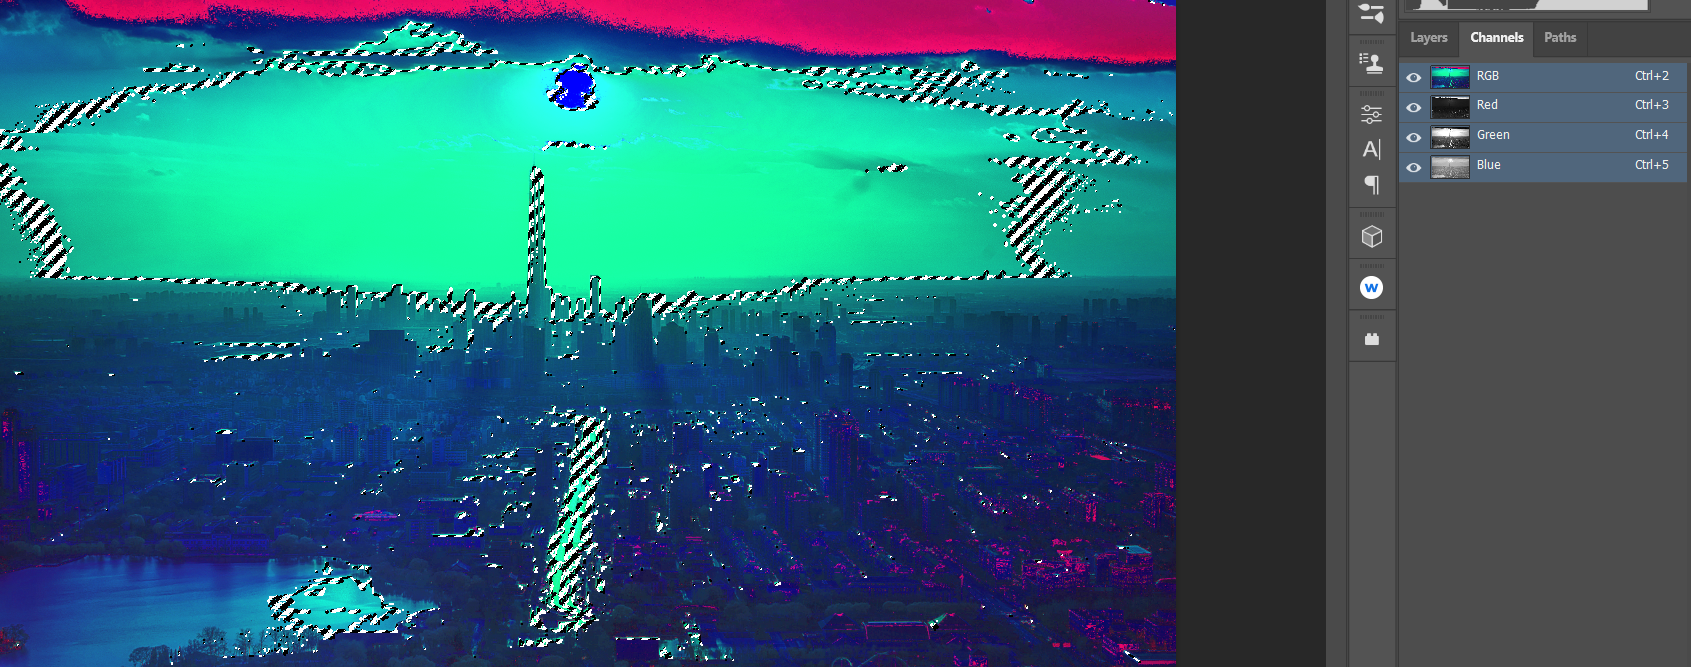
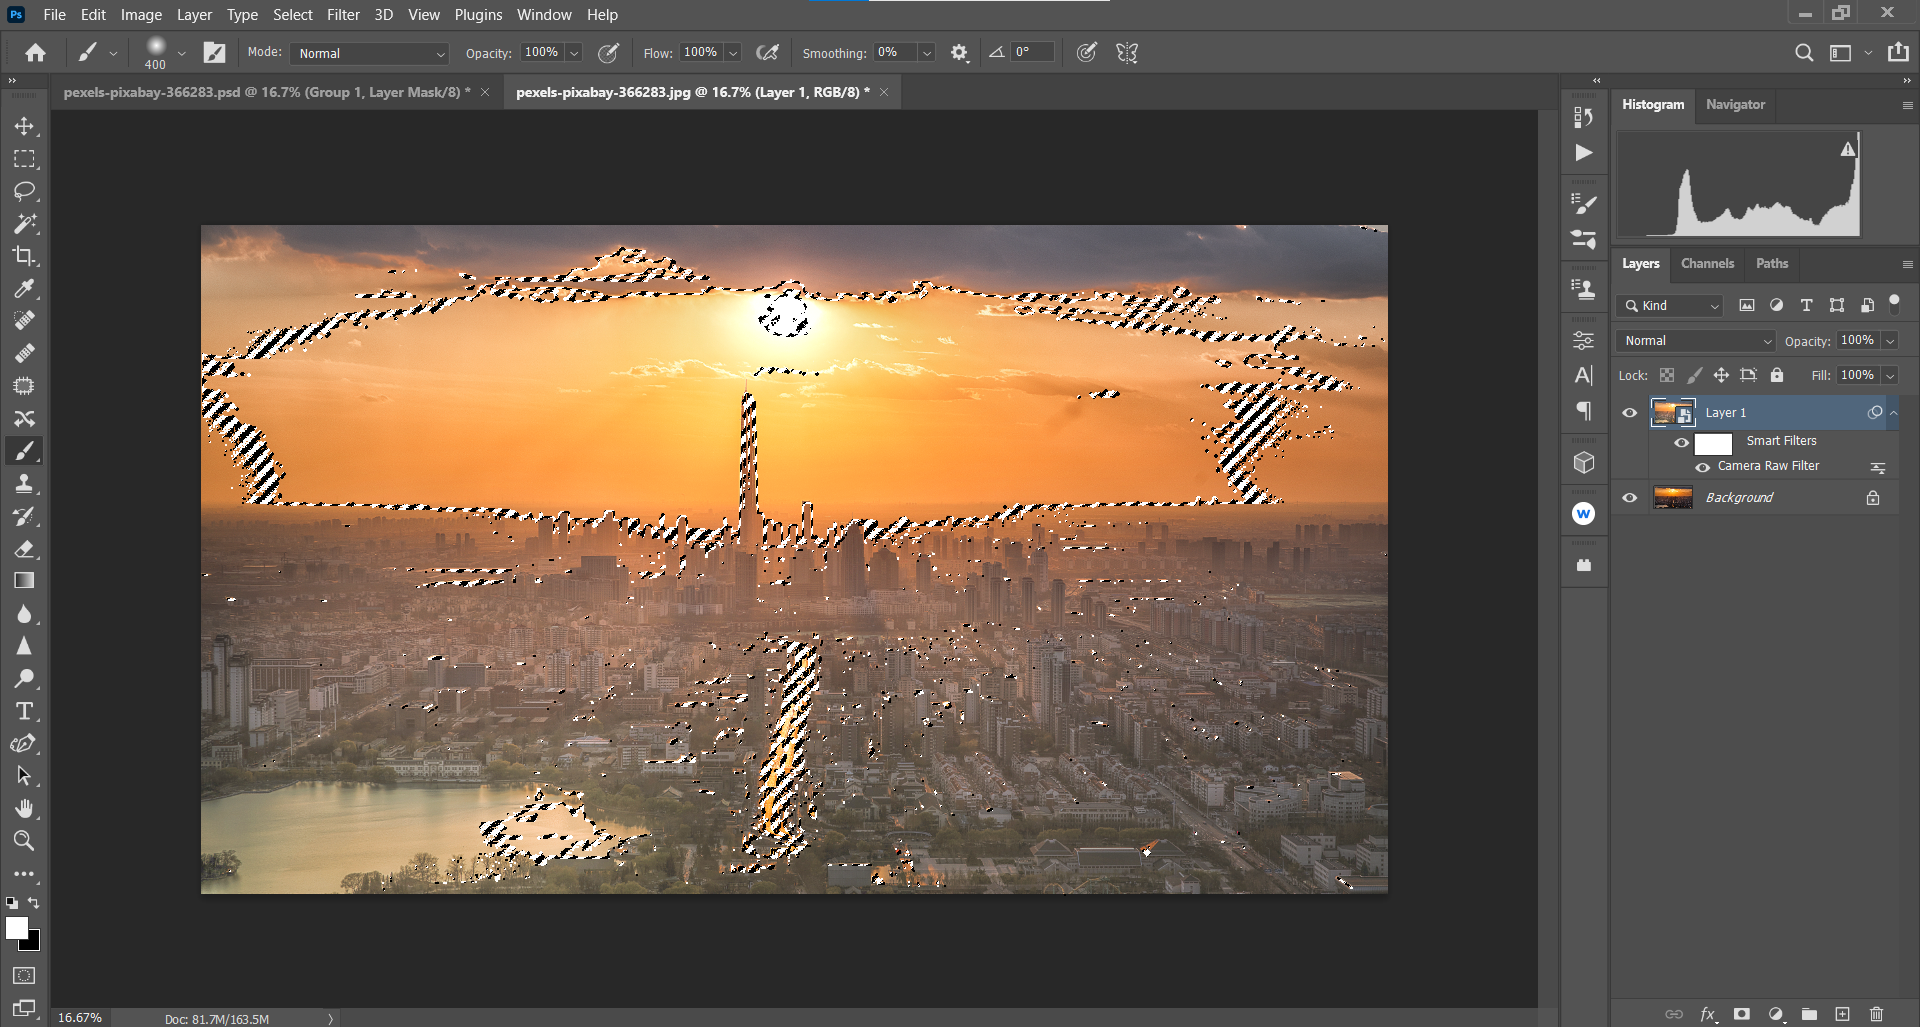
Go to Channels. Select RGB + Ctrl.
-
Go back to the Layers tab. Delete the duplicate layer by dragging it down to the Trash icon.
-
With the Background layer selected, create a Hue/Saturation layer.
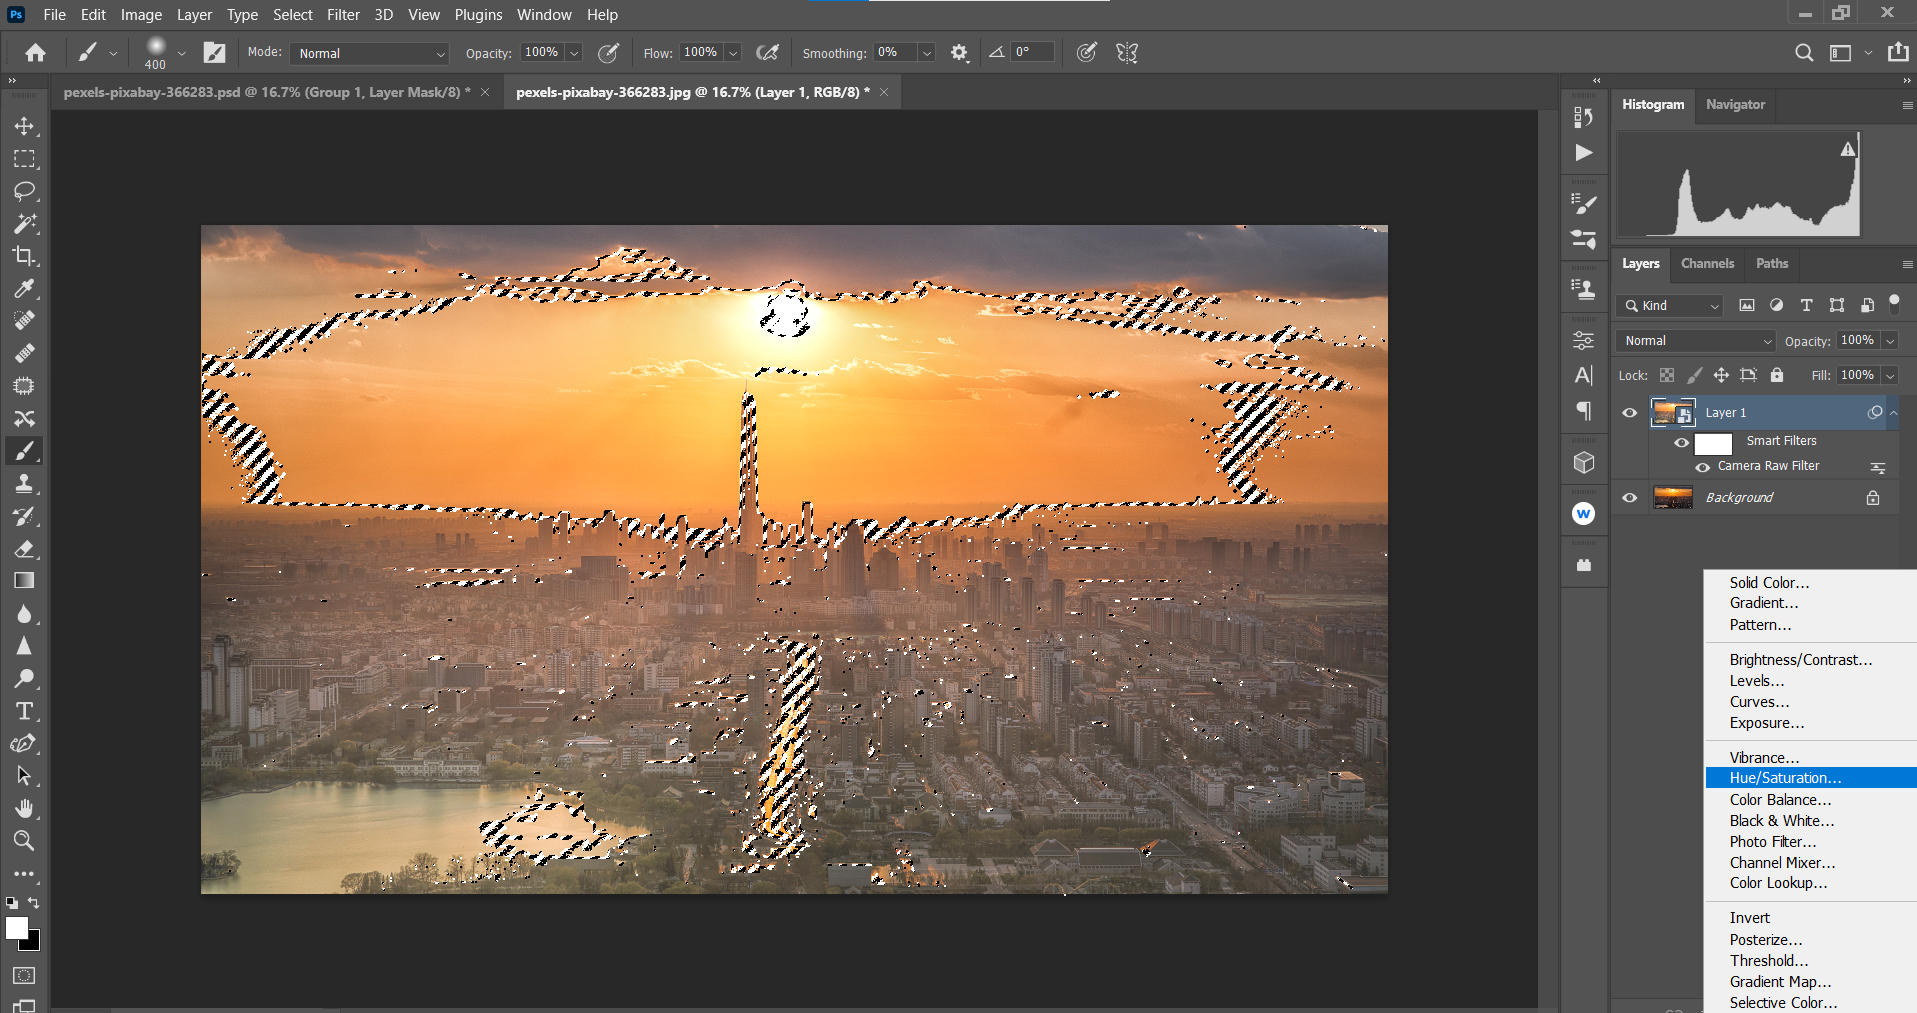
-
A Saturation Mask will be created above the Background layer. Click on RGB in the dropdown menu and then choose Reds. Change the Saturation to -39 and the Lightness to +19.
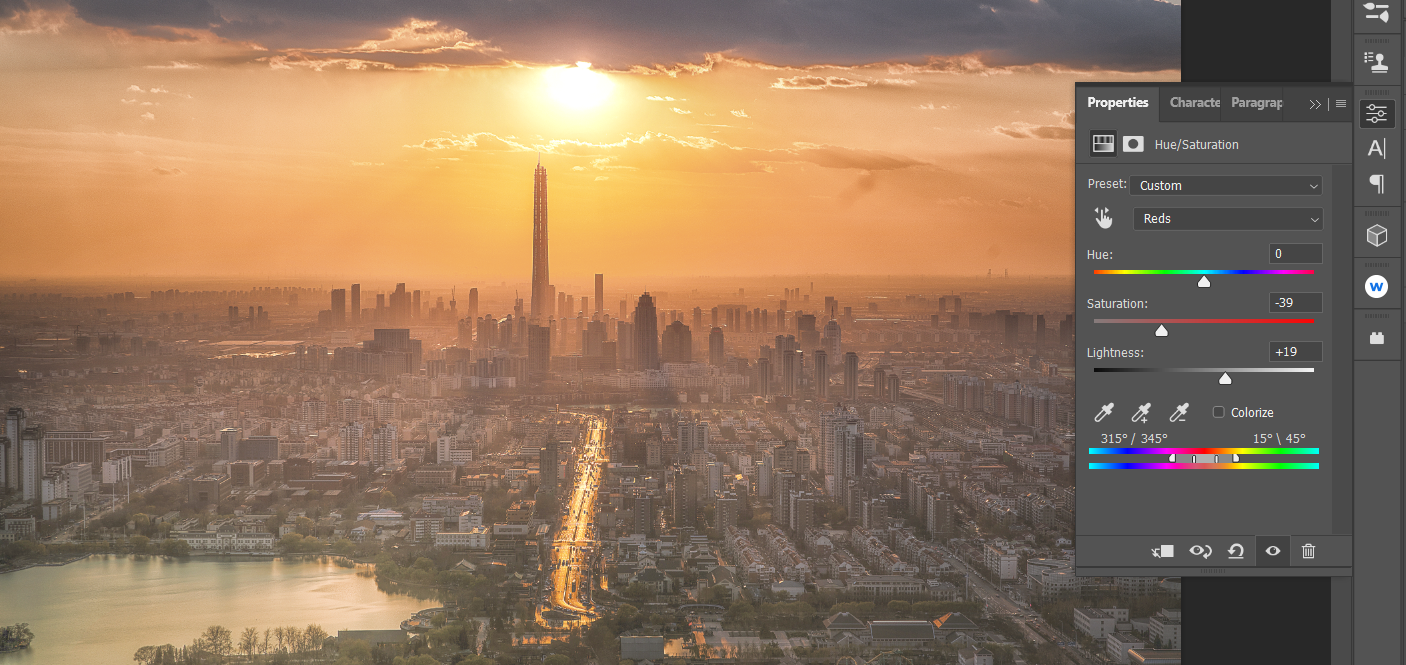
-
Then, select Yellows in the dropdown menu. Change the Saturation to -19 and the Lightness to +42.

-
Click on the Hue/Saturation layer and then Shift + Click on the duplicate layer below it. Then, click on the Create a New Group icon at the bottom-right corner of the screen.
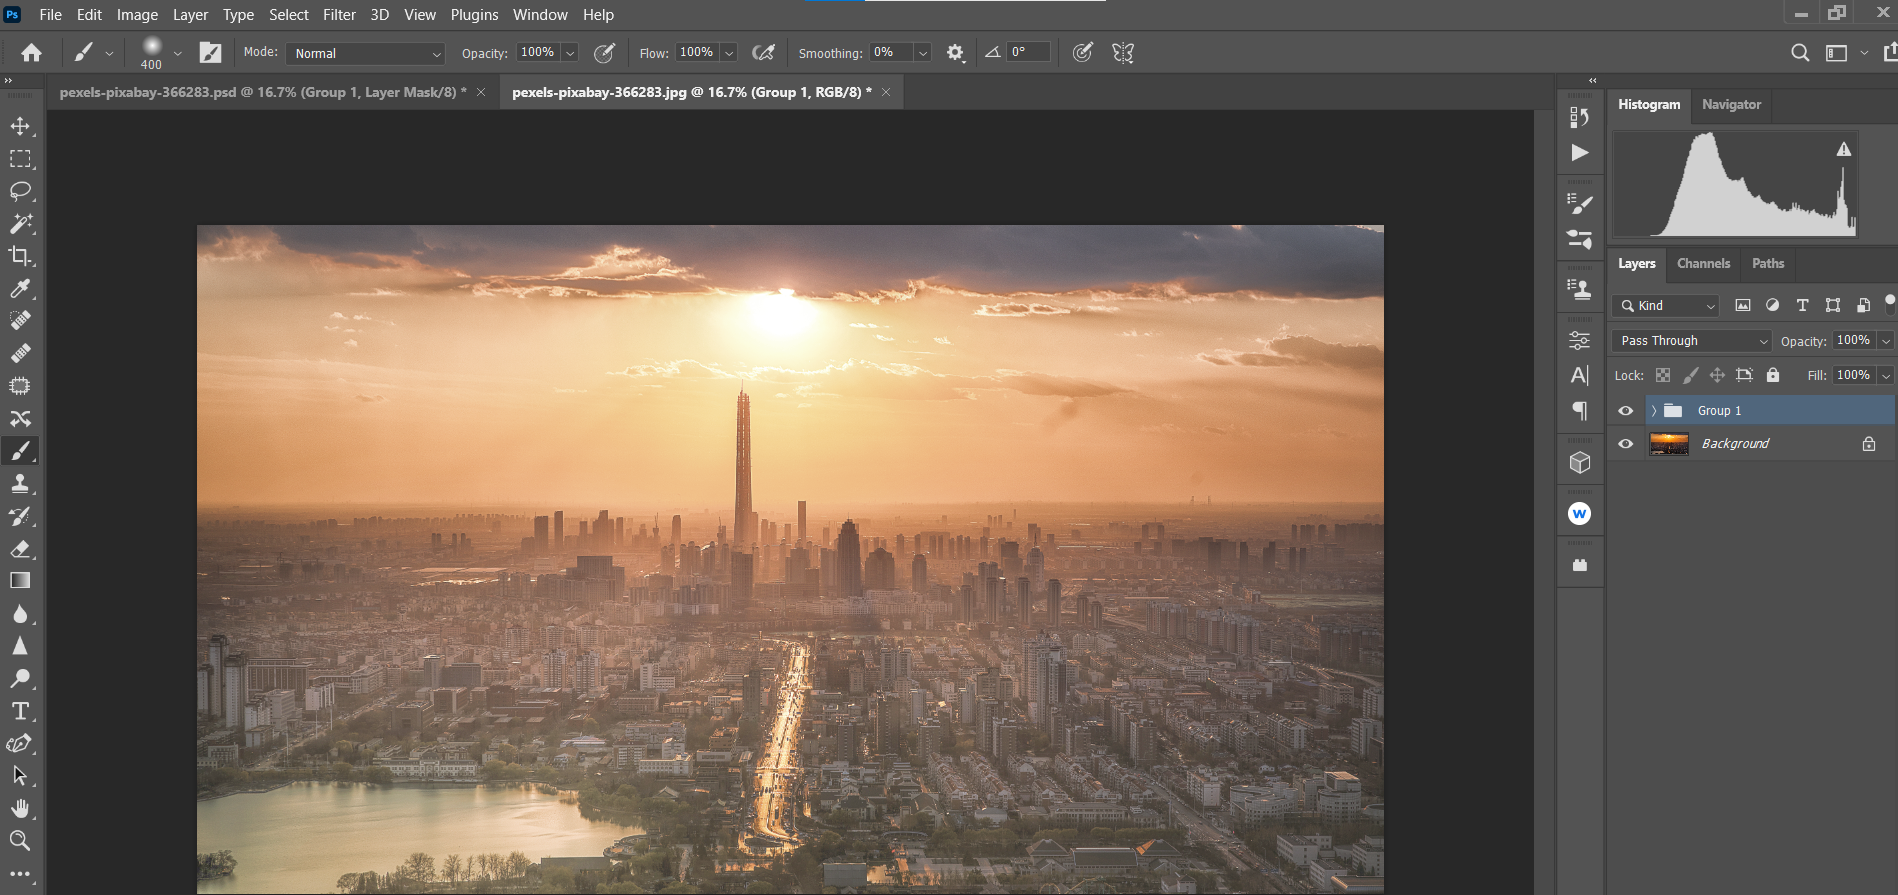
-
Click on the Create A Mask icon at the bottom-right corner of the screen.
-
Press B for the Brush tool. Then, select Soft Round Brush in the brush settings.
-
Toggle the X key to make the Foreground Color Black.
-
With Flow set to 10 percent, paint away the effects to create a natural-looking vignette.


Tackling the Steep Learning Curve of Editing Sunsets
Photographing sunsets (and editing them) could probably be one of the most difficult tasks that millions of picture-takers around the globe contend with. After reviewing these examples, it’s easy to see why. There are so many variables that need to be considered in order to make that perfect sunset photo.

It is our hope that you now have a better understanding of how to edit your sunsets in Photoshop. But if by chance you end up with a bad sunset, there are other editing options available to make your photos shine nevertheless.
Image Credit: Abhiram Prakash/Pexels