If you love to sculpt in Blender but hate hitting the wall in terms of your resolution, you're in luck. Dynamic topology is one way to really get stuck in without starting with an unnecessarily complex foundation.
Dyntopo transforms any mesh primitive into what essentially feels like a block of real clay. Your options become infinite instantly, all with a single toggle.
This article will provide you with all the information you need to get started with Dyntopo.
What Is Dynamic Topology?

Dynamic topology, Dyntopo for short, is a "dynamic tessellation sculpting method" that helps you conserve geometry without limiting your ability to model the object with a fine degree of precision.
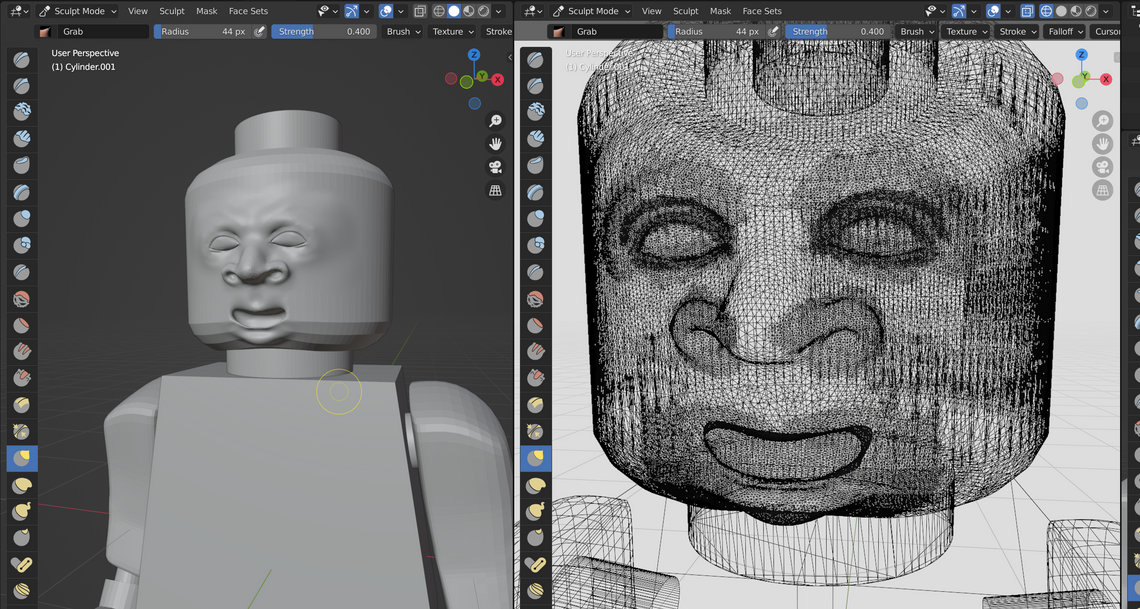
As you apply each sculpt operation, the mesh of the object interacts with each stroke, breaking down and subdividing underneath your cursor as you work. You can keep things simple where you can and really lean into parts of the model that could use a bit of extra resolution.
Think about your ordinary, everyday Subdivision Surface modifier. This modifier subdivides the entire mesh of your object, leaving no stone unturned. What results is something that feels a lot more like clay than the low-poly version that came before, and you're able to refine it minutely.
Needless to say, this situation will leave you with a lot of polygons to deal with when the time comes to render your scene. This is where Dyntopo in Blender might be useful to you.
Instead of subdividing the entire mesh, Blender works procedurally along with you, generating new geometry only in the areas that you're actually sculpting.
How to Use Dyntopo in Blender
To toggle Dyntopo on, use Ctrl + D or click the little checkbox at the top of your UI in Sculpt Mode. Tabbing out of Sculpt Mode may disable the setting—after navigating away, always check to ensure that the setting is still turned on before continuing.
Enabling Dyntopo prompts a brief warning that you don't need to worry about—just click through it. In the resulting dropdown, you'll be able to specify a few basic Dyntopo settings:
- Detail Size: The "brush" size of your Dyntopo protocol; IE, the level of sensitivity and detail that your brush is capable of.
- Resolution: A few of these Detailing settings will use Resolution instead of Detail Size when choosing the diameter of the brush. The main difference is that a smaller Detail Size will result in a finer Dyntopo effect, whereas you would need to choose a higher Resolution setting in order to accomplish the same thing.
- Refine Method: This is the protocol by which each polygon will be broken down. Subdivide Edges subdivides geometry to match the size of the brush, while Collapse Edges will simplify what it can in order to match the detail level of your brush. Subdivide Collapse is a combination of both, leveling off detail in excess while catching the rest up to speed.
- Detailing: This setting allows you to customize the way that your brush size behaves within the 3D viewport. Relative Detail results in a brush that's both scale- and zoom-dependent, changing as the relative size of your sculpt brush does as you get closer and further away. Constant Detail bypasses zoom, giving you a consistent brush that does not change as you work. Brush Detail offsets this value to the actual size of the sculpting brush itself, as it exists at the top of your UI, not within the Dyntopo panel.
After dialing in your settings, try to interact with the mesh of your model. You should be able to cut in with much more detail and precision than you would ordinarily. It's an extraordinarily freeing way to work, especially if sculpt mode is where you thrive.
Dyntopo makes adding geometry procedurally really easy. You also have the option to smooth your work over behind you by holding Shift and glossing over anything that ended up being too jagged or outlandish.
What else is there to know about Dyntopo in Blender? Under certain settings, you'll have a couple more options to work with.
Advanced Settings and Features
When you're using Constant Detailing or Manual Detailing, you'll see an additional option called Detail Flood Fill. Clicking this button essentially subdivides the entire mesh according to the brush Resolution value that you have dialed in.
Is it just a Subdivision Surface modifier under a different name? Not really—we found that subdividing in this way actually preserves the original shape of the mesh much more effectively and intuitively than a Sub-Surf modifier applied under the same conditions.
Our advice? Try 'em both and see what works for you. Here are a couple of our favorite ways to use Dyntopo in 3D modeling.
Dyntopo for Beginners: The More You Know, the Better
Dynamic topology rocked our entire worlds when we first learned how to use it. It makes sculpting anything really easy, all without weighing your system down with geometry where you don't really need it.
Give it a try; you never know what you're going to come out with when you work with dynamic topology. That's sort of the best part.