
The dxgi.dll file, also known as the DirectX Graphics Infrastructure file, is a Dynamic-link library file that is present in Windows by default. It typically works to ensure that the programs installed on the computer are working properly, but it can also sometimes cause issues in the system.
One such problematic error is the ‘The program can’t start because dxgi.dll is missing from your computer’, which prevents users from launching apps on their computers. Below, we take a look at how to fix this issue in no time.
A Note About Downloading DLL Files
When faced with a missing DLL file, people sometimes opt to download a copy from an online website. However, doing so isn't the best practice.
For one, the website you're downloading the file from may have laced it with a virus, which will cause you more headaches in the long run than a missing DLL file. If the website is legitimate, the file you download may still be for the wrong operating system, version, and build that you're on, which can cause more issues.
Also, there are some general fixes you can try which fix the underlying problem of a missing DLL, which is a great deal more productive than simply replacing it. As such, it's worth taking all routes before taking the chance with a DLL website.
1. Restore Dxgi.dll
The simplest way to fix the problem is by restoring the missing dxgi.dll file. We recommend checking your recycle bin for this file and restoring it from there, as there is a good chance you or someone else accidentally deleted the file.
Here is how you can proceed:
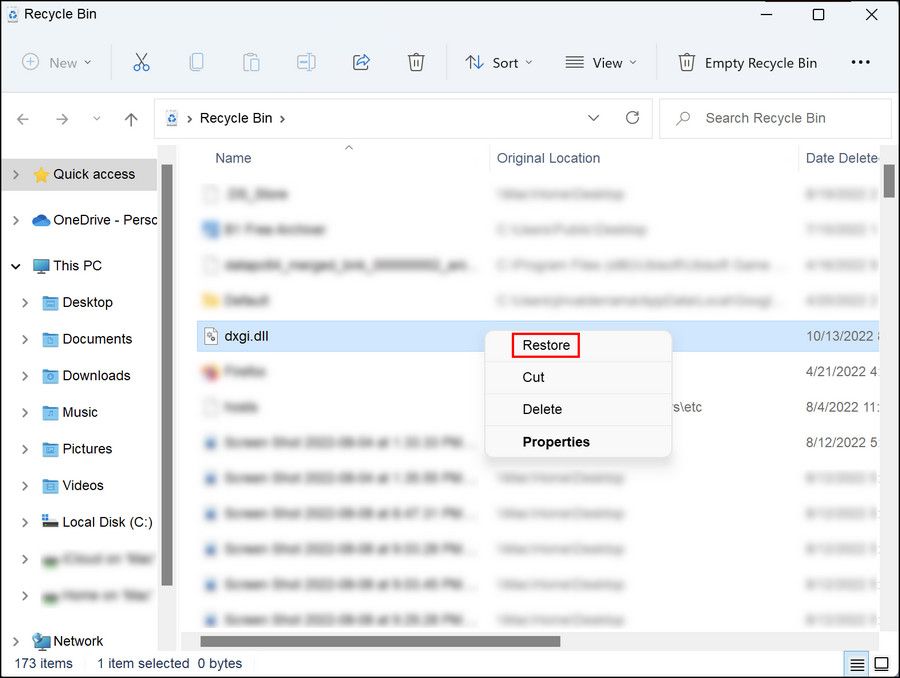
- Double-click on the Recycle bin icon on the desktop to open it.
- Locate the dxgi.dll file in the recycle bin and if found, right-click on it.
-
Choose Restore.

Once the file is restored, you can check if you can now run the targeted application.
2. Use a Backup Folder to Copy the File
Another way to restore the dxgi.dll file is by copying it from a backup folder. If you use backup software to keep your Windows backed up at all times, you can simply go back in your archives and pick out the dxgi.dll file.
If you manage to find this file, you can paste it into the System32 folder to replace the missing or corrupt file with a working version.
Here is all that you need to do:
- Navigate to the folder or website where your backup files are stored. If you do not have a specific backup folder, search for the required file in the entire system using the search bar in File Explorer.
- Locate the dxgi.dll file and copy it.
- Now, navigate to the C:\Windows\System32 folder and paste the backup file there.
- Once done, restart your computer and upon reboot, check if the issue is resolved.
3. Reinstall VC Runtimes
Several applications and games installed on your system depend on essential VC runtimes to function. These are libraries that contain code used by applications to run. If there is a problem with these runtimes, they can affect the performance of the application, resulting in issues like the one at hand.
In this case, you can attempt to reinstall these VC runtimes:
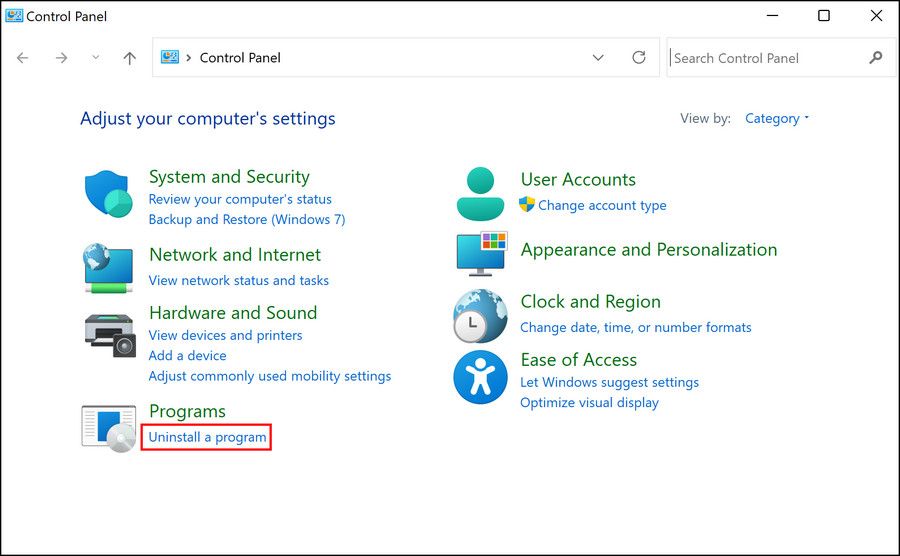
- Press the Win + R keys together to open Run.
- Type control in Run and click Enter.
-
In the Control Panel, navigate to Programs > Uninstall a program.
- Now, locate the Microsoft Visual C++ Redistributable package and right-click on Uninstall.
- Follow the on-screen instructions to proceed.
- Once done, download the latest version of the Microsoft Visual C++ Redistributable package.
- Now, unzip the downloaded file and run the install_all.bat as administrator.

Wait for the file to install and after it is installed, try launching the app you were trying to access earlier and check if the issue is now fixed.
4. Check the Integrity of Files

The next thing you can try doing is running a system scan to check the integrity of the file itself and identify any potential corruption errors or malware that may be preventing the dxgi.dll file from functioning properly.
As a first step, we recommend scanning your system with your antivirus program. You can use any third-party security program installed on your computer for this purpose. Once the scan is complete, check if it has identified and fixed any issues. After that, we recommend using the built-in system utilities to do the same to ensure that no potential culprit is left behind.
The most suitable option for this scan will be the System File Checker (SFC) and you can run it via Command Prompt. When you run the SFC utility, it scans the important files for underlying issues. If any problems are identified, the tool will replace the faulty files with their healthier counterparts, fixing the problem at hand in the process.
As we have previously covered how to run an SFC scan in detail, you can refer to that guide for step-by-step instructions to ensure you perform the scan accurately.
5. Apply General Fixes for a Missing DLL File
If nothing so far seems to work, there are some more fixes you can try. Unfortunately, Windows is no stranger to DLL errors, so there's a whole host of general fixes you can apply, regardless of which file has gone missing.
If you'd like to know more, check out how to fix DLL files missing on Windows.
Restore the Dxgi.dll File in Windows
The dxgi.dll file in Windows can go missing for a number of reasons, including corrupted or missing system files and issues with DirectX. Fortunately, fixing this issue is quite easy, and the methods listed above should help you restore the file for good in no time.
Some of these methods may require a certain level of technical knowledge so if you are not sure what you are doing, it is best to seek professional assistance. You can reach out to the official Microsoft support team for help as well.