
With Windows 11, Microsoft brought several visual changes to its desktop operating system, including the notable addition of rounded corners for windows, menus, and dialog boxes. While the new design update has been widely embraced by many users, there are those who prefer a more traditional look with sharp corners.
The good news is that it is possible to disable rounded corners in Windows 11, and this guide will walk you through three easy methods for the same.
1. How to Disable Rounded Corners in Windows 11 Using a Third-Party Tool
Win11DisableOrRestoreRoundedCorners is an open-source tool available on GitHub that can help you disable rounded corners on your Windows 11 PC. Since this tool modifies your PC's system files to remove the rounded corners, it's a good idea to create a restore point before using it.
- Head over to GitHub’s website to download the Win11DisableOrRestoreRoundedCorners tool.
- Double-click the downloaded executable file to run it.
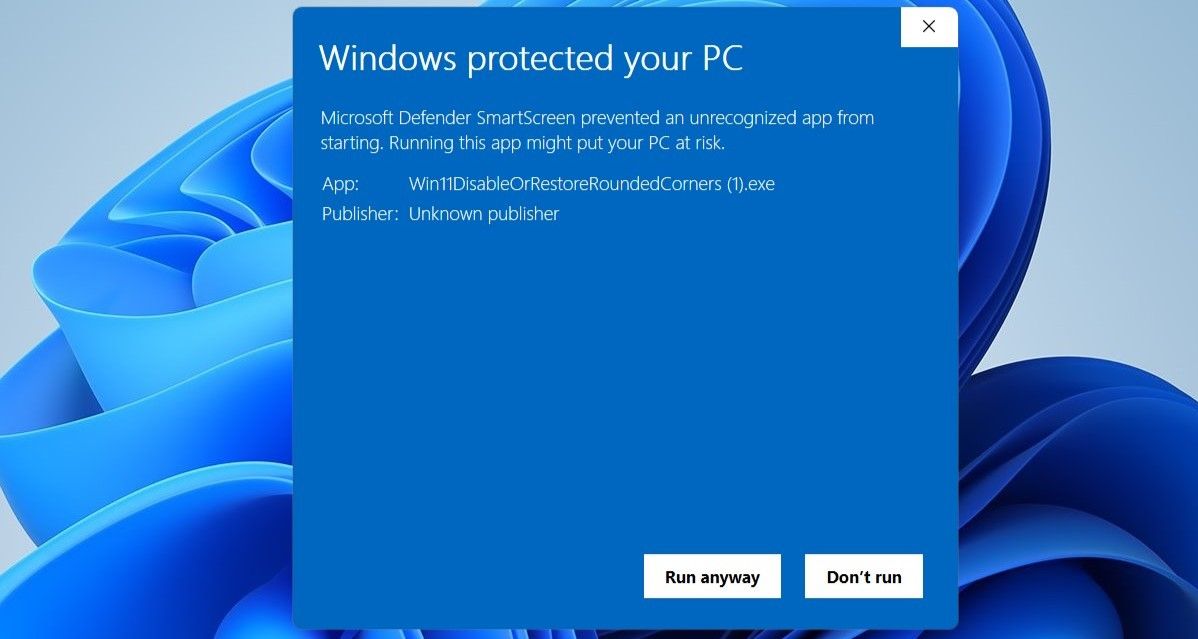
- If you see the Microsoft Defender SmartScreen window, click on More info and then select Run anyway.
-
Select Yes when the User Account Control (UAC) prompt appears.

Once you complete the above steps, a PowerShell window should appear and disable rounded corners on your PC. Here’s a glimpse of how your windows will look once the rounded corners are disabled.

Note that this tool will not disable rounded corners in the Start menu or some modern apps. If you want to revert the changes later, simply run the downloaded EXE file again.
2. How to Disable Rounded Corners in Windows 11 Using the Registry Editor
Don't want to use a third-party tool? No problem. You can also disable rounded corners in Windows 11 by making changes to the Windows Registry. However, it's crucial to exercise caution, as modifying registry files without proper knowledge can be risky.
Before you proceed, consider backing up all the registry files, just in case. After that, use these steps to disable rounded corners via the Registry Editor:
- Press Win + S to open the search menu.
- Type in registry editor and select the first result that appears.
- Select Yes when the User Account Control (UAC) prompt appears.
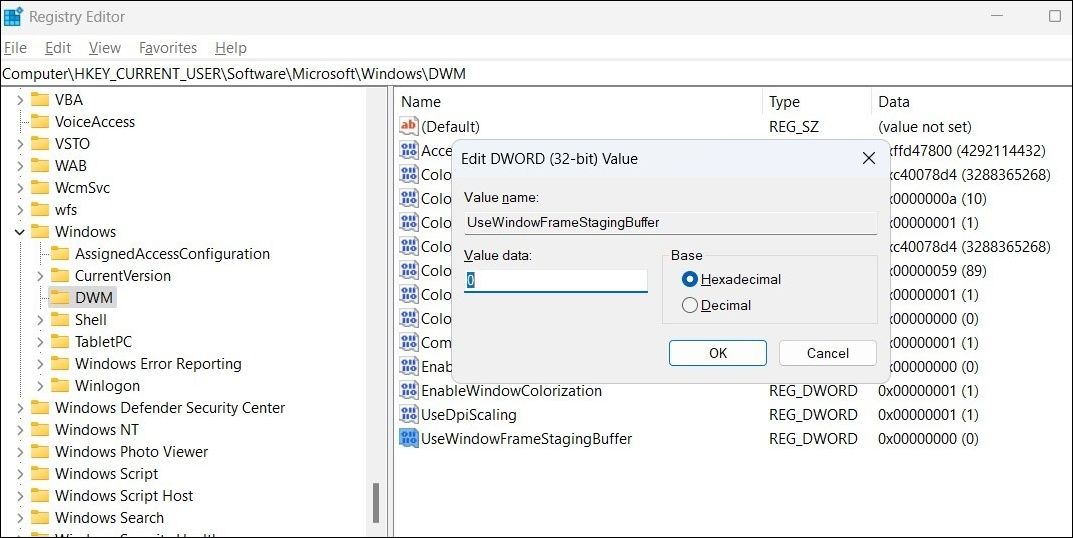
- Navigate to Computer > HKEY_CURRENT_USER > Software > Microsoft > Windows > DWM.
- Right-click on the DWM key and select New > DWORD (32-bit) Value. Rename it to UseWindowFrameStagingBuffer.
- Double-click the newly created DWORD and enter 0 in the Value data field. Then, click OK.
-
Restart your PC to apply the changes.

If you want to reverse the above change later, repeat the same steps mentioned earlier and change the value data for the UseWindowFrameStagingBuffer to 1.
3. How to Disable Rounded Corners in Windows 11 via Device Manager
Another way to remove rounded corners in Windows 11 is by disabling the graphics driver on your PC. However, it is important to consider a few caveats. Firstly, disabling the graphics driver will result in reduced display performance, lower screen resolutions, and the deactivation of any visual effects. Secondly, this will also prevent you from running any graphics-intensive applications or games on your PC.
If you are fine with these trade-offs, use these steps to disable rounded corners via Device Manager.
- Press Win + X to open the Power User menu.
- Select Device Manager from the list.
- Double-click on Display adapters to expand it.
-
Right-click on your display driver and select Disable device.
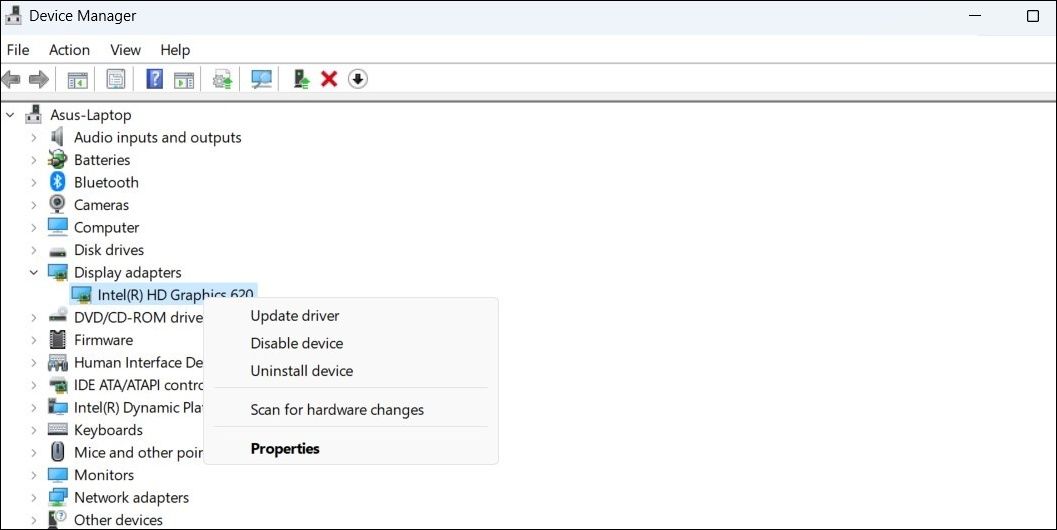

Once the graphics driver is disabled, you should see square corners on all windows and menus in Windows 11. If you want to undo this change later, simply enable the graphics driver via Device Manager.
Disabling Rounded Corners in Windows 11 Is Easy
Using a third-party tool is arguably the most convenient way to remove rounded corners in Windows 11. However, if you prefer to rely on the native methods, you can use the Registry Editor or Device Manager instead.
Disabling rounded corners isn’t the only way to get the classic look of previous Windows versions. You can also use a third-party tool like the ExplorerPatcher to make Windows 11 look like Windows 10.