Microsoft was hoping to launch the tabs feature in the File Explorer app for Windows 10. But it scrapped the idea later on. However, with the Windows 11 22H2 update, users can now try out the tabs feature in File Explorer. The participants of the Windows Insider Program got early access to the feature and Microsoft could soon apply the tabs idea to Windows Notepad as well.
But what if you want to turn the File Explorer Tabs feature off? An immediate idea would be to uninstall the update, but that is a temporary workaround. You can use ViVeTool to enable or disable the tabs feature or any other new feature of Windows 11.
What Is ViVeTool?
ViVeTool is an open-source command line tool that can enable or disable Windows operating system features. Microsoft continuously works on many experimental features and does a lot of testing before rolling out a stable version of a feature. But if you are impatient, you can use ViVeTool to enable an otherwise hidden feature. It is free and the developers recently launched a GUI version of the tool as well.
How to Disable File Explorer Tabs In Windows 11
You can disable the File Explorer Tabs by either using the ViVeTool or the ViVeTool GUI version. The latter is much simpler to use because you can search for a feature and activate or deactivate it in one click. But before doing that, download and install both of these tools on your system. Also, create a system restore point for added precaution, in case the tool wrecks something on your Windows 11 computer.
Download: ViVeTool
Download: ViVeTool GUI
1. Disable File Explorer Tabs Using the ViVeTool
Since it is a command line tool, you can access it from a terminal window. Here’s how to do it:
- Press Win + R to launch the Run command box.
- Type CMD in the text input area and press Ctrl + Shift + Enter key to launch the command prompt with administrator privileges.
- Type cd Drive Name:\path. Here, you need to enter the exact location where you extracted the tool after downloading it. For example, we extracted it to a folder name Vive in C drive. So, our command is cd C:\Vive.
-
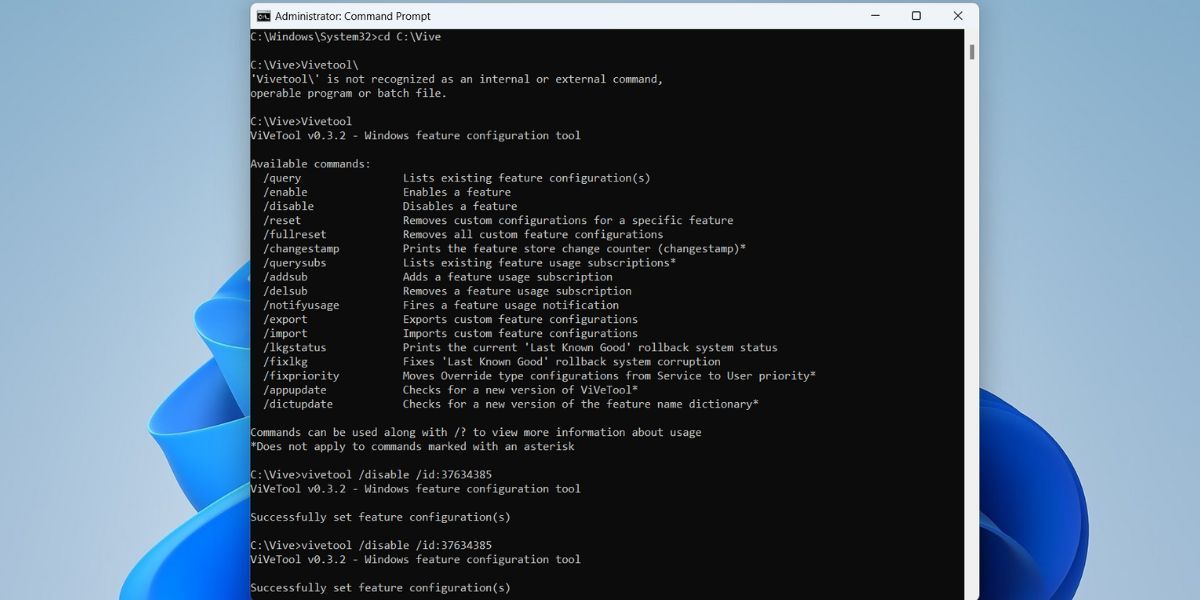
Now, you will be in the directory where ViVeTool exists. Type vivetool and press the Enter key. You will see a bunch of parameters you can use with the tool.
-
Type the following two commands, one by one in the CMD and press the Enter key.
vivetool /disable /id:37634385
vivetool /disable /id:36354489
- You will see the “Successfully set feature configuration(s)” if the command executes successfully.
- Now, restart your system for the changes to take effect. The File Explorer Tabs feature will no longer be active on your system.

2. Disable File Explorer Tabs Using the ViVeTool GUI version
The GUI version of ViVeTool works similarly. You can manually enter the feature ID or use the search function to find a feature in the list. Repeat the following steps to disable File Explorer Tabs using the ViVeTool GUI.
- Launch the ViVeTool GUI with admin privileges.
- Click on the drop-down list and select the latest Windows build number. Wait for the tool to list all the feature IDs available for the Windows build.
-
Type 37634385 in the search bar. Select the highlighted feature and click on the Perform Action button.
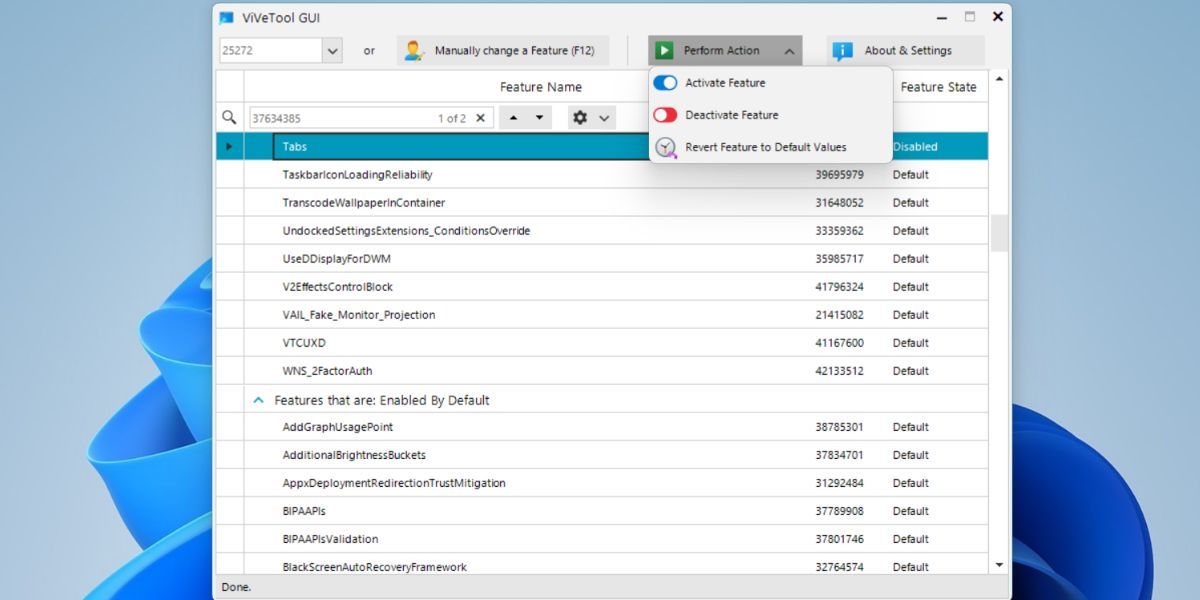
- Select the Deactivate Feature option. Similarly, find the feature ID 36354489 and deactivate it.
- Now, close the ViVeTool GUI and restart your system.
- Open the File Explorer and you won’t see the tabs feature anymore.

Disable Any Windows 11 Feature Using ViVeTool
File Explorer tabs are more useful than you think. But if you use another File Explorer program or can make do without it, ViVeTool is a great utility to disable/enable it. Moreover, it is completely free, and you can even enable other experimental features of Windows 11.