Cloud computing has gained much popularity in the past few years mainly because it eases the burden of maintaining servers on individuals, small businesses, and large enterprises. The vast array of computing services offered in the cloud also make it an attractive proposition.
This guide will explore how to set up and configure a virtual machine (VM) in Azure, a cloud computing service from Microsoft.
Step 1: Logging In to Azure
To start, log in to the Azure portal. If you do not have an Azure account, you can sign up for a free Azure trial.
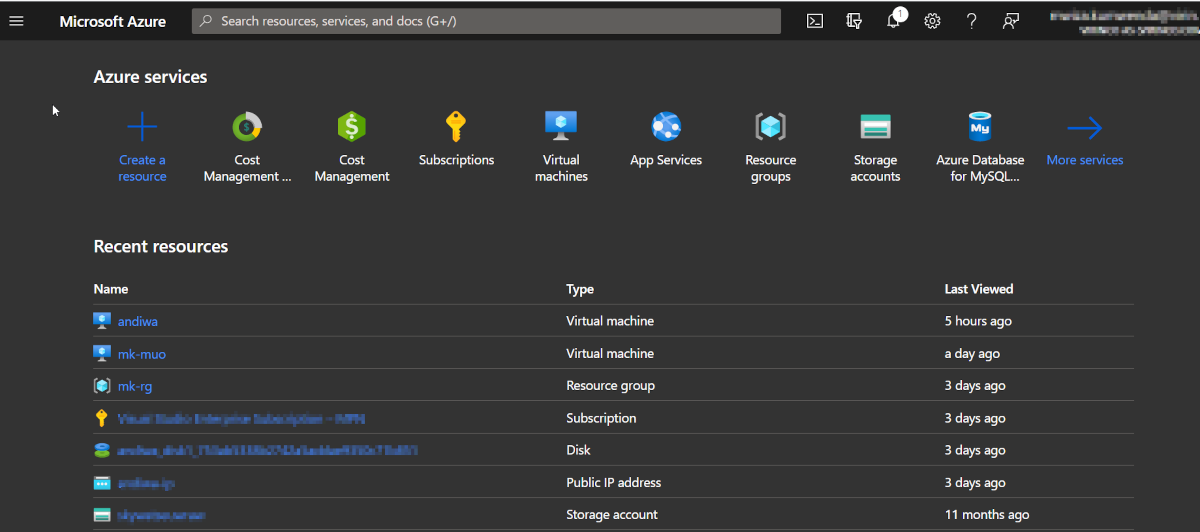
Once logged in to your account, you will see the following screen.
The Azure portal home page shows you an overview of the resources you currently have, a few selected services that you can create, your subscription information, etc.
Step 2: Creating a Virtual Machine
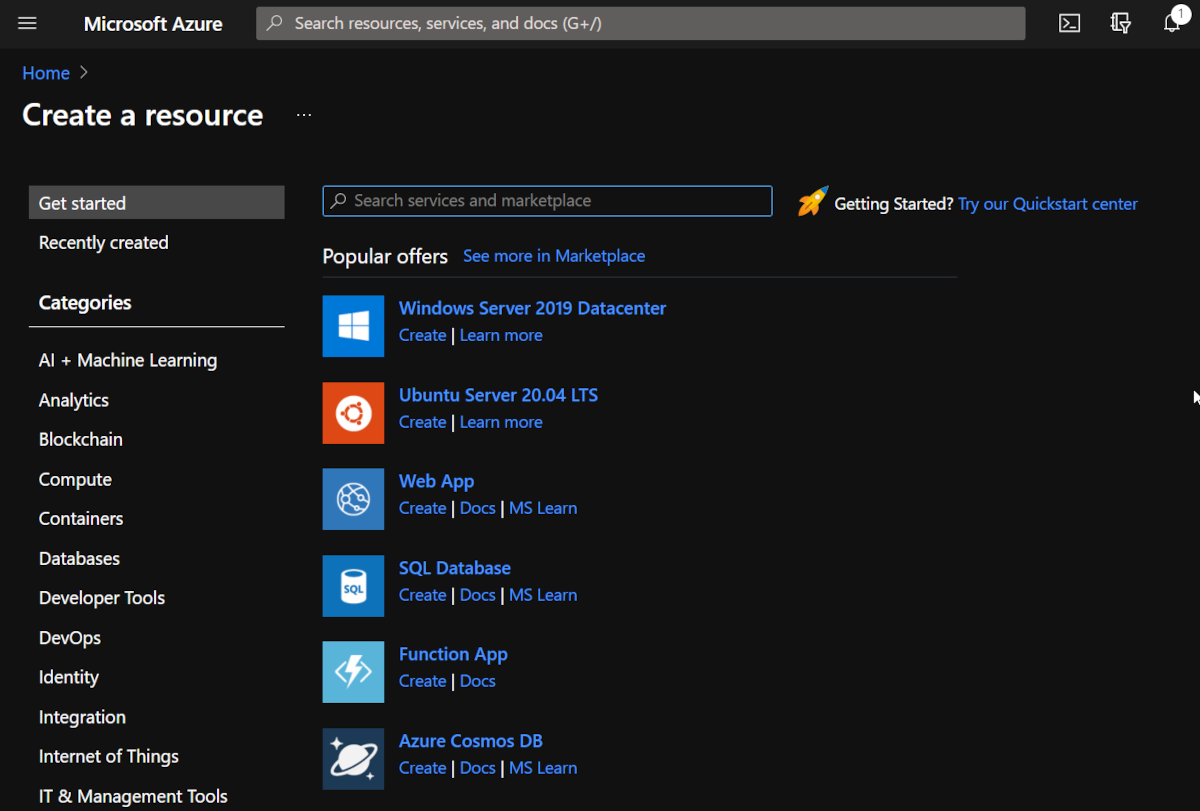
To create a virtual machine, click on the Create a resource button listed under Azure services. Azure will then present you with an overview of the resource categories as shown below.
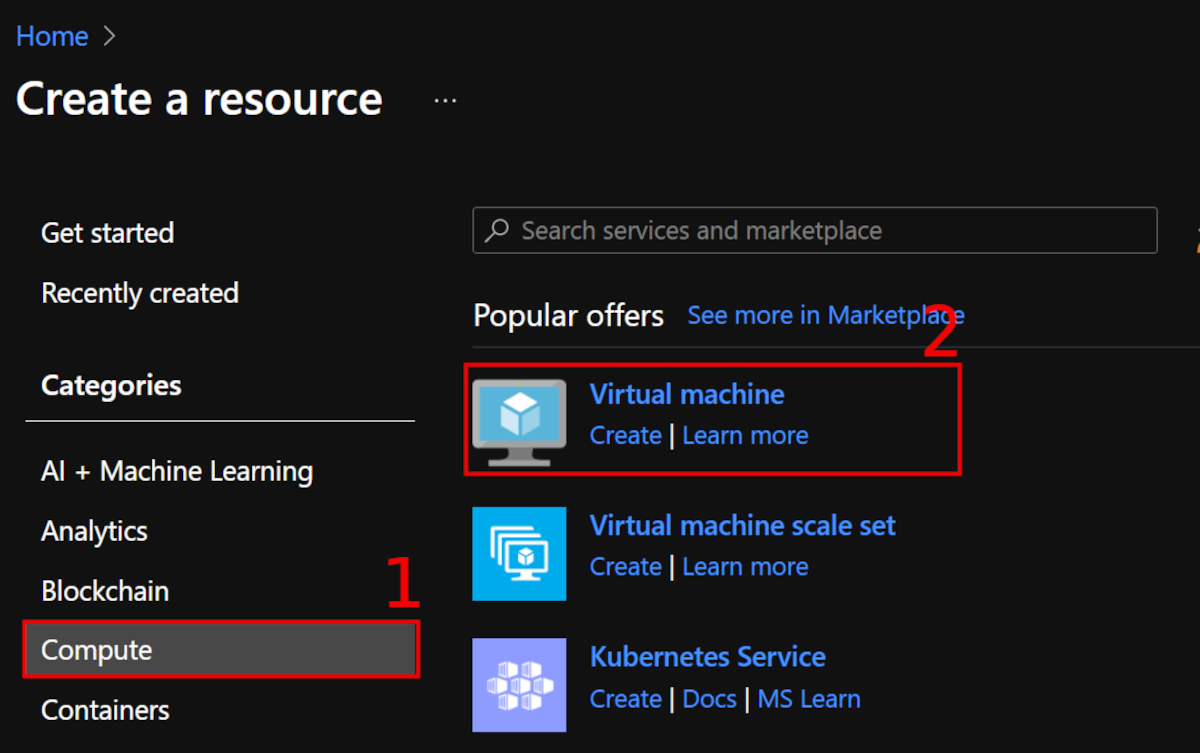
Virtual machines in Azure fall under the Compute category, so go ahead and select the option from the left sidebar. Then, proceed to click the Virtual machine button under the popular offers section.
Step 3: Configuring Your Virtual Machine
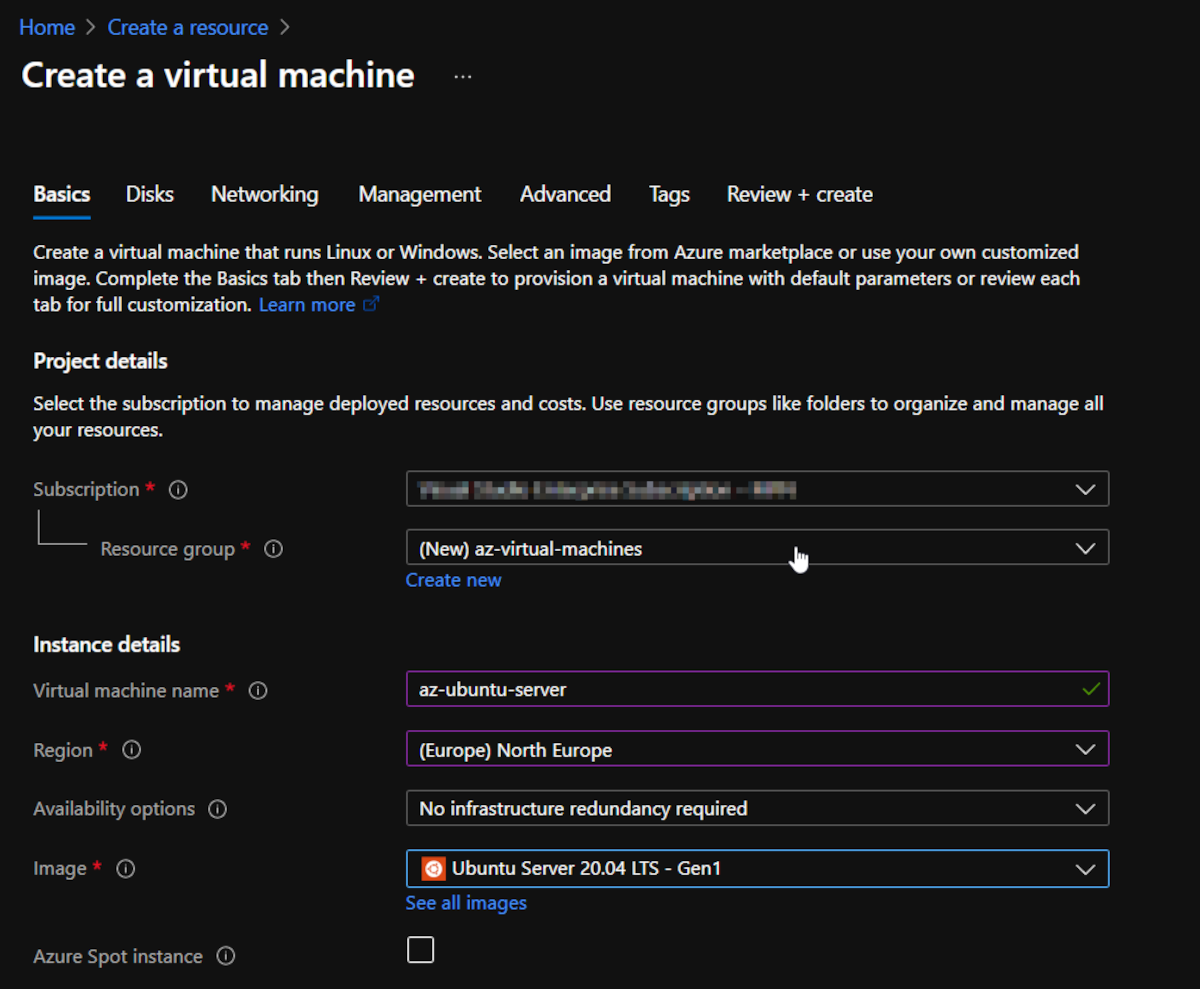
Azure will provide you with a template that you can use to create and configure your VM. The initial virtual machine configuration page will be similar to this:
All required fields are marked with a red star and therefore, you must fill them as follows:
Resource Group
A resource group in Azure is a logical container that holds related resources. Click on the Create new link located below the Resource group field and give your resource a meaningful name of your liking. The name of the resource group in this guide is az-virtual-machines.
Virtual Machine Name
The next step is to give your VM a name. Make sure to choose an appropriate name as this is what Azure will use to uniquely identify your VM instance.
Region
Next is the Region field, which determines the location of the data center that will store your virtual machine. Depending on your needs, your VM should be ideally placed in a region that is either close to you or your clients to avoid latency.
Image
The Image field helps you choose the operating system of choice that you wish to install on your VM. Go ahead and select the Ubuntu Server 20.04 LTS - Gen 1 image. You can choose any other operating system that you want.
Size
The Size field determines how powerful your VM will be. It also has implications on the cost you pay for your VM. For simple tasks, you can select a B1 VM that will cost you on average $10 per month. It has 1GB of RAM, a 32GB SSD, and a single-core CPU.
Also, Azure will calculate the estimated cost of the VM for you, so go ahead with the one that fits your needs. You can also select the See all sizes link under the Size field to see other VM size offerings by Azure.
Administrator Account
In this section, select the Password radio button and supply your username and login password. Remember to use a strong password as this is what you will use to log in remotely to your VM.
Inbound Port Rules
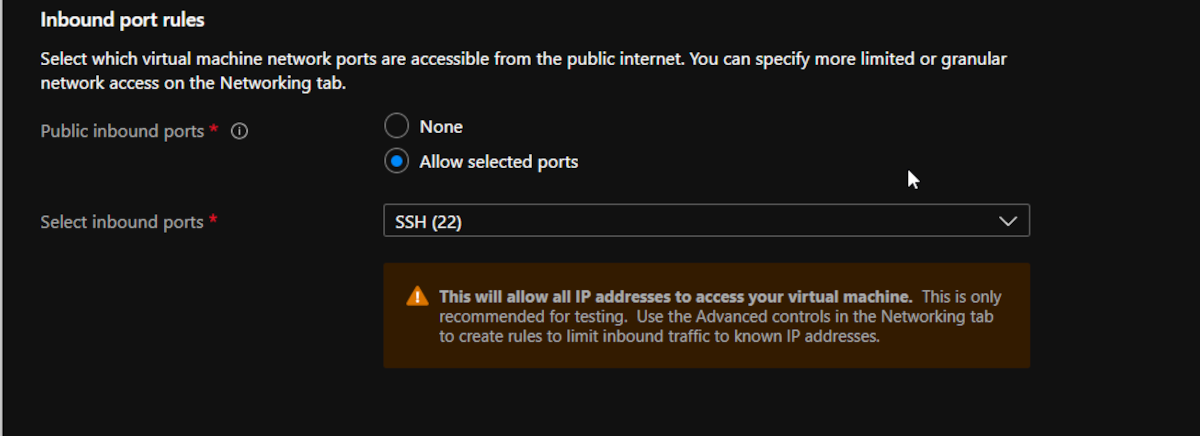
Under the inbound port rules, port 22 is enabled by default, which will allow you to access your server remotely via SSH.
You can further configure inbound port rules later when the VM is up and running.
The most crucial VM configurations are listed on the Basic tab that you're on at the moment. Azure also gives you further configurations in the tabs labeled Disks, Networking, Management, etc. You can proceed with the default options in those tabs for now. Azure also allows you to adjust these configurations later on.
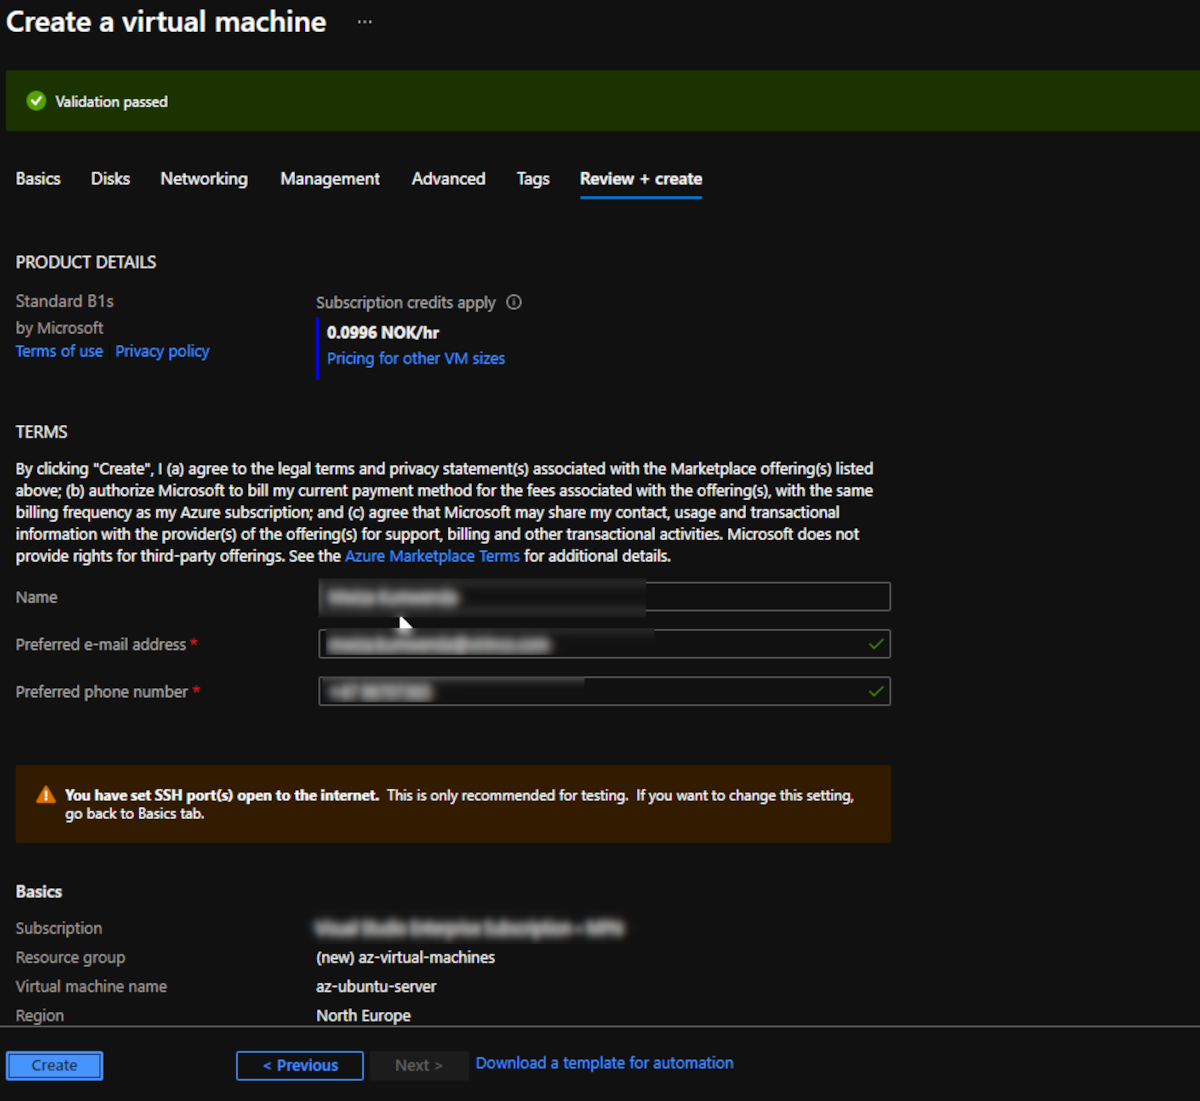
Now that you've filled all the required fields, go ahead and click on the Review + create button located at the bottom of the configuration page.
If everything looks fine, Azure will notify you that the validation has passed. On the other hand, it'll alert you if the validation fails. In addition, Azure will also present you with a summary of the VM that you're creating, including estimated monthly costs.
If you want to change a configuration at this stage, click on the Previous button and make the necessary adjustments.
Azure also provides you with the option to download an automation script, using the Download a template for automation link. You can use the automation script to easily create VM's in the future without having to spend time creating a resource. This is especially handy if you frequently create Azure resources or want to duplicate a virtual machine.
Click on the Create button to commission your virtual machine and Azure will do the rest for you.
Step 4: Accessing Your VM
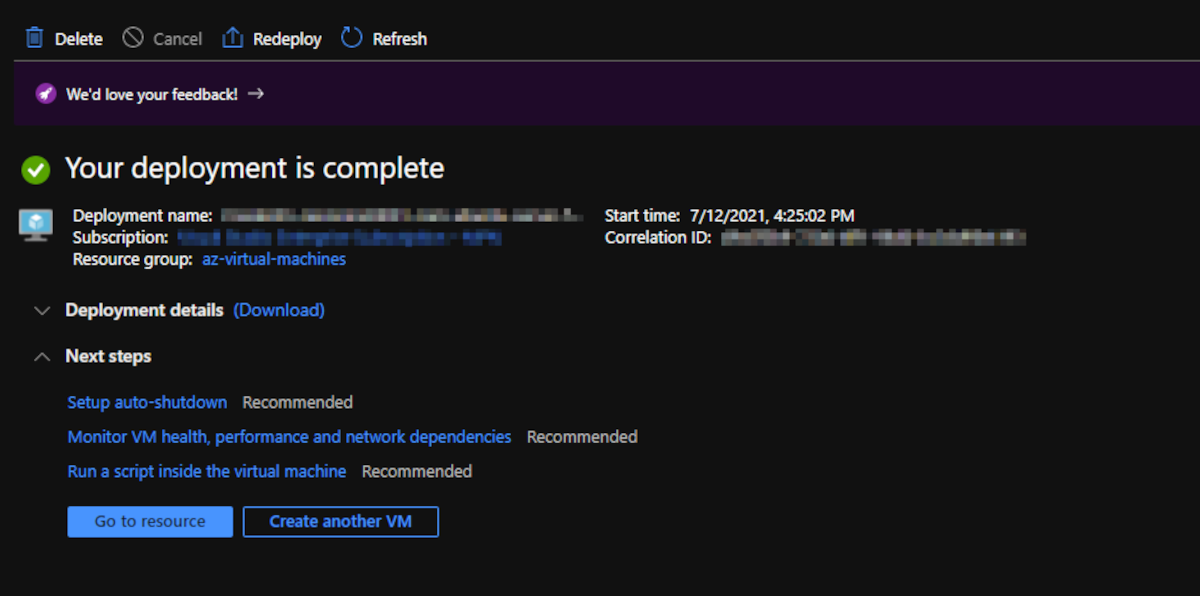
Once the deployment is complete, you will be notified with a screen that looks similar to the one below.
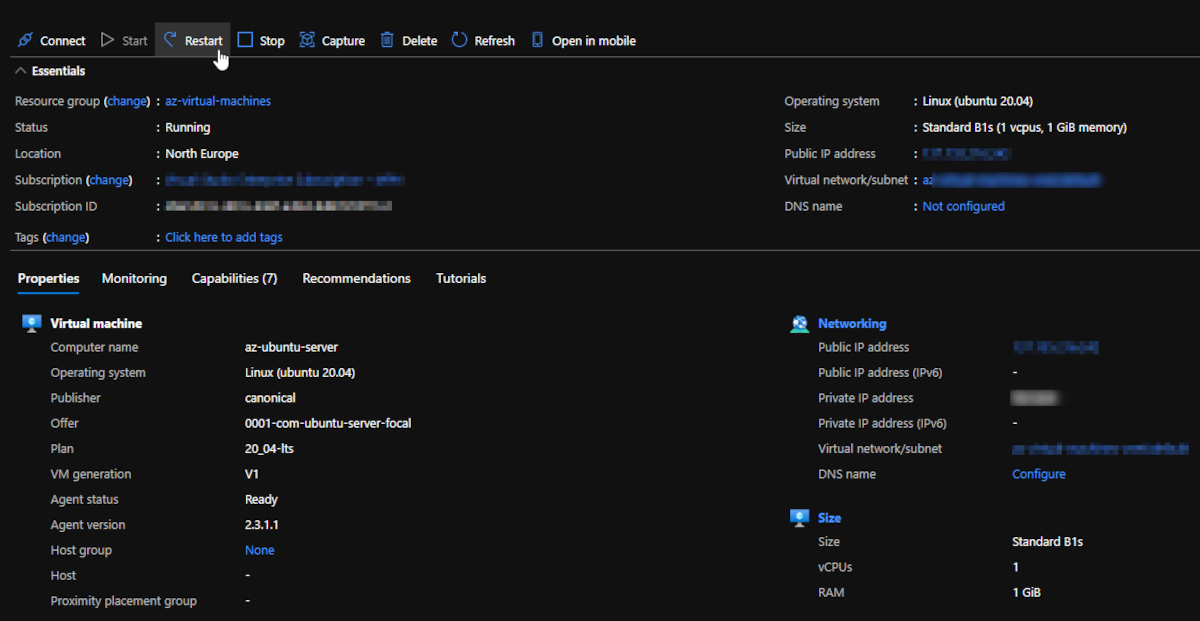
Click on the Go to resource button to see details related to your VM. Azure will present you with an overview screen.
Your public IP address is also listed, and this is what you will use to access your server using SSH or any other remote connection tools such as SCP, SFTP, etc.
On your local PC, fire up the terminal. If you are using Windows, PowerShell is the recommend terminal to use. In the terminal, run the following command, where muo is the name of the username you want to configure on your VM server.
ssh muo@your-public-ip-address
Remember to replace the word your-public-ip-address in the aforementioned command with the public IP address of your server. The system will ask you to enter a password. Type the server password that you set up when configuring your VM.
Once logged in, the system will present you with a command prompt of your Linux server, which you can use to interact with your server.
Boost Your Cloud Computing Knowledge
This guide explores how to create a Linux virtual machine in Azure. The Azure platform has a lot of services that can help you commission IT infrastructure and service in a rapid, secure, and cost-effective manner.
The demand for cloud engineers is on the increase, which means the competition will skyrocket as well. Stand out from the crowd by enhancing your cloud computing skills using online courses.


