
It's fun enhancing your Windows experience with new looks. You would have also used scenic wallpapers or cool themes to liven up your desktop and other system areas.
However, some themes that change the look of your desktop may also change the desktop icons and even the mouse pointer. But what if you prefer the original Windows icons or don't like the theme-oriented icons or mouse pointers?
By tweaking just a few settings, you can keep the default Windows icons while enjoying new themes. Read on to explore how.
The Handy Windows Desktop Icons
Windows has five desktop icons that you can use to access your files, folders, settings, and certain sections of your system easily. These are for This PC or Computer, User's Files, Network, Recycle Bin, and Control Panel.
However, if you've freshly installed Windows 11, you may find only the Recycle Bin icon on your desktop. Yes, other icons are disabled by default keeping in sync with the minimalistic design language of Windows 11.
Or maybe you had set a few desktop icons earlier and mistakenly turned off the option to view them or disabled them in desktop icon settings.
Whatever the case, you can get your desktop icons back through a few easy ways.
If you've recently applied a Windows theme and found that the desktop icons have changed, you can easily restore the default icons on both Windows 11 and Windows 10. Let's see how.
How to Keep Original Desktop Icons While Changing Themes Via Settings
So you've put a desktop theme of a favorite movie or web series as you love the wallpapers that depict its memorable scenes and characters.
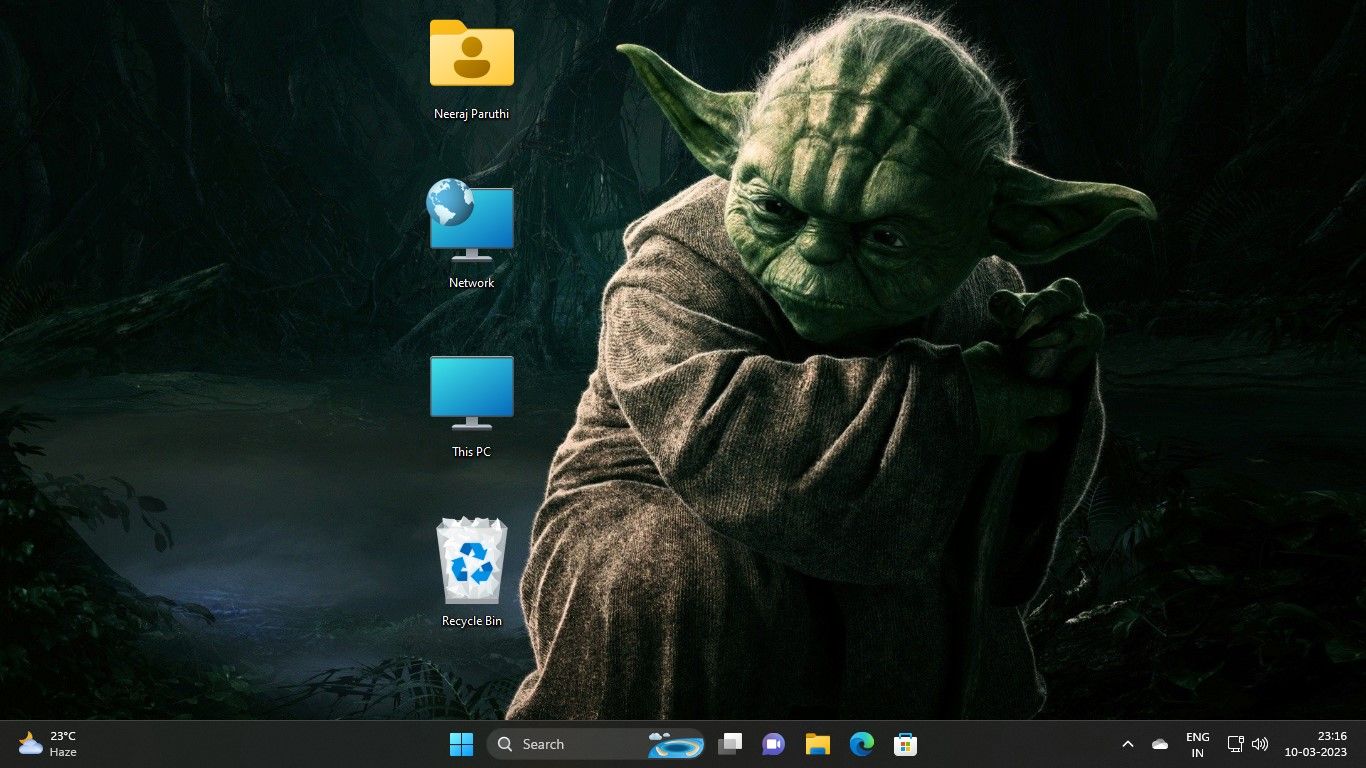
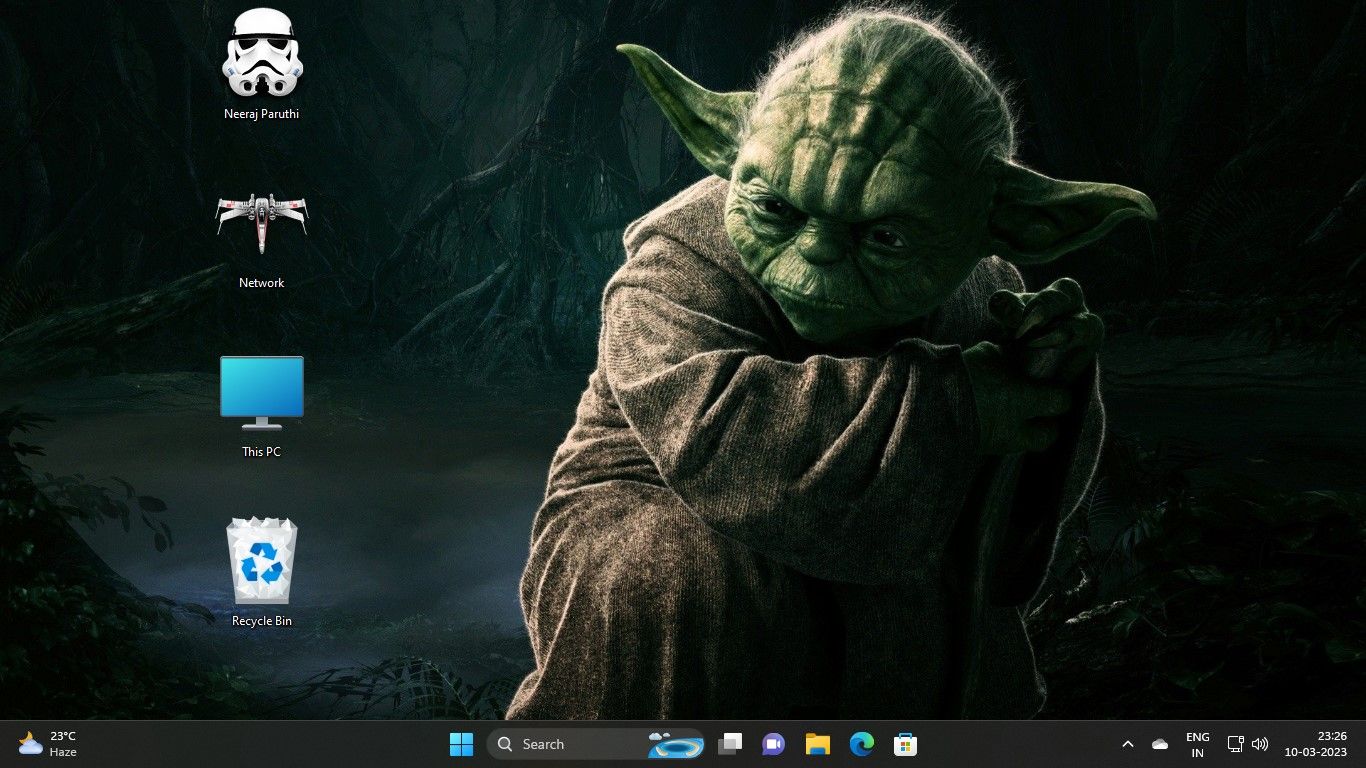
For example, you've added a Star Wars theme, like the one in the screenshot below. Yes, Jedi Master Yoda looks amazing, but you can't see Darth Vader as your computer or This PC icon—as you don't like the Dark Side. And how can the cute R2-D2 be your Recycle Bin?

Or it's just that you prefer the default Windows icons over the icons that your new theme offers.
Well, you can easily prevent the Star Wars theme or any other theme from changing your desktop icons. But make sure you take the following steps before applying a new theme:
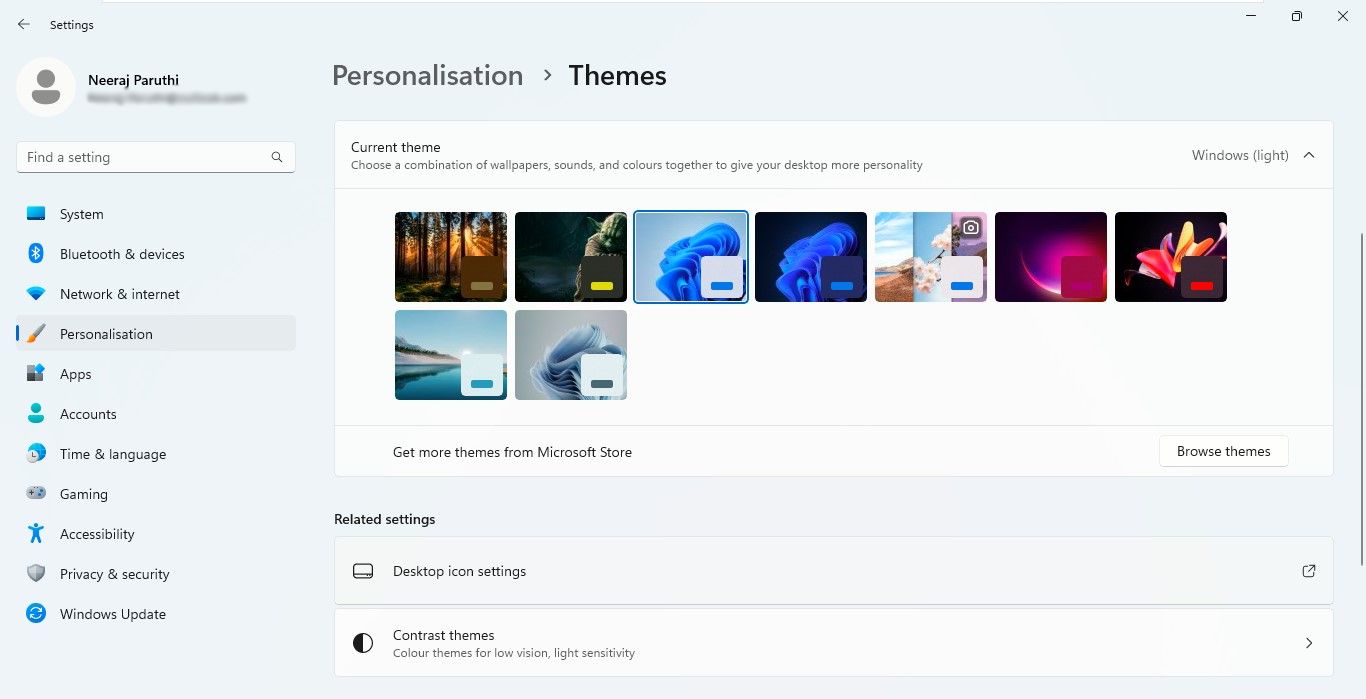
- Right-click your desktop, select Personalize, and then select Themes from the right pane in Personalization settings.
-
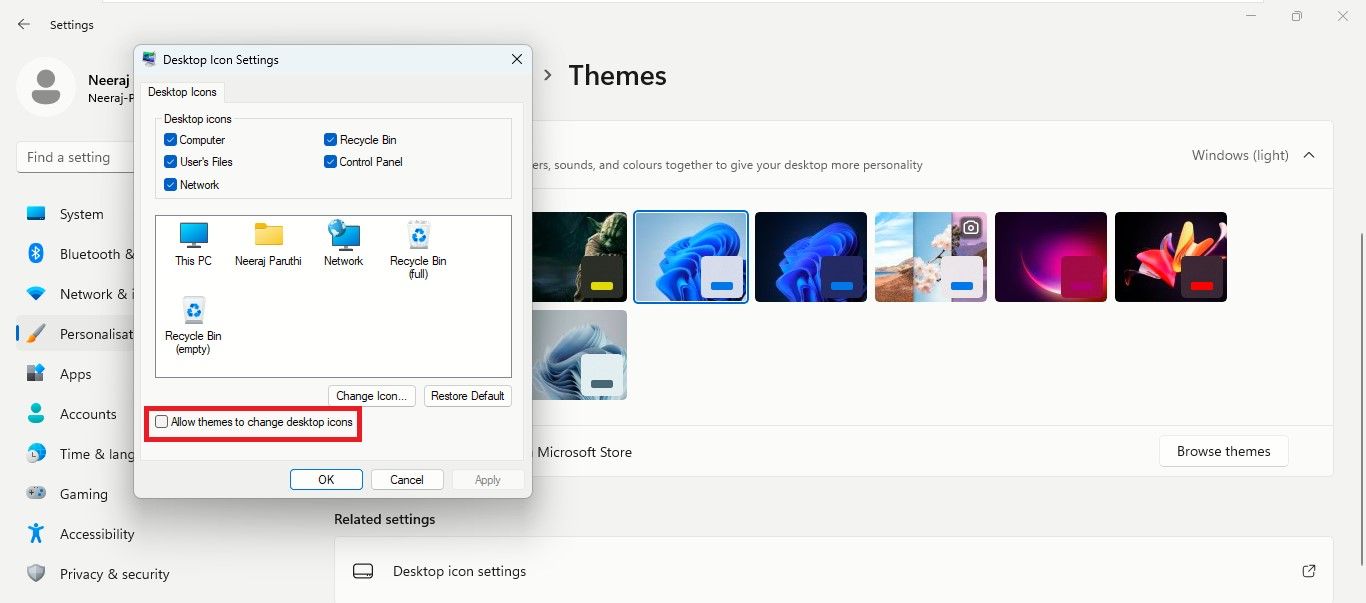
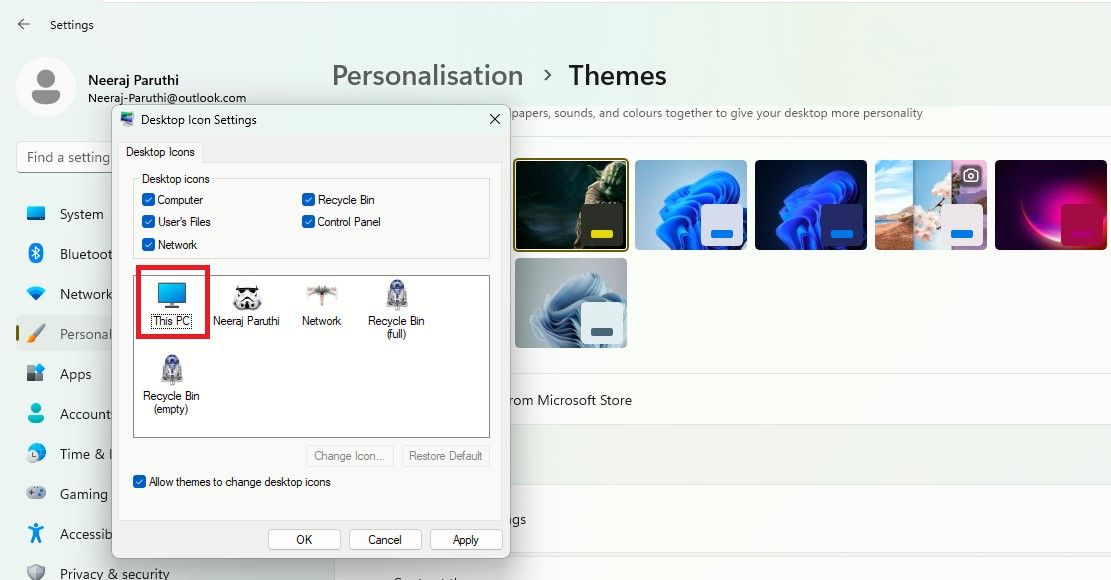
In the Themes settings, under Related settings, click on Desktop icon settings.
-
Then in the Desktop Icon Settings window, untick the box next to Allow themes to change desktop icons.
-
Finally, click on Apply and then OK.
That's it. Now whenever you change a theme, your default desktop icons will remain unchanged.
How to Keep Both Default Desktop Icons and Theme Icons
Supposing you like only two theme desktop icons of a new theme and would like the other desktop icons to be the default ones—you can do that too.
Let's again take the Star Wars theme icons as an example. So you don't like Darth Vader as This PC and R2-D2 as the Recycle Bin. But you'd want the Stormtrooper as the User's Files icon or with your user name. And the X-Wing Starfighter makes for an exciting Network icon.
You can keep the theme icons you like and replace the theme icons you don't like with the default desktop icons. Here's how:
- Right-click on the desktop, and choose Personalize > Themes > Desktop icon settings.
-
In Desktop Icon Settings, select the theme icons you want to change one by one. So first select This PC or Darth Vader, as in the screenshot below. Then click on Restore Default.
You will see the theme icon change back to the default icon in the desktop icon settings.
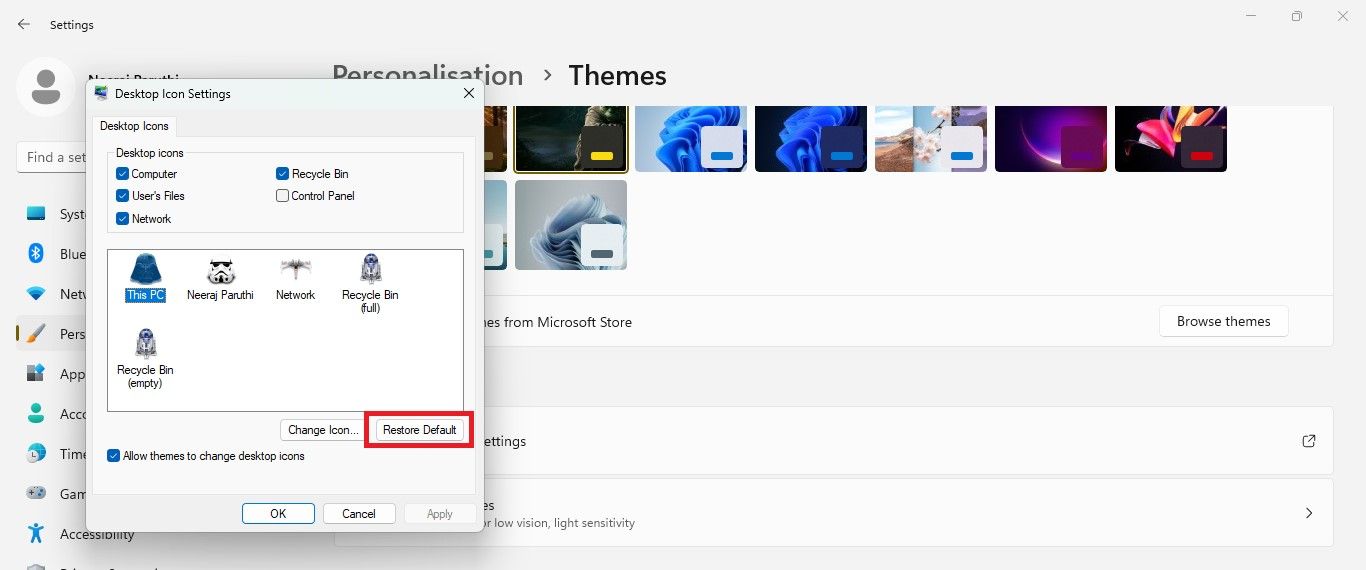
- Now change the Recycle Bin or R2-D2 back to the default icon.
-
Finally, click on Apply and then OK.
Now you can enjoy a personalized Windows experience with all the desktop icons customized to your liking.
How to Retain Original Desktop Icons While Changing Themes Via Registry Editor
You can also use the Registry Editor to ensure that themes do not change the desktop icons. However, tweaking the registry settings needs to be done with caution. So we recommend creating a restore point as a recovery option in case anything goes wrong.
Then follow the few steps explained below:
-
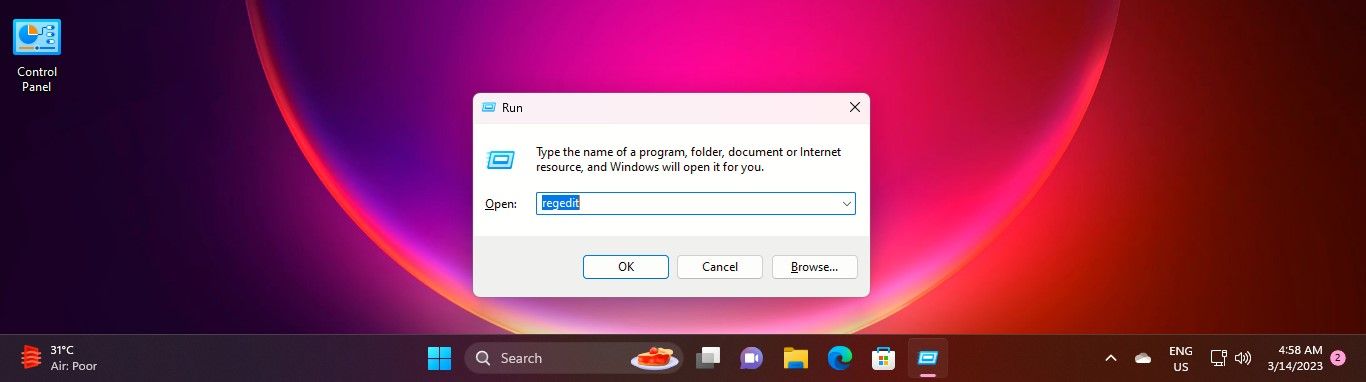
Click the Win + R keys together to open the Run box. Type regedit in the navigation bar and hit enter or use one of the many ways to open the Registry Editor. Then click Yes on the UAC prompt.
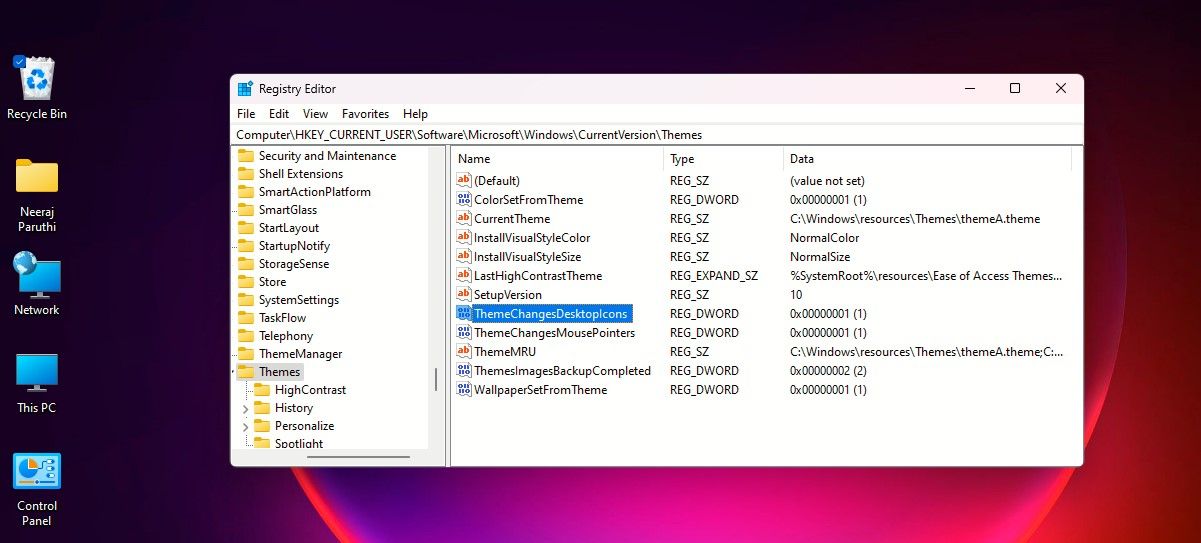
- Now navigate through the registry using the following path to reach Themes: HKEY_CURRENT_USER\Software\Microsoft\Windows\CurrentVersion\Themes
-
On the right pane of Themes, double-click on the DWORD: ThemeChangesDesktopIcons
-
In the EDIT DWord window, change the Value data from 1 to 0. And click on OK.
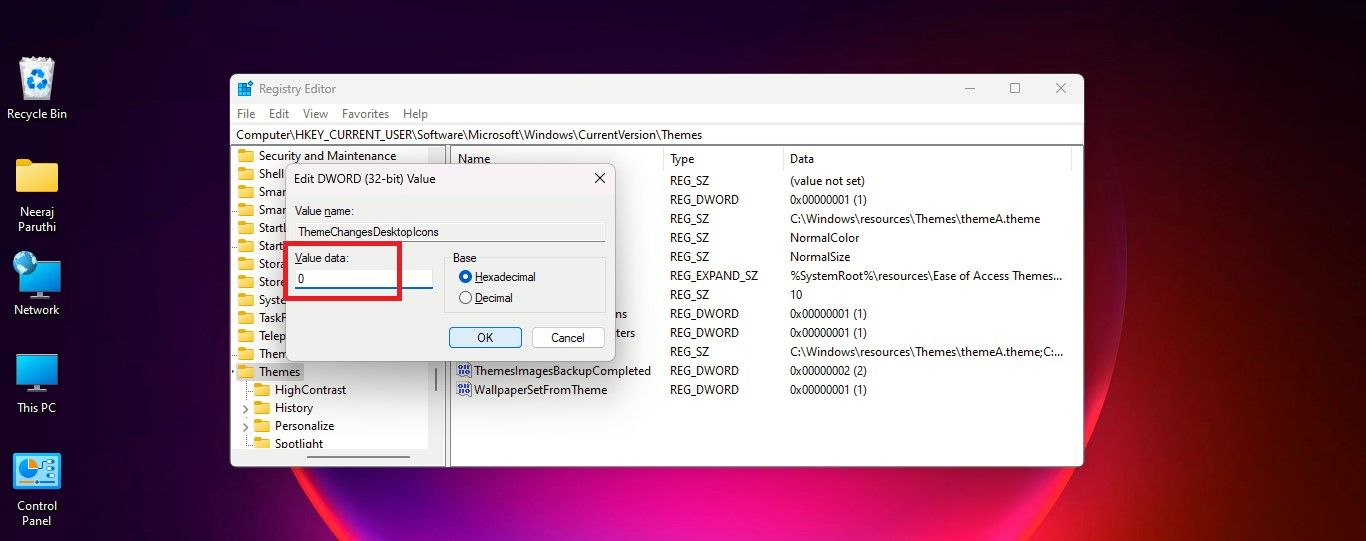
- Close the Registry Editor.


Now, when you change to a new theme, the desktop icons will not change with it.
You can easily reverse this by navigating to the registry key: HKEY_CURRENT_USER\Software\Microsoft\Windows\CurrentVersion\Themes
Then double-click on the DWORD: ThemeChangesDesktopIcons and change the Value Data to 1. With this, the new themes you apply will be able to install new icons instead of the default desktop icons.
How to Retain Original Mouse Pointer While Changing Themes
Some themes also change the mouse pointer to extend the theme effect further in Windows.
The Star Wars theme we have used for this tutorial changes the mouse pointer to a colorful lightsaber. Yes, it looks cool, but is not handy, especially when working on a text document.

But you can easily restore your trusted arrow mouse pointer to work smoothly and efficiently like before.
Though, to get the default mouse pointer back, you will have to edit the registry as there is no option for it in Settings.
But it's easy. Navigate to the same Themes key as you did before for the tweaking desktop icons key: HKEY_CURRENT_USER\Software\Microsoft\Windows\CurrentVersion\Themes.
On the right pane, just under DWORD: ThemeChangesDesktopIcons you'll find DWORD: ThemeChangesMousePointers.

Double-click on it and change its Value data to 0. Then click on OK.

The Windows default arrow pointer will appear in the new themes you apply on your PC.
Enjoy Windows With Your Preferred Desktop Icons
There are hundreds of spectacular themes available that you could use to dress up your desktop. Now you can do that while keeping your preferred desktop icons and enjoy Windows your way.
You'll find many amazing themes on the Microsoft Store too. So why not check out how to install and use them with ease?