Whether you’re new to DaVinci Resolve or have been using the software for a while, chances are that you spend most of your editing time on the Edit page. This could be because the rest of DaVinci Resolve’s pages can be daunting.
However, the Cut page gives all video creators the tools for a more efficient experience—even better, it works seamlessly with the familiar Edit page. Here are six impressive features on the Cut page to consider using the next time you create on DaVinci Resolve.
1. Look at Your Video Clips in Strip View
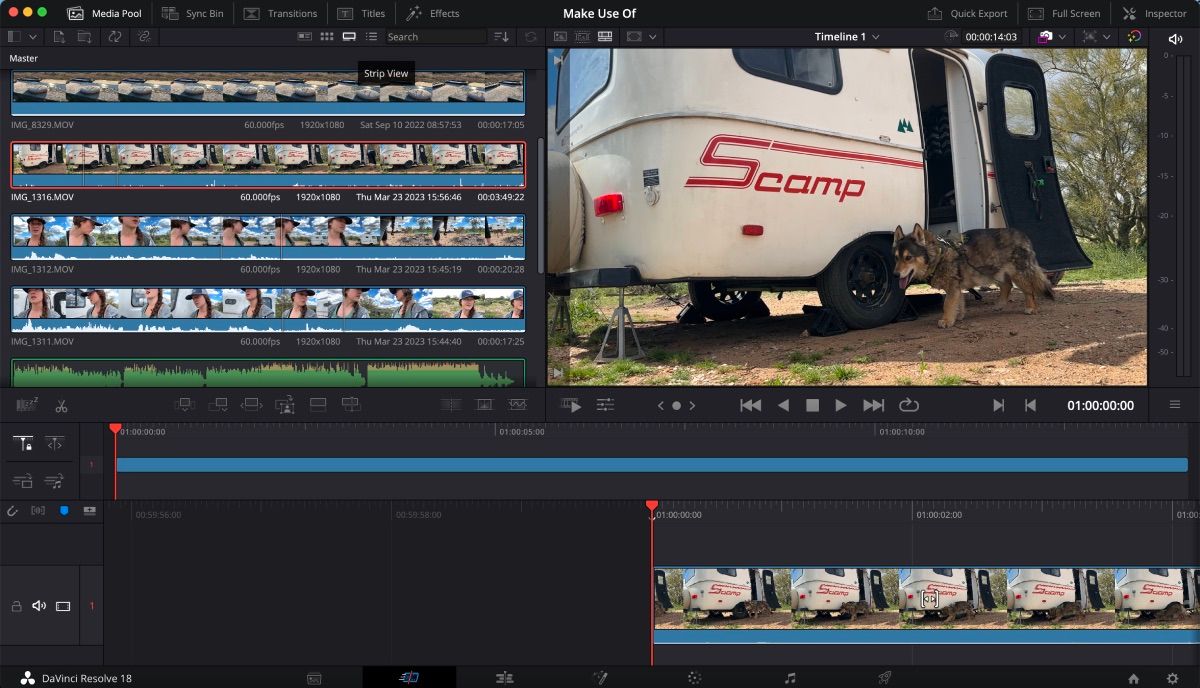
Strip View is only found on the Cut page, and the icon is on the second bar from the top. Once you click on the Strip View icon, you’ll see all your video clips laid out like filmstrips. The most significant advantage to this type of view is that you can see the full length of your clips along with the audio.
If you have a specific section you want to use from your clips, it is easy to drag it out and place it on your timeline. Additionally, it will transfer along to the Edit page. Isn’t that handy?
Place your marker where the clip will start and press I on the keyboard to mark in. Then place your marker where the clip will end and press O to mark out. After this, drag and drop your clip on the timeline below.
2. Use Quick Tools to Maximize Efficiency
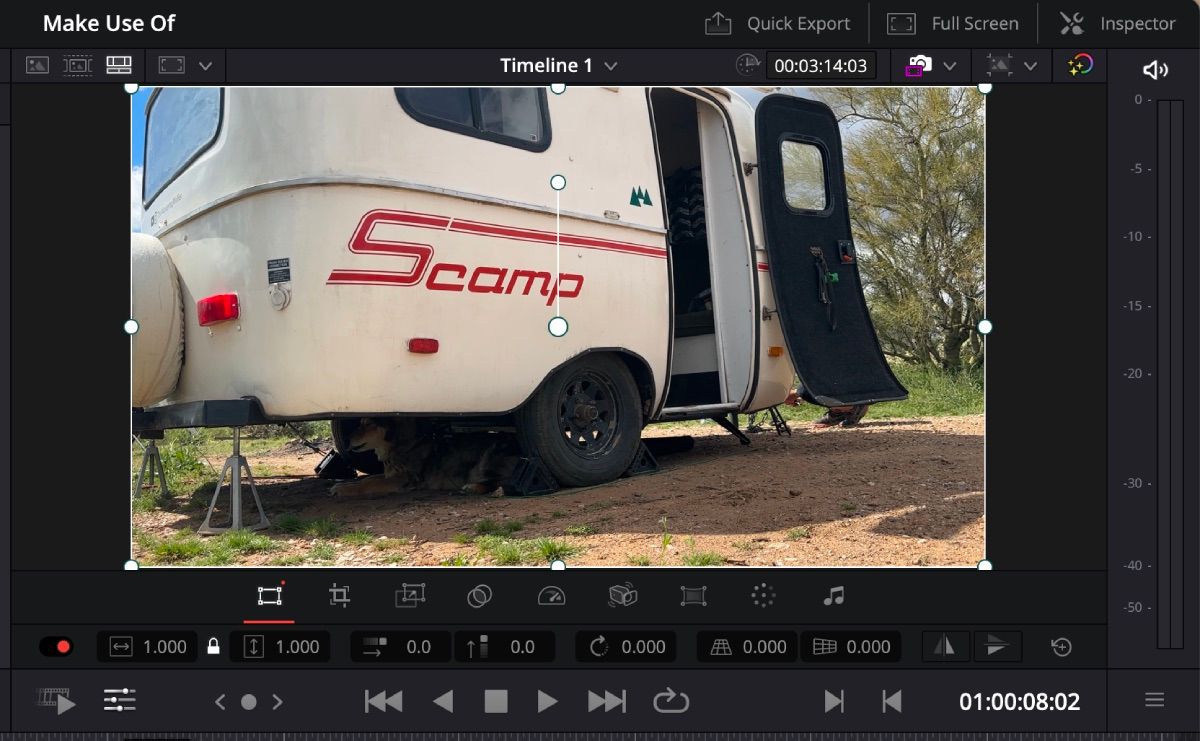
Within the Cut page, you can access the same Inspector tab as you can on the Edit page. However, what if there was an easier way to use the Inspector tools without digging through the tab? Luckily, DaVinci Resolve makes that possible.
Under the preview page, click on the Tools icon—it looks like three lines with a ball on each line. After you give that a click, several icons will appear above it. Some of these are shortcuts to the more popular tools in the Inspector tab, like Transform, Crop, Dynamic Zoom, and Stabilization.
What if the Quick Tools icon isn’t working? This is because there is no video clip in the timeline for Quick Tools to work with.
3. Improve Your Video With Auto Color
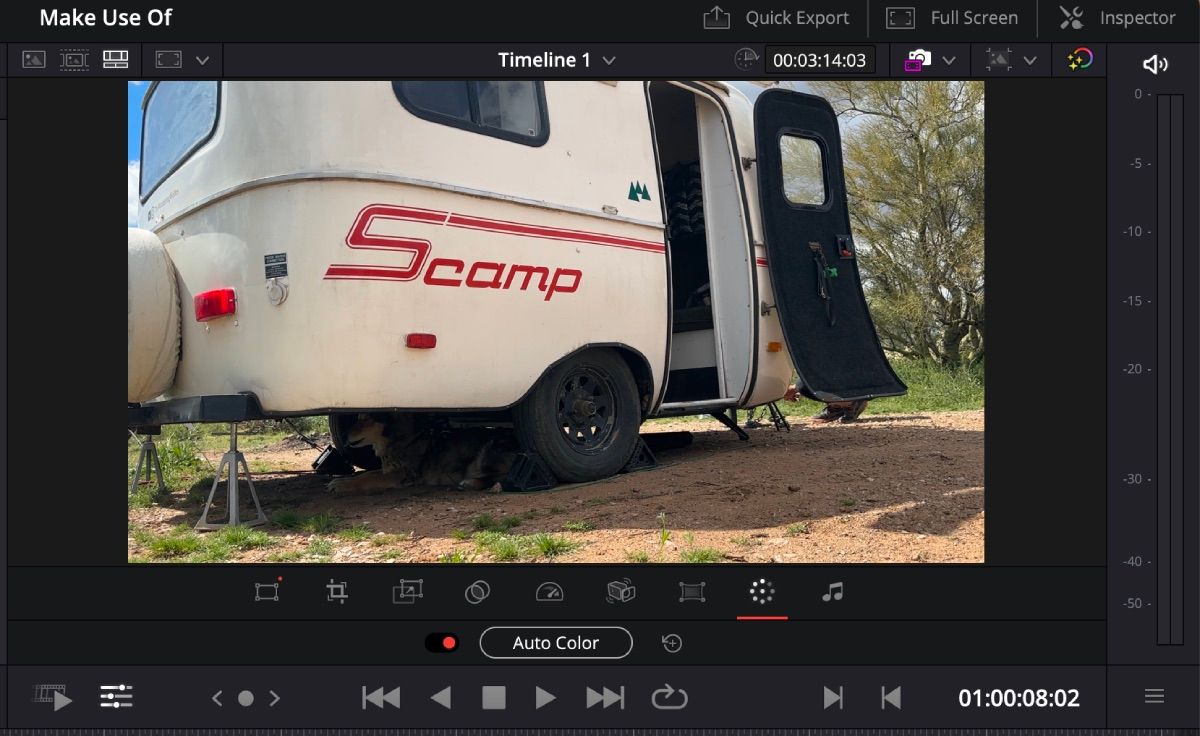
If you look closely at your Quick Tools bar, you’ll notice a familiar circular icon—this is Auto Color for the Cut page. Usually, creators go to the Color page to use color correction tools, but sometimes, it’s nice to have a quick solution.
By clicking on the Auto Color button, you’ll notice a slight difference in appearance. The toggle to the left of the Auto Color button will let you turn Auto Color on and off to see the difference.
The aim of Auto Color is to help with contrast and bring the image to life. If you’re looking for more color correction tools in DaVinci Resolve, you’ll want to head over to the Color page.
You can also use Auto Color on the Edit page by pressing Command + Shift + C on Mac or Alt + Shift + C on Windows. However, keep in mind you cannot undo it without going to the Color page and resetting the node.
4. Timeline Resolution Options Made Easy
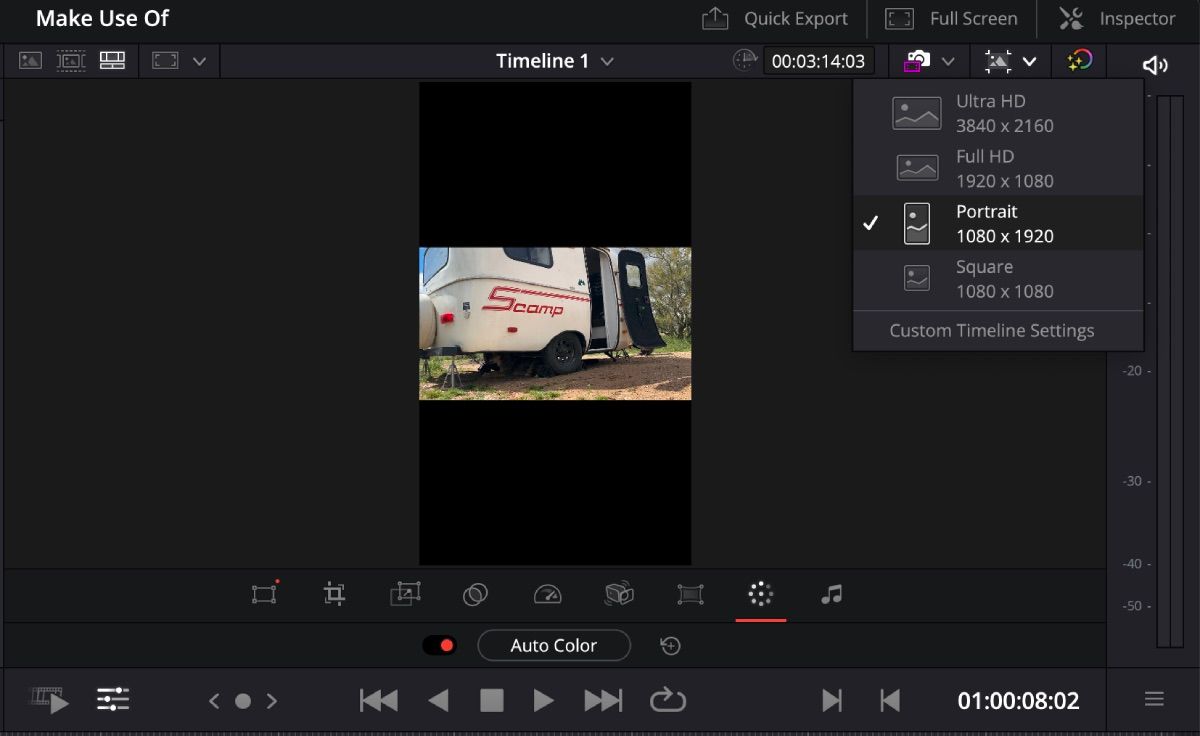
DaVinci Resolve’s Cut page has made it effortless to choose between multiple timeline resolutions. In the second bar from the top, all the way to the right, there is a little picture with an arrow pointing down next to it. Select the icon and choose the resolution.
This is especially useful when you are creating videos that require a different resolution outside the standard Ultra HD and Full HD. Multiple social media platforms use portrait mode and square mode, so they would definitely come in handy for experienced and aspiring content creators.
5. View Your Video as It Would Appear Once Uploaded
Say you forgot you wanted your video in portrait, but you’ve already finished it in Full HD. Sure, you could go into the Timeline Resolution on the Cut page and change the resolution. However, you would have to go back and zoom in on each clip—these adjustments can become tedious.
Instead, you could export the video as Full HD and still upload it to Instagram, TikTok, or YouTube Shorts. Although, how would you know what it’s going to look like once uploaded? DaVinci Resolve’s Cut page has a solution.
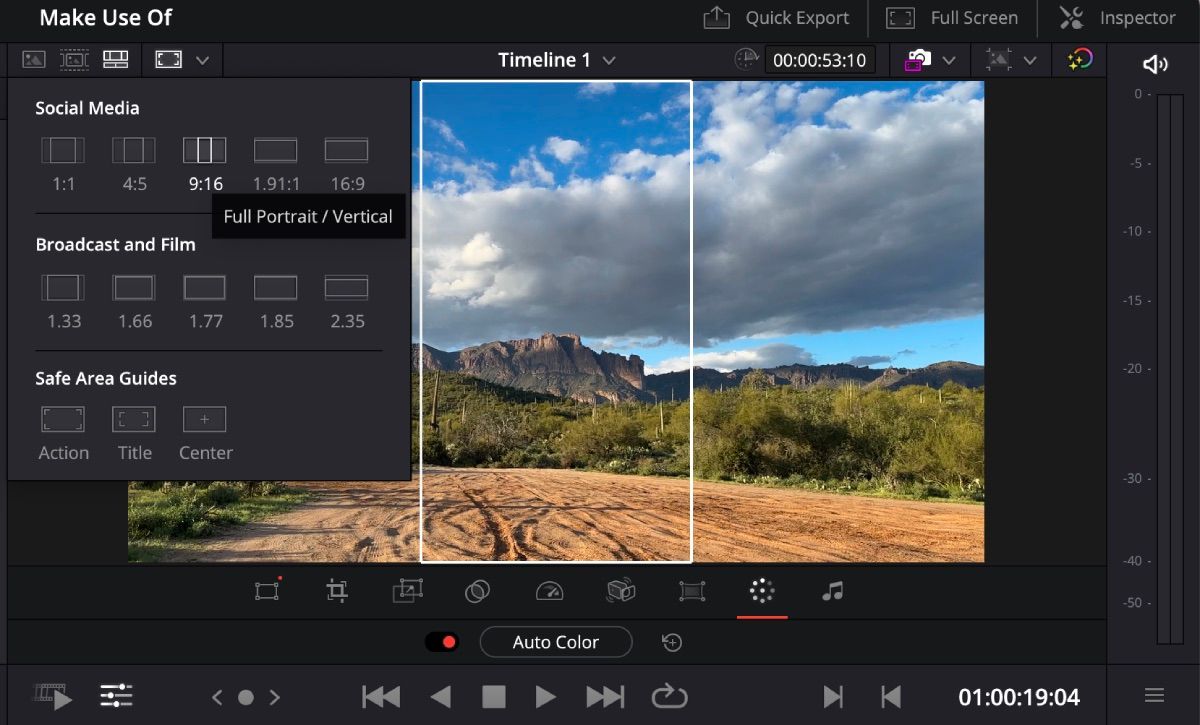
In the middle of the second bar from the top, there is a square icon with an arrow next to it. Give that a click and a menu will pop down showing all the different viewing options. These options won't permanently change the aspect ratio of your video—it's simply for viewing.
Make sure to select the correct aspect ratio for your video based on where you will be uploading it. For the scenario above, simply click the 9:16 aspect ratio and a portrait box will appear over your video. This will allow you to see how your video will appear once uploaded to social media.
6. Use Source Tape to View All Your Clips at Once
Source Tape is a resourceful Cut page feature if you’re editing your clips in the order they appear in the Media Pool. If they aren’t in the order you want them, you can always rename the clips to place them in the correct sequence.
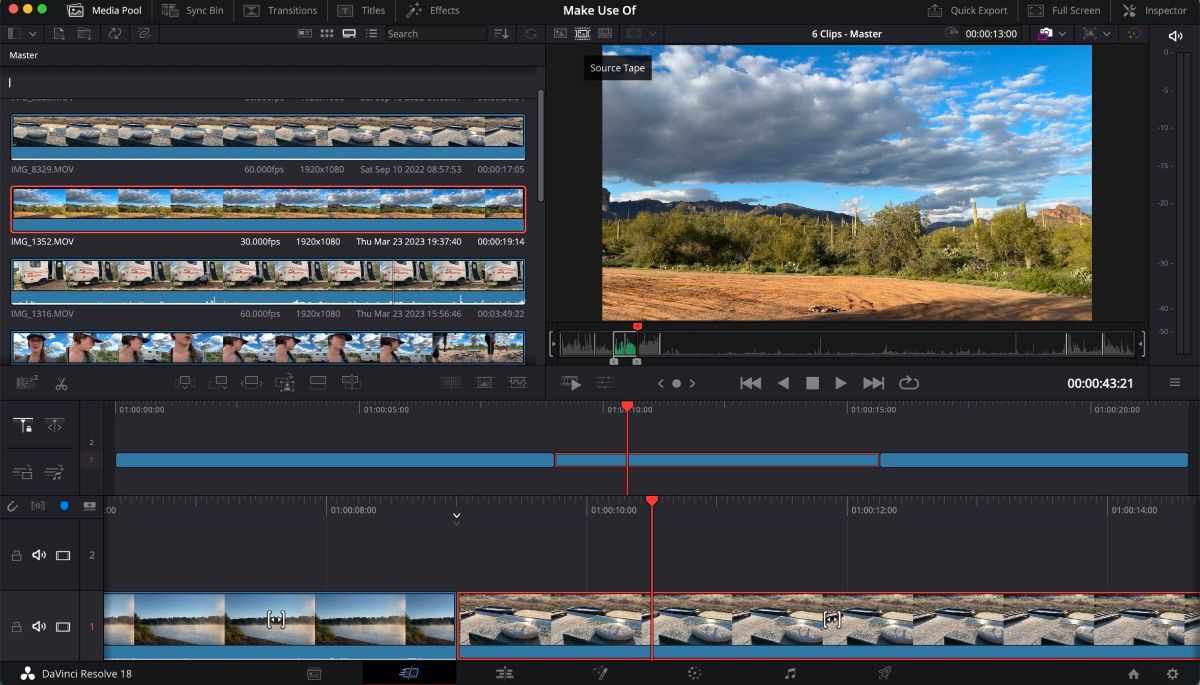
In the middle of the second bar from the top, there is an icon that looks like a filmstrip—this is the Source Tape icon. Click it and all of your video clips will go into the preview window as one big timeline. From here, you can scan through all your clips and start cutting.
To cut, place your marker over where you want your selected clips to start and end, and press I and O to mark in and out. Then drag your cut clip starting at the preview menu down to the far right of your main timeline to add to your video.
If you drop your clips anywhere on the timeline, they will become out of order. Make sure to drop them to the far right to keep your original sequence.
Use the Cut Page Next Time You Open DaVinci Resolve
Though the Cut page can seem a bit overwhelming for any video editor, there are many features within that will help your creative process. Furthermore, taking advantage of the tools located on all of DaVinci Resolve’s pages will make the video editing experience quicker and smoother.

