DaVinci Resolve deals with all things related to video production, but you might not know that it can record audio too. With a built-in audio editing workstation called Fairlight, you don't need to use another piece of software just for audio. A feature like this is perfect for recording simple audio or voiceovers.
Understanding how audio inputs and outputs work can be confusing at first. But it only takes a few turns recording audio before the process becomes intuitive. Here's how to record audio in DaVinci Resolve 18.
What You Need to Record Audio in DaVinci Resolve
You can record audio in DaVinci Resolve 18 whether you use the free or studio version, you just need the following:
- A microphone
- DaVinci Resolve 18
If you don't already own a microphone, it's well worth exploring the options out there. Capturing good-quality audio is essential to producing professional videos.
Thanks to the popularity of podcasting, there are plenty of affordable desktop mics available on the market. For the simplest solution, requiring no extra audio gear, look for a USB microphone.
1. Create an Audio Track

Start by navigating to the audio editing workstation by selecting the Fairlight tab from the bottom of the screen. If your project already has audio then you will be able to see the audio track displayed in the timeline.
To create a new audio track for recording, right-click in an empty spot in the track header area and select Add Track > Mono. If you have a stereo microphone, select Stereo instead.
This is a good time to change the name of the audio track. Simply double-click on the title of the audio track and enter a new name.
2. Select an Audio Input
Next, set up your microphone and make sure that it is connected to your computer. Once that is done, look for the audio Mixer panel in DaVinci Resolve. By default, it should be on the right-hand side of your screen.
In the mixer, there is a channel strip for each audio track in your session. The information is laid out vertically and starts with the number of the track at the top, i.e., A1, A2, Bus1.

To use the microphone that you connected earlier, you will need to add a mic Input to the audio track you created in Step 1.
Find the track number in the Mixer (e.g. A2), then click on the input slot that says "No Input" and select Input from the menu.

The Patch Input/Output window will then appear, and you will see audio input options listed under Source on the left-hand side, and a list of audio tracks on the right under Destination.
Look for the name of your microphone under Source and make sure that it is selected. In this example, we selected the Built-in Microphone from our computer. Make sure to press the Patch button, then close the window.
3. Arm the Track for Recording

Before hitting the record button, you first need to arm the track for recording. You can do this by pressing the R button on the track header. Doing this will also let you check if your microphone is working.
If everything is connected correctly then you will see the gain meter light up green when you make a sound. This signal is also displayed in the mixer with more precise markings from 0 dB to -50 dB.
See our tips for troubleshooting at the end of the article if your microphone doesn't appear to be working at this stage.
4. Record Your Audio

With the microphone set up and working, it's time to hit record. Move the red playhead to where you want to start the recording, then press the Record button in the playback controls. To stop the recording, press the spacebar on your keyboard.
Check out our handy tips for achieving studio-quality vocals at home to help improve your recordings. It's not uncommon for professionals to work from home nowadays, so a few extra DIY hacks to improve your home studio will also help.
5. Record Multiple Takes Using Layers

DaVinci Resolve makes it easy to re-do parts if you need to record them again. This is especially useful when you are recording a voiceover and need to fix a mistake, or if you simply want to change the way you delivered a line.
Instead of overwriting the existing audio file, it will create a new audio file and place it on top of the original. You can view these layers by going to View > Show Audio Track Layers.
The audio track that is at the very top of the stack is the one you will hear during playback. If you want to use a different clip, click and drag the clip to the top of the stack.
6. Export Your Video

Once you are finished recording your audio or voiceover you can export your video as usual by moving over to the Deliver tab at the bottom of the screen.
To the left of the screen are the export settings. Here you can click on the Audio button to change the audio export settings. Make sure that the Export Audio checkbox is ticked and adjust the codec and bit depth to suit your needs.
Troubleshooting
Not being able to hear anything from your microphone is a problem that crops up time and time again, whether you are new to audio production or a professional.
The best way to troubleshoot the problem is to follow the signal from where it begins to where it should end, testing it at various points.
Here is a checklist you can work through to isolate the problem:
- Check that your microphone is correctly connected to your computer.
-
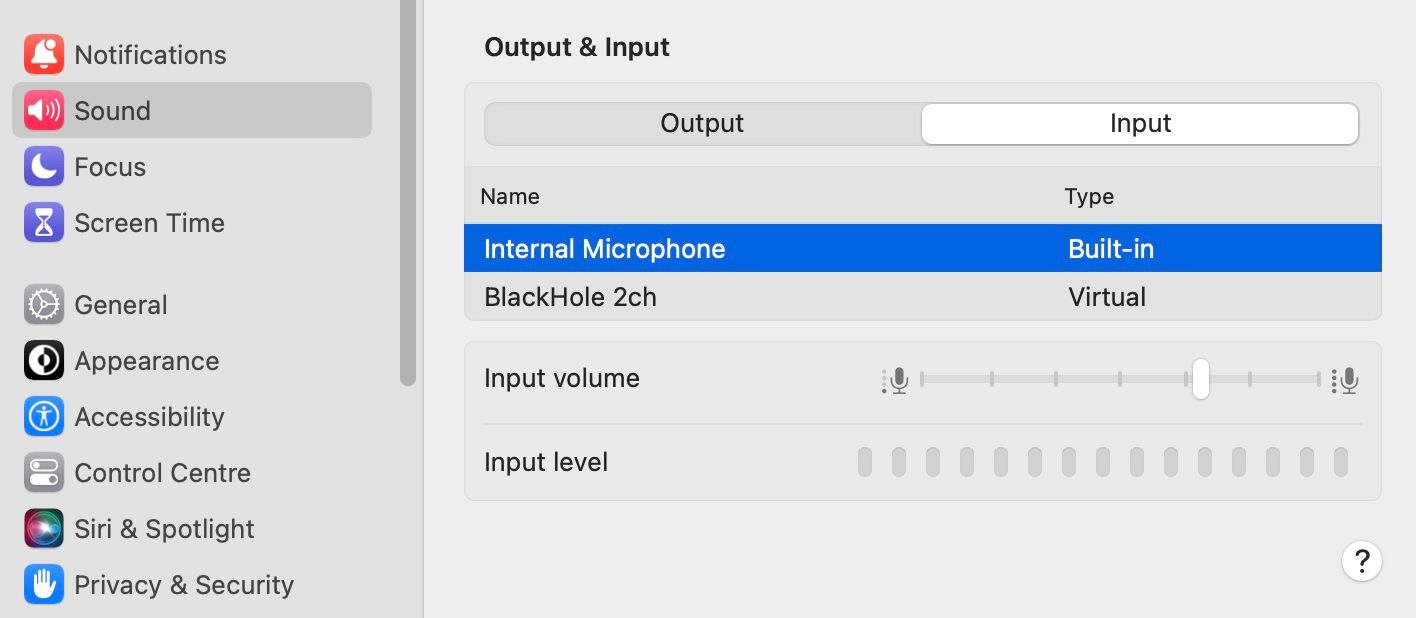
Open the Sound settings on your computer and look for Input and Output. Check that the name of your microphone appears under Input and make sure that it is selected.
- Check that the track is not muted in DaVinci Resolve.
- Check to see if your microphone appears in the Patch Input/Output window (see Step 2). Additionally, make sure that Source is set to Audio Inputs and Destination is set to Track Input. If done correctly, the microphone will appear in the Input slot for the selected track in the mixer panel.
- Arm the track before recording by pressing the R button in the header of the track. This must always be on if you want to hear the microphone input.
-
Make sure that you have the input monitoring option selected. From the navigation menu, select Fairlight > Input Monitor Style > Input.


There are lots of mistakes that beginners make when using DaVinci Resolve, but with a bit of patience, you can easily troubleshoot the problem.
A Simple Way to Record Audio in DaVinci Resolve
Adding audio in DaVinci Resolve 18 is a useful skill to have. And with just a microphone and some handy troubleshooting tips, you can learn how to record audio directly into your session.
Whether you are an aspiring filmmaker or a YouTube creator, knowing how to add audio to your DaVinci Resolve project will help you streamline your production. You can use it to add temp tracks while you're still drafting your video. Or you can use it to add the final audio or voiceover track once your video is finished.