The last thing you want is to review your footage and discover it is shaky. This can be frustrating, especially if you need the footage for the video you're creating. You may wonder if it’s even possible to salvage it.
DaVinci Resolve has the solution. It programmed Stabilization into three separate pages of the software, giving you the option to add the feature at any point of your editing process.
Stabilization Features to Understand
There are three different Stabilization modes located on three pages of DaVinci Resolve's tab layout. Beyond that, there are several other features that work with the different modes to help give you the best result for a stable video.
Stabilization Modes
Perspective Mode: This mode works well if you’ve shot your footage using a wide angle, and there is perspective distortion. It uses perspective, pan, tilt, zoom, and rotation analysis to help stabilize the footage while maintaining its perspective distortion.
Similarity Mode: This mode keeps the aspect ratio and scale of the original video, and it also uses pan, tilt, zoom, and rotation analysis. This is the more popular mode video editors use.
Translation Mode: This mode works well for videos that have been shot with a handheld camera with only a little bit of movement. Because it uses pan and tilt analysis, it will only adjust the video on the X and Y axis—it won’t change the size of the subject within the frame.
Other Stabilization Features to Know
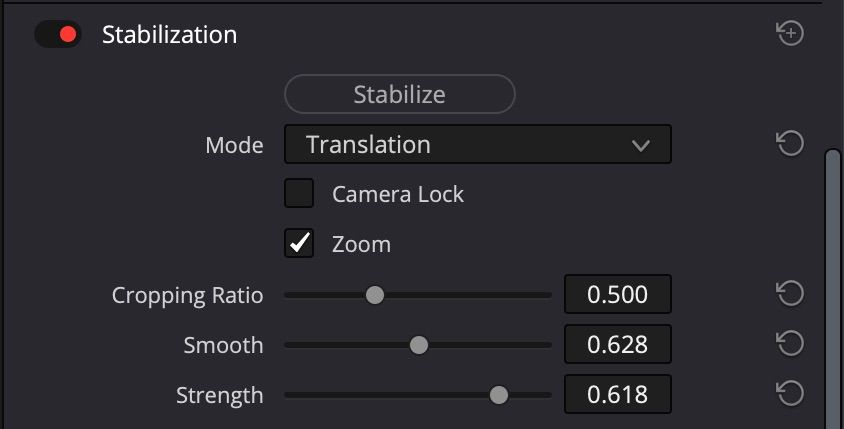
Stabilize Button: You select this button every time you want to stabilize a clip. Make sure to click it if you switch modes or make changes to the other features below.
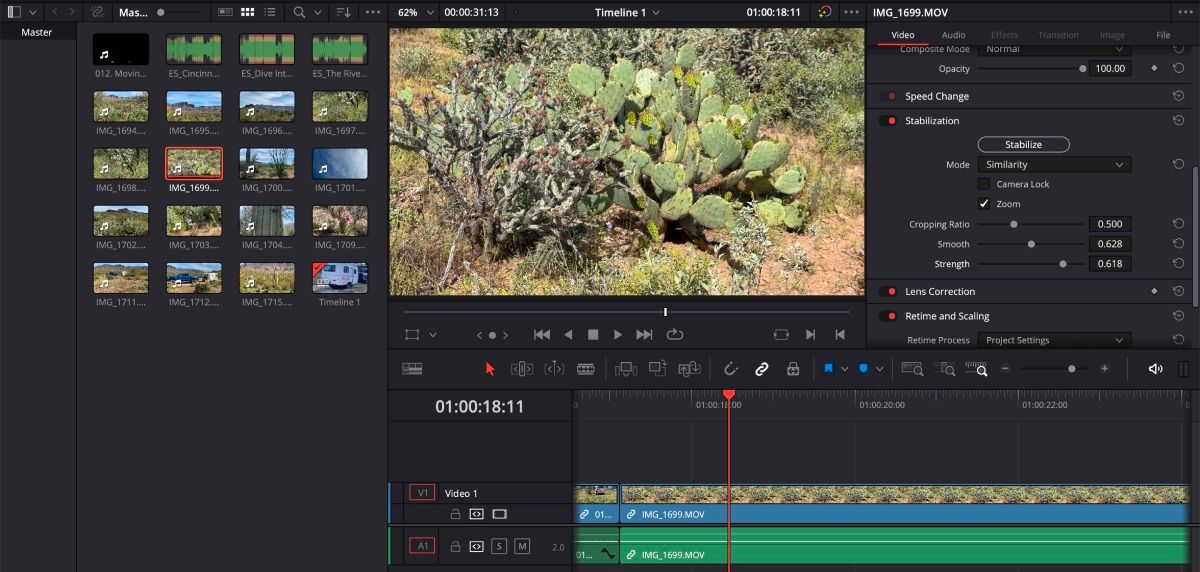
Stabilization Toggle: This toggle is located within the Stabilization tab on the Cut and Edit page. It allows you to turn Stabilization on and off to see the results.
Camera Lock: This feature will disable Cropping Ratio and Smooth. Instead, it focuses on removing all camera motion as if the camera was locked in one spot.
Zoom: When Stabilization is processed, many times there will be blank edges. Select the box next to Zoom to ensure the video resizes and the black border is eliminated. Keep in mind, the lower the Cropping Ratio is set, the more DaVinci Resolve will have to zoom in to remove the blank edges.
Cropping Ratio: This feature is important because it tells DaVinci Resolve how aggressively to stabilize the footage. If you have the Cropping Ratio set to 1.0, the footage will not stabilize. The lower the ratio, the more blanking and zooming will appear in your clip if Zoom was selected.
Smooth: As the name suggests, this feature allows you to smooth out the Stabilization effect. The lower the value, the more of the original camera motion is going to show. The higher the value, the more aggressively the Smooth feature will perform.
Strength: This feature controls the intensity of Stabilization. Setting Strength at 1 will apply the maximum amount of Stabilization—however, this can also make the footage look a bit tight. Sometimes, it’s good to allow for a little bit of natural movement, so a number between 1 and 0 is good.
If you have the setting at 0, Stabilization is disabled altogether. There is also the option of inverting Stabilization, which would require you to set Strength between -1 and 0.
How to Stabilize Your Footage on the Edit Page
The Edit page is where many video editors spend a lot of their time working. You may find that adding Stabilization here can work well for you too.
To add Stabilization on the Edit page:
- Select the clip in the timeline you want to stabilize and open the Inspector.
- Make sure the Stabilization toggle is on to allow for changes.
- Select the mode you want to use and adjust the other options as you see fit.
- Click the Stabilize button.
- Watch the clip and make sure it has stabilized to your liking.
- If not, apply a different mode or adjust the Cropping Ratio, Smooth, and Strength options.
Remember to click the Stabilize button every time you make a change.
How to Stabilize Your Footage on the Cut Page
There is the option of stabilizing a clip on the Cut page. If you select the clip, you can open the Inspector and follow the exact instructions as above. Editors can also use Stabilization through the Quick Tools feature—which is just one of the ways to take advantage of the Cut page in Resolve.
To add Stabilization on the Cut page:
- Select the clip in the timeline you want to stabilize.
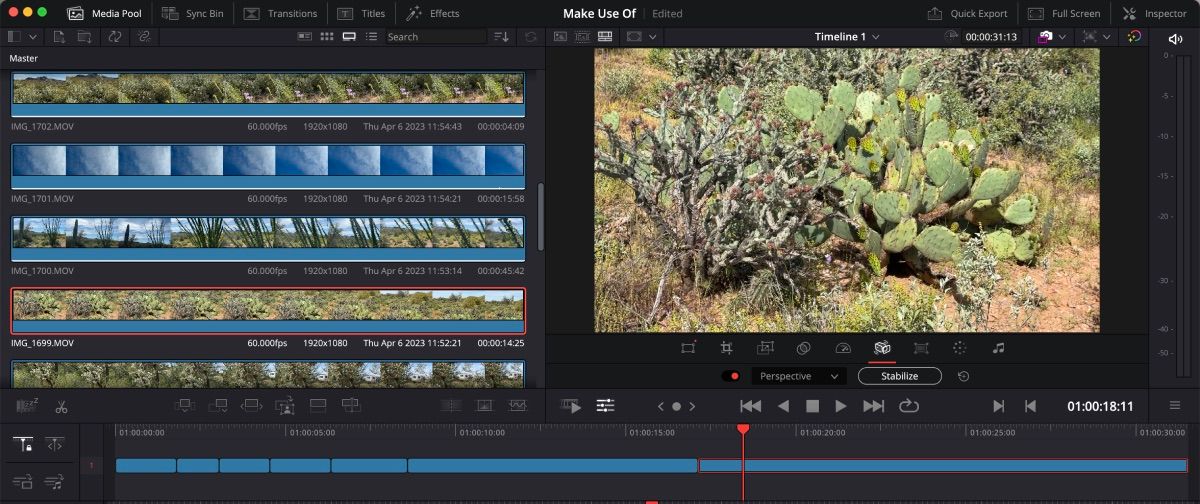
- Under the preview page, click the Tool icon—it looks like three lines with a ball on each line.
- Click on the Stabilize icon—it looks like a shaking camera.
- Select the mode you want to use.
- Click the Stabilize button.
The Quick Tools shortcut only offers mode stabilization. If you want to alter the other Stabilization features, you will need to open the Inspector.
How to Stabilize Your Footage on the Color Page
The Color page is for more than just using DaVinci Resolve's color correction tools. You can find Stabilization on this page as well, though it is a bit trickier to find. It is hidden within the Tracker feature.
To add Stabilization on the Color page:
- On the Edit page, make sure the red tracker is over the clip you want to stabilize. Simply clicking the clip won't bring it to the Color page.
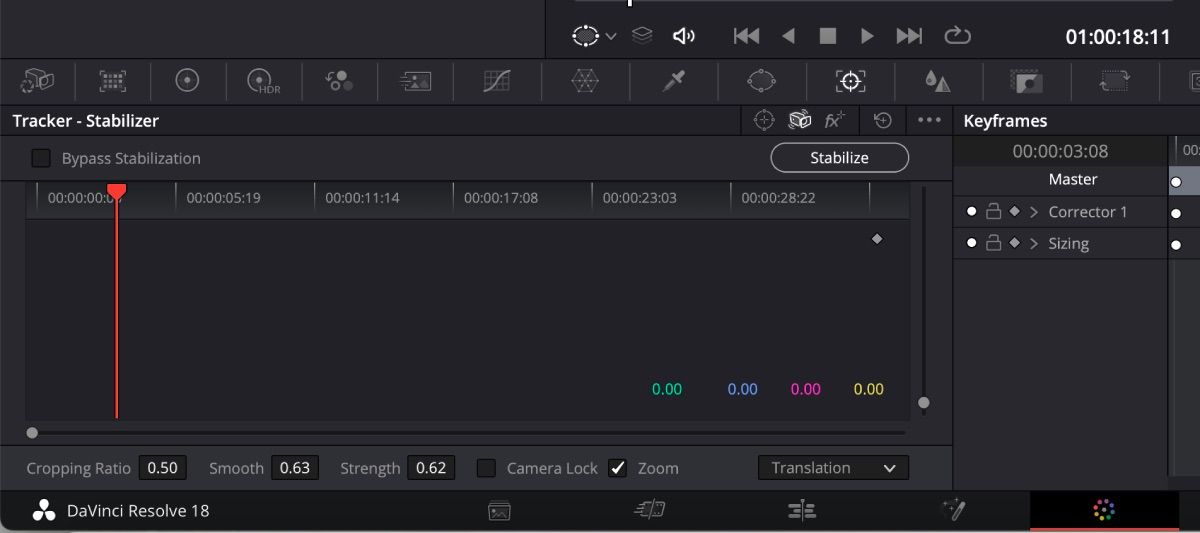
- On the Color page, click the Tracker icon—it will look like a little target with a box around it.
- Within Tracker, next to the Window icon, click on the Stabilization icon.
- Select the mode and adjust the other stabilization options if needed.
- Click the Stabilize button.
To turn Stabilization on and off to see the results on the Color page, simply mark the box next to Bypass Stabilization.
Smooth Out Your Shaky Footage in DaVinci Resolve
Preferably, video editors would rather work with footage that doesn’t require too much correcting—though, DaVinci Resolve does make it easy if it has to be done. No matter which page you use to stabilize your footage, play around with each of the Stabilization modes to see what looks best. You’ll have your video ready for public viewing in no time!


