The Start menu has been an integral part of Windows since 1995. Of course, Windows 8 was one notable exception. However, removing the Start menu from that platform turned out to be a disastrous mistake for Microsoft.
Now you’ll have to get to grips with a somewhat different Start menu in Windows 11 after upgrading to the new desktop platform. Although that menu has changed, you can still customize it in numerous ways via Settings and add app shortcuts to it. Read on to find out how you can customize the Start menu in Microsoft’s latest desktop OS.
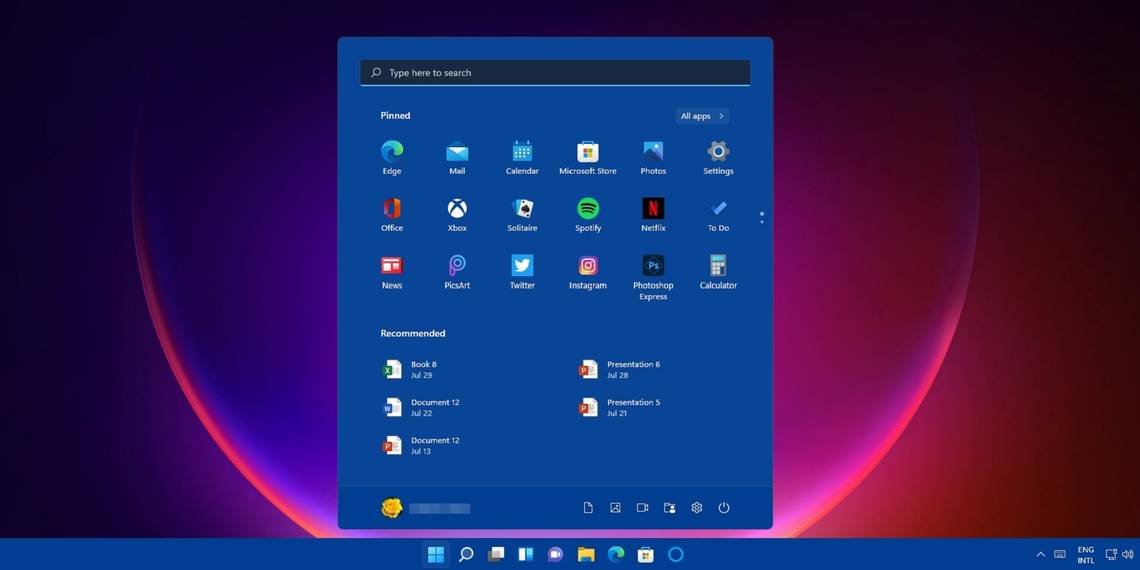
The New Windows 11 Start Menu
The big difference between Windows 11’s Start menu and its predecessor is that it doesn’t have any tiles. Gone are those snazzy animated live tile shortcuts that lit up Windows 10’s menu. Whether that’s a change for the better is debatable.
However, Windows 11’s Start menu does display recent file items, which is a feature the previous menu lacked. So, you can select files you’ve recently opened in software applications from the menu to re-open them when needed. That’s a friendly accessibility feature many users will appreciate.
The other notable difference is that Windows 11’s Start menu incorporates a search box. You can enter keywords there to search from the menu. Therefore, the search box is more closely integrated with the new menu.
1. How to Pin App Shortcuts to the Start Menu

You can pin app shortcuts for your most essential software to the Start menu. To do so, follow the steps below.
- Click the Start taskbar button to open the menu.
- Press the All apps button.
- Right-click an app and select the Pin to Start option.

Then you’ll see the shortcut on the Start menu’s pinned app section. To remove a pinned app, right-click it and select Unpin from Start.
2. Add Library Folder Shortcuts to the Start Menu
Alas, you can’t pin folder desktop shortcuts to the Start menu in Windows 11. However, you can still add library folder shortcuts to that menu, such as your user account’s Videos, Documents, Pictures, Downloads, and Music subfolders, among others.
This is how you can add folder shortcuts to the menu via Settings.
- First, open the Start menu.
- Click the pinned Settings app shortcut.
-
Then select the Personalization tab.
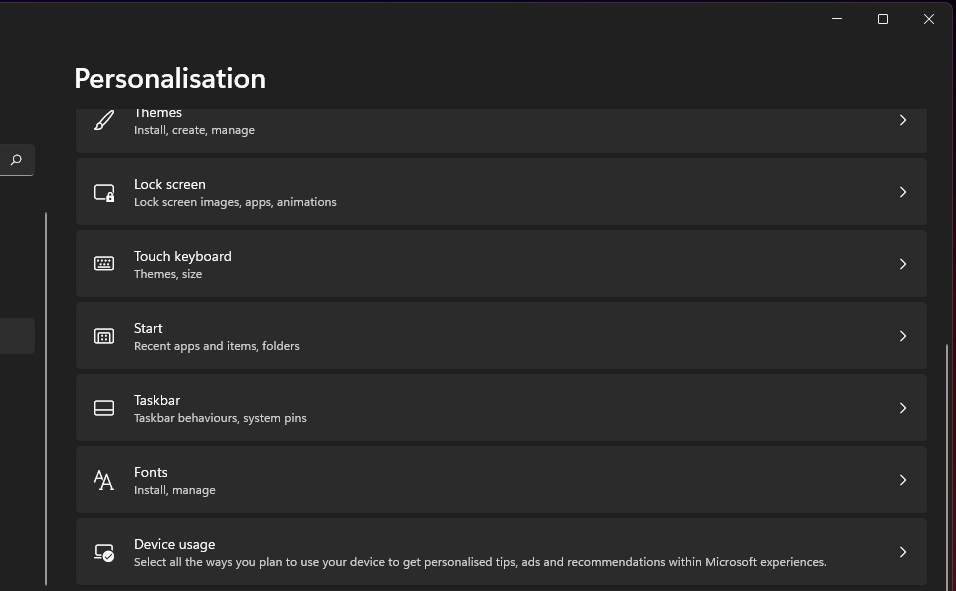
- Click Start > Folders from there to bring up the options shown below.
- Now click the On buttons for library folders you want to add to the Start menu. Then you’ll see new shortcuts at the bottom of the Start menu.


3. Toggle the Start Menu’s App and Item Features On/Off
The Windows 11 Start menu can show your recently added apps and items, but it doesn’t have to. Instead, you can configure what that menu does and doesn’t show by adjusting a few options in Settings.
- To open Settings, press the Windows key + I hotkey.
- Click Personalization on the left side of Settings.
- Then you can click the Show recently opened items in Start, Jump Lists, and File option’s toggle button on or off to disable recommended files.
- To change how the Start menu displays apps, click the toggle buttons on or off for the Show the most used app and Show recently added apps options.

4. Change the Start Menu’s Color
The Start menu and taskbar will be dark blue by default, but you don’t have to stick with that. Windows 11’s Settings app includes a color palette you can select a variety of different colors with. You can change the Start menu’s color with that palette as follows.
- First, select Settings on the Start menu.
- Select Settings’ Personalization tab.
-
Click Colors on that tab to bring up the options in the screenshot directly below.
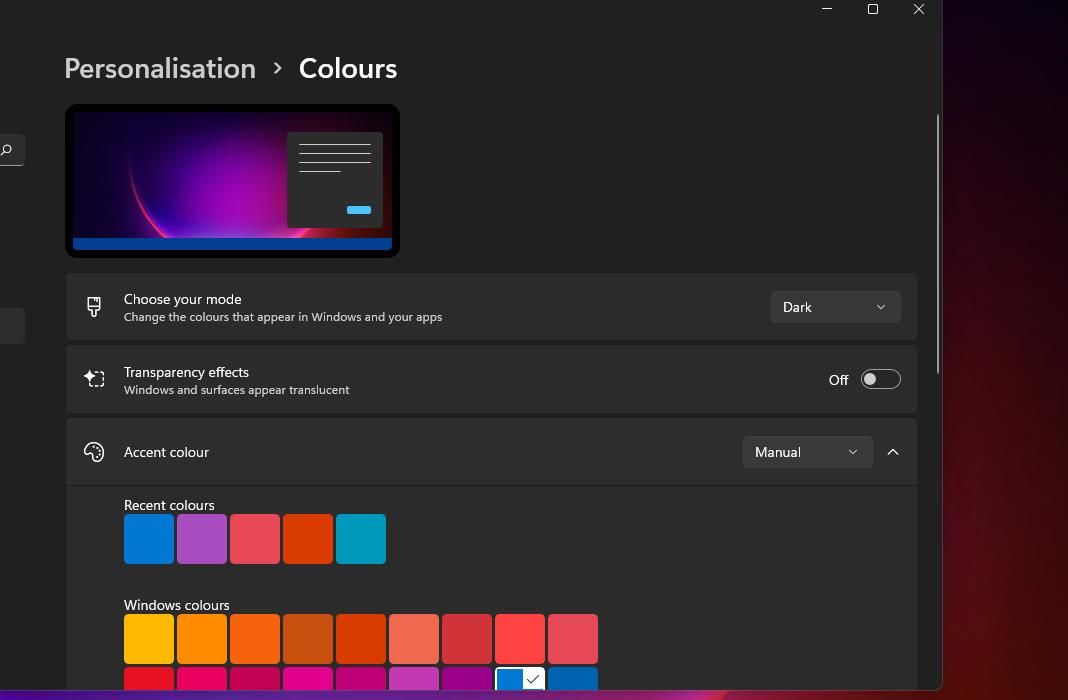
- Windows grays out The Show accent color on Start and taskbar option when the White mode option is selected. So, you’ll need to select the Dark setting on the Choose your mode drop-down menu.
- Then select the Show accent color on Start and taskbar setting.
- Double-click Accent color to expand its palette.
- Then choose a different color for the Start menu and taskbar there.
-
You can open a bigger color palette by clicking the View colors option.
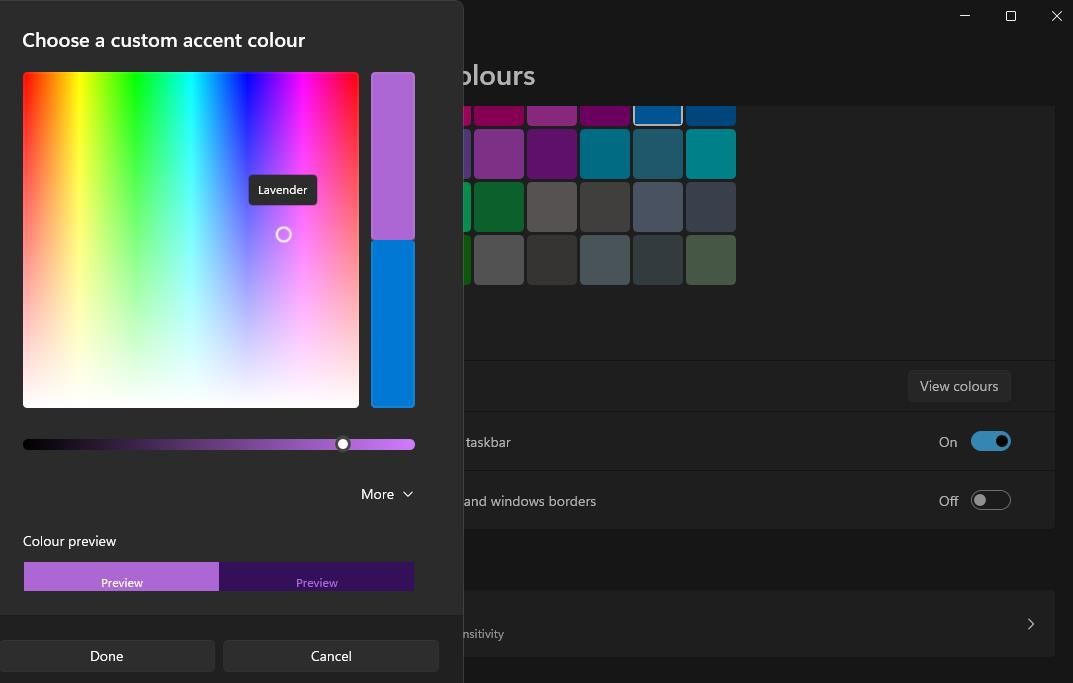
- Left-click and drag the little circle on that palette to choose a different color with it, and press the Done button.


5. Move the Start Menu to the Left Side of the Taskbar
Windows 11’s customizable taskbar has a centralized Start menu and icons. Do you not like the central menu? If not, this is how you can move the Start menu and other icons to the left side of the taskbar.
- Bring up the Settings window.
- Click Personalization and Taskbar to navigate to further options.
- Then double-click Taskbar behaviors to expand its settings.
- Select Left on the Taskbar alignment drop-down menu. After that, your Start menu will be left-aligned as in the snapshot directly below.

6. Add an Alternative Start Menu to the Taskbar with StartAllBack
If you’re not much of a fan of Windows 11’s revamped Start menu, you can restore a classic-style menu with the StartAllBack app. StartAllBack is a new app that includes various Start menu and taskbar customization options. That software is retailing at $4.99, and you can try out a 30-day trial by clicking Download 3.0.5 on the StartAllBack webpage.
After downloading StartAllBack, click File Explorer’s taskbar button. Then open the folder you downloaded the software to. Finally, click the StartAllBack_3.0.5_setup.exe file to install the program.
After installing it, the StartAllBack configuration window will open. Next, click the Start Menu tab to open the options shown directly below. There you can click the Use enhanced classic start menu option’s toggle button to enable it.

Selecting that option doesn’t exactly restore a Windows 10-style menu with live tiles. However, you can choose Plain8 and Windows 7 options on the Visual style drop-down menu. If you select the Windows 7 option, your menu will look like the one shown below. You can further adjust the menu’s visual style by altering the Icon size and Icon count settings.

Beyond the visual options, you can configure all program, general, search, and right-side items settings for the Start menu. The right-side items options enable you to add or remove shortcuts from the right of the menu. There’s also a Power button option for configuring the default action of that button.
If you’re wondering how to open the StartAllBack configuration window after closing it, bring up the Control Panel. Select Small icons on the View by menu. Then you can click StartAllBack in the Control Panel to open it from there.

Customize Windows 11’s Start Menu to Suit Your Preferences
Whether you love or loath Windows 11’s Start menu, there are various ways you can customize it to better suit your preferences. The revamped Settings app provides all the built-in customization options for you to tweak that menu’s color, alignment, app and item features, and library folder shortcuts. However, if you prefer the old-style menus, check out StartAllBack, which restores a faithful replica of Windows 7’s Start menu.