Installing a new operating system can be very helpful for many computers—it helps you clear out any unwanted malware and cleans up your system. In the case, you're contemplating doing a fresh installation for Windows 10, it'll help to have a bootable USB, which will speed up the installation process.
Creating a Windows bootable USB is easy on a Windows PC, but what if you want to create one on a Mac? Today we've covered how to create a Windows 10 bootable USB on your Mac, both with and without BootCamp for your ease.
Create Windows 10 Bootable USB on Mac Without BootCamp
Apple's newer silicon-chip Macs do not come with BootCamp installed. This is due to the difference in the ARM chip architecture, which doesn't allow traditional Windows installations. Thus, Apple did away with BootCamp for good, which means it isn't available to create a bootable disk either (as it was before).
Fortunately, there are third-party solutions available. And the best of them is making a Windows bootable USB using PassFab 4Winkey.
Method 1: How to Create a Bootable Windows 10 USB on Mac Using PassFab 4Winkey
The easiest way to create a Windows bootable USB on your Mac is using PassFab 4WinKey. The app is actually designed to help you recover a Windows account that you've been locked out of. However, an additional benefit is that you can also use the app to create a Windows USB bootable disk without BootCamp.
The advantage of using 4WinKey is that you don't need to download the Windows ISO separately—the application does that for you automatically. Thus, all you need to do is plug in your USB disk, and the app does the rest.
PassFab4 WinKey comes in a free, standard, pro, enterprise, and ultimate version. The free version will allow you to create the bootable disk, which should be sufficient for this task. If you want to use its additional features such as Windows account recovery, you'll need to purchase any of the paid versions, starting at $29.95 for a year.
Make sure you have a minimum 16GB USB disk for creating the bootable disk. Since the USB drive will be formatted to create the bootable disk, make sure you have backed up all important data before proceeding.
To create a Windows bootable USB disk using PassFab 4WinKey:
- Download PassFab 4WinKey and open it up on your Mac.
-
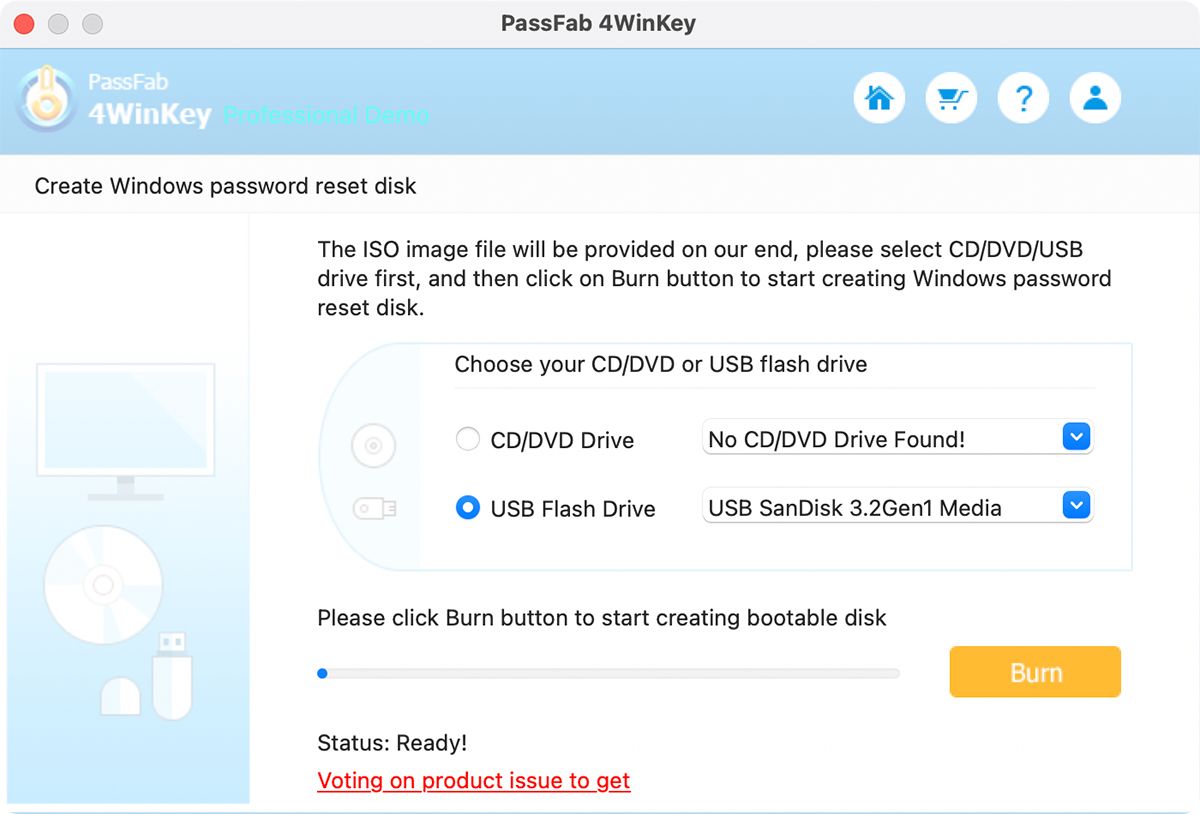
Plug in your USB disk. PassFab 4WinKey should automatically detect it. Confirm the correct disk is selected, and click on Burn.
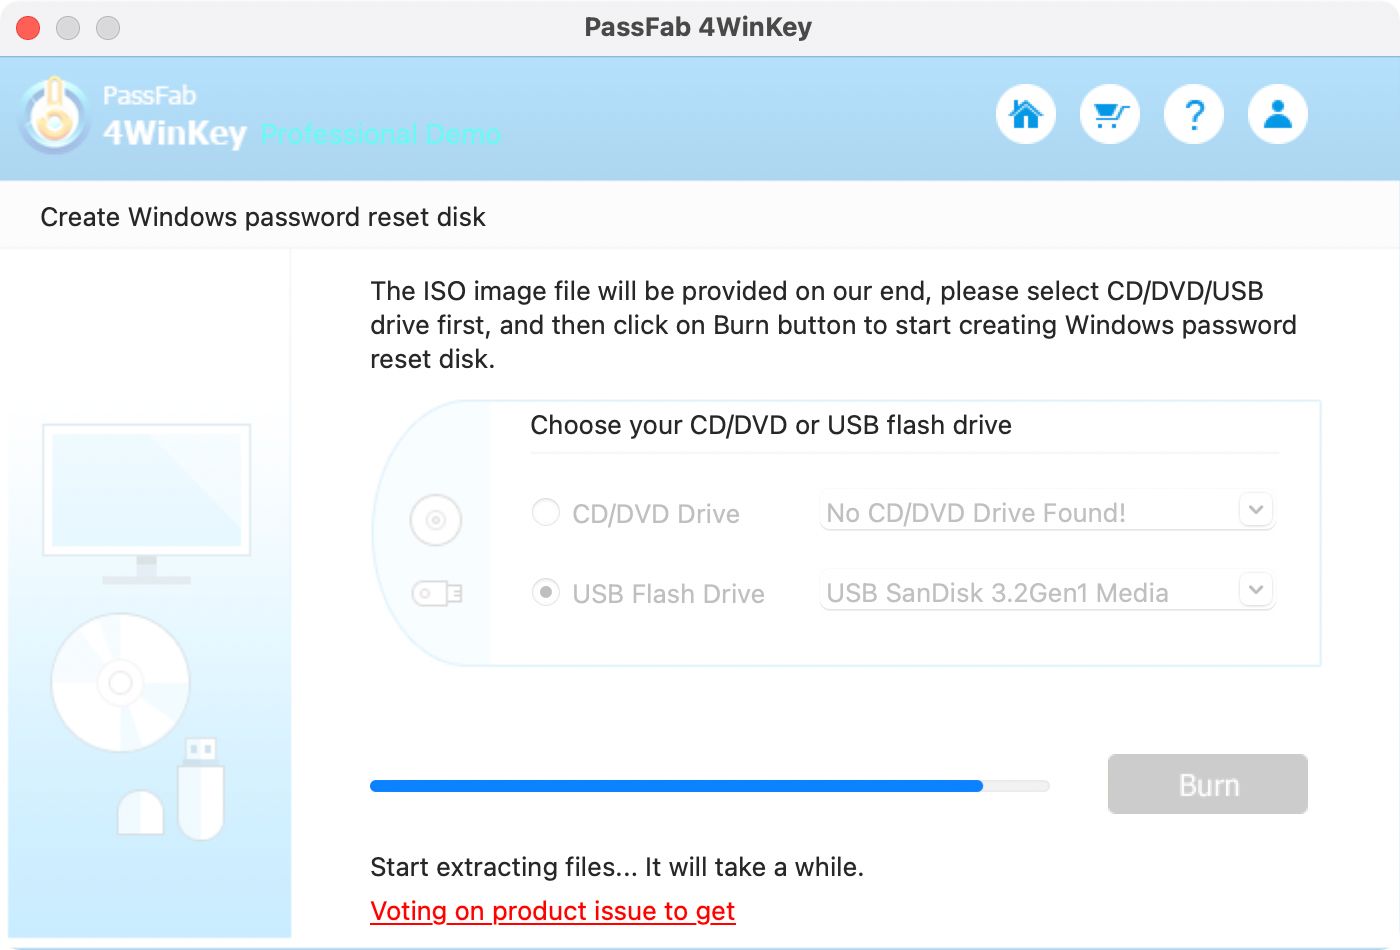
- Since the process involves downloading the Windows ISO, it may take some time depending on your internet connection.
-
You'll receive a confirmation message once it's done, alongside some instructions on how to boot a Windows PC to the recovery disk.


That's it! You can now use the bootable disk to reinstall a fresh version of Windows on your PC or Mac.
PassFab 4WinKey
PassFab 4WinKey is one of the best tools available for resetting Windows 10 passwords. Need to delete or create a Windows account? This tool has you covered.
- Easy to use for beginners and advanced users
- A single click can create a bootable Windows 10 reset disk
- Helpful support and excellent tutorial walkthroughs
- A reliable choice for all users
- Version specific functions
- Free trial only available from PassFab 4WinKey website
Way 2: Make Windows 10 bootable USB on Mac with UNetbootin
If the first method doesn't work for you, consider using UNetbootin—UNetbootin is a free app that allows you to make a bootable USB drive for Windows 10 on your Mac. Using the app is very easy, however, unlike the first method, you'll need to download the Windows ISO from Microsoft's website before starting.
Once you have the ISO on your Mac and a USB disk ready, simply follow the steps below:
- Plug in your USB disk onto your Mac.
-
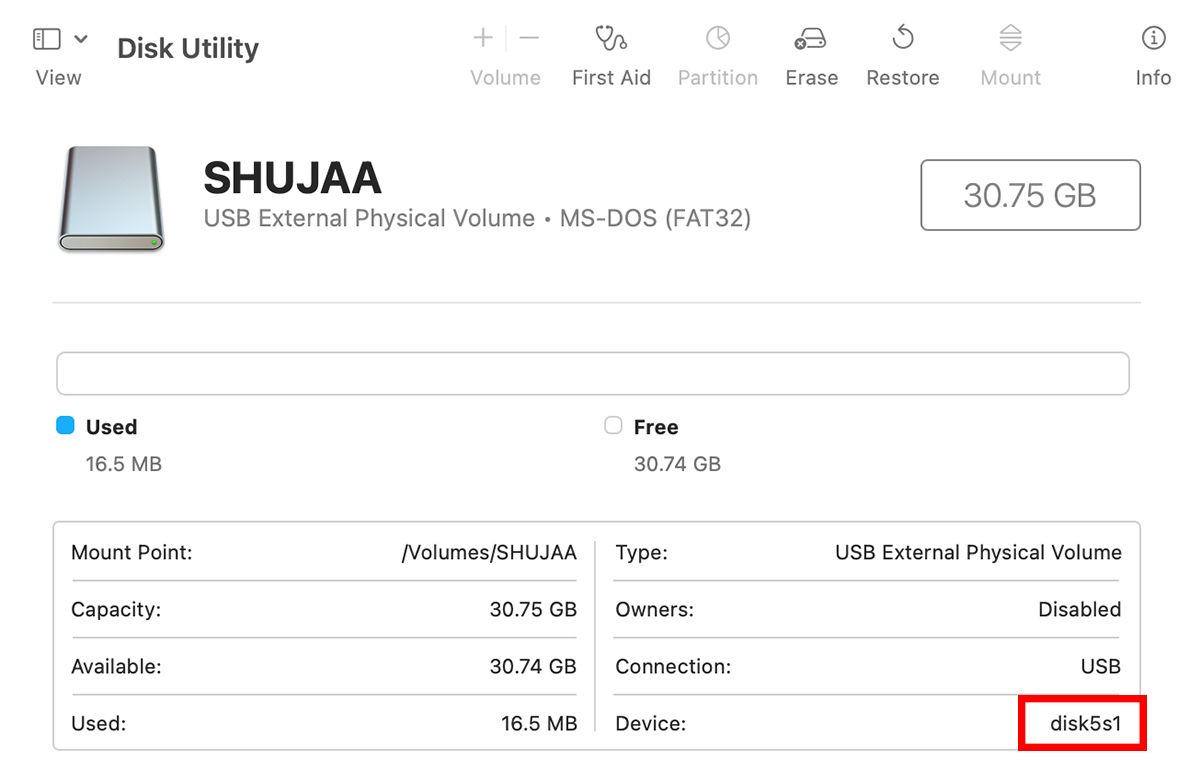
Open up Disk Utility on your Mac. Select your USB disk from the left-hand menu, and note down the disk identifier.
Author Screenshot - Download the UNetbootin utility and open it.
- UNetbootin will ask you to enter your password. This is to authenticate any changes to your USB disk that you'll be doing later. Enter in your password, and the app's main window should open up.
-
Choose ISO from Diskimage, and click on ... to specify the location of the ISO on your disk.
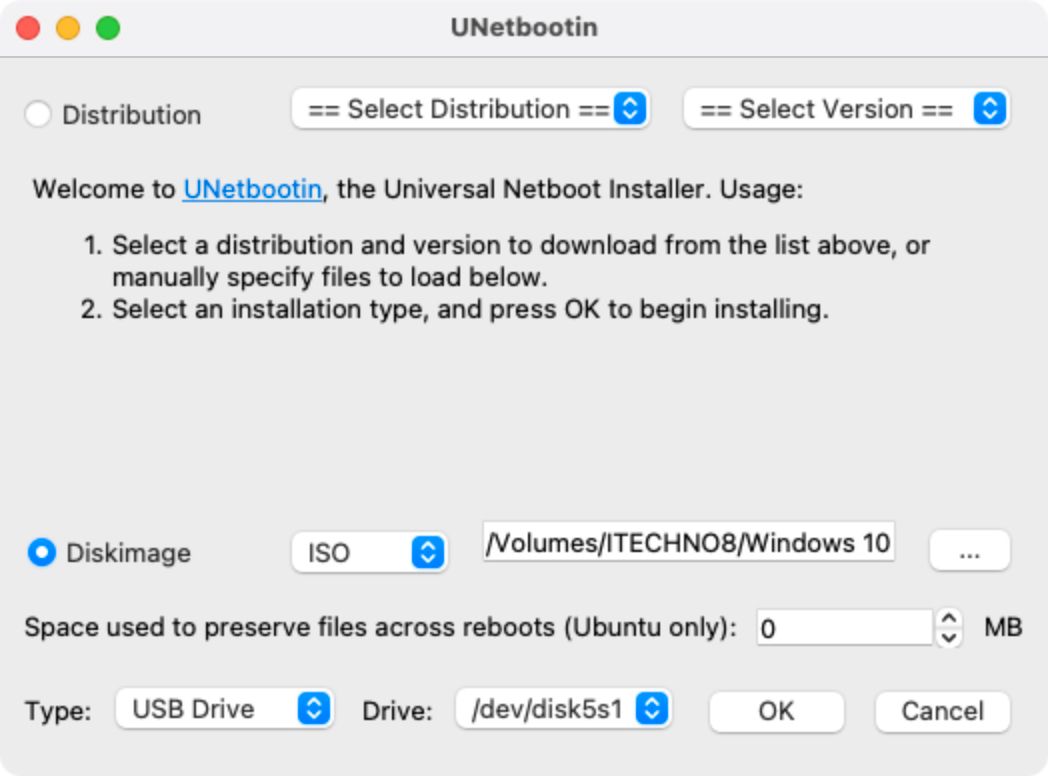
- Set USB drive in Type, and select the drive name of your USB drive that you noted down earlier.
- Click OK and wait for the USB to be formatted to a bootable drive.


Method 2: Create a Bootable USB Disk Using BootCamp Assistant
If you have a Mac with an Intel processor, you can also use BootCamp Assistant to create a bootable Windows installation USB disk. This is an easy method and requires no additional software to be installed. You can also choose to install additional Windows support software, which will be helpful if you are planning to use the bootable disk to install Windows on your Mac.
Note: You can't use Boot Camp Assistant on Macs with Apple M1 chips.
You will also need a 16GB USB disk, alongside the Windows ISO file for this method. To create a bootable Windows disk using BootCamp:
- Go to Finder > Applications > Utilities and launch Boot Camp Assistant.
- Select Continue, and check the option to Create a Windows 10 or later install disk.
- Select the Windows 10 ISO image from Mac's internal storage and select Continue.
- Boot Camp Assistant will create the bootable Windows 10 USB. Once it's done, unmount the USB drive (right-click and select Eject) from the desktop.
Make a Windows USB on Your Mac
Many users thought that making a Windows bootable USB on your Mac without BootCamp wasn't possible, but there are different third-party solutions available that are as effective. Hopefully using this method you were able to create your bootable disk to install Windows on your PC or Mac.