Sharing a hefty amount of information with many people can be challenging. This is especially true if you’re not the only one maintaining and keeping the documents up to date.
That’s where wikis come in handy. Wikis are the perfect solution for storing and sharing knowledge online. Anyone can make one and allow others to edit, or not, depending on the permissions settings.
In this article, we’ll tell you how you can build and customize a wiki in Notion, from getting started to sharing it with your audience. First, we’ll explain in more detail what a wiki is.
What Is a Wiki?
In Hawaii, wiki means quick. Online, it’s a collection of web pages that provide summarized information to an audience—and in turn, the audience provides information to the wiki.
Think of it as a living document. It’s published, but anyone with access can contribute their thoughts, ideas, and expertise around the topics in a wiki so that others can benefit.

You can display and give access publicly, which comes in handy when creating a fan site for your favorite video game or hobby. You can also limit access to a smaller group if you want to create a wiki for a limited group, such as an employee handbook, manual, or study notes.
If you wanted to, you really could create a wiki for just about any topic for any purpose.
How to Make a Wiki in Notion
If you’re a seasoned Notion user, it may be tempting to create a wiki from scratch. However, there’s no point in reinventing the wheel as the software provides a template where it’s done most of the work for you. The template is excellent for beginners and pros alike.
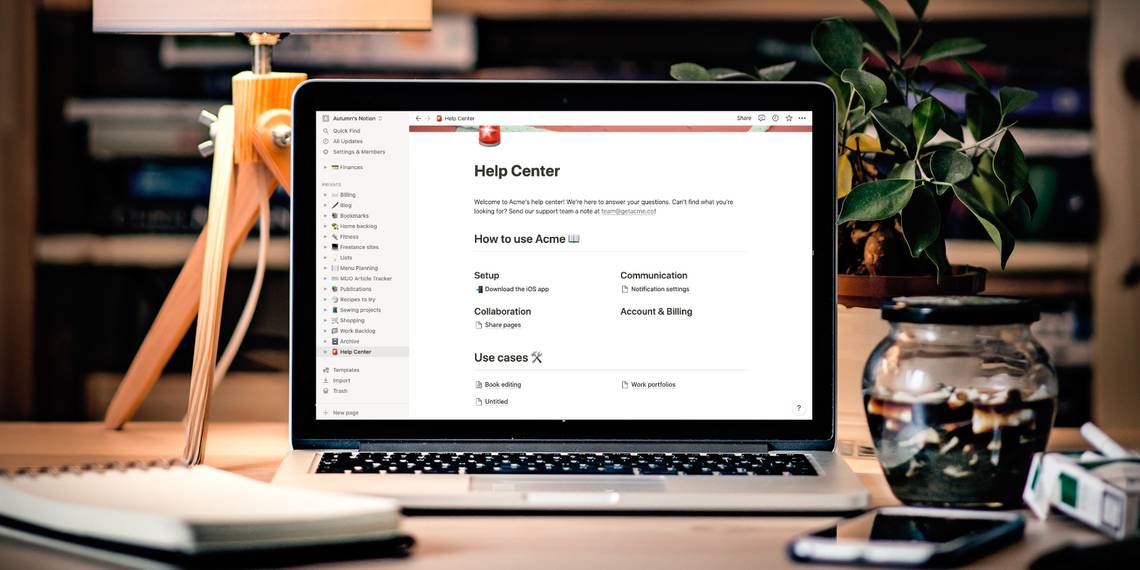
To find the wiki layout, select Templates in the bottom-left corner and open the Support dropdown. There you’ll find one called Help Centre.

Clicking Use this template will create a new page where you can begin customizing your wiki. This page is the hub of your knowledge base. Each link under the subheadings takes your audience to another page in Notion. You could also link to other resources here.
The template offers some instruction, but if you’re just getting started with Notion, here are some general tips on customization.
How to Customize Your Wiki in Notion
To change the cover photo, hover over it with your cursor and select Change cover. Here, you can swap it out for a stock photo, upload your own, change it to a color, or remove it altogether.
Changing the icon is as simple as clicking it and selecting another from the options. The icon library is vast, so you’ll likely find something relevant to the topic. However, you can also upload or link to your own.
You may notice working with text in Notion is similar to any other basic editor. As you go, you can change the formatting by highlighting anywhere to bring up the toolbar. Alternatively, you can right-click on the block.
Another note on the text editor is that it uses commands to add elements to your page. If you want to add a new block, press the forward slash (/) on your keyboard, and a list of options will come up.
Keep in mind, this is the main hub of your wiki, so you may want to keep it minimal for navigation purposes.
How to Add Pages to Your Wiki in Notion
To quickly add a new page to your wiki, hover over the name in the sidebar and click the add option beside it. Alternatively, you can use forward slash in the text editor to bring up commands and select pages from the menu. A new page will appear where you can decide to build your layout from scratch or work with one of Notion’s many useful templates.

Here's where you can get creative with blocks by adding headings, media, and bullet points to your page to support the information on the page. If you're summarizing a lot of information, Notion's databases will help you stay organized.
After you design your page or at least give it a title, click out of it, and you’ll find it in your wiki. Now you can drag and drop it to the proper location. You can also find it in the sidebar by clicking the dropdown arrow beside the name of your wiki.
If you selected the New page option in the bottom left corner of Notion, you’ll notice it appears independent of the rest of your knowledge base in the sidebar. To fix that, drag and drop it into your wiki. Now you’ll find it inside, where you can move it under the appropriate subheading.
How to Share Your Wiki and Set Permissions in Notion
Once you’re ready to give others access to your wiki, select Share at the top-right of your page and toggle Share to web on. A permissions menu will open where you can choose to allow editing, comments, duplication, and if you have a pro account, indexing.

If you decide you don’t want just anyone to comment on or edit your wiki, you can toggle off these options and invite others to do so on an individual basis in the share settings. You can also limit your audience by not publishing your page and inviting others privately.

Something to keep in mind when you share or publish a page on Notion is that you’re giving the same access to all of its subpages as well. While you can toggle these off individually, it may be worth double-checking you don’t have any personal information on your pages before making it public.
The ability to make pages public without giving everyone permission to edit, also means you can make a webpage for just about anything as well.
Get Creative With Your Wiki
Making a wiki in Notion is far easier than learning how to build a traditional webpage. This also means editing is more accessible for your contributors.
It’s an excellent tool for building any sort of knowledge base, whether it’s for business, school, or simply just for fun. Plus, you don’t need to pay a thing unless you want to take advantage of some of Notion’s pro features.