Using a Wiki to organize your files and documents is fast becoming a norm these days. And a well-built Wiki does more than organize your teams’ files into more accessible categories. This innovation also helps promote content creation, editing, and sharing.
And while it may seem cumbersome and expensive to create a Wiki, Google Sies helps you go through the process efficiently and at no cost.
To this end, we'll look at how you can take full advantage of Google Sites in creating your Wiki and alternative tools you can use in place of Google Sites.
1. Visit Google Sites
First, you must ensure you have an active Google account. If you do not have one, creating a new Google account takes a few minutes.
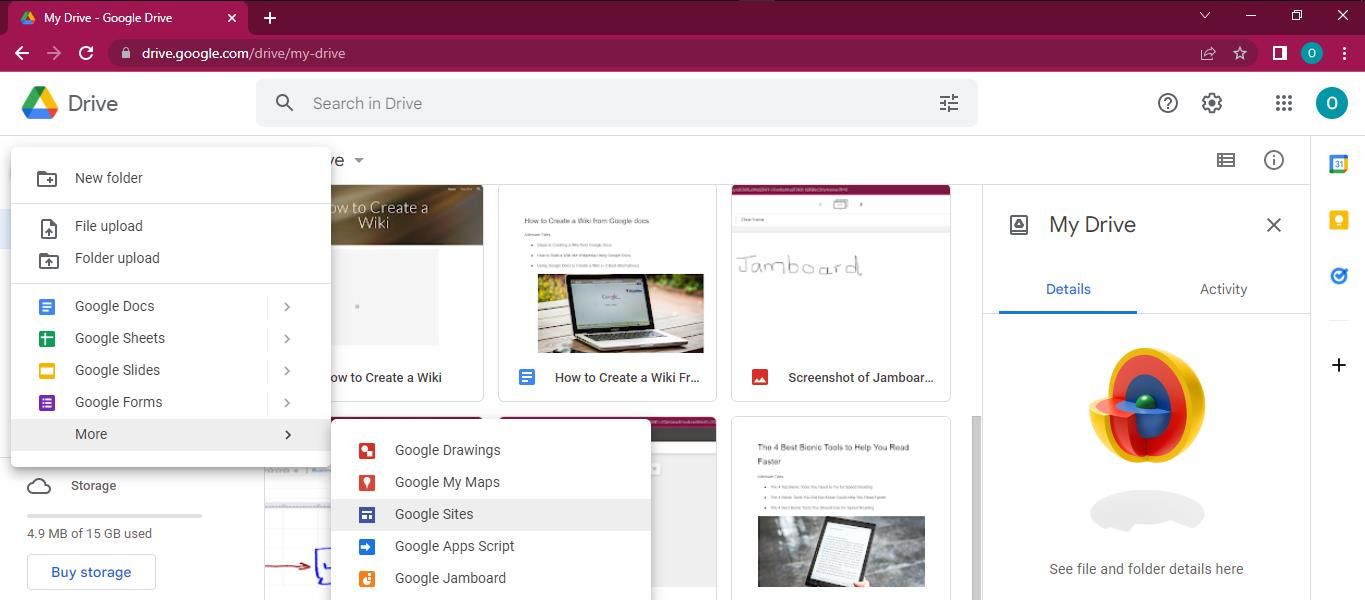
Next, using your preferred browser, go to Google Drive. Click on the New sign in the left-hand corner, and click on More > Google Sites. Alternatively, you could go directly to the Google Sites webpage.
2. Create a New Site
Click on the plus sign on the new page to open a blank page where you can begin your site-building with Google Sites. Sometimes, clicking on Google Sites will automatically open a blank page with a default theme for you to work on.
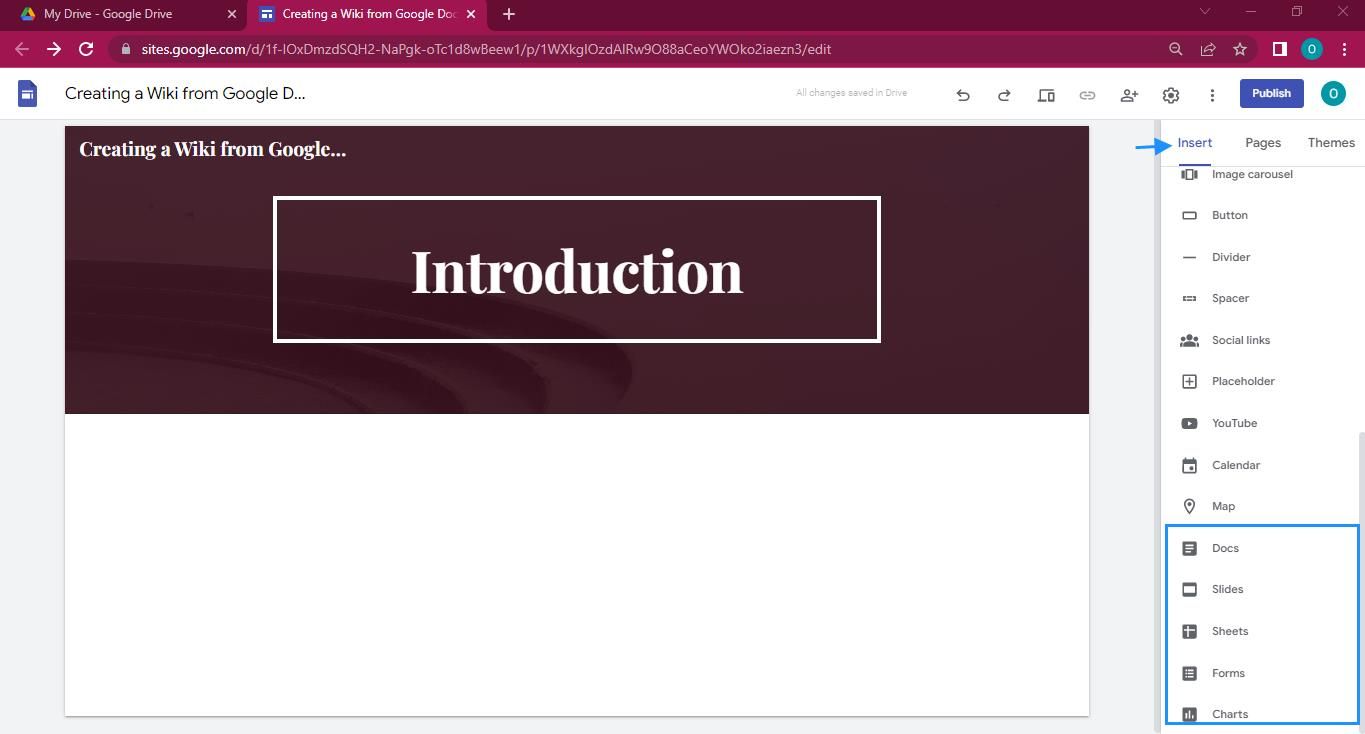
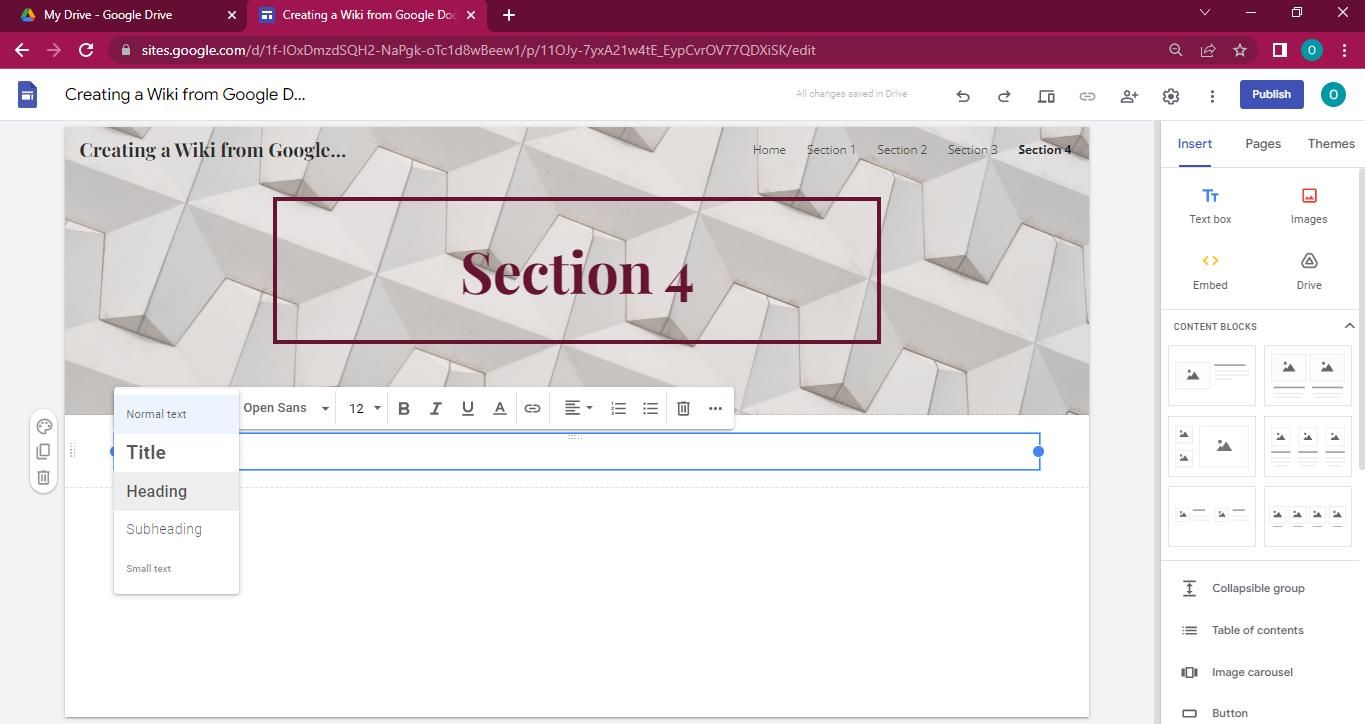
The panel on the right-hand side of this page includes the Insert, Pages, and Themes menus. The Insert menu has several tools and widgets to help you create your site. These tools include buttons, images, videos, your table of contents, and a text box to type in your Wiki content manually.
This menu contains content blocks that serve as templates for arranging files on your Wiki. It also contains buttons for adding slides, sheets, forms, charts, and many other documents directly from Google Drive.
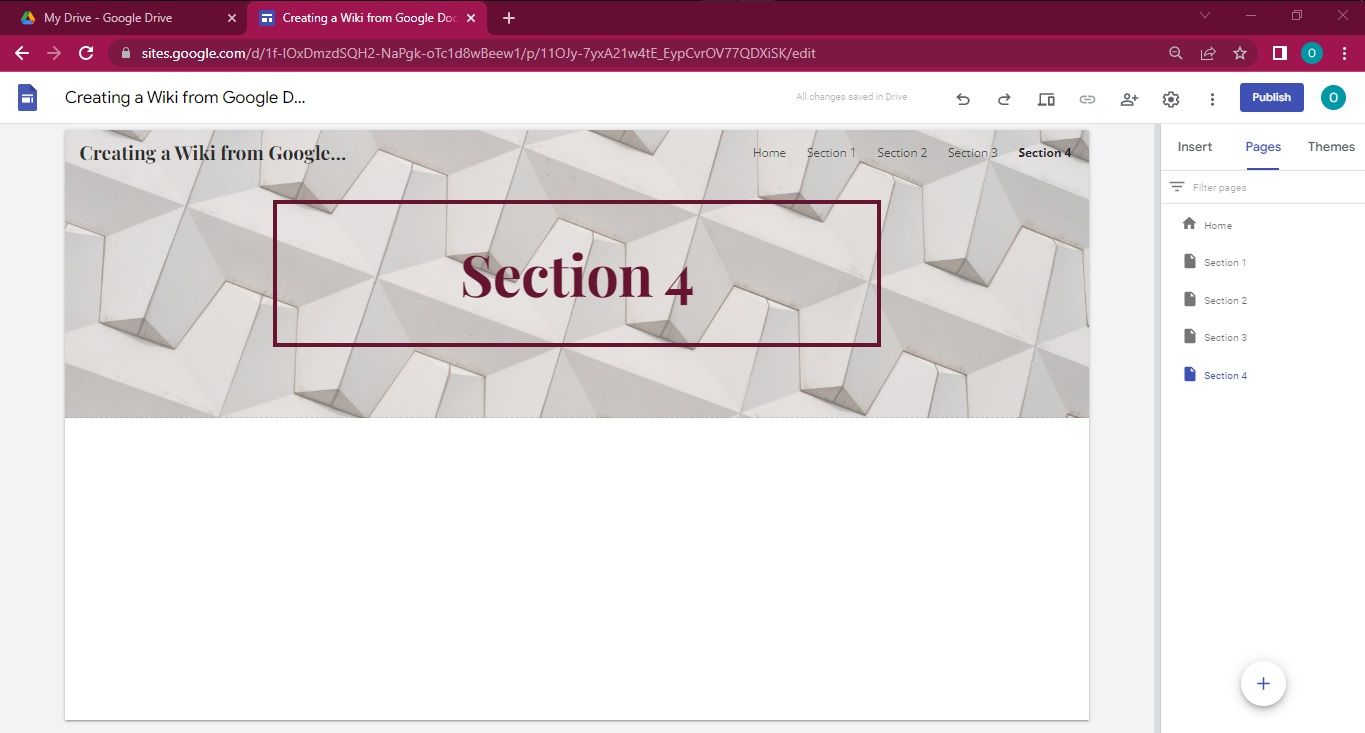
The Pages menu lets you track the pages you create as you work on your Wiki. This way, you can easily move from one section to another without wasting time scrolling up or down.
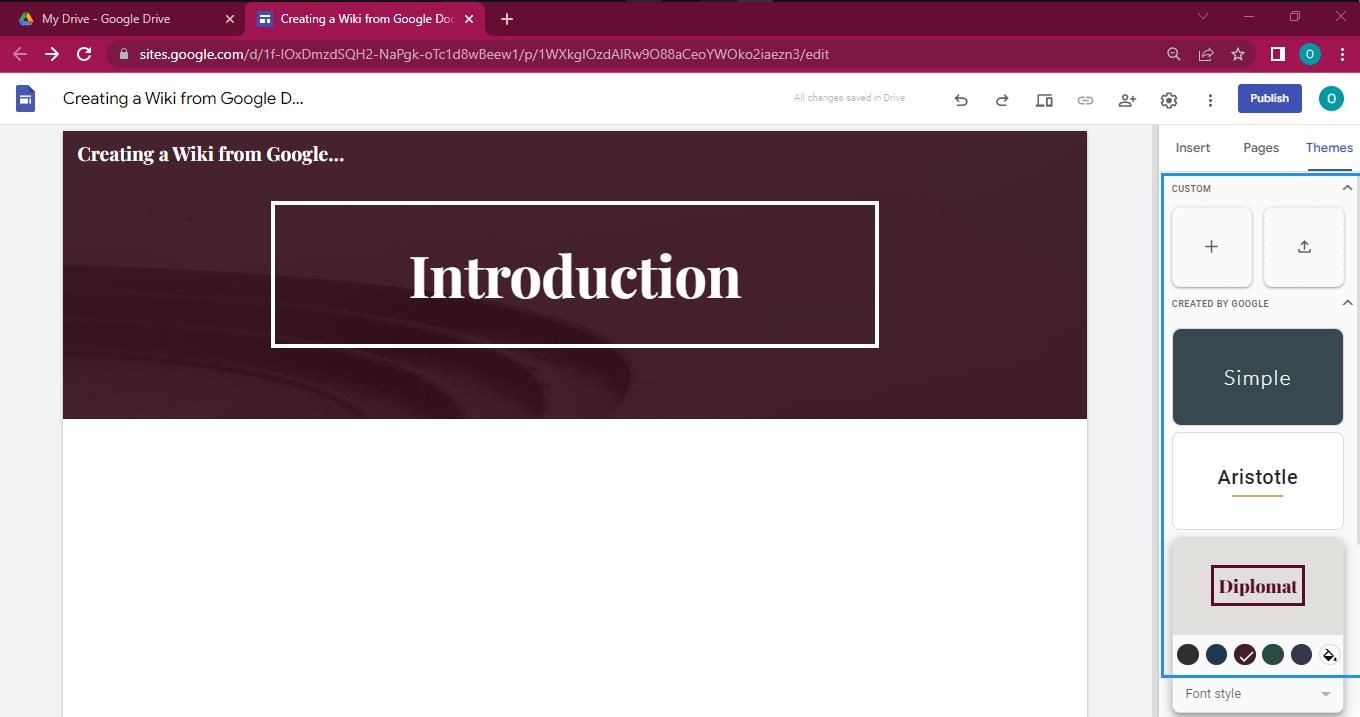
Finally, the Themes menu gives you six different themes you can choose from. You can also decide to tweak the colors of these existing themes or create a new one entirely.
3. Title and Format Your Wiki
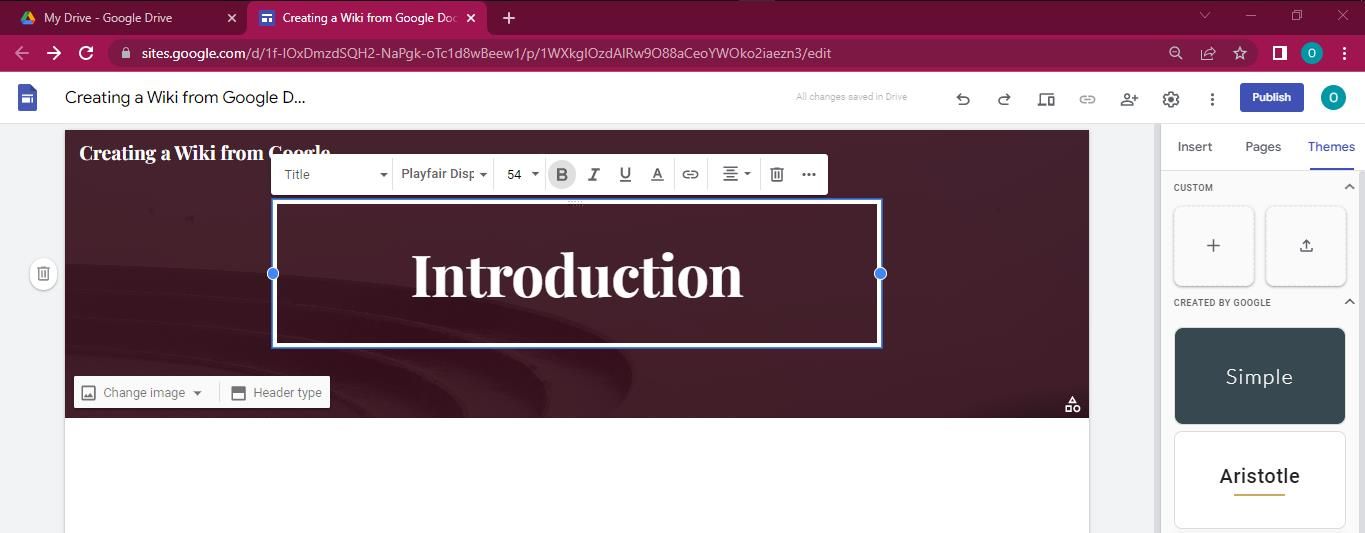
The first thing you should do when creating your Wiki is to give it a title. The top header on this page provides space for the site title and the page title. Your site title can be the general name of your Wiki project, while the page title reflects the current section you want to build.
You can change the font size and the background to suit your choices, or even use different header backgrounds for other pages. Otherwise, the background you choose will be the same as the page title if you do not want to change it.
There is no limit to the number of pages you can create. However, if you have a lot of pages, it would be best to include a table of contents at the beginning of your Wiki. This way, you can always jump to the page you wish to work on without scrolling.
4. Add Your Content
Your Wiki page would not be much to look at without the content to captivate your audience. Luckily, the Insert menu provides several content blocks and page elements that help you display information on your web pages.
As a result, you can type into a text box, insert pictures, embed links, and even add files from Google Drive.
Formatting your text to include headings and subheadings will make creating a Table of Content easy when you are done.
5. Publish Your Wiki
After adding all content, double-check that they are in the proper format. The proper format will ensure that all the files on your Wiki are easy to access and follow. Once you have confirmed that your content is presentable, it is time to publish your Wiki on the web.
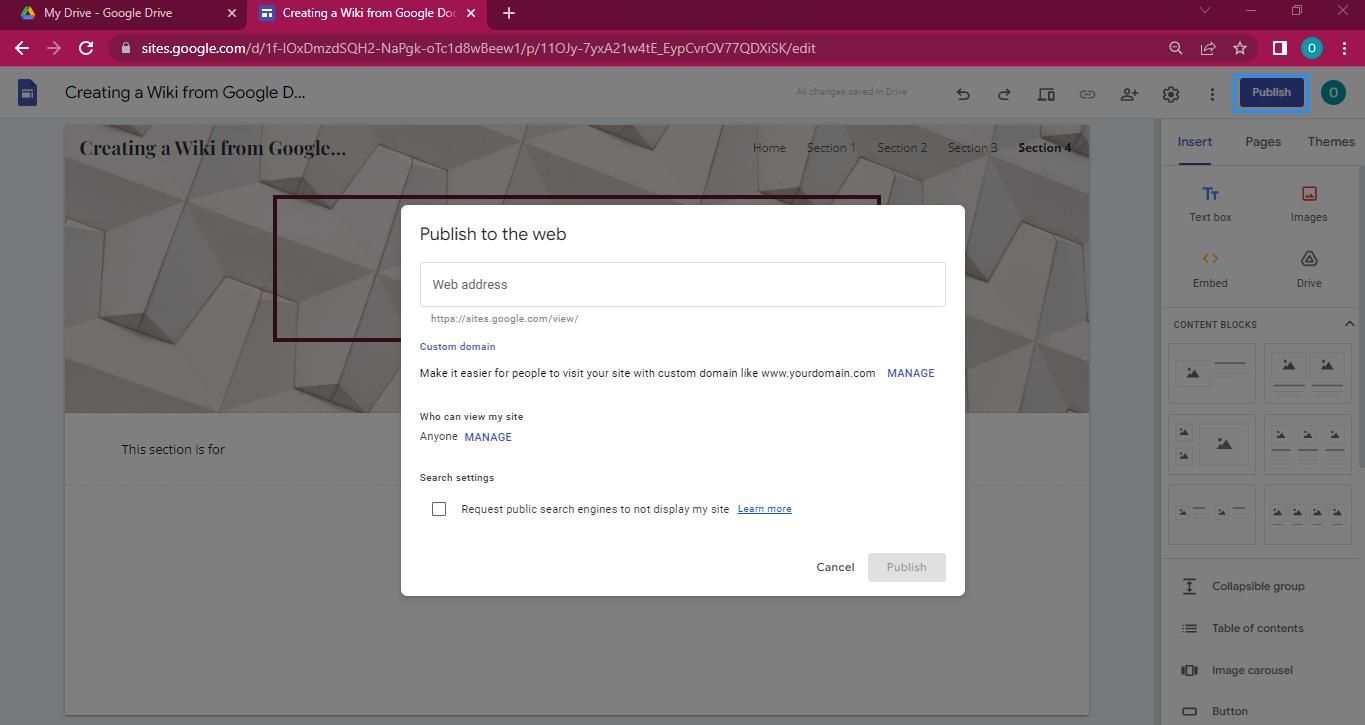
Click on the Publish button in the top-right corner of your Google Sites document. Next, enter the Wiki’s web address in the content menu. You can also add a domain name if you have one. Furthermore, you can manage the Wiki’s visibility by choosing if it is for the public or selected individuals with a shared link.
One good thing about a Google Sites powered Wiki is that you can always review and change the content and the publication settings, even after your first publishing.
Alternative Tools You Can Use to Create a Wiki with Google Docs
There are other alternatives if you do not want to use Google Sites to create your Wiki. Some of the more popular options include.
1. You Need a Wiki
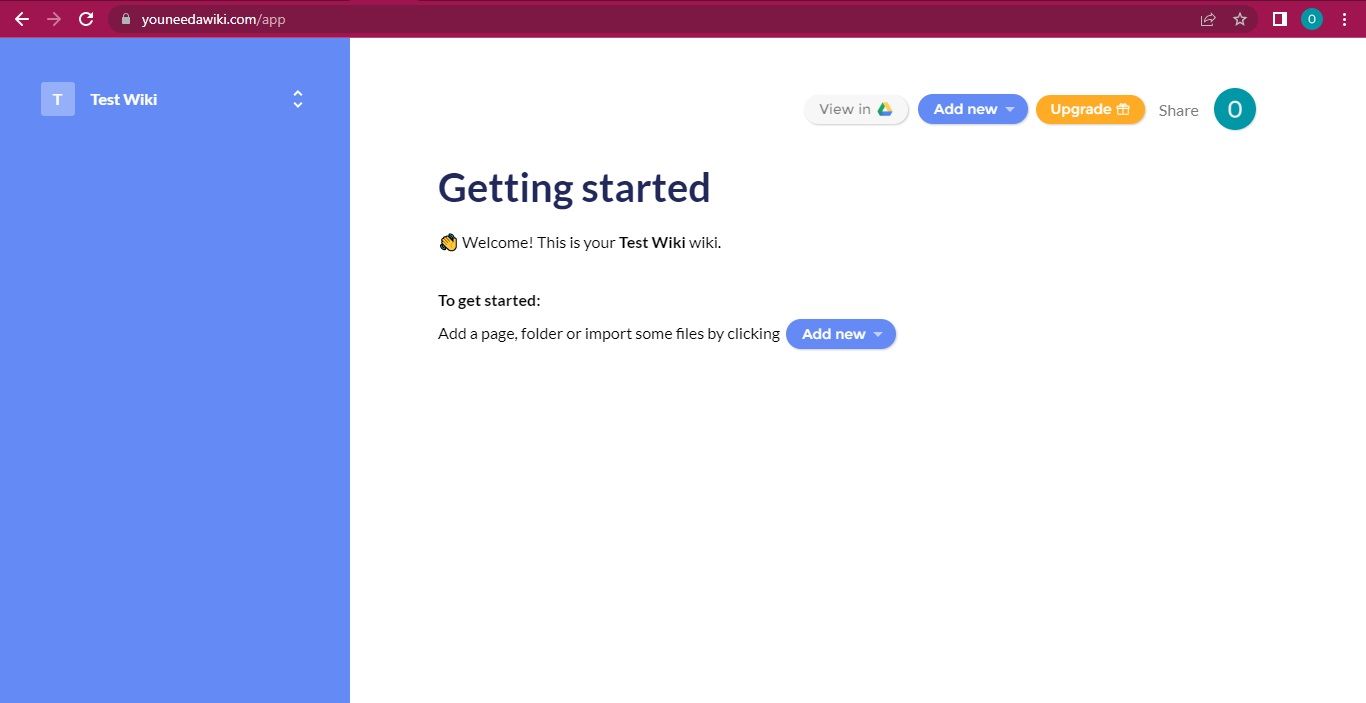
You Need a Wiki (YNAW) is a web tool that helps users create a Wiki from Google Drive folders. Its selling point is that it helps to integrate your files into your Wiki in 30 seconds or less, providing you with a nested tree menu.
This tool helps you arrange your Wiki content into a table of content for ease of accessibility. Furthermore, it allows you to make your Wiki pages public or private to share with any of your contacts or team members.
YNAW is free for one user, but requires a monthly subscription as the number of users increases. The subscription rates for 10, 25, and 75 users are $10, $49, and $99 per month, respectively.
YNAW allows you to create as many Wikis as possible, and you can save each one to Google Drive.
To use YNAW, you have to sign up using your Google account. The first page that opens after you sign in will require you to enter the name of your Wiki project.
In addition, you can choose to invite your team members before you start working on the Wiki. Otherwise, click on skip and follow the instructions on the next pages to build your Wiki.
2. Tettra
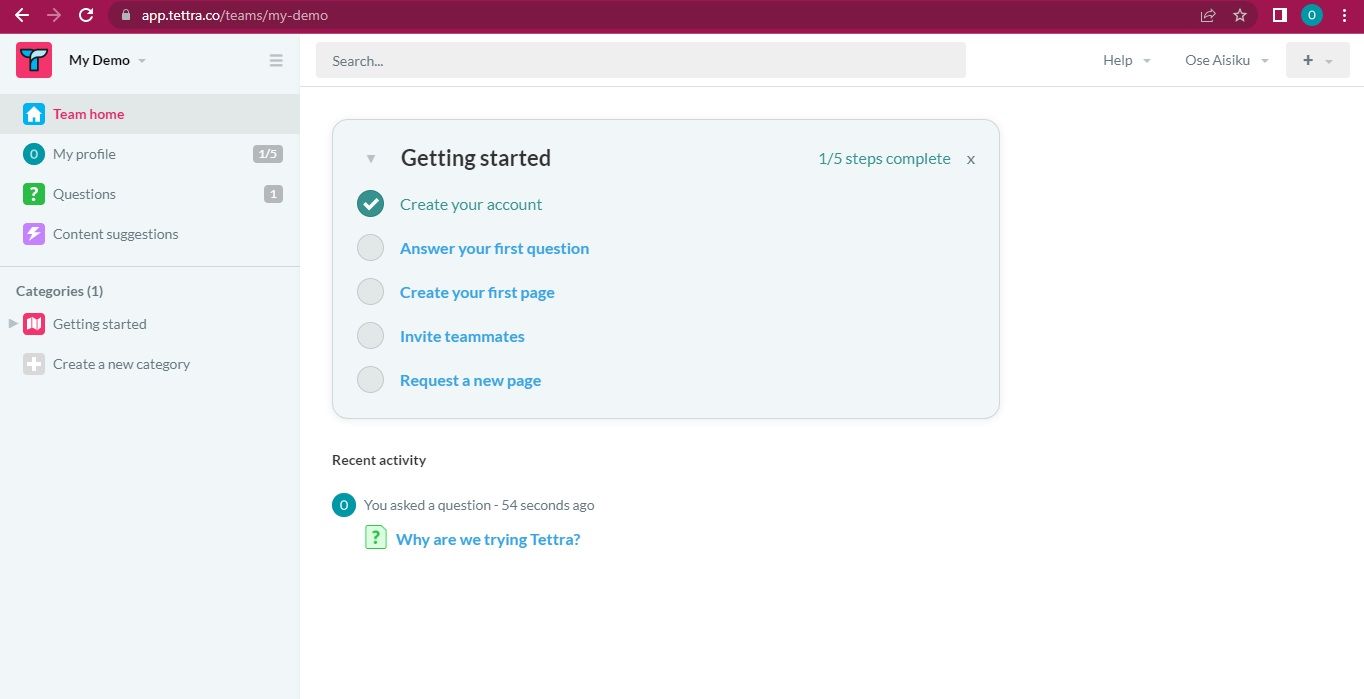
Tettra is another tool that helps you create a Wiki. With this website, you can arrange your existing Drive files into categories, keep track of your files and share information with your team members more effectively. This way, you can search for the files effortlessly, read, and even edit them.
Additionally, Tettra allows you to embed your documents directly into your Wiki. This way, any changes to the regular file will reflect immediately on the Tettra page. Another interesting Tettra feature is that you can link your team to a Slack channel and receive and respond to notifications in real time.
To use Tettra, sign up with your Google or Slack account. Using your Google account allows you to link your Slack account on the follow-up page. You will have to customize your team’s information, including the name and desired URL slug. Additionally, you can decide if your Wiki is solely for support or documentation.
Tettra offers a free version with limited features. The Scaling alternative is a $10 monthly subscription for each user. This subscription plan allows you to integrate Slack and Microsoft Teams. It also offers an account analysis that monitors any edits made to your Wiki. What's more, Tettra has a free 30-day trial period.
Wikis Make Collaboration Easier
With the advent of Wikis, you can easily access, review, and edit your files. This development goes a long way to ease collaboration. Furthermore, direct synchronization with Google Drive helps you create Wikis quickly and efficiently.
Using a cloud-based system like Google Sites means that any authorized user can make edits that other users can access. This opens an avenue for effective cross-platform collaboration.


