
While attending training or watching a tutorial, do you wonder how it was created? Learning a new skill or technology can be enjoyable if it is taught well. A knowledgeable instructor complimented with a well-drafted learning module goes a long way.
Many expensive software like Articulate, RoboHelp, or Adobe Captivate can help you create professional training modules. However, if you are a small organization or team and don't have access to these softwares, you can create an e-learning module using Microsoft PowerPoint.
Let's look at the elements of a good tutorial and how to create one.
1. Components of a Learning Module
Every learning module usually has three components:
-
Objective: Clearly defined goals set the expectations from the module. By reading this slide, the learner should understand what to expect after completing the module. Add a relevant image to the objective slide.

- Main Body: This includes conceptual information and activities such as quizzes or multiple-choice questions to check the learner's understanding. This section makes the majority of the module. The concepts should be well-structured across multiple slides.
-
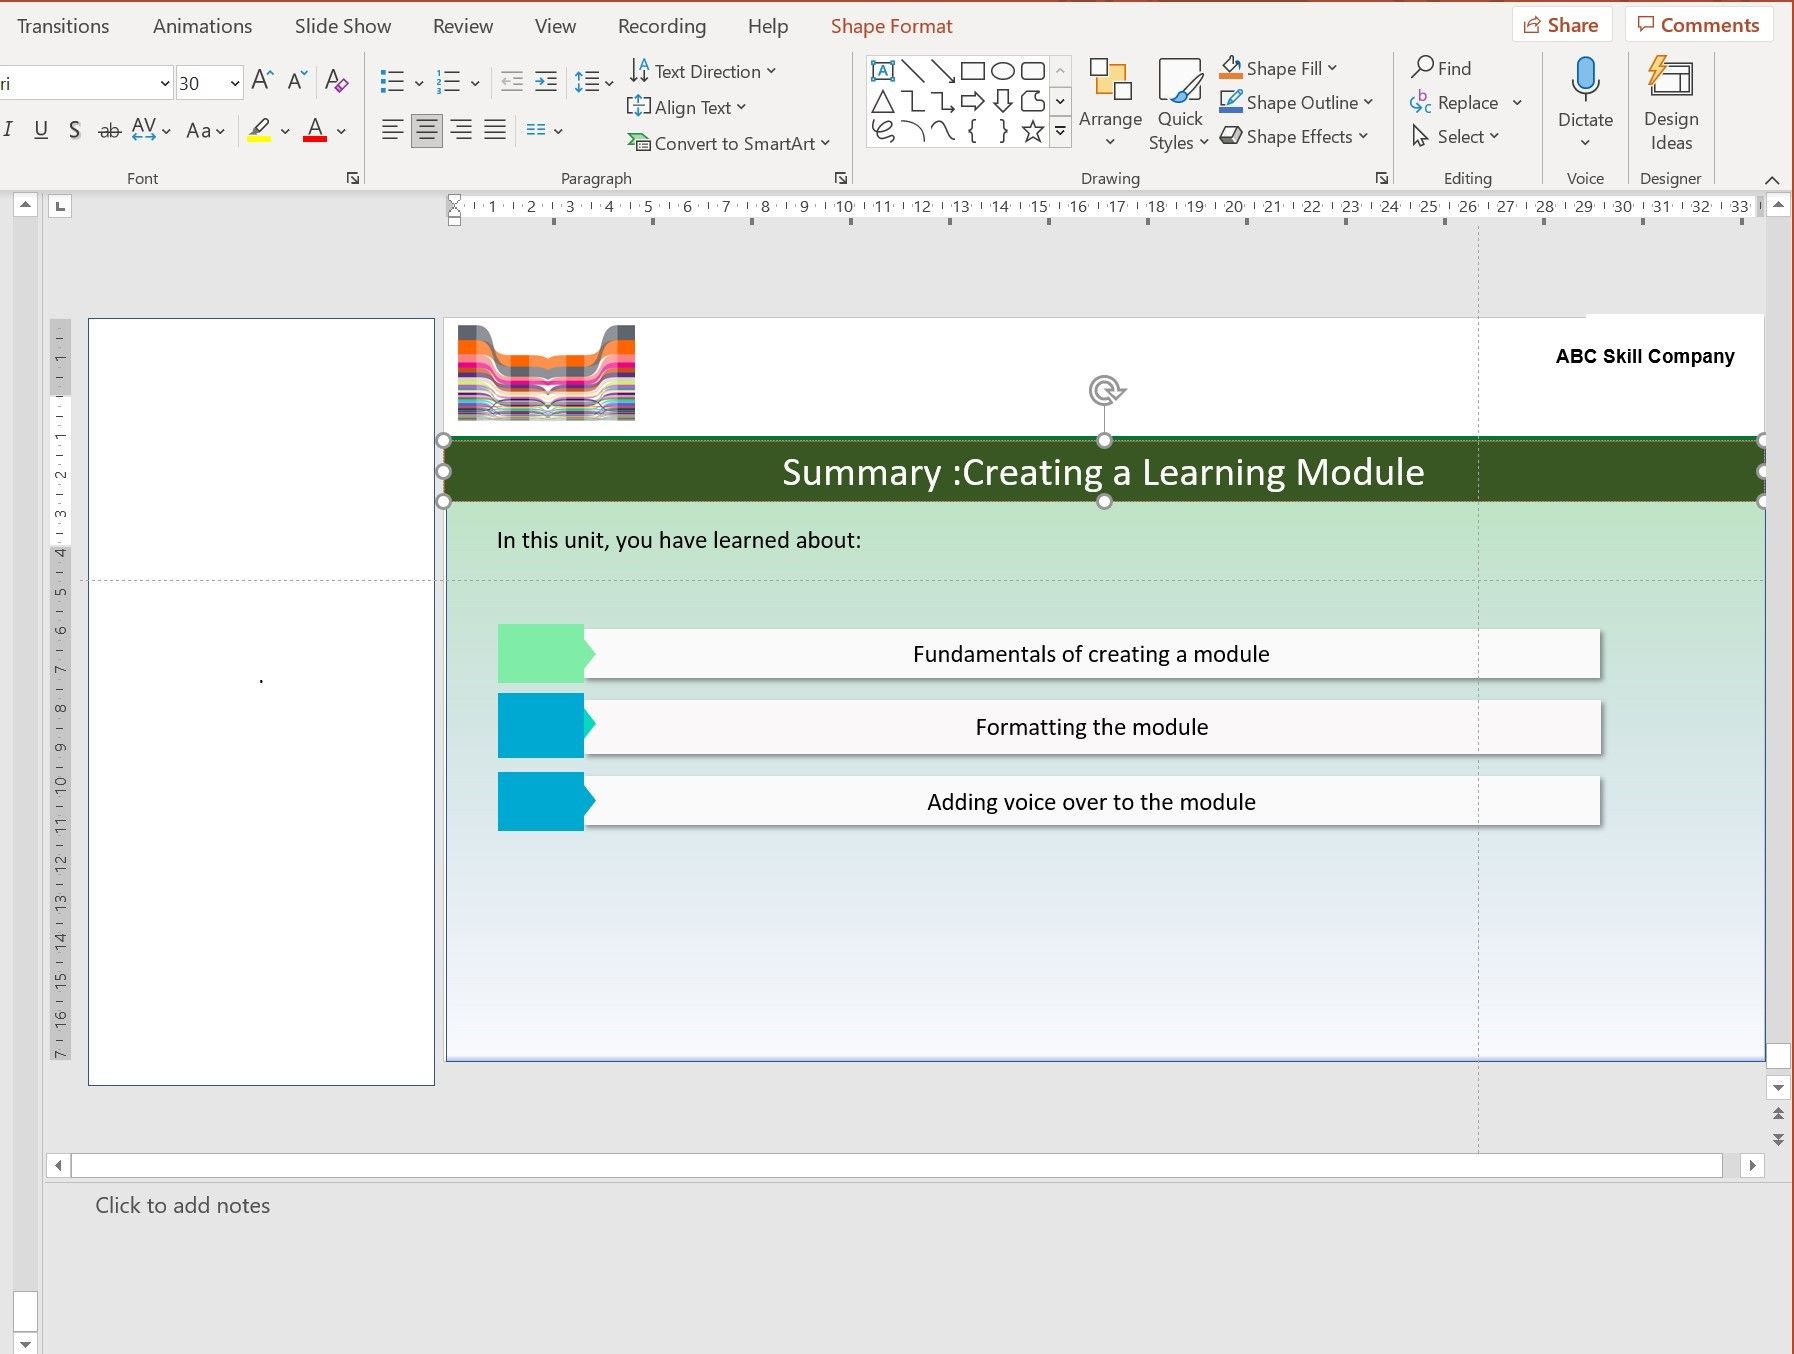
Summary: This is the last slide which concludes the module. It should align with the objectives and be easy to remember. You don't need to add an image to this slide.


2. Create a Mind Map for the Learning Module

A mind map helps you brainstorm ideas and achieve clarity of thoughts, and it can help you visualize the entire learning module. Based on the complexity of modules, you can either use mind mapping apps such as Miro, Figma, or a pen and paper. Alternatively, you can create the mind map in PPT.
To create a mind map for a learning module, follow these steps:
- Create the top-level headings, name, and objective of the module.
- Add the child elements such as unit names, their objectives, and components. This exercise helps you structure the entire module in a PowerPoint.
- In PPT, create slides corresponding to the mind map headings.
- If you are working in a team, assign 3-4 slides to each member.
- Add detailed content on every slide.
3. Set a Theme to the Learning Module

Applying a consistent color combination and adding the company logo on all the slides is essential for a professional-looking module.
You can ask the company for which you are designing the module to provide the color, theme, and logo. Else, you can select a custom color combination. To apply the theme to your module:
- Open Microsoft PowerPoint and select New > Blank Presentation.
-
Click View > Slide Master.
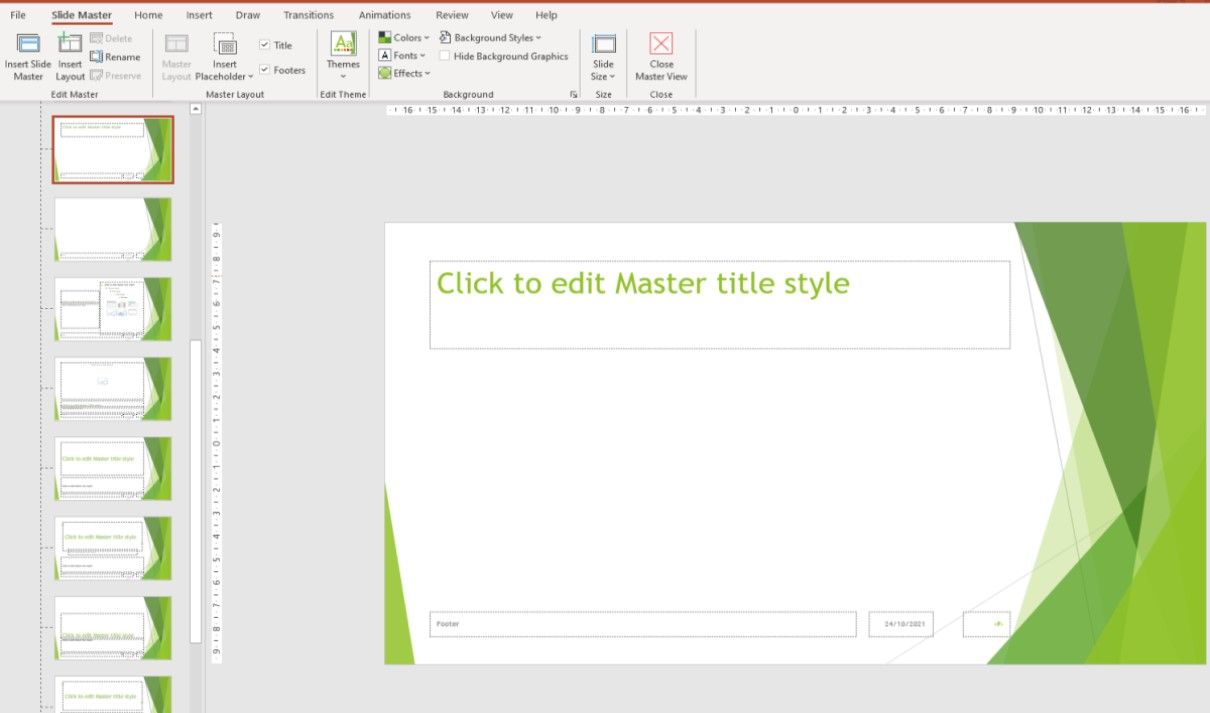
- Select the color, font, themes from the drop-down in the menu.
- To add placeholder content, table, or chart, select the Slide Master > Insert Placeholder option in the menu.
- To place a logo or any other image, click Insert > Picture. Choose the media and place it on the header.
- Click Close Master View.
- Apply the same font to the entire learning module by clicking Home > Replace > Replace Fonts. In the With drop-down, select the font of your choice.

All the slides will have the same color and logo, and you don't need to modify individual slides.
4. Formatting the Content
It is good to apply uniform formatting to the slides. So that when a learner watches the output in slideshow mode, or you record the presentation, the transitions are seamless. Break down the concept into bullets so that it is easy to understand.
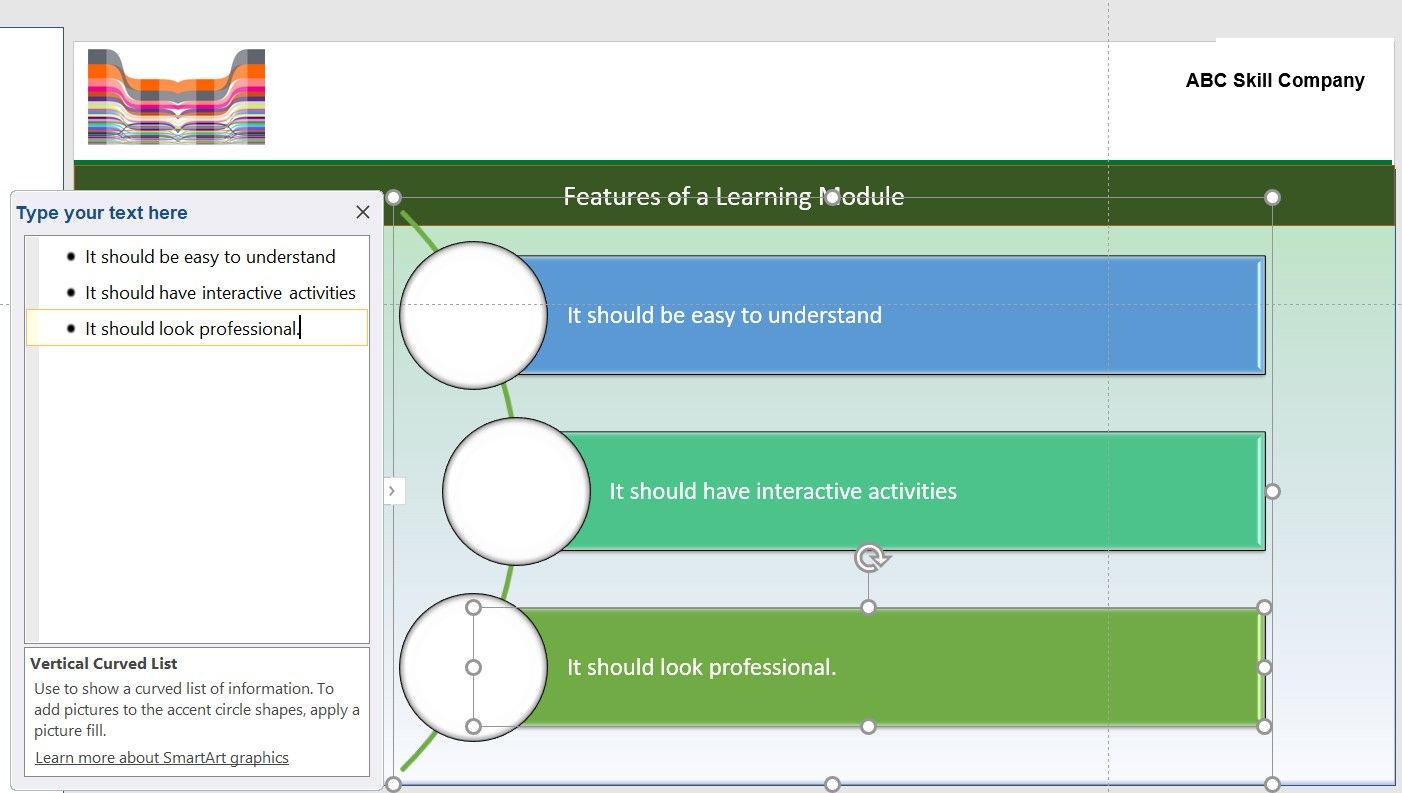
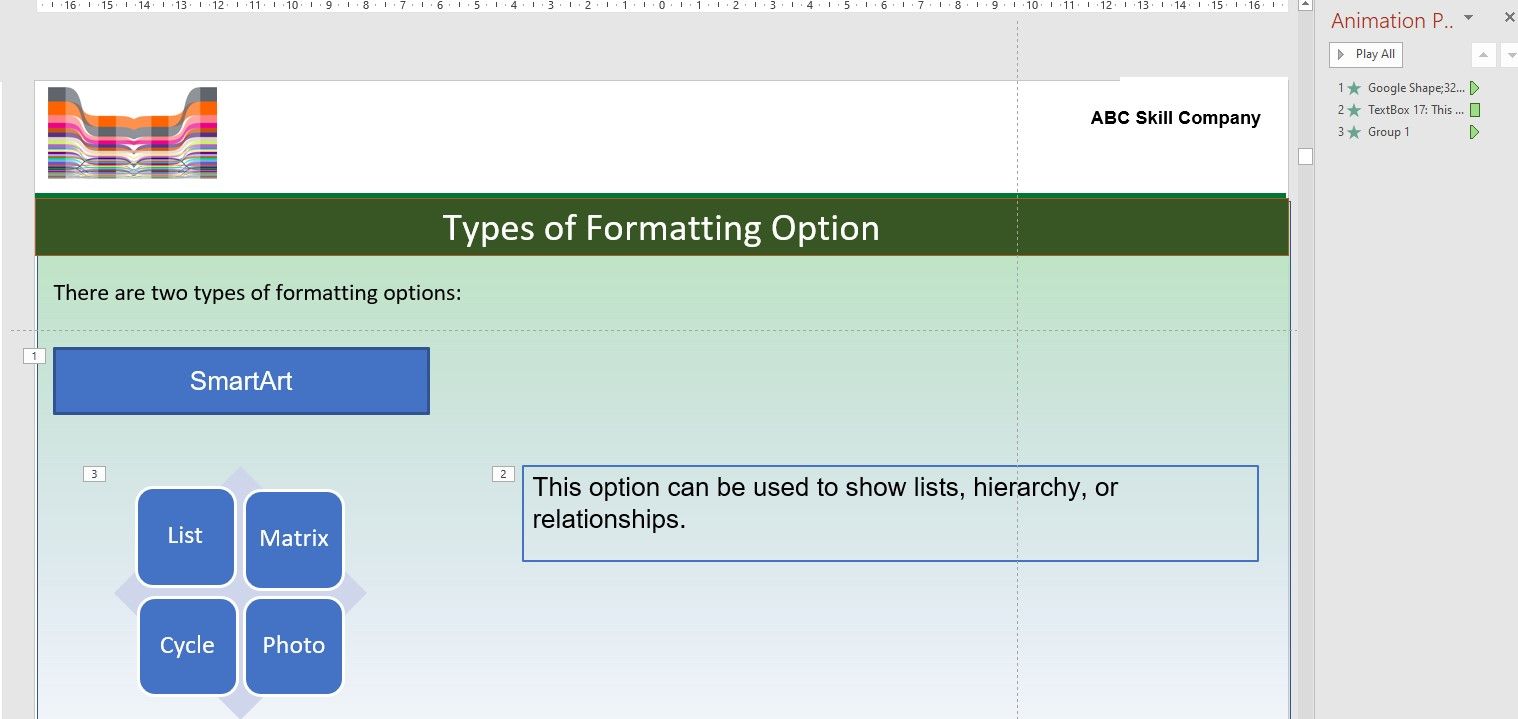
Insert relevant images to complement the content. They help break the monotony of text and help quickly understand the most complex tasks. You can also use one of many PPT features, such as smart art, shapes, or animation, to convey complex information.
Here are some ways to format the content.
-
A SmartArt is a graphic that helps you visually present your information. You can click Insert > SmartArt and choose the layout that best conveys the content. Double-click the art and add your points.
-
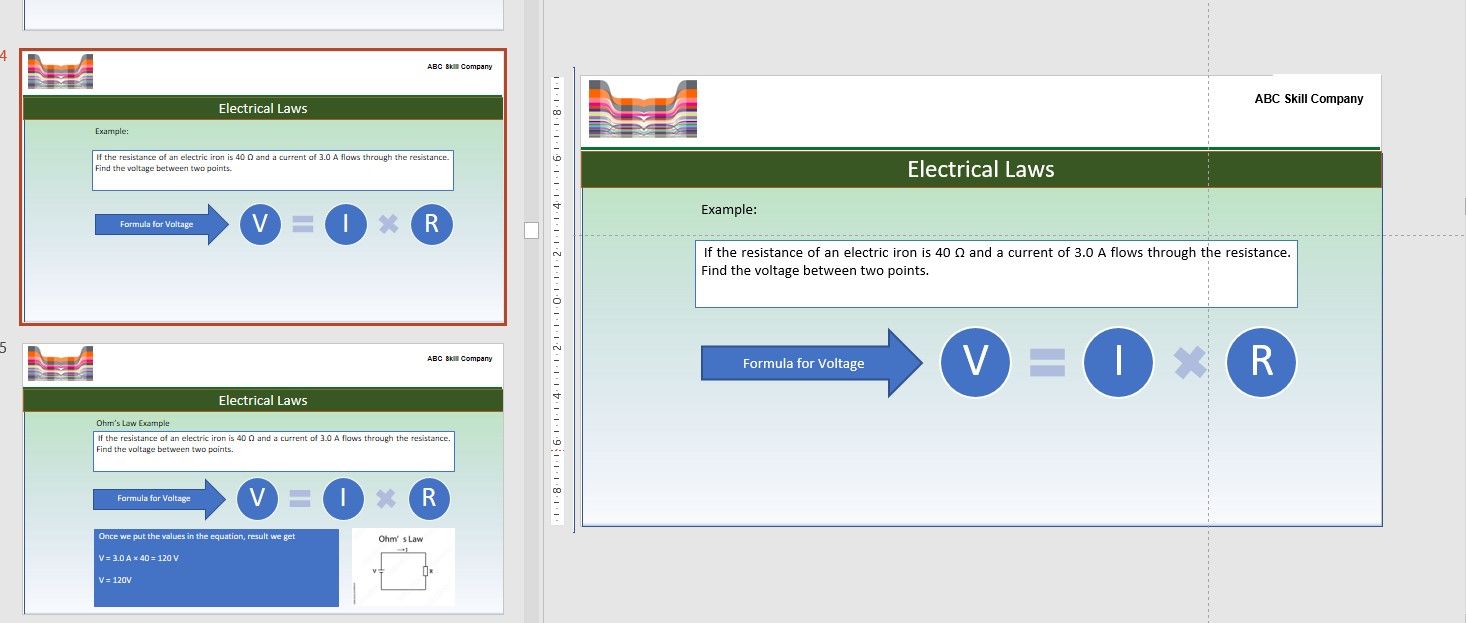
Microsoft has ready-to-use shapes like squares, circles, arrows which can be handy in visualizing your message. For example, you can use a combination of shapes to explain a formula in one slide and the use case in the next slide.
-
You can apply animation or transition effects to the text in a slide by selecting the appropriate option in the menu bar. For example, you can fade in one concept at a time to help the reader focus on it. Click the Animation Pane to preview the effects.
-
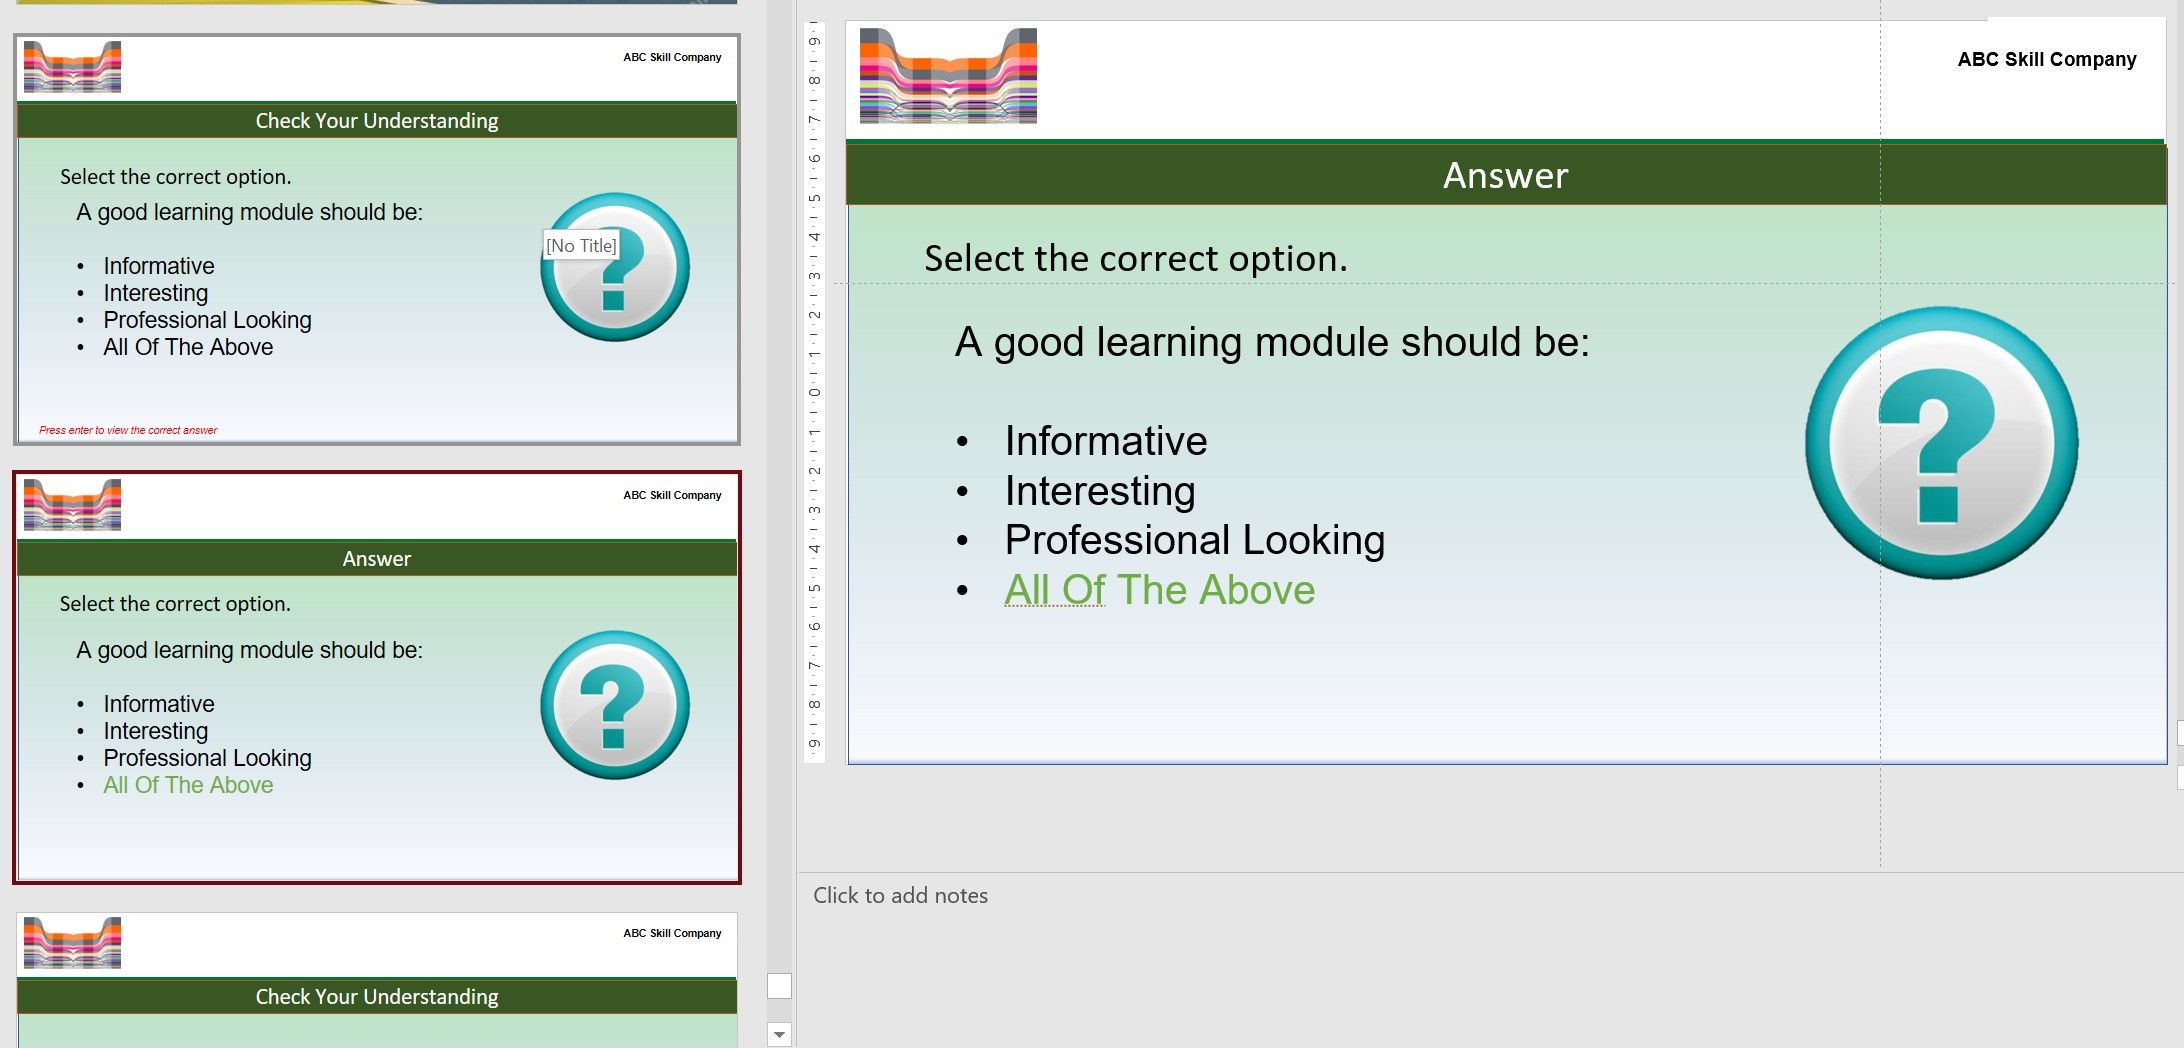
Every learning module has a quiz or multiple-choice questions activity to test the knowledge of the learner. You can apply the Click To Reveal style by using animation. Alternatively, show the question and the choices on one slide, duplicate it, and change the color of the correct answer.


A learning module should have a balance of different formatting options. Overdoing any effect can distract the reader from the actual learning. If possible, refer to the company's branding or style guide.
5. Adding a Voice Over

Not many people enjoy reading training material, no matter how creative it is. To make the experience of learning enjoyable, add a voice-over to the slides.
There are many ways to record audio in PPT. So, choose the method according to your audience and goal of the module:
- In the menu, click Recordings > Record Slide Show > Record from Beginning. The entire module is presented as a slide show, and you can add voice and video in the background.
- If you want to record audio for a specific slide, go to the slide and click Audio > Record Sound. This option gives you the freedom to explain the content at your own pace.
- Provide a name for the recording and click the red button.
- Stop the recording by clicking the stop button. The record icon is displayed on the slide.
- Click Export to Video to save the presentation as a video file.
Features of a Good Voice Over
One of the essential aspects of recording a voice-over is not to read the content as-is, because that does not add value. You should summarize the information where possible. Here are some points to remember while recording the voice-over.
- Sync your voice-over with the transition or animation effects.
- Pause after displaying the question in a quiz and read all the answers.
Make Learning an Enjoyable Experience
Microsoft PPT comes with various features and has a learning curve associated with it. If you prefer a plug-n-play model, then paid software like Articulate or Docebo are better options. You can add the content and convert it into an interactive module without worrying about the design aspect.
Whether you are in a classroom setting or attending a course from the comfort of your home, a good tutorial can enhance the learning experience. So, get creative and design your first training module.