
Inserting a timeline into your presentation is a great way to simplify content and better tell your brand’s story. Instead of going back and forth between your company achievements and future plans, you can offer your audience a visual representation.
Before you start to create the timeline, write down the information you want to add. Make sure you are adding only important information, as it shouldn’t be too crowded with text and call outs.
1. Use a Timeline Template
Google Slides has a quick solution if you don’t want to spend the time creating your own timeline diagram, or if you don’t need a complicated graphic for your presentation. You can use one of the available templates and customize it to meet your requirements.
Follow these steps to insert a timeline diagram into your Google Slides presentation.
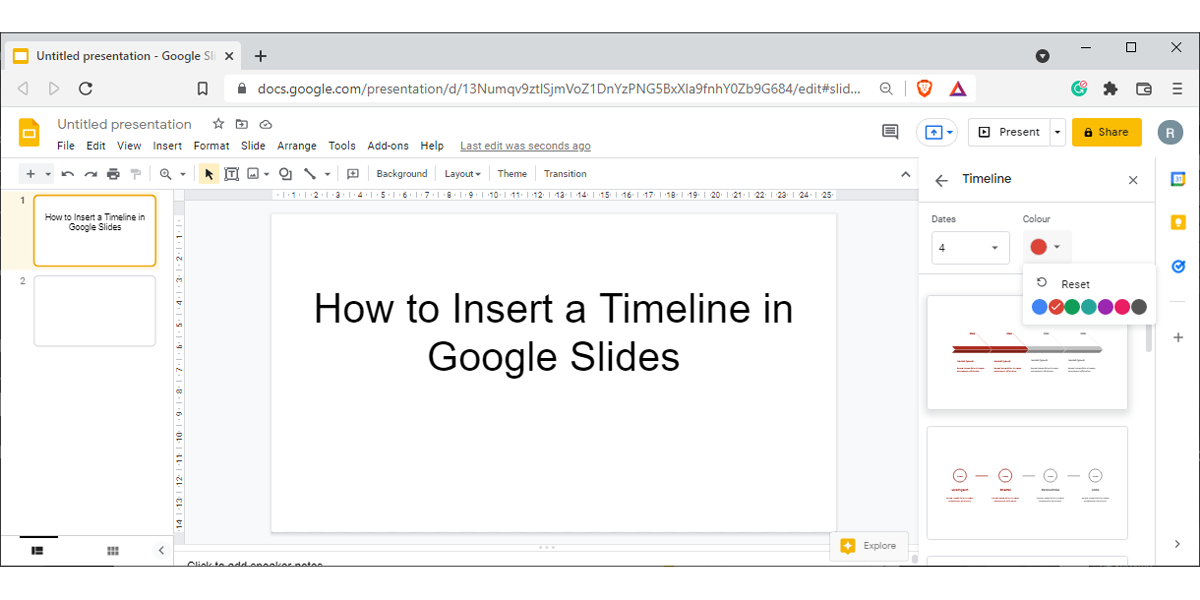
- Make sure you have selected the right slide, open the Insert menu, and select Diagram.
- From the right sidebar, choose the Timeline template.
-
Use the Dates and Colour drop-down menus to configure your diagram. Google Slides will adjust the previews when you change the color and the number of dates, so you can see the timeline’s design.
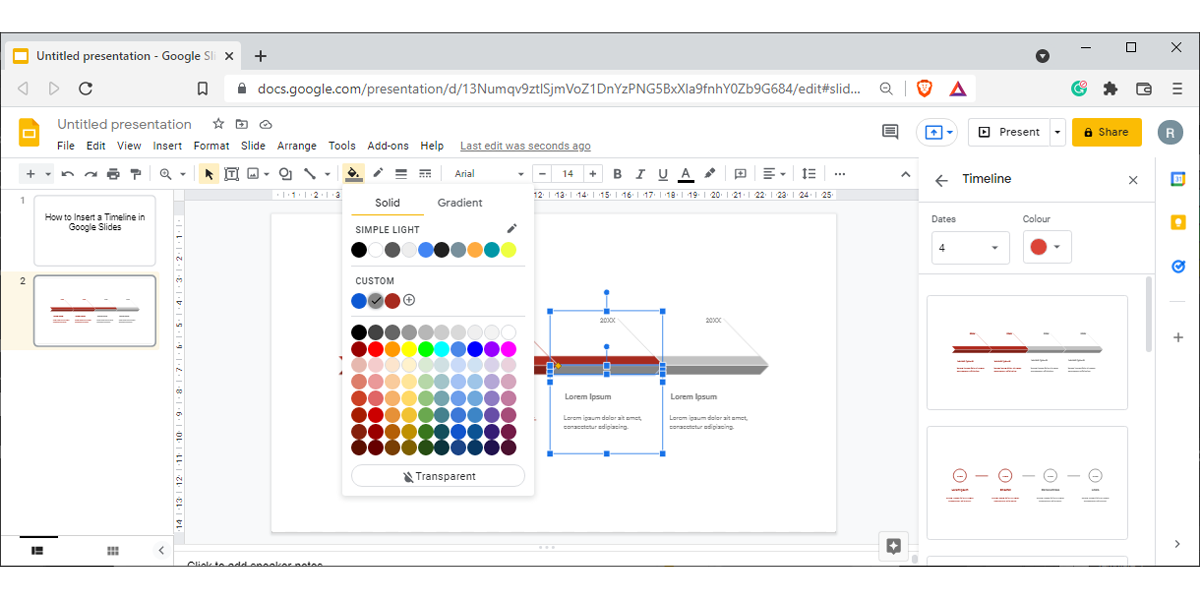
- Click one of the timelines to insert it into the slide. Depending on the template you select, there are different field texts such as project name, project manager, task details, and so on. To add information to the timeline, simply double-click the text fields.
-
Use different colors to evidentiate progress through time. To change the color of an element, select it and click on Fill colour from the toolbar. The colors already used for your timeline are listed below Custom.


You may need to copy the diagram to a different slide. Select the entire diagram, use the copy command, go to the other slide and simply paste it there.
2. Create a Timeline From Scratch
If you don’t find a Google Slides template that you like or need more customization options for your presentation, you can create a timeline from scratch using shapes, call outs, and text boxes. While it will take longer than simply inserting a template, you can get a timeline to match your style and needs.
Here is how you can create a timeline in Google Slides:
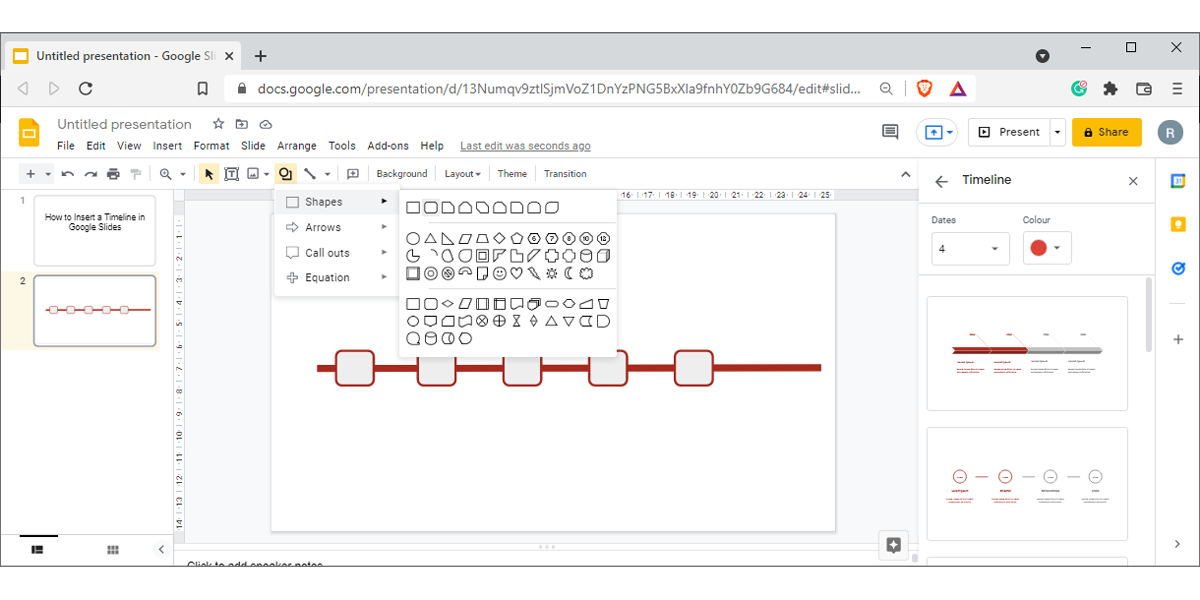
- Insert the timeline axis. From the toolbar menu, click Line. You can use any line style that you want. For this example, we will insert a straight line.
- With the line selected, open Line Colour to select its color. Then, go to Line Weight and set the thickness.
-
Add the shapes that will contain the dates. Open the Shapes drop-down menu from the Insert menu and choose which shape you want to use. You can use circles, rounded rectangles, hexagons, and so on.
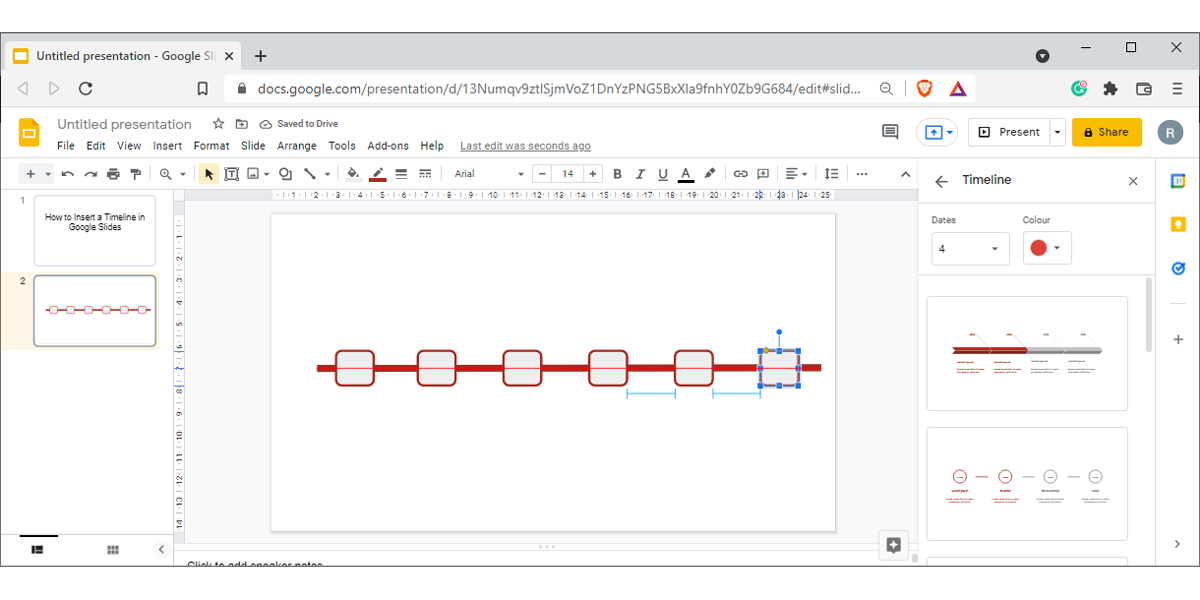
- Once you’ve added the shape, resize it and use the Fill colour, Border colour, Border weight, and Border dash menus to personalize it.
-
Copy and paste it according to the number of dates you want to insert. When rearranging these shapes, Google Slides will show you guidelines, so you can place them on the same axis and have equal distance between them.
- To add the callouts for each stage presented in the timeline, go to Insert > Shapes > Call outs and select one that you like. Alternatively, you can use any shape you want from the Shapes menu.
- Resize the call out and edit it using the same tools that we mentioned above.
- Copy and paste it as many times as needed. Then, rearrange the callouts using the guidelines.
-
If you don’t want to clutter the timeline, you can place the call outs on both sides of the axis. Right-click the callout and go to Rotate > Flip Vertically. The flipped call outs will have the text upside down. To fix it, insert a text box over them.
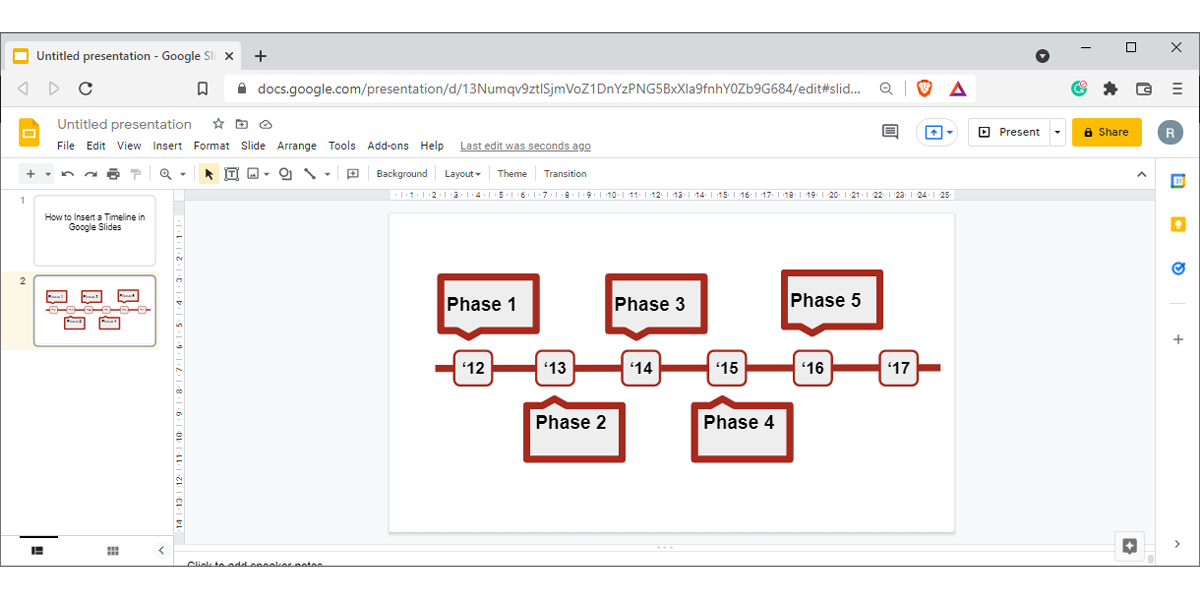
- Group all the elements. Once you’ve selected the entire timeline, open the Arrange menu and select Group. Or use the Ctrl + Alt + G keyboard shortcut.


Improve Your Presentation With a Timeline
Hopefully, you are now looking at a timeline that represents your business or project progress. Adding a timeline is one of the many ways to make your presentation more visually appealing and deliver easy-to-understand ideas or concepts.
You can also learn how to add GIFs to your Google Slides.