Sometimes Linux applications aren't available from your distro's repositories and software stores, or as downloadable DEB or RPM packages. Many times apps are only available as AppImages or old-school tarballs. These standalone executables don't actually install, they just run.
The problem is, with no installation, you don't have taskbar or menu entries for these apps. While there are tools to make creating these entries easier, it's good to know how to manually create them yourself.
Luckily, most major Linux desktop environments rely on a common set of specifications provided by freedesktop.org. So the process of creating application shortcuts works the same on different Linux distributions.
Step 1: Show Hidden Files and Folders
Custom menu entries are created from desktop files located within a hidden folder in your home directory:
/home/username/.local/share/applications
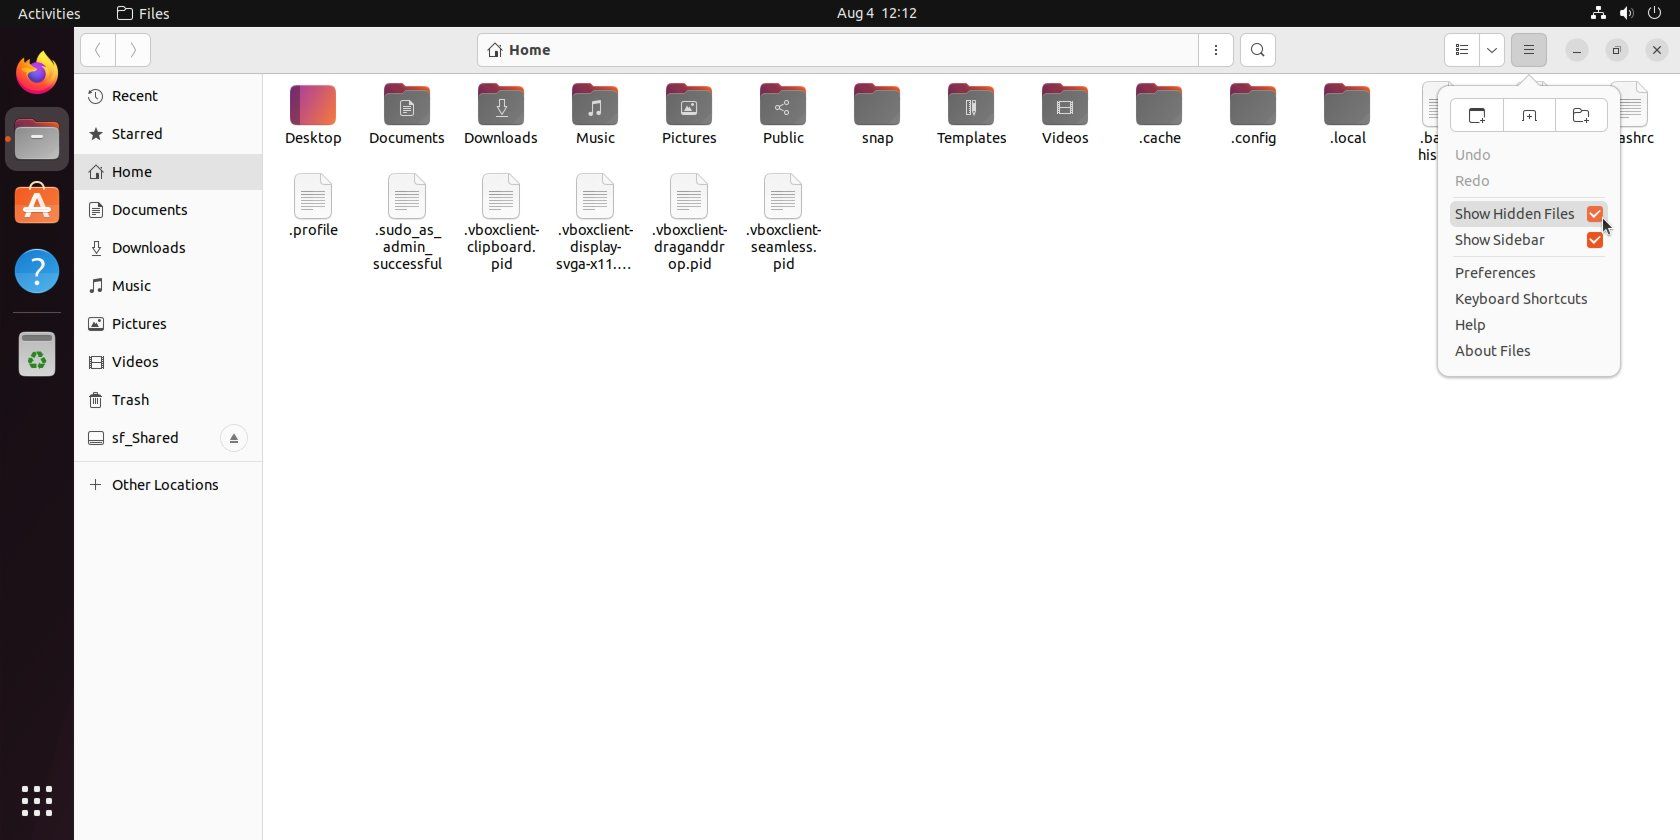
The first thing to do is configure your file manager to view hidden files and folders. Open your file manager, click the menu icon (three horizontal bars), and check the box next to Show Hidden Files.
A handful of new files and folders that start with a period, including .local, should now appear in your home directory (appending a period (.) to the beginning of a filename or directory is how you hide files and folders on Linux).
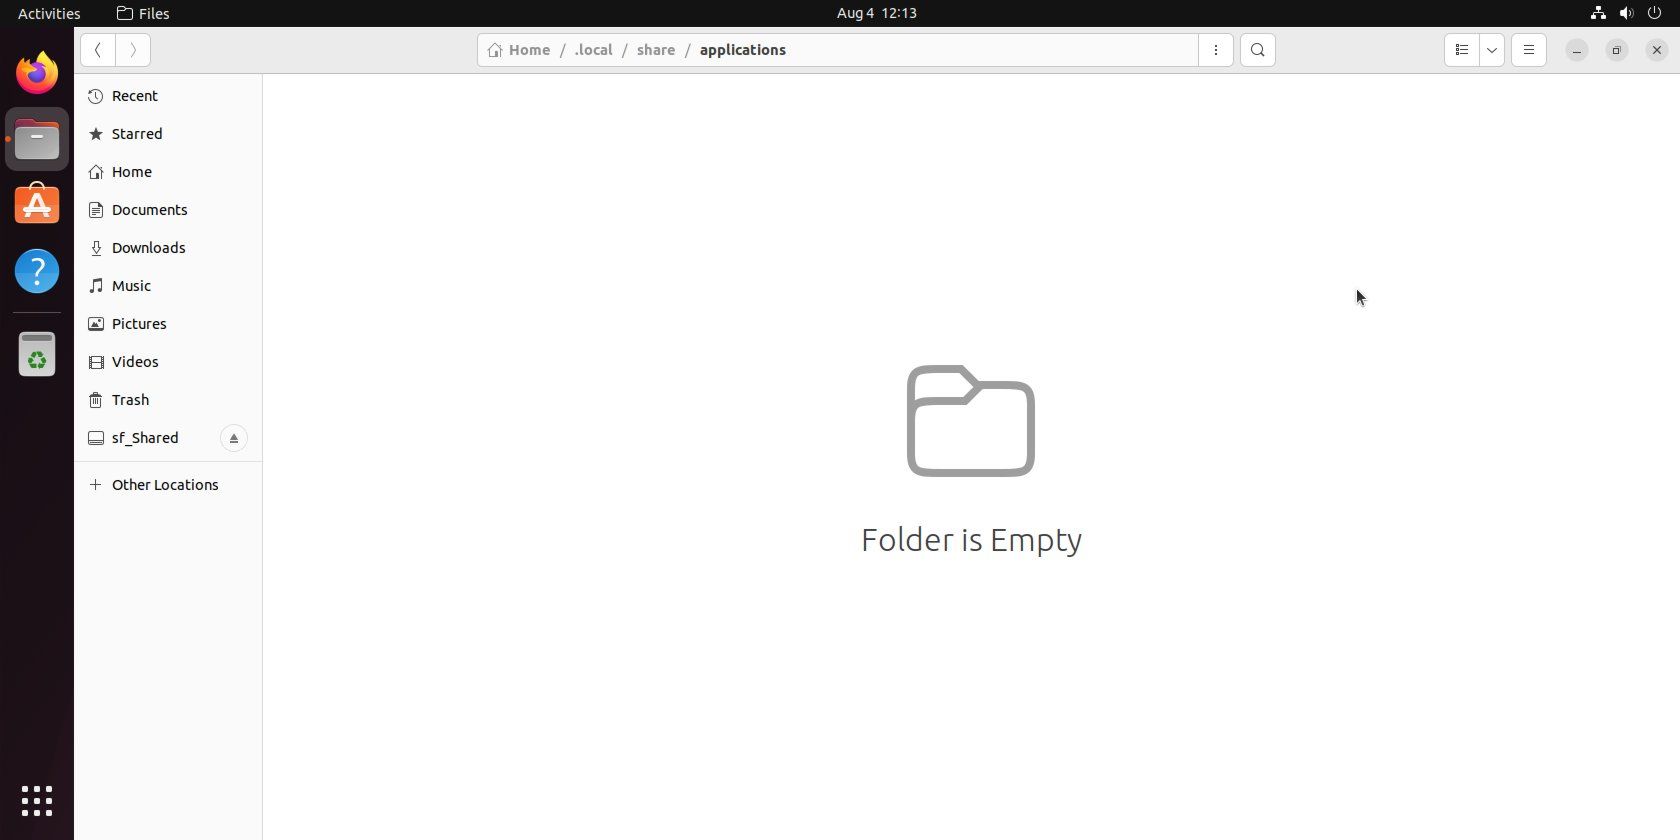
Head over to the .local > share > applications folder. If this is a brand-new Linux installation, you might have to create the applications folder yourself. This is where you'll save your desktop files.
Step 2: Find WMClass of the App
The next thing to do is identify your application’s WMClass, or window ID. This allows us to create a modern taskbar entry that combines both application launcher and open windows into a single icon. If you skip this step, you will have only created a shortcut to launch the application.
To identify your specific application’s WMClass, start your AppImage or tarball the old-fashioned way by launching the executable directly.
Finding WMClass on X11
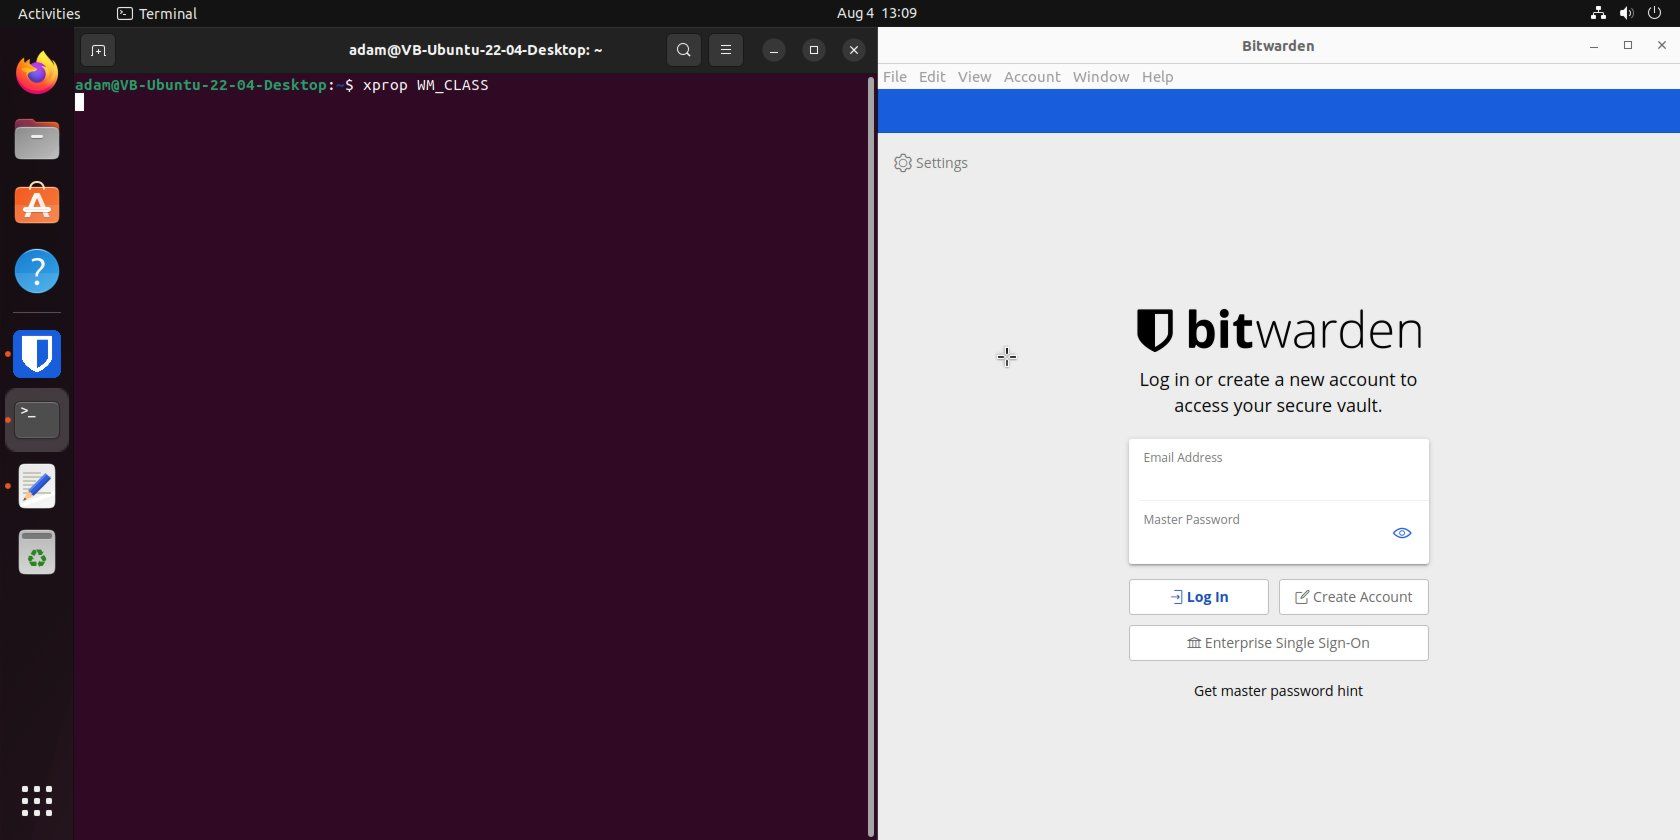
If you're using X11, open a terminal and enter:
xprop WM_CLASS
Your mouse cursor should turn into a crosshair.
Click anywhere within your application window and your terminal should display output in this format:
WM_CLASS(STRING) = “appname”, “AppName”
The second value in quotations is your application’s WMClass; remember it for the next step.
Finding WMClass on Wayland
If you're on a newer distribution, you might not be using the traditional X11 display server, but rather the newer, touch-friendly Wayland. Unfortunately, this trick only works with GNOME as it relies on GNOME Shell's Looking Glass tool.
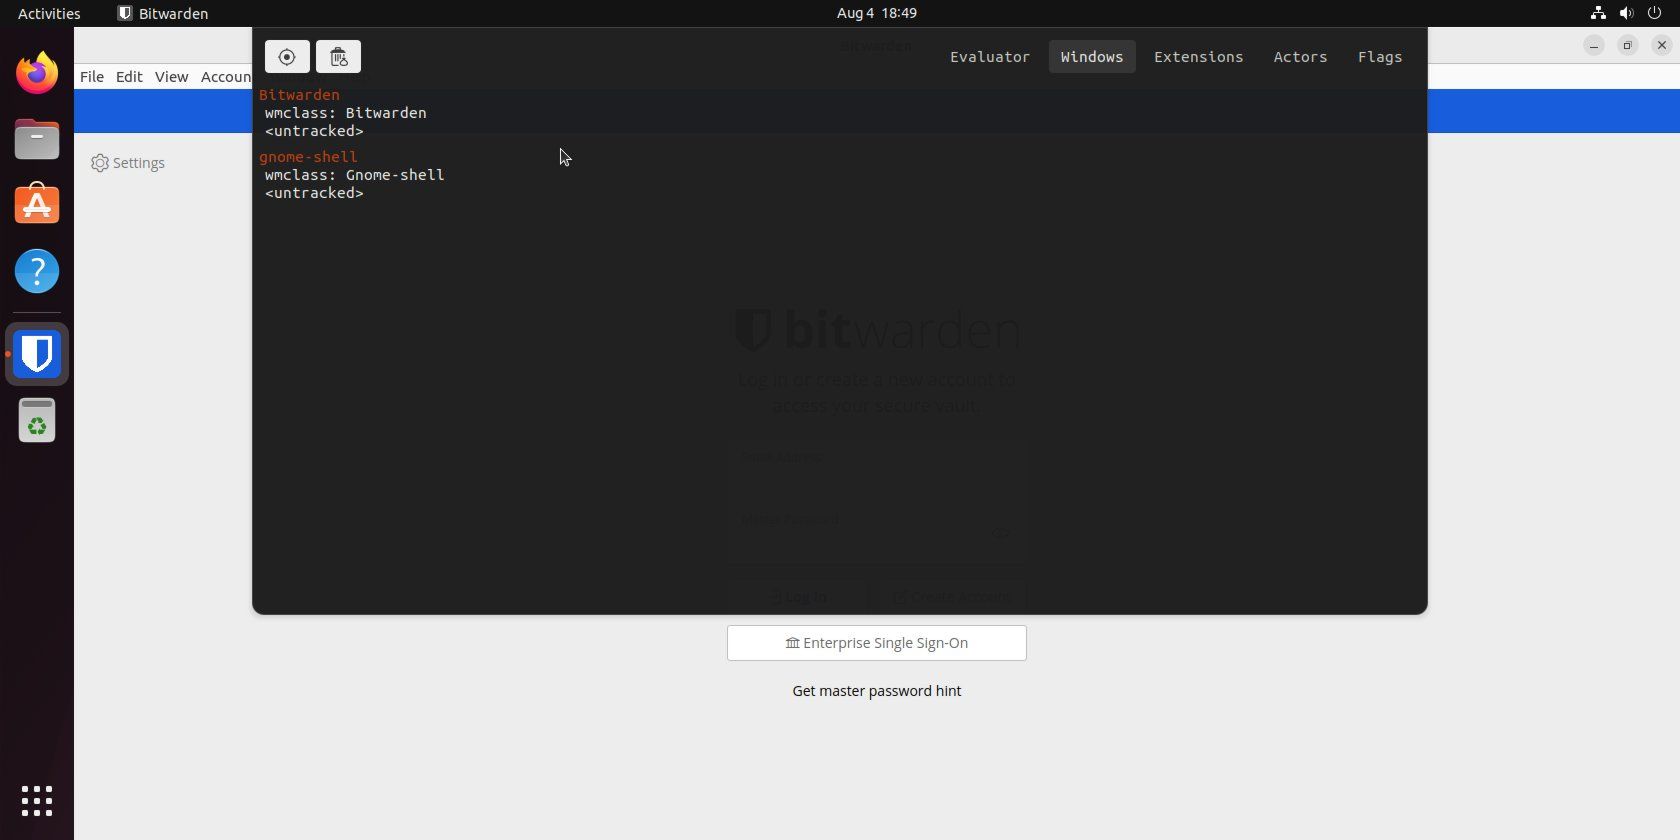
- Press Alt + F2, type lg, and press Enter.
- Click on the Windows tab.
All of your open windows should now be listed along with their respective wmclass. Remember to jot down the wmclass of your application for the next step.
Step 3: Creating a Desktop File
Now it's time to create a desktop file. Open a text editor and paste the following into a new file:
        [Desktop Entry]

Type=Application
Name=ApplicationName
GenericName=ApplicationType
Icon=/home/Username/.local/share/applications/ApplicationIcon.extension
Exec=/home/Username/ApplicationDirectory/ApplicationExecutable.extension
Terminal=false
Categories=ApplicationSubCategory;ApplicationCategory
Keywords=Keyword1;Keyword2;Keyword3
StartupWMClass=ApplicationWMClass
Let’s go through this line-by-line:
- [Desktop Entry] identifies the file as a desktop menu entry and should always be left as-is.
- Type identifies that the shortcut is to an Application. Other options include Directory and Link.
- Name identifies the name of your application. Change ApplicationName to reflect the name of your application.
- GenericName identifies the application type. Change ApplicationType to a generic description such as “Text Editor” or “Web Browser”.
- Icon identifies the icon associated with your application. You can choose any image file, but PNG and SVG typically work best. Change /home/Username/.local/share/applications/ApplicationIcon.extension to reflect the location of your application’s icon.
- Exec identifies the application’s executable file. Change /home/Username/ApplicationDirectory/ApplicationExecutable.extension to reflect the location and name of your application’s executable file.
- Terminal identifies your application as running in a terminal window or not. Options here are true for terminal and false for graphical applications.
- Categories identifies what categories and/or sub-categories your application belongs to. Replace ApplicationSubCategory and ApplicationCategory with the appropriate categories and/or sub-categories for your application—you can find a complete list of options at freedesktop.org. While you can include multiple selections of each, doing so may cause your application to appear multiple times within your menus.
- Keywords identifies words to help search for your application. Change Keyword1, Keyword2, and Keyword3 to any number of keywords you want to associate with your application, separated by semicolons (;).
- StartupWMClass identifies your application’s windows. Replace ApplicationWMClass with your application’s WMClass from the previous section.
Here’s an example using the Bitwarden AppImage and the Downloads folder as the icon and executable directory.
        [Desktop Entry]

Type=Application
Name=Bitwarden
GenericName=Password Manager
Icon=/home/adam/Downloads/Bitwarden.png
Exec=/home/adam/Downloads/Bitwarden-22.6.2-x86_64.AppImage
Terminal=false
Categories=Security;System
Keywords=Bitwarden;Crypto;Passwords;Security
StartupWMClass=bitwarden
Make your changes and save the text file as ApplicationName.desktop in /home/username/.local/share/applications/.
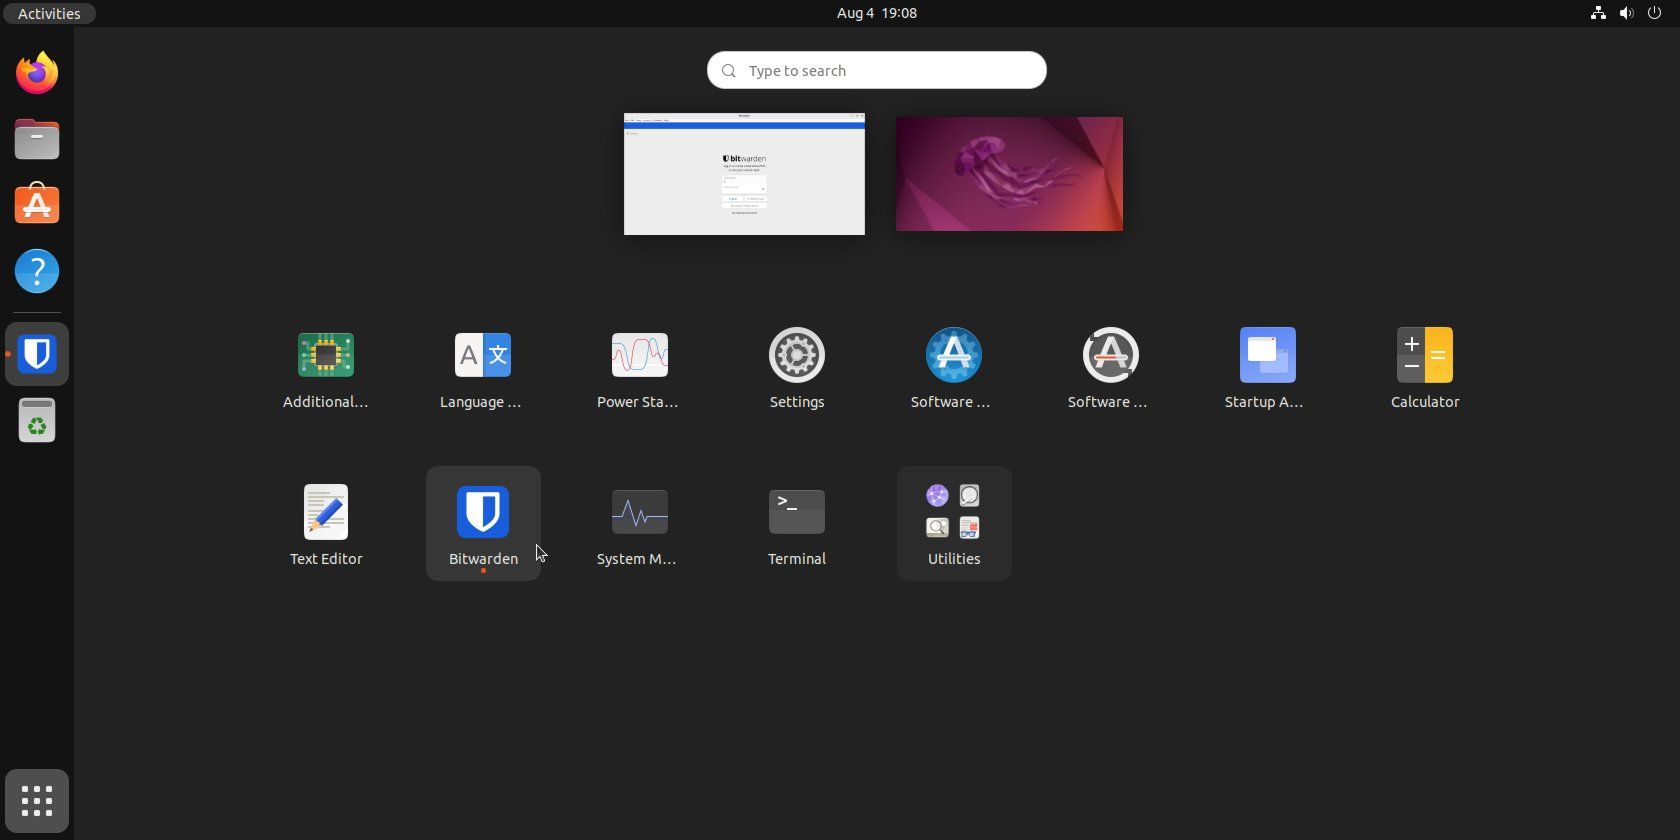
Your application should now appear in your menus:
You can now pin your AppImages and tarballs to your taskbar or dock, and they'll generally function just like normally installed applications.
Using Quotes to Deal With Spaces
If a directory, icon, or executable file contains a space, your desktop file is unlikely to work:
Exec=/home/Username/Application Directory/Application Executable.extension
You’ll need to include quotation marks at the beginning and end of the Icon and Exec fields. For example:
Exec=”/home/Username/Application Directory/Application Executable.extension”
Now your application's menu entry should function properly.
Using Asterisks to Deal With Version Numbers
If your application's executable file contains version numbers, you'll need to update the desktop file every time the application updates:
Exec=/home/Username/ApplicationDirectory/ApplicationExecutable-v2.2.extension
However, KDE users can employ an asterisk (*) as a wildcard to replace changing text, such as version numbers, like so:
Exec=/home/Username/ApplicationDirectory/ApplicationExecutable-v*.extension
Unfortunately, GNOME does not respect wildcards in desktop files but you can always rename the executable file and remove the version number.
Create Your Own Application Menu Entries on Linux
Now when you download an AppImage or tarball, you'll be able to integrate it into your taskbar and menus as if it was any other installed application.
Along the way, you also learned how to show hidden files and directories in your file manager (and hide them as well), create desktop files, and a couple of methods to identify an application's WMClass.
Usually, you'll get the menu entry created for you by default, given that you get your software from a reliable source.


